This post has been originally commissioned for SketchBook Blog in 2016. After the site’s migration, the original is no longer available, but you can still access the content here. Enjoy!
Let’s be honest — dragons can capture our imagination like nothing else. Powerful, magical, and, unfortunately, unreal. We can bring them to our world with drawing, but how to make them realistic if nobody knows what they look like? Actually, we kind of do. We all have a certain vision of what a dragon should look like, which makes it even harder to create a consistent image of them. That’s why in this tutorial I will not show you how to draw a specific dragon — instead, I will give you solid basics to design your own, personal species of them.
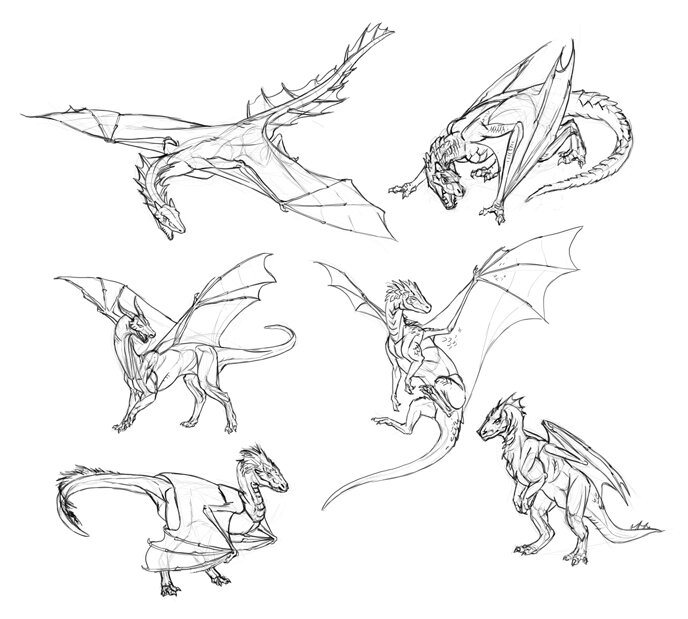
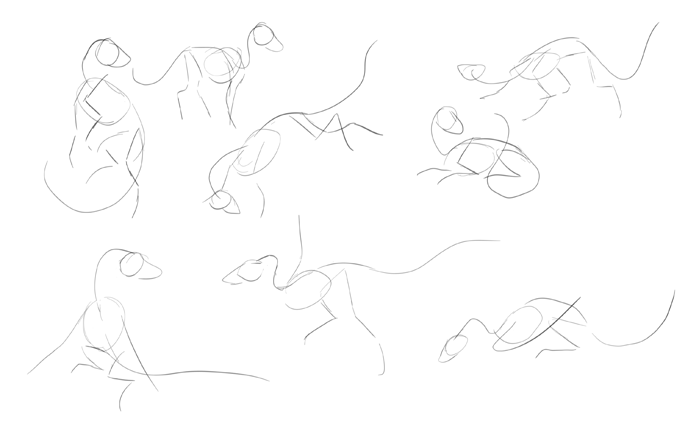
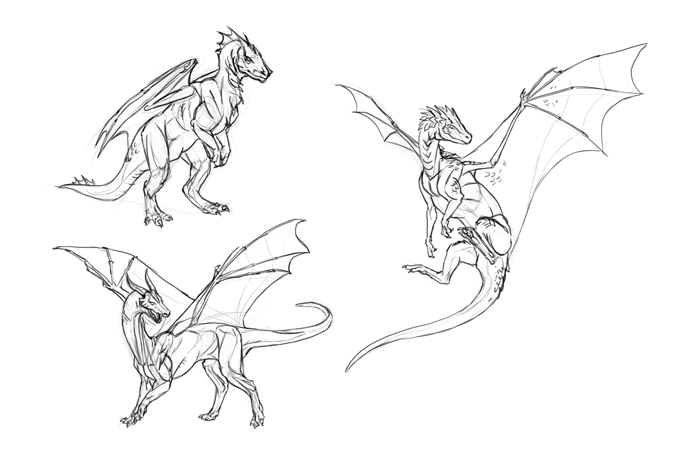
Once you’ve mastered these basic techniques, you’ll be able to create lots of creative dragon variations like these I drew while making this tutorial.
General Anatomy: Two Kinds
Dragons aren’t real, but if we want them to look like something living in our reality, their design must obey certain rules. That’s how we decide if a creature is believable or not. The best way to ensure believability of an unreal creature is to base its design on the anatomy of real animals. If we look at the evolutionary tree, we can place dragons in two possible groups: saurischians (the dinosaurs that birds came from), and therapsids (mammal-like reptiles). Let’s take a look at their possible anatomies.
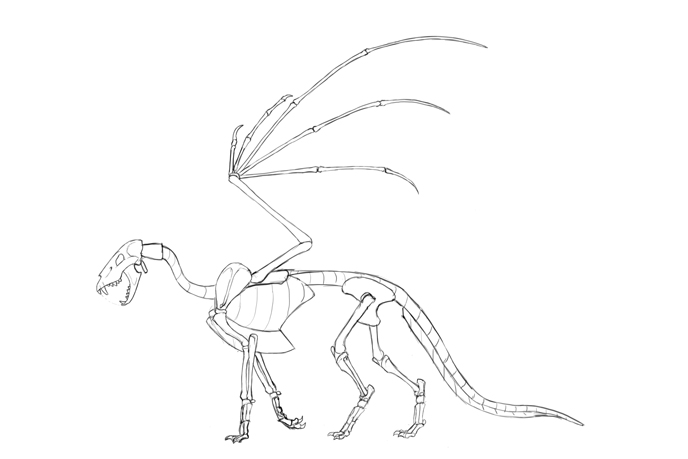
Saurischian Dragon
This could be a saurischian species that evolved membranous wings. They were created without hands, so this dragon doesn’t have arms. Probably all carnivorous saurischians were bipedal, so the forelimbs were redundant anyway. We call four-limbed dragons wyverns, and some people don’t consider them dragons, but a different kind of mythical creature. However, this type of dragon design is actually the most plausible, and that’s how they’re often portrayed in the pop culture today (See Skyrim, Game of Thrones, the Hobbit, Harry Potter series).
Remember to keep the tail long, meaty, and quite stiff—it’s used for balance. There’s no other animal today that moves like dinosaur saurischians, so you can’t really base the movement on anything else. But you can use two simple rules: the femur can’t go back farther than 90 degrees, and the feet usually copies its angle.
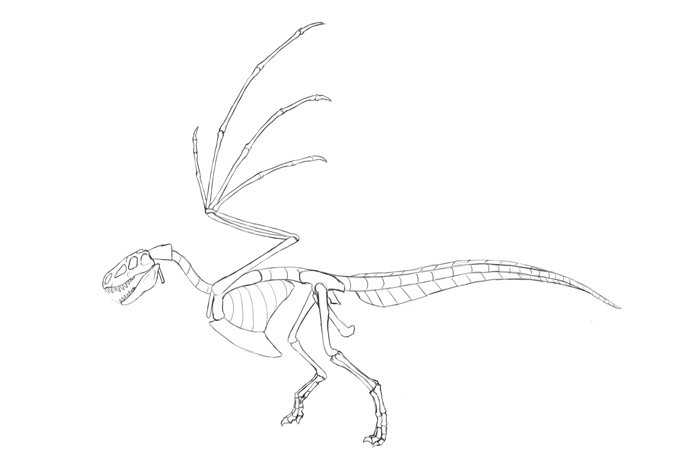
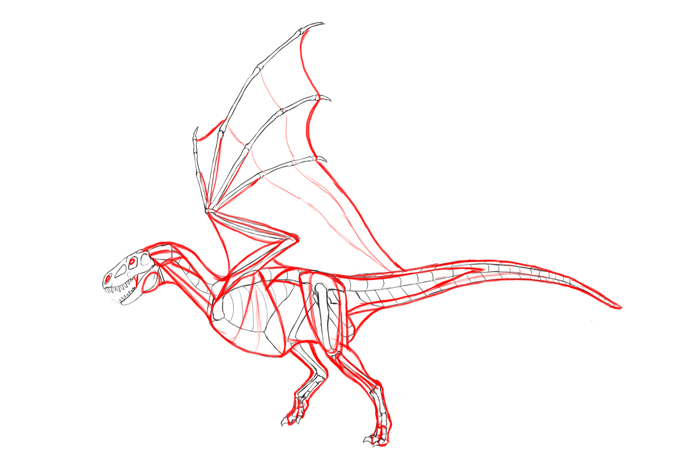
There are many different designs you can base on this anatomy. For example, your “wyverns” can use their wings for walking. Feathers are acceptable as well in this evolutionary line.
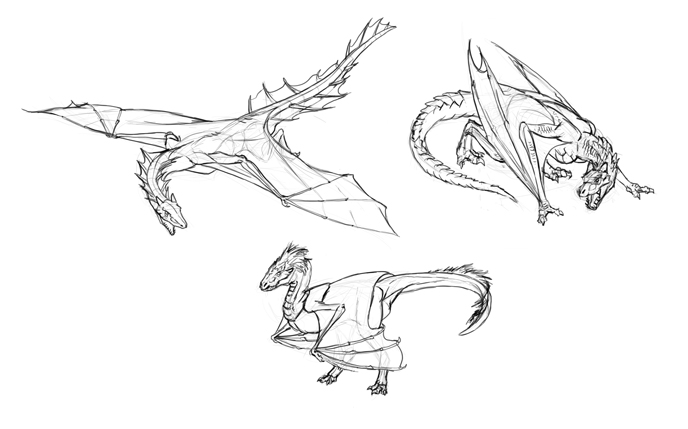
Therapsid Dragon
This one has a different story. It’s closely related to mammals, so it can move like them and be quite intelligent. It’s quadrupedal like most mammals, so it can’t sacrifice its forelimbs for the sake of wings. Instead, a special mutation has gifted them with an additional pair of limbs (it actually happens in nature; see dipygus). It’s very hard to place those additional limbs in a plausible way, and the whole design is very unrealistic when you compare it to most “real” creatures. However, it’s a very attractive vision. It can be brought to life in a convincing way (E.g., Dragonheart, Eragon, Dungeons & Dragons).
The tails of therapsids are flexible and are used more for communication than for balance. Dragging it on the ground is fully allowed. To understand how this kind of dragon moves you can observe movement of big cats.
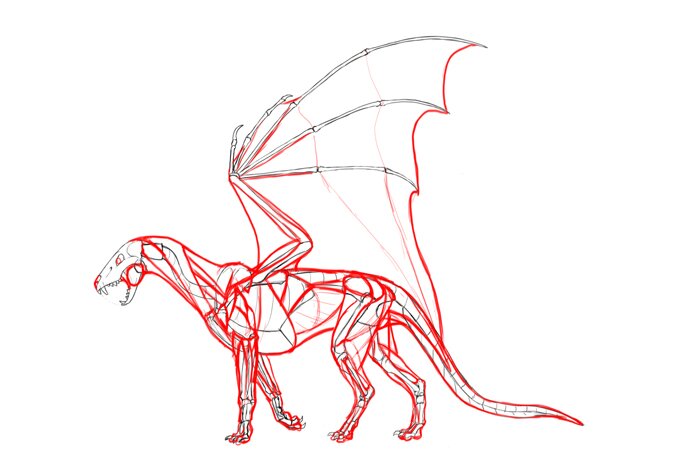
Again, there’s no need to copy this anatomy 1:1. You can experiment to create many fun designs, all very different. Keep in mind that fur is acceptable in this evolutionary line!
Dragon Skeleton
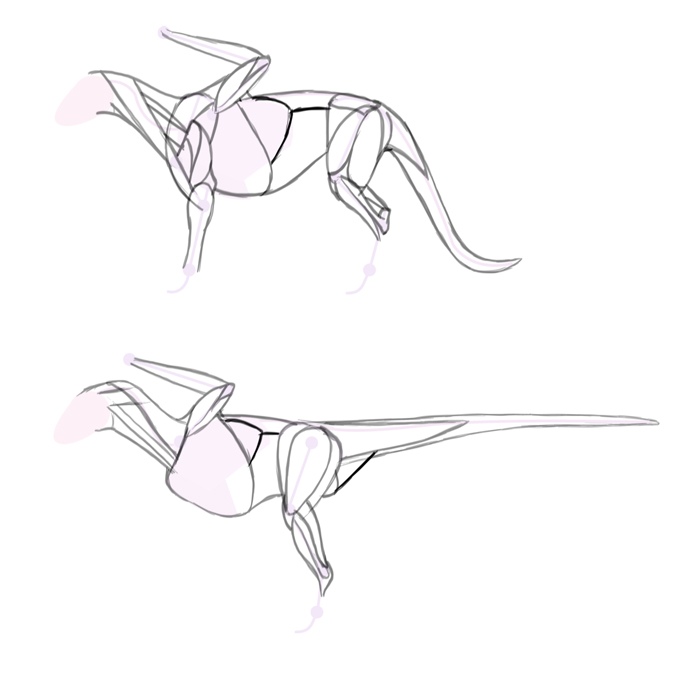
To draw a dragon properly you need to start with a few simple lines based on its skeleton. Skeleton gives form to the body and establishes the proportions before you invest any time in details. Obviously, both “species” will need a different skeleton:
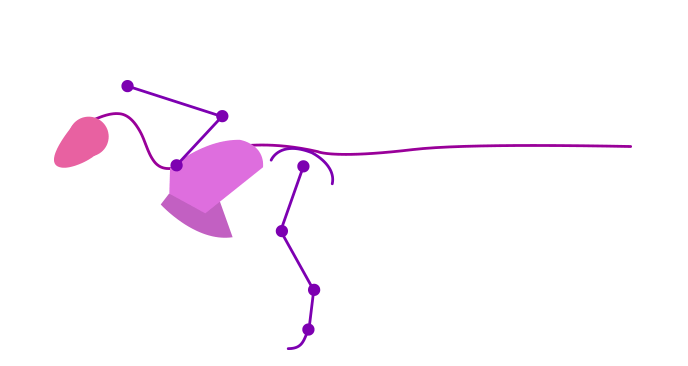
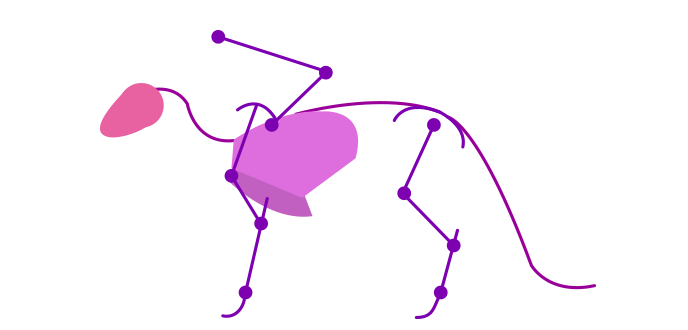
You don’t need to know the names of the bones, or the exact shape of them. You just need to know the general proportions, the placement of joints, and the limitation of their movement. You can learn a lot by sketching the animals your dragon is based on.
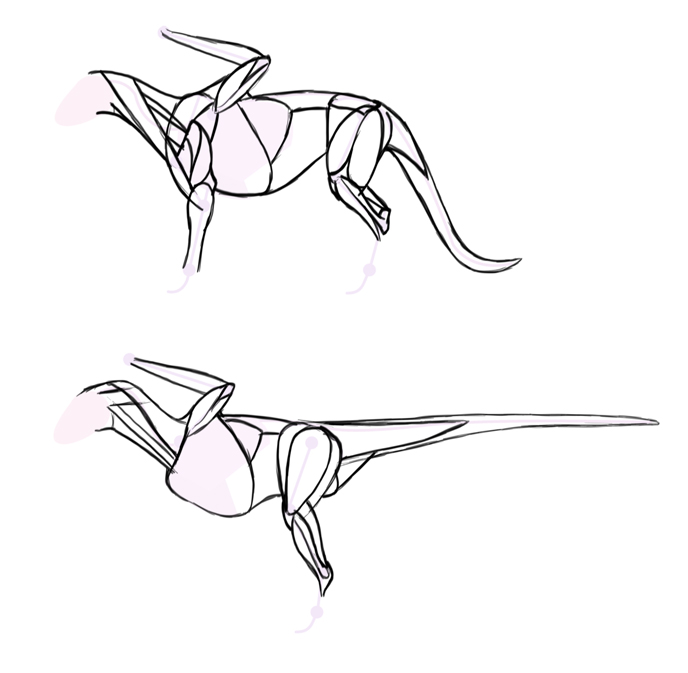
And here’s how you can start your drawing. You don’t need to finish out the first sketch that turns out well. Experiment, create many sketches, and then pick the one that you like the most.
Dragon Muscles
Muscles give volume to the body and make the creature look strong and powerful. They’re also very hard to draw. If you want some kind of reference, you can try the illustrations below. However, I’ll also show you how to sketch the muscles step by step.
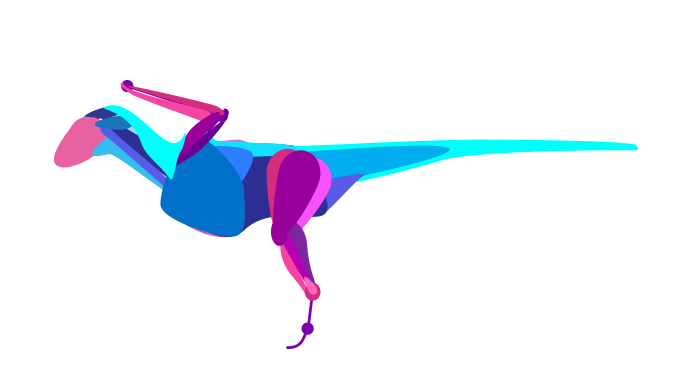
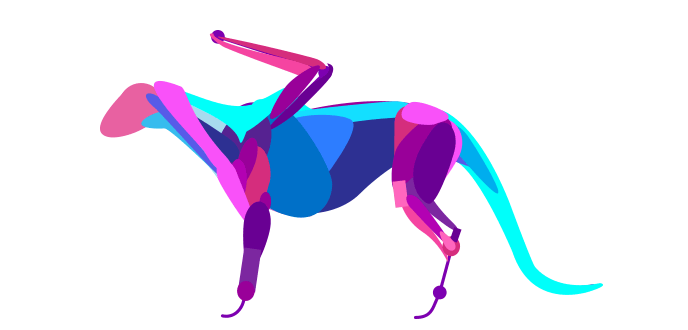
Start by giving a very general outline to the front side of the limbs. Add the back part.
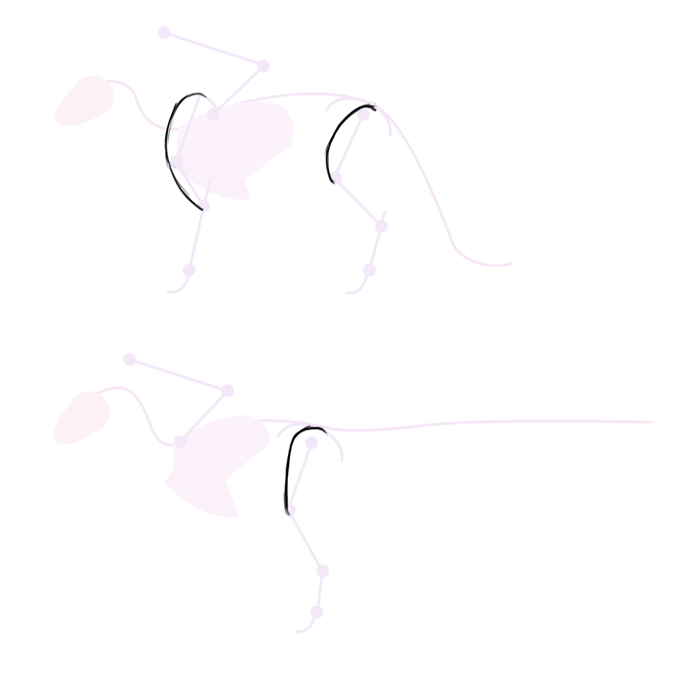
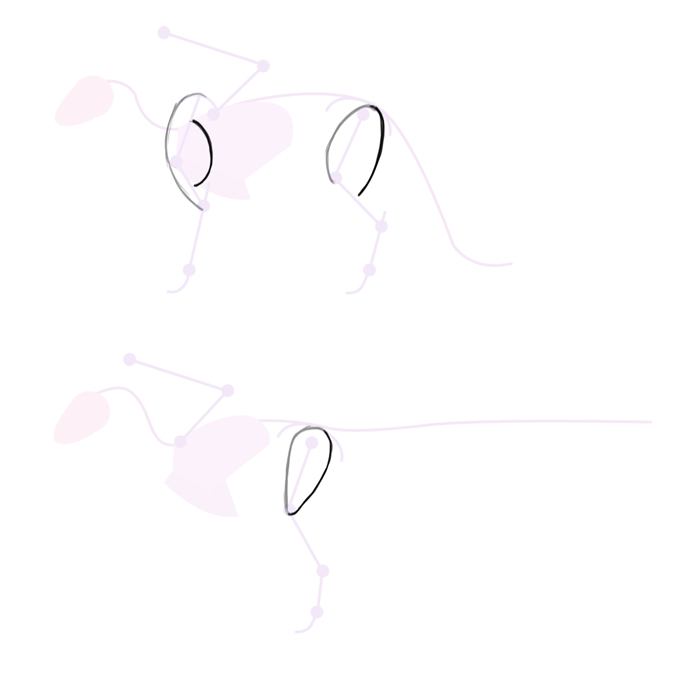
Outline the thinner parts of the limbs. Add “supporting” muscles of the upper limbs. Add “supporting” muscles of the upper limbs.
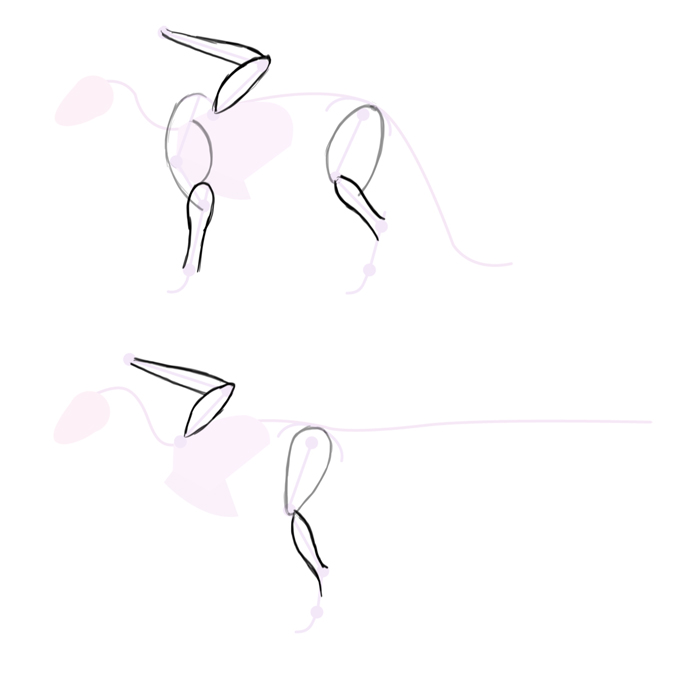
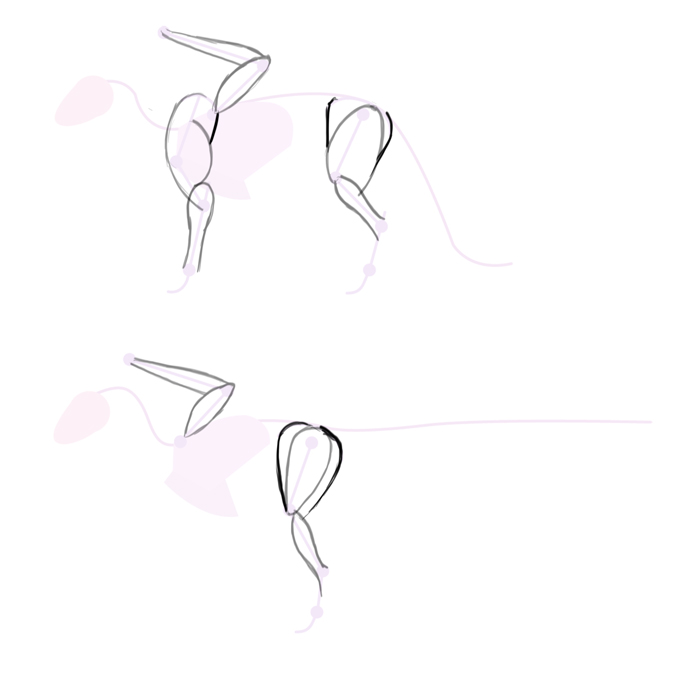
Draw the basic muscles of the neck. Give an outline to the rest of the body. Pay special attention to the hips of the saurischian.
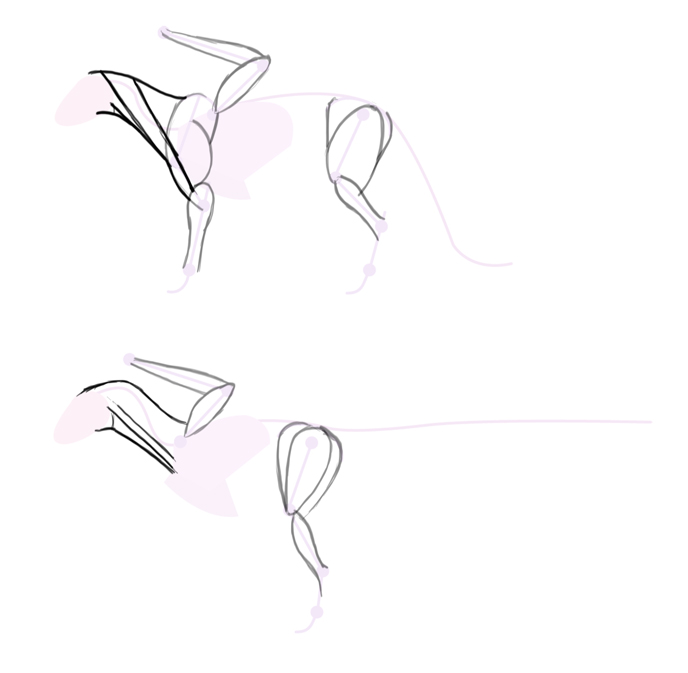
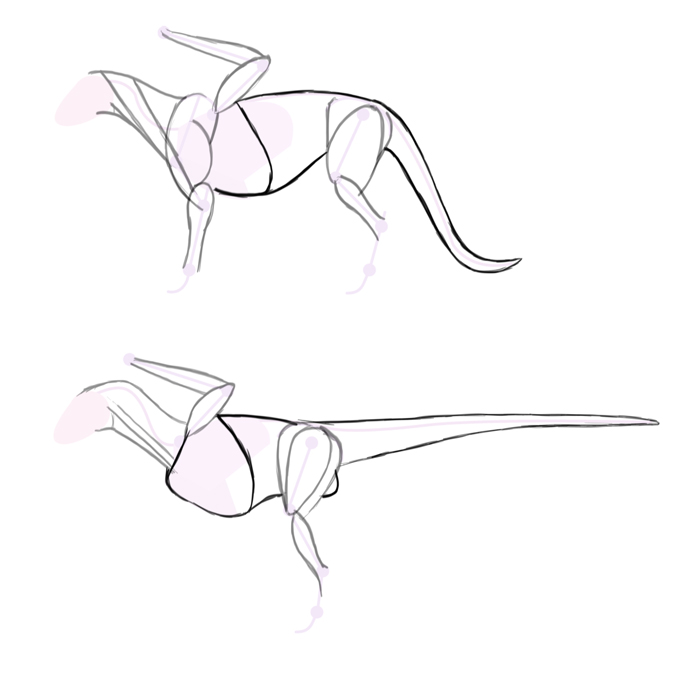
You can stop here if you intend to add a lot of big scales later, because details of the muscles will not be visible under them. But if you want, you can make the musculature more detailed:
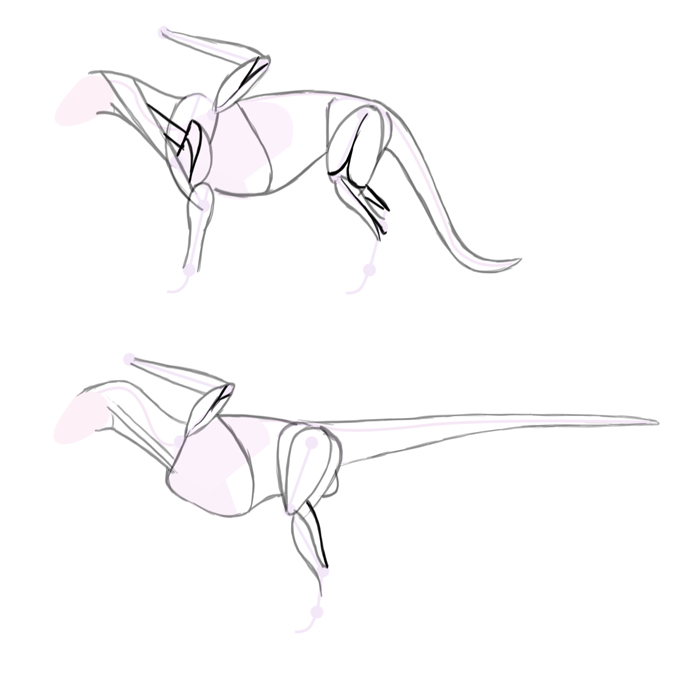
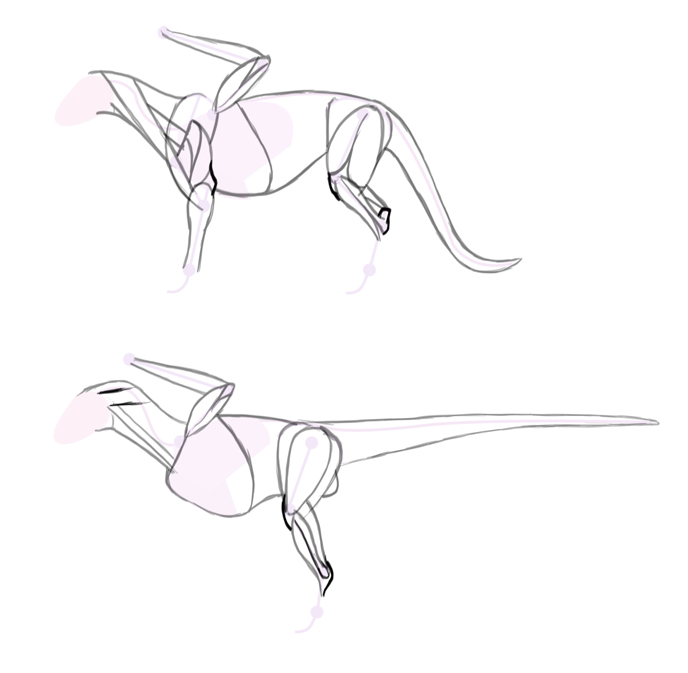
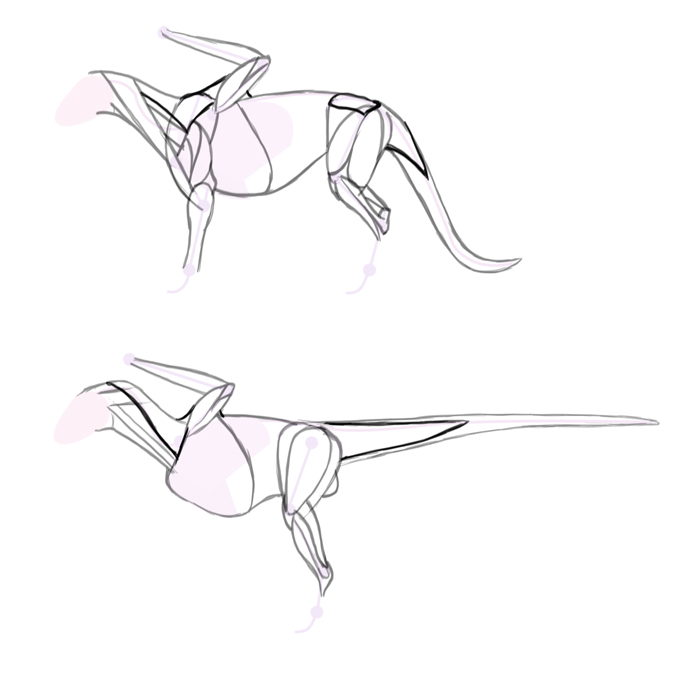
Dragon Wings
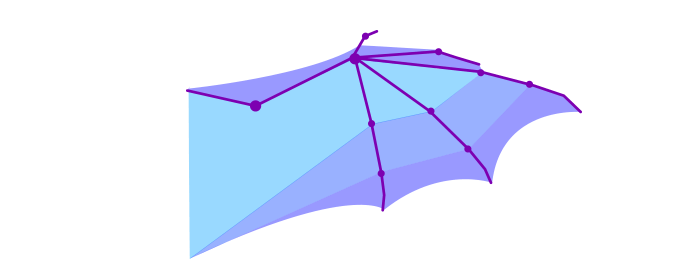
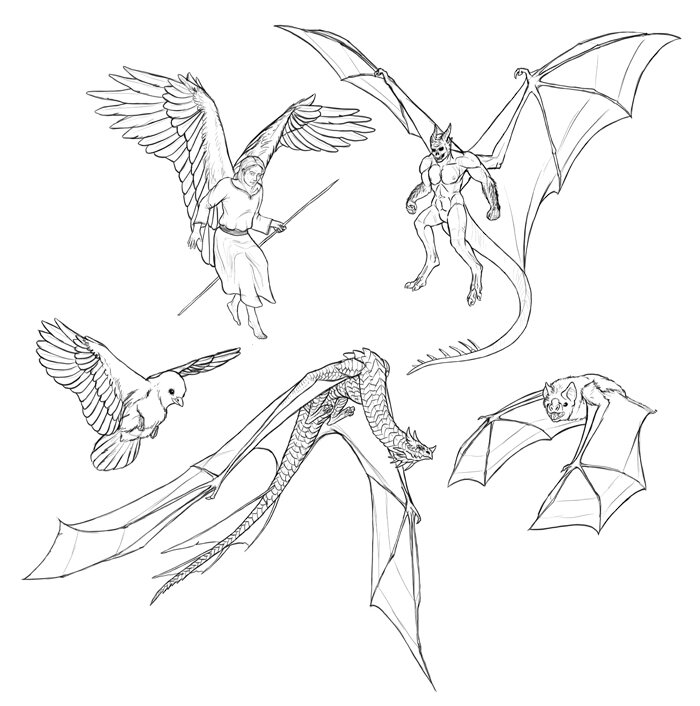
Dragon wings are a complicated subject, too complex to explain properly here. So let me just show you the basics. Bat wings, the only membranous wings in nature today, resemble your hands: You can easily pose the wings by spreading your fingers.
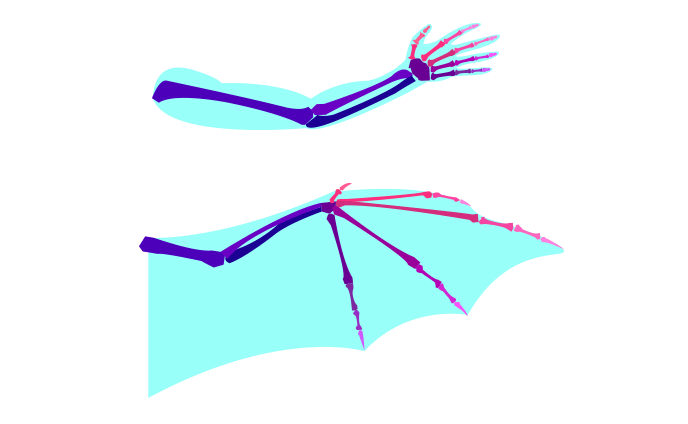
Dragons are much bigger than bats, so proportions of the elements of the wing must be a little different.
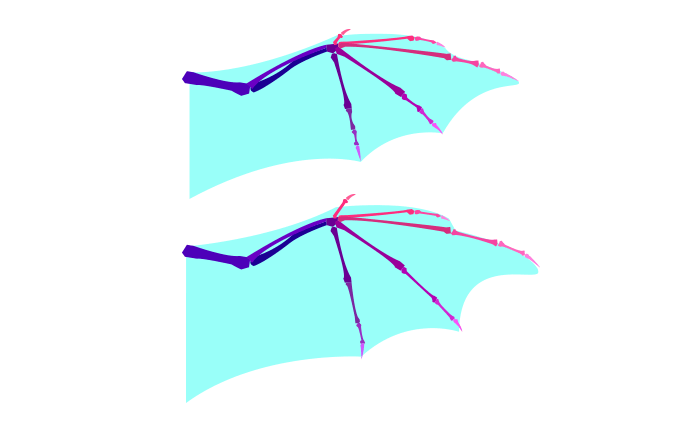
To draw the membrane correctly, imagine “areas of tension” between the joints.
Dragon Feet
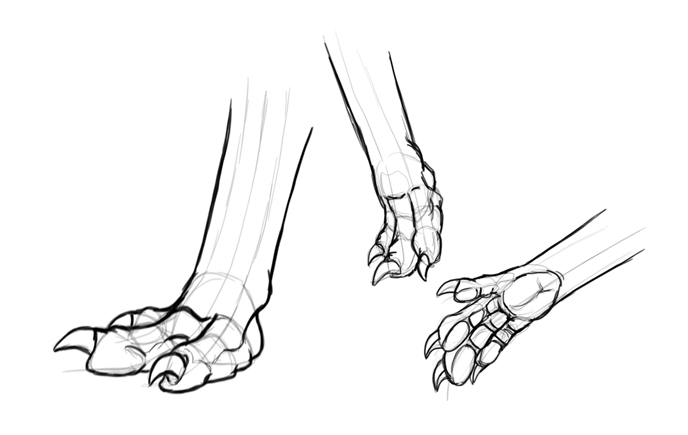
Dinosaurs make a perfect template for many elements of a dragon body, with feet being especially proper. They usually have three or four toes, and each toe has fewer “parts” than the previous one, counting from the big toe (for dinosaurs it’s actually the smallest toe).
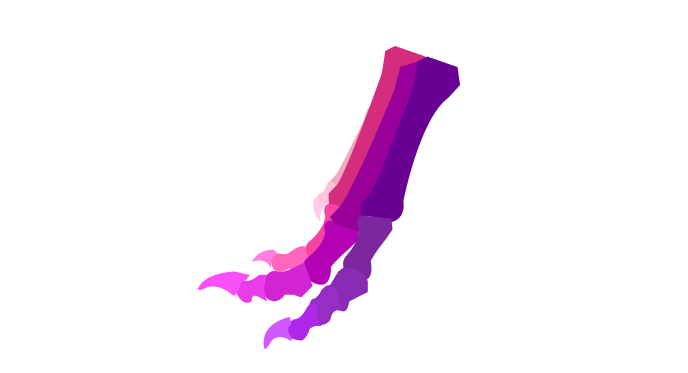
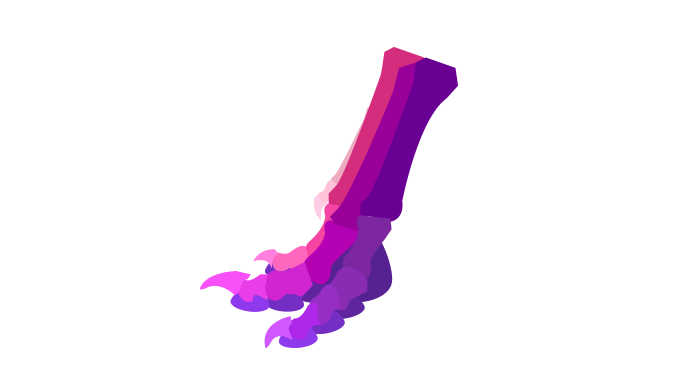
There are shock-absorbing “pillow” under the toes that give the foot its final form. For a therapsid dragon they may look like actual paw pads. In case of saurischian dragons stick to a more bird-like look.
All right, let’s draw some feet step by step:
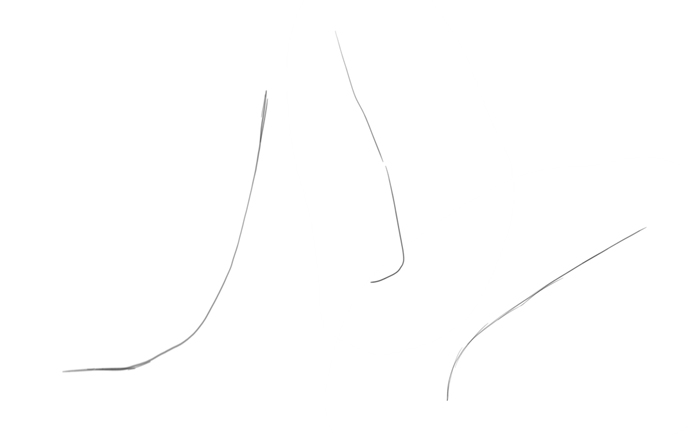
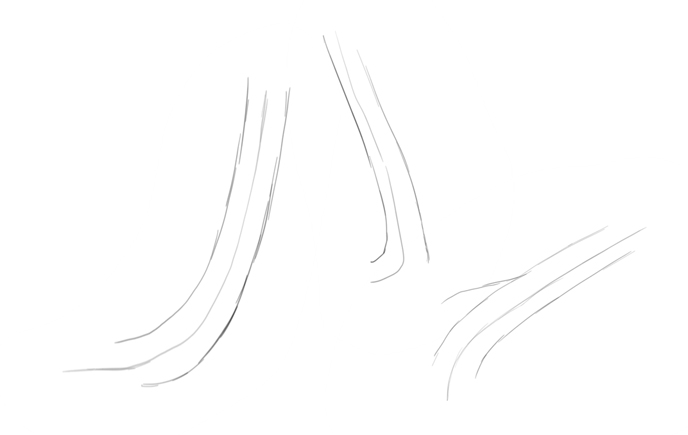
Start with a very general line, like a piece of wire for a sculpture.
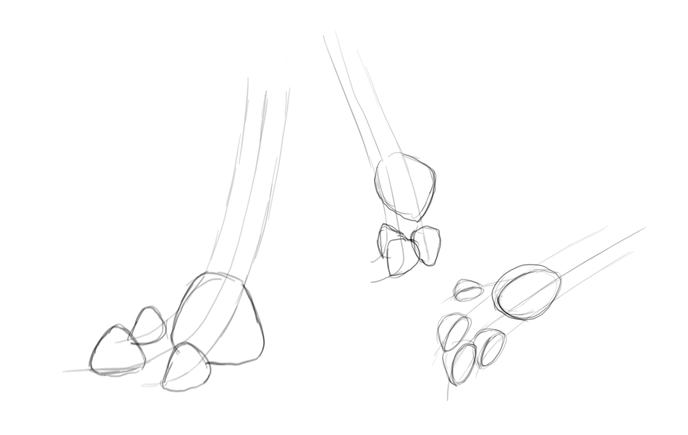
Add the other fingers around. They should be shorter than the one in the middle, unless you’re going for a straight therapsid look—then you can use four toes, with two in the middle being the longest.
Add the foot pads. That big one is optional and depends on the style your dragon sports for walking.
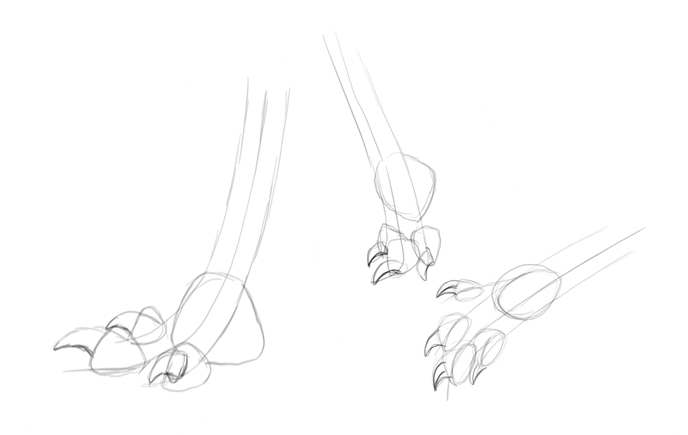
Add the claws with gentle curves. These curves shouldn’t point directly to the ground—they can’t impede walking!
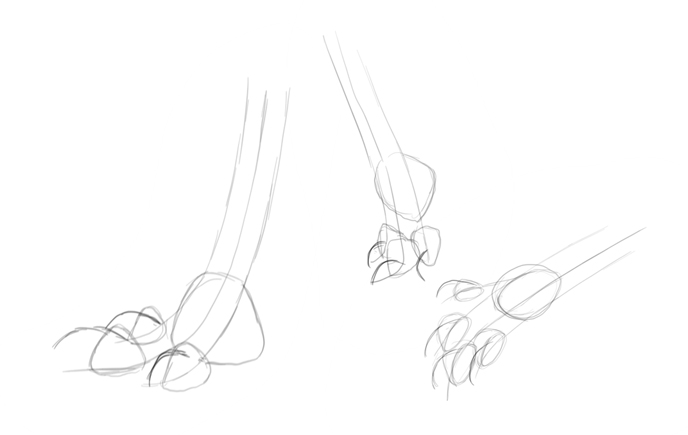
Draw the rest of the toes by creating a line of “marshmallows.” Their number should be roughly similar to the number of joints.
Finish the drawing by outlining the details…
Dragon Head
The head of the dragon is not easy to draw, but it’s very important for the final impression. Let’s see how to draw it step by step, using any view you wish:

- No matter which view and which species you want to draw, start with a circle.
- Add a line showing the direction of the snout. You can cross it with the “eye line.”
- Add the eye sockets. For a more difficult view imagine them as two ends of an empty toilet paper roll.
- Add a circle to create a basic form of the snout. Use a big circle for a T-Rex look, and a small circle for a “beak.”
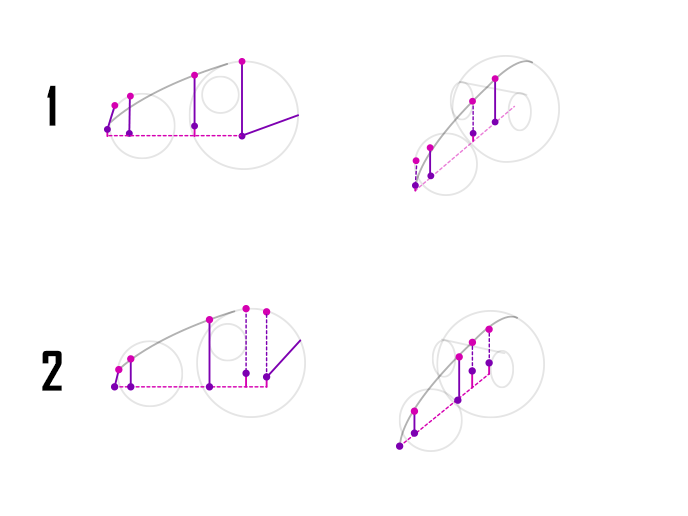
Now we need to go in a different way for a saurischian (1) and a therapsid (2), as the skull is the main difference between them. Draw the points that will establish the shape of the upper jaw.
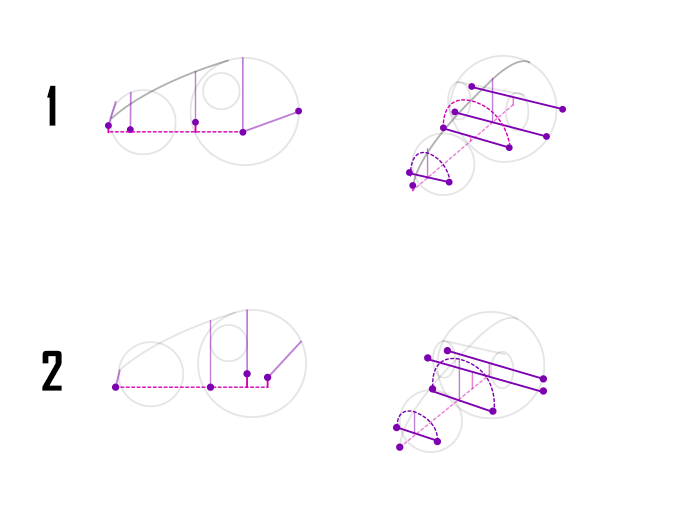
In a 3D view cross these points with lines giving them a certain width. Generally, the snout should be narrower than the braincase.
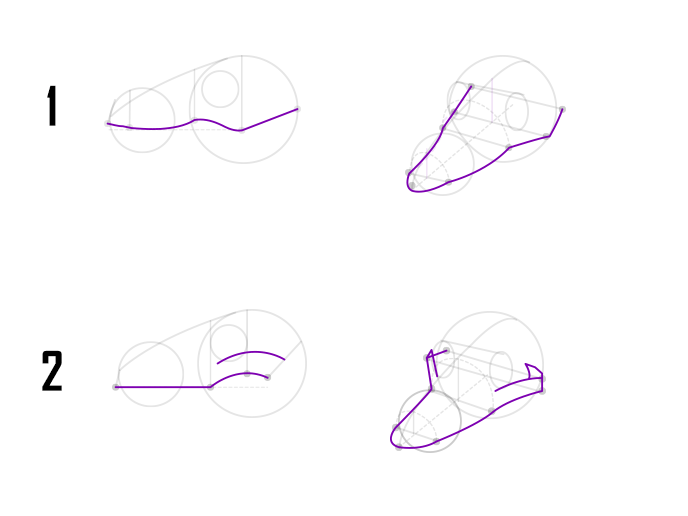
Connect the dots in this special way to create the outline of the upper jaw. Pay attention to characteristic cheekbones of the therapsid.
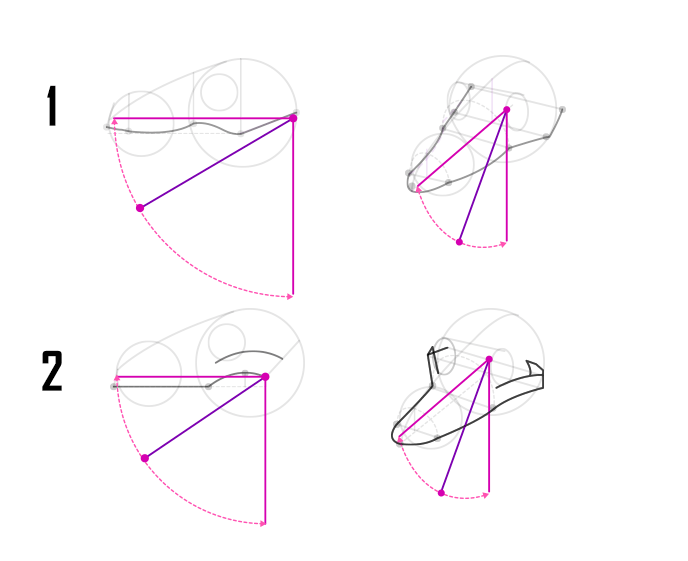
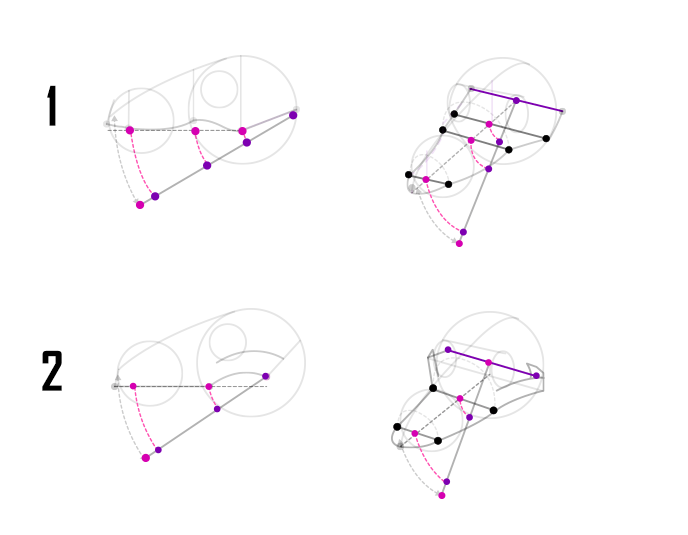
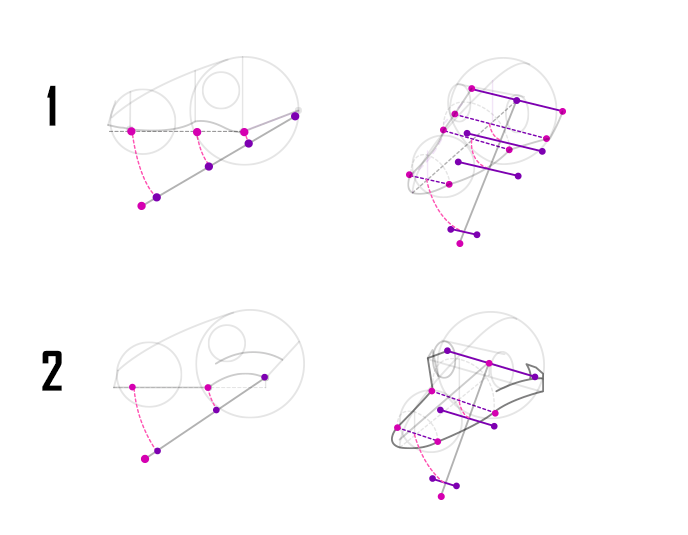
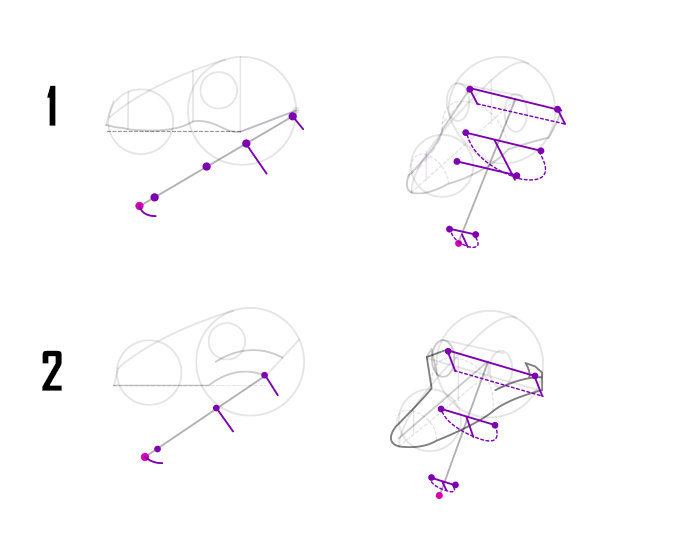
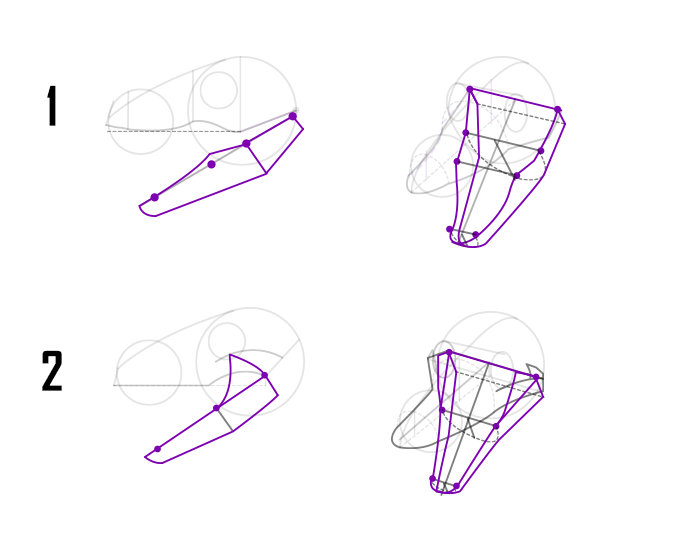
Let’s add the lower jaw now. This method is quite complicated, especially in perspective, but it’s still better than a guessing game. Find the axis of rotation of the lower jaw (different for saurischian and therapsid), and sketch a fraction of a circle between the most extreme positions of the jaw. In perspective, that circle must take a form of a rotated ellipse. Lead a line between the “jaw point” and a point on the circle to define a position of the lower jaw.

Cast the form-indicating points to the lower jaw.
Give the lower jaw a width similar to the upper one.
The lower jaw needs a depth, too.
Outline the lower jaw using the guide lines you have created.
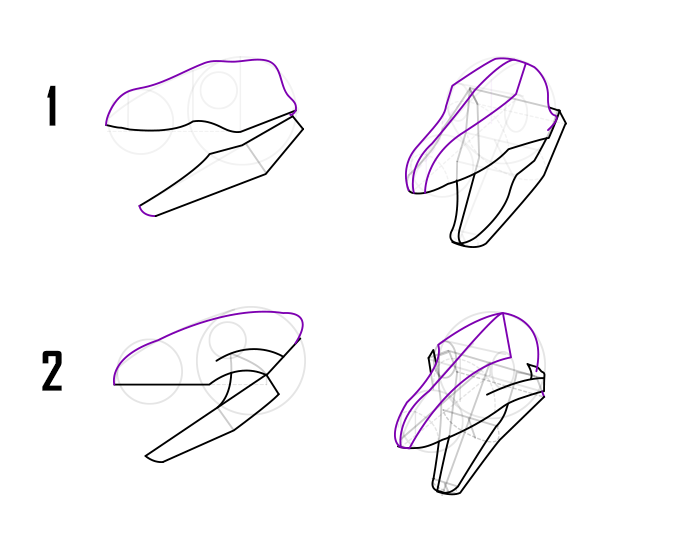
You can now outline the upper part of the skull as well.
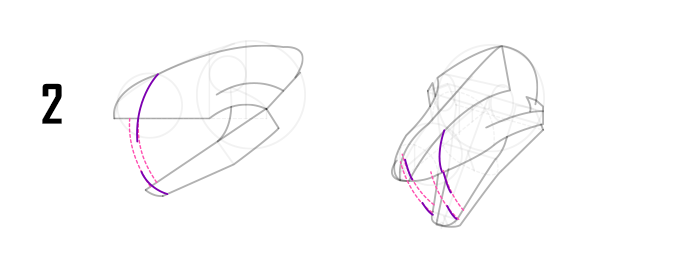
Let’s add the teeth now. This is where the two species differ a lot: saurischians don’t have specialized teeth like therapsids.
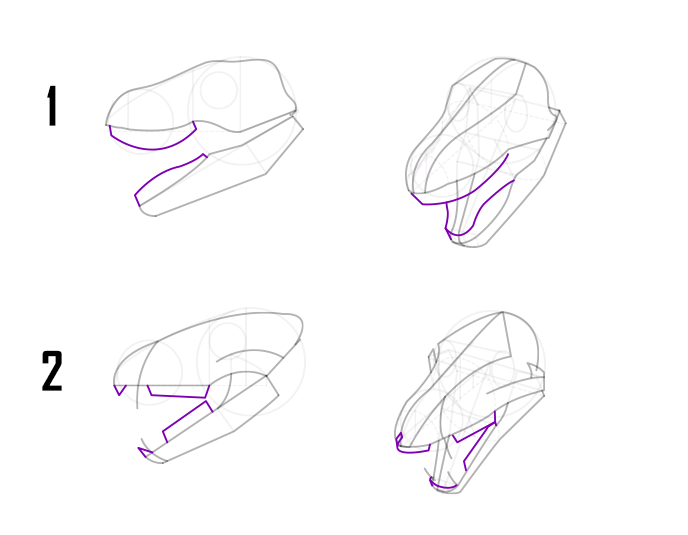
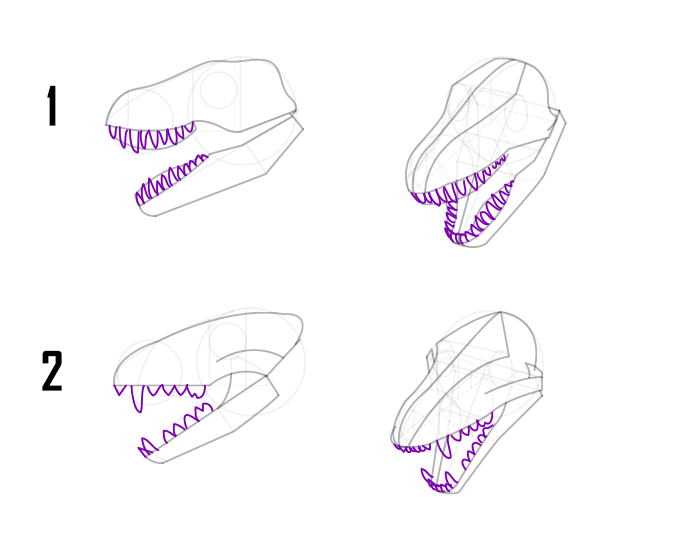
Finally, outline the head and give it final details
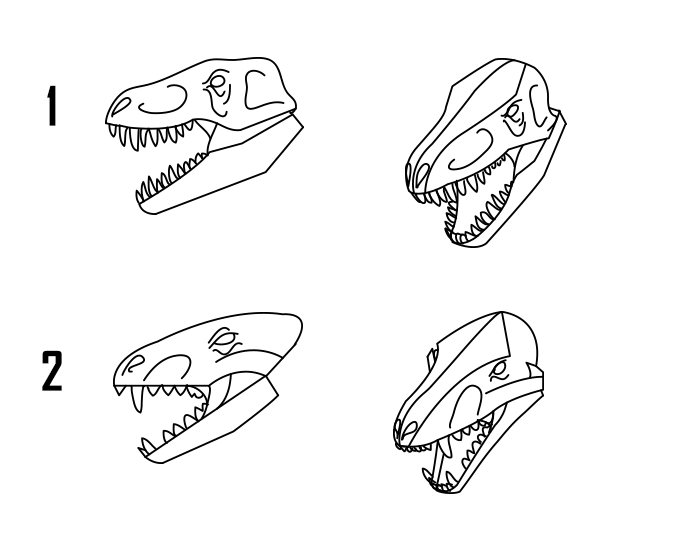
Dragon Scales
Scales (or big “plates”) are what make dragons unique and differs them from dinosaurs. That’s why it’s so important to draw them properly. They seem very time consuming, but if you learn one simple rule, you’ll be able to add them to your dragons in no time!
There are two things to consider before we add the scales. First, locate the areas that must be the most flexible and therefore can’t be covered with big scales.
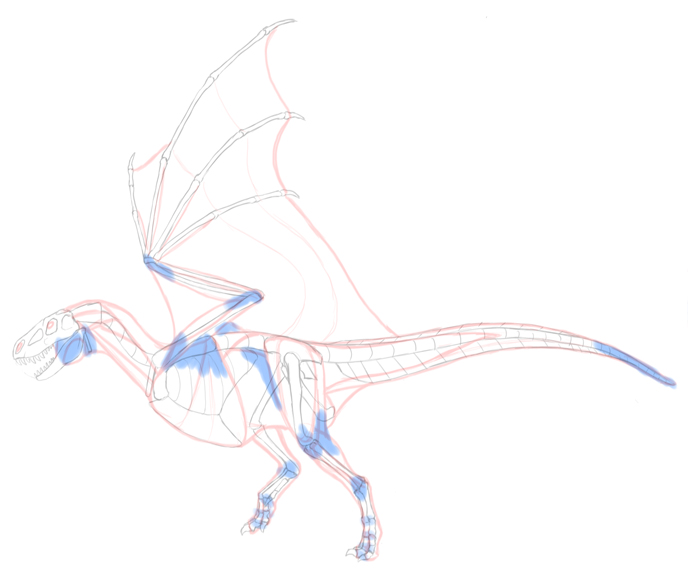
Now, locate the areas that require the biggest protection. You don’t need to draw these areas, but make sure you know where they are.
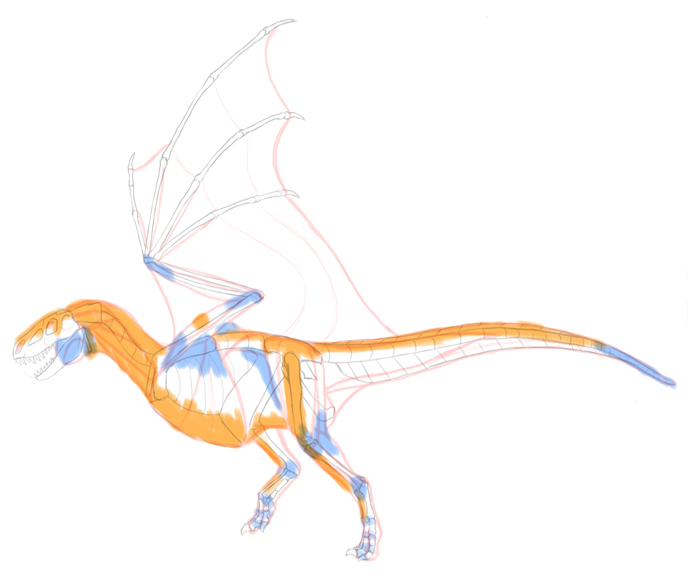
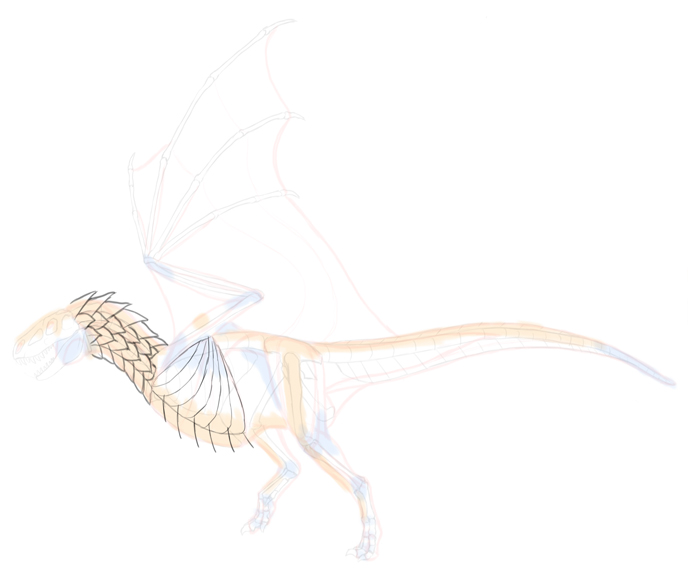
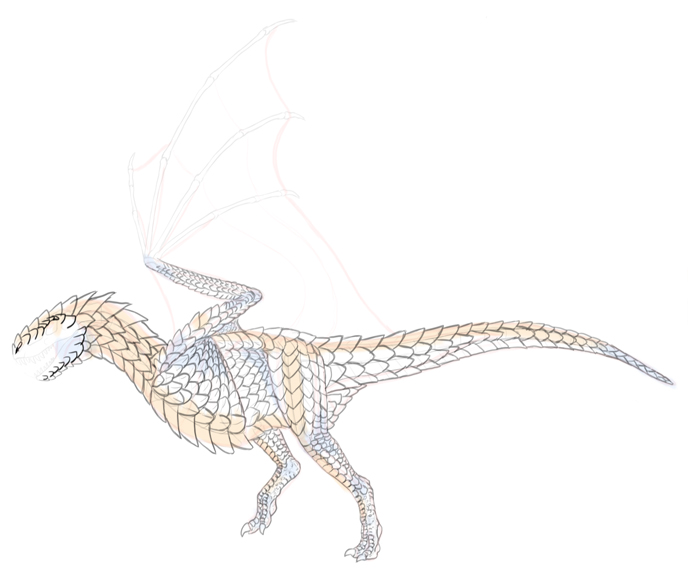
Let’s start drawing now (you can download my initial sketch and follow my actions if you want). Draw a line near the bottom of the neck, following its rhythm.
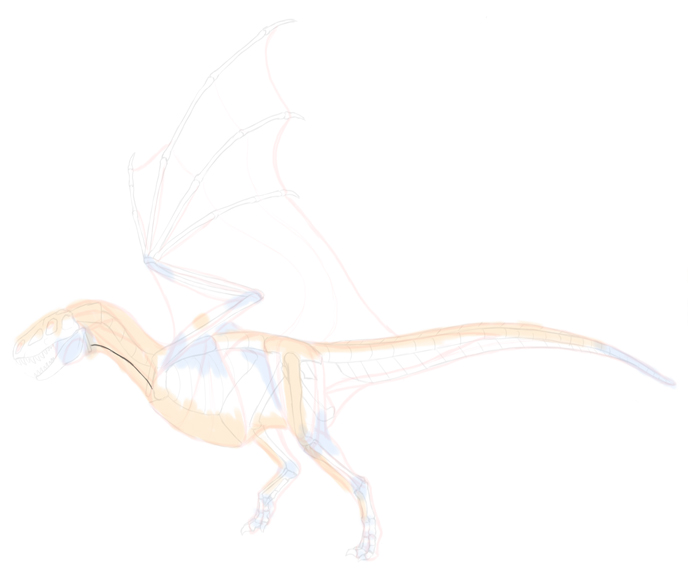
Cross this area with diagonal lines, creating scales covering the throat.
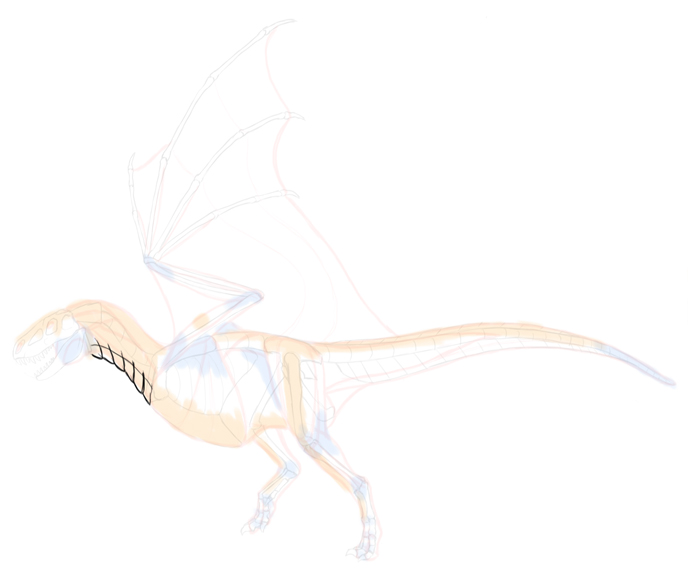
Add another line a bit farther, and draw a line between these two. This will be another row of scales.
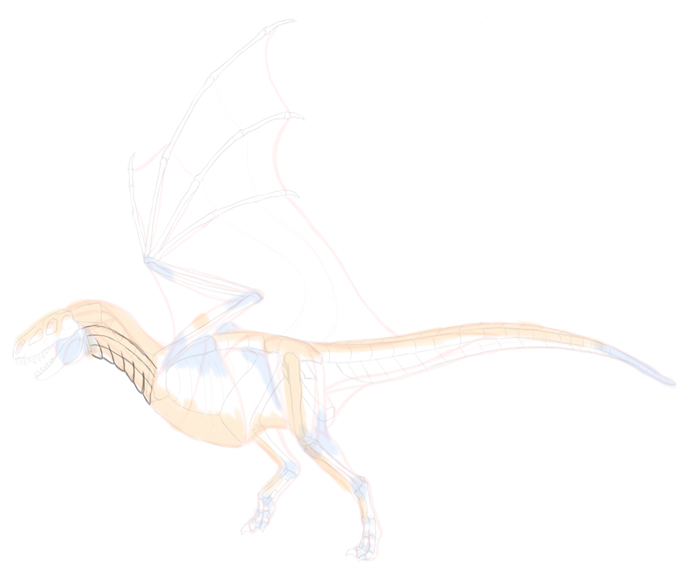
First draw one side of the row…
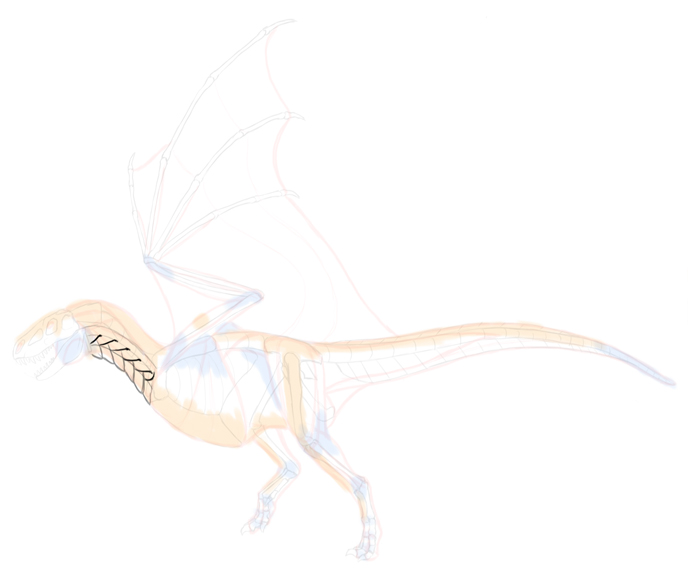
… then the other. Pay attention to the serration between the rows of scales. This is what makes the pattern of scales look orderly!
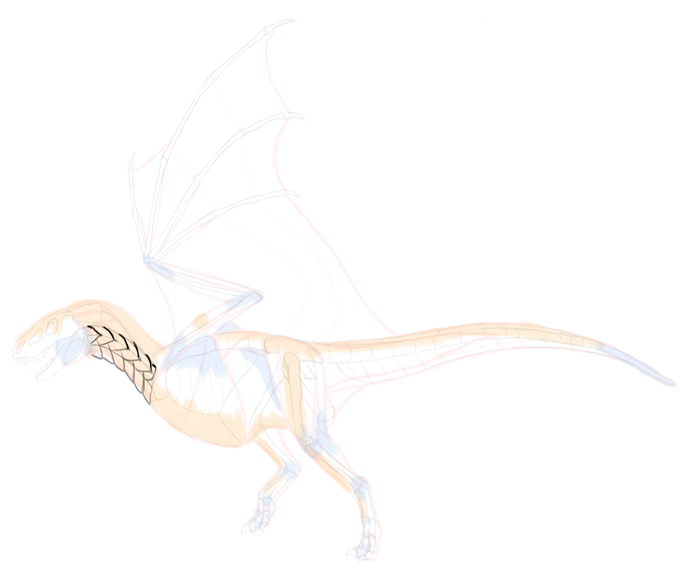
Add another row with the same method.
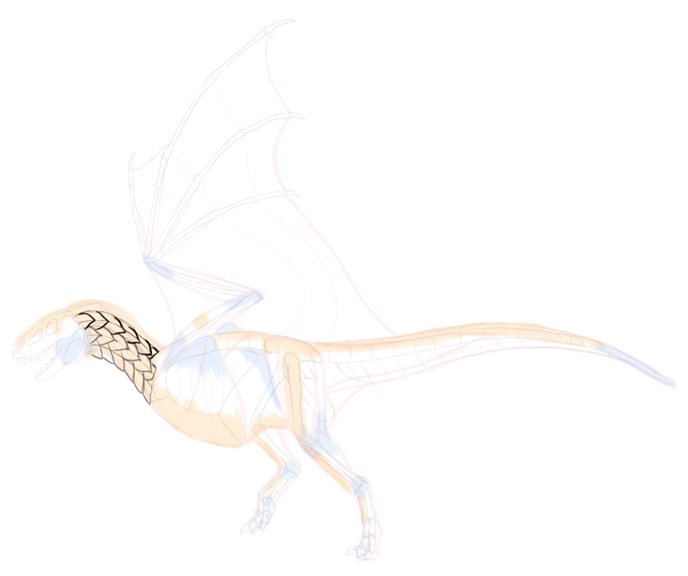
Once you come closer to the top of the neck, add a row of diagonal lines. Again, pay attention to the rhythm of the neck—a bent neck leads to outstretched scales.
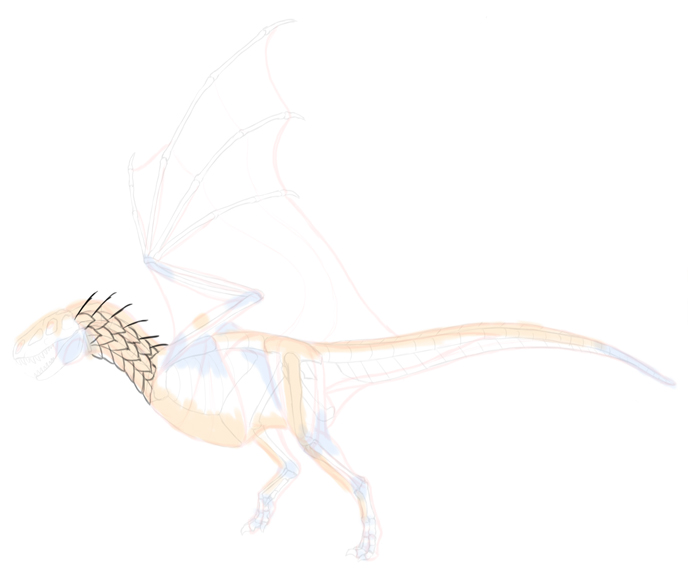
Close them to create scales.

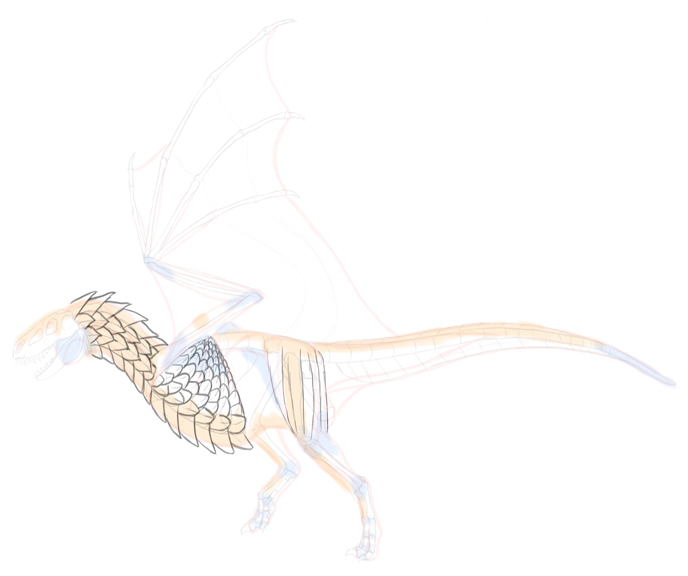
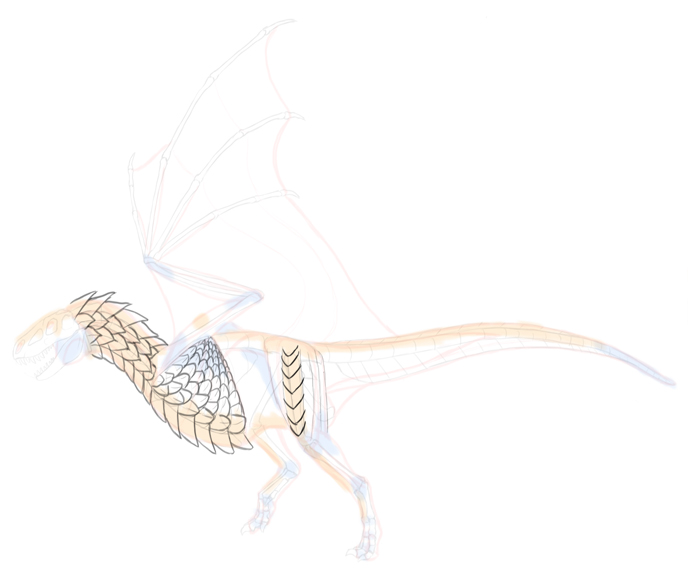
We can use this method to cover all the body, except you need to adjust the shape of the rows to the form of the body. First the huge breast muscle…
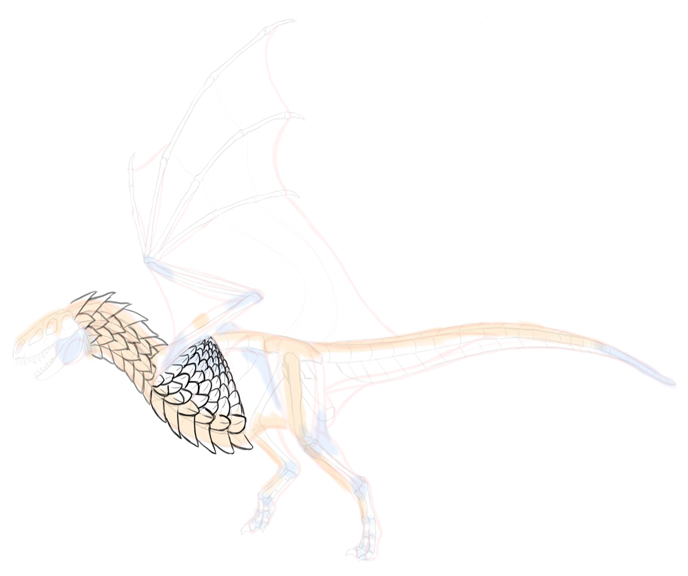
… then the thigh.
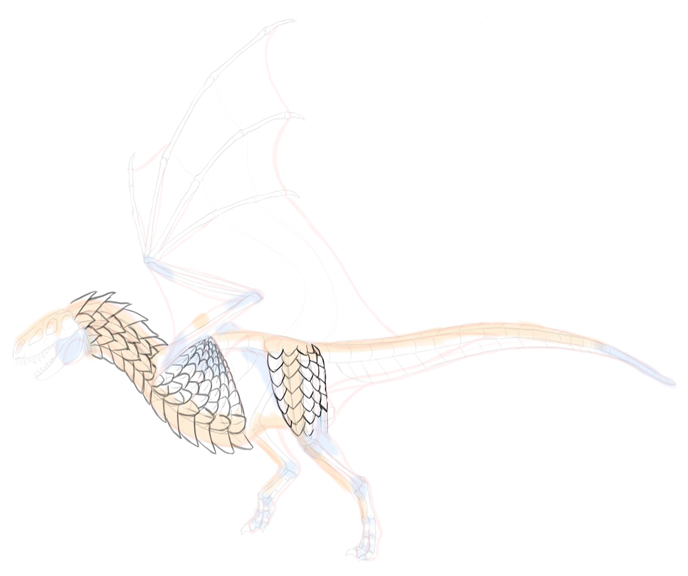
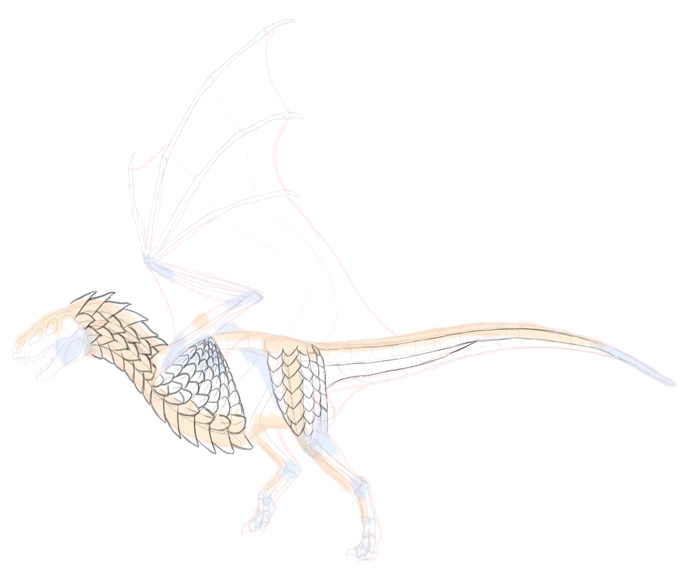
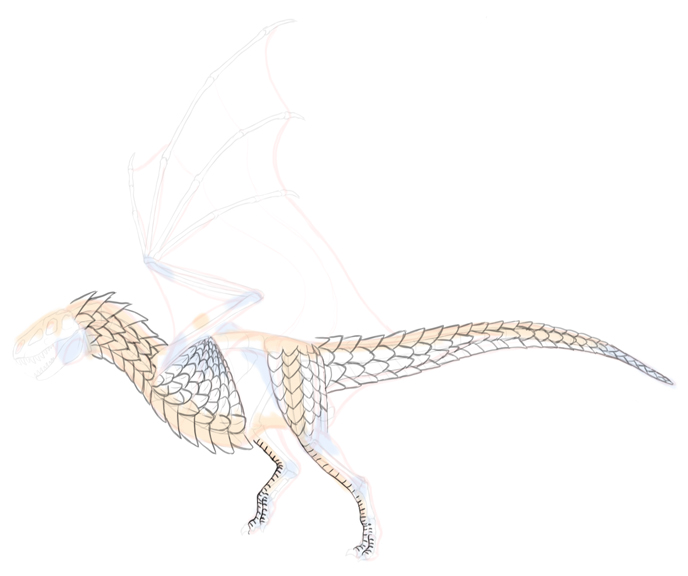
The tail is a good place to present the scales in all their glory.
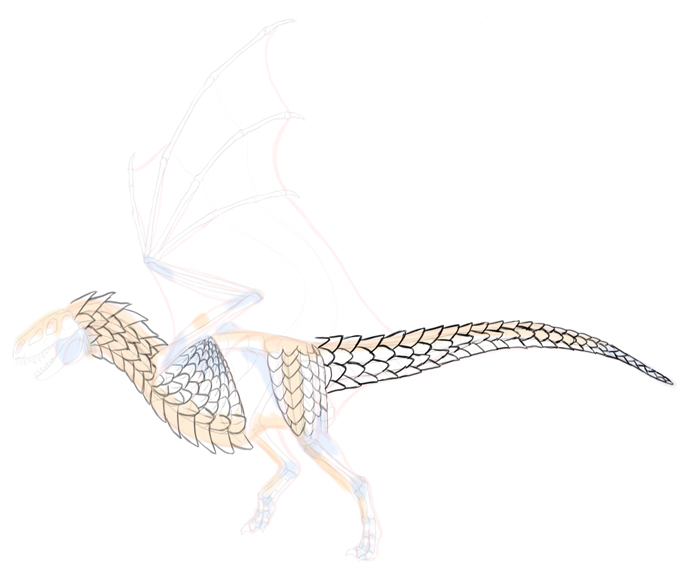
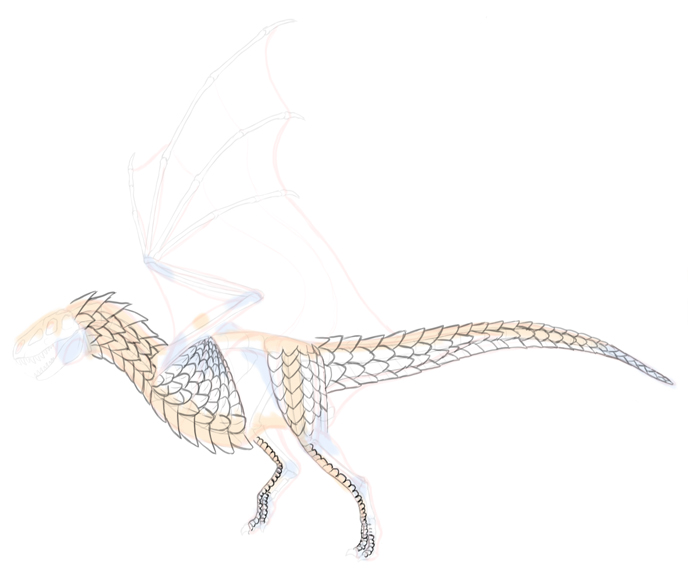
The legs contain many flexible parts, so they must be covered with small scales. The less uniform the scales are in terms of size, the more real the dragon will look. A creature covered with same-size scales look simply lazy!
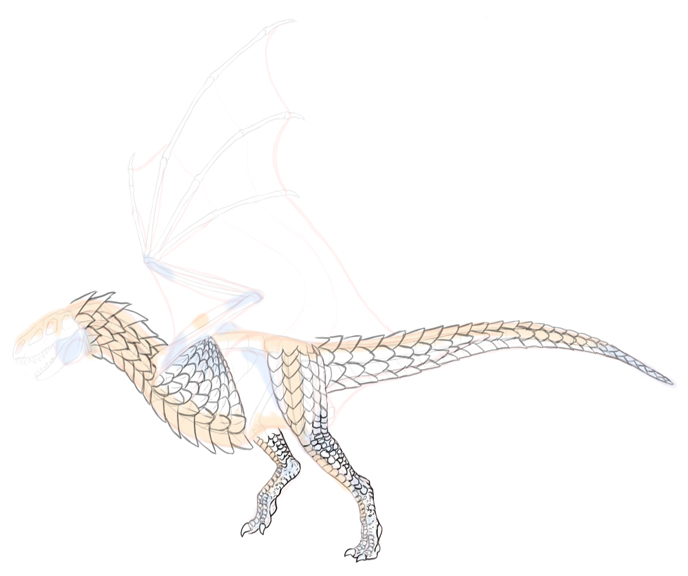
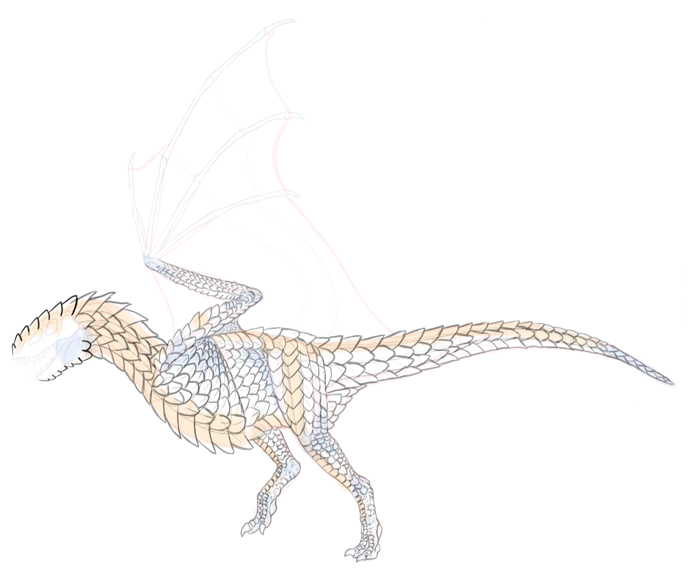
Finish the body by adjusting the style of scales to the already drawn ones. All the parts should naturally blend into each other.
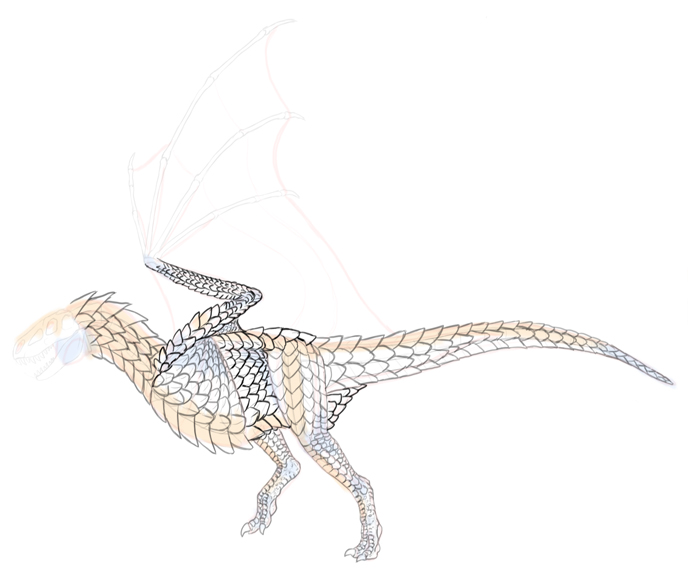
Pay special attention to the head. The scales here should be detailed and carefully placed around the important parts (nose, eyes, jaw muscle).
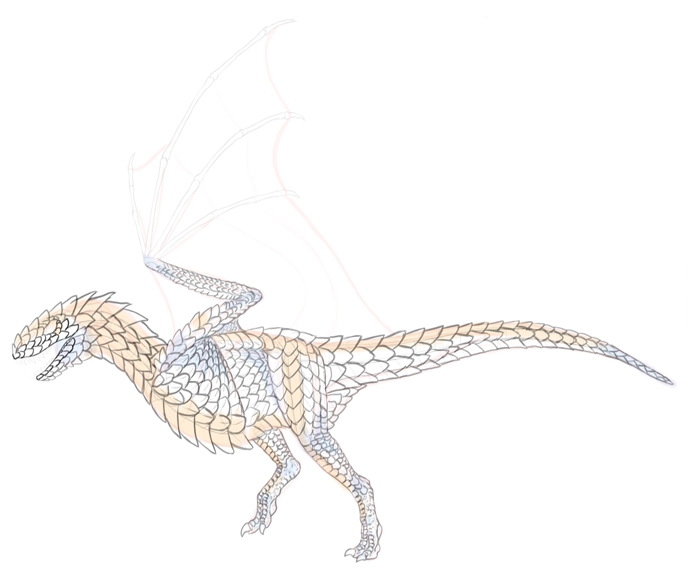
Here’s our dragon in all its scaly glory!
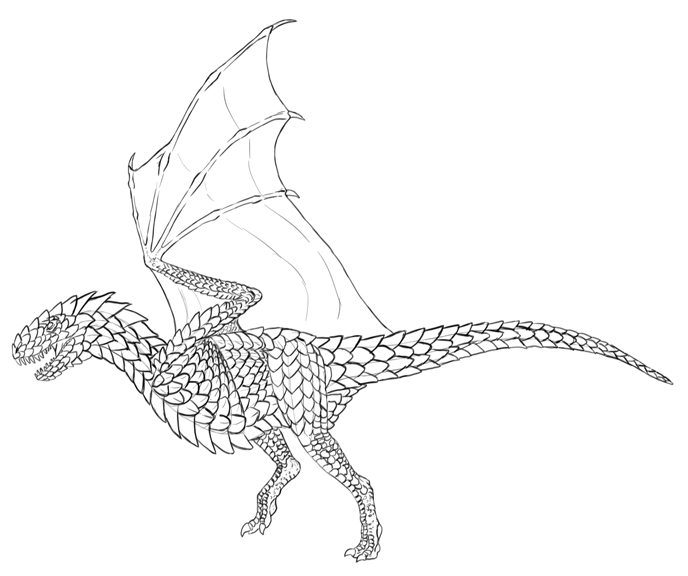
If you want to add realistic horns and spike, simply modify certain scales. Spikes look the best when they grow in rows that start with small, insignificant ones.
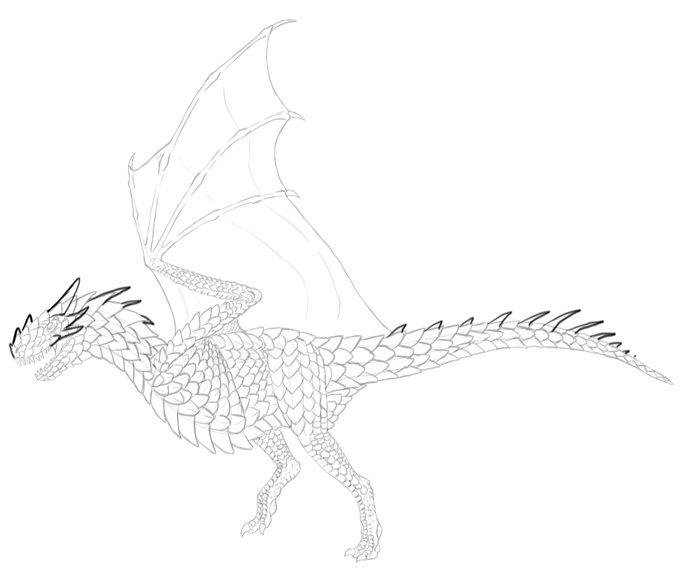
You don’t need to draw the scales in the exact way I showed you. The most important thing here is the serration between the rows of scales. The actual shape of the scales is left to your imagination!

Dragon Eyes
Eyes are very important in adding the character to the dragon. However, it’s not the eyes that really show it, but the structures around it.
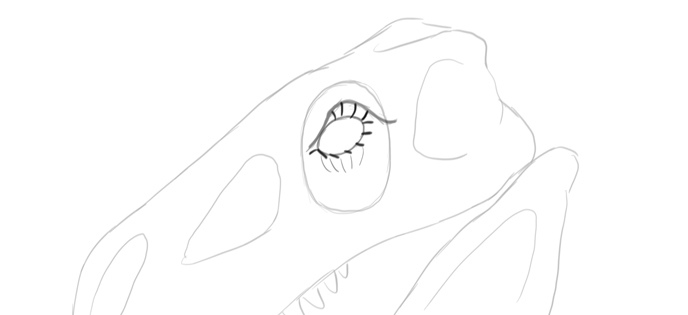
Start by drawing the general shape of the eye. The smaller it is in comparison to the head, the bigger the dragon will look (reserve big eyes for baby dragons).
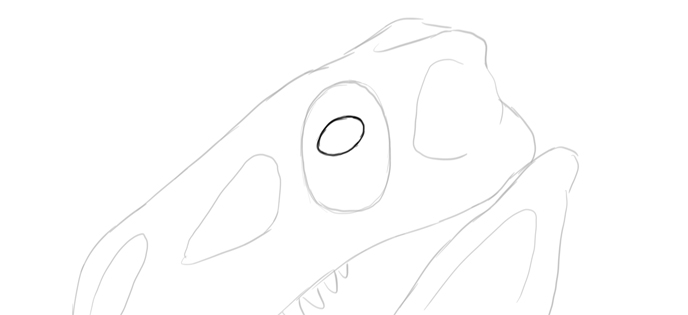
Add a brow that will make it look angry. Make the eyelids look thick by adding little scales to their edges.
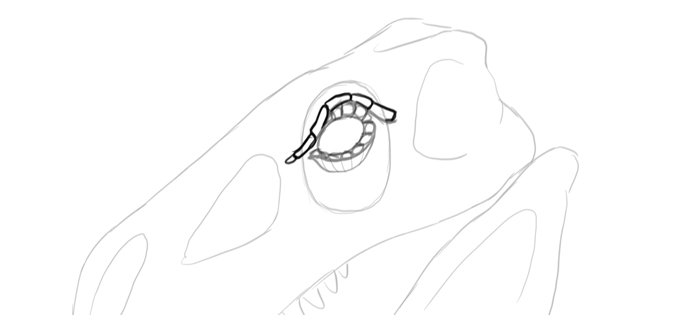
Justify the angry brow by covering it with protective scales. You can add a row of scales around the eye socket to accentuate its shape.

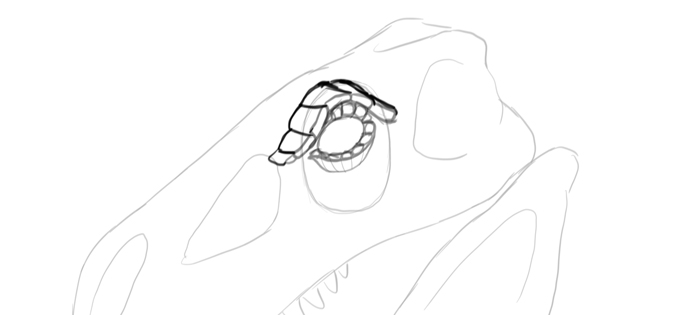
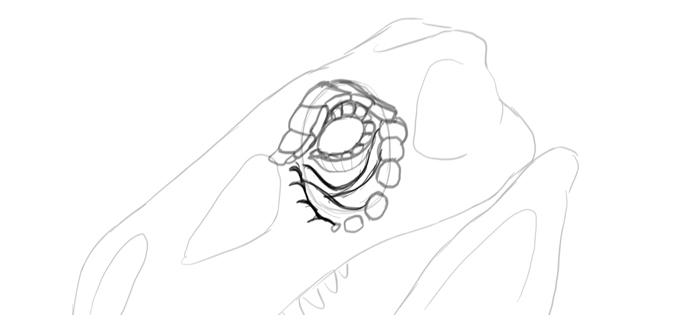
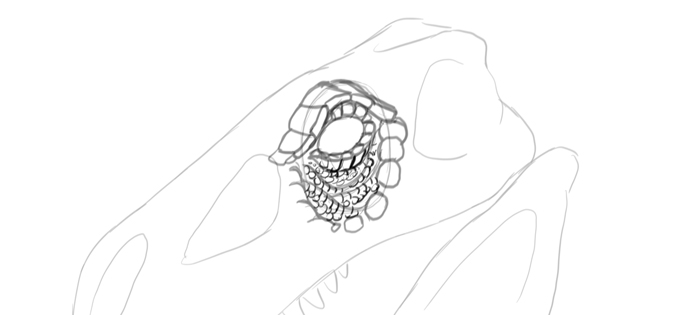
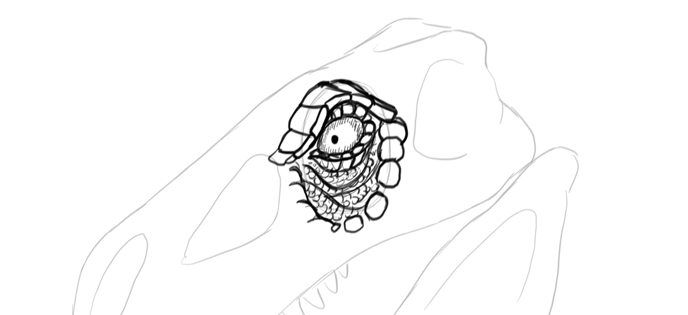
Add wrinkles in the soft area under the eye and cover them with little scales. Finish the outline of the eye and add the pupil.
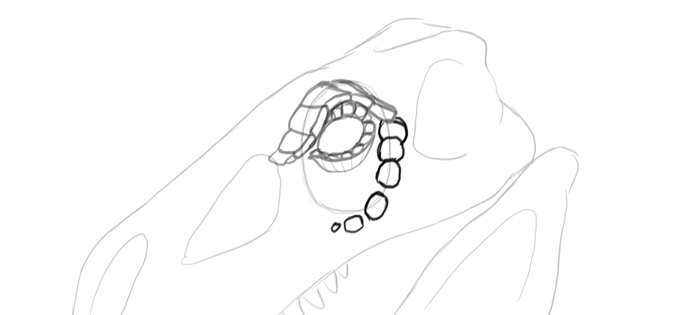
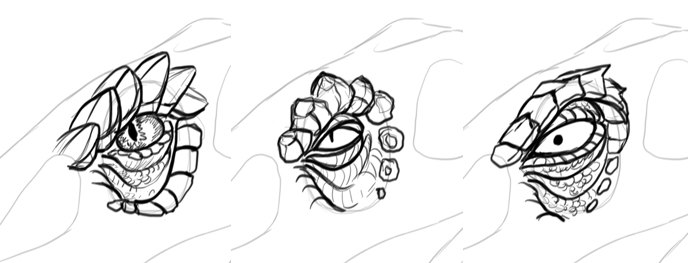
Of course, this isn’t the only style you should go for! You can use the same method to create different looks. Keep in mind that the pupil can change everything—experiment with various shapes to achieve the effect you want.
That’s All!
Today you learned all the rules you need to create a realistic, plausible species of dragon. But keep in mind it’s all about fun—feel free to mix the features of saurischians and therapsids if your imagination allows so. Remember—it’s us who make dragons real!

4 Comments