This post has been originally commissioned for SketchBook Blog in 2016. After the site’s migration, the original is no longer available, but you can still access the content here. Enjoy!
I’ve shown you how to draw predators like wolves and big cats, and today it’s time for another group of terrifying beasts: the bears. Big, fluffy, and clumsy, bears are fascinating creatures with unique silhouette and features. They’re also surprisingly simple to draw! In this tutorial I will teach you everything you need to learn how to draw bears from the paws to the nose.
Basic Bear Anatomy
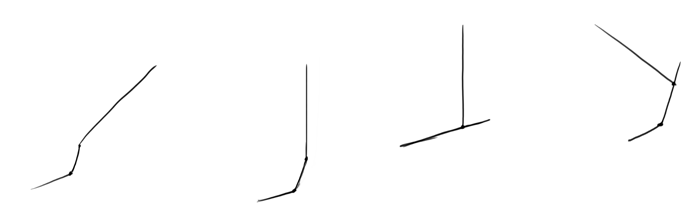
As always, let’s take a look at the base of the body of a bear first – the simplified skeleton. When you remove all the fur, fat, and muscles, you’ll see that bears are built just like all the other animals we’ve been studying.

There’s one big difference, though. Bears are plantigrade, which means they’re walking with their whole feet, like us. Compare it to the wolf (digitrade) and the horse (ungulate). This arrangement of feet lets them walk on the hind legs.
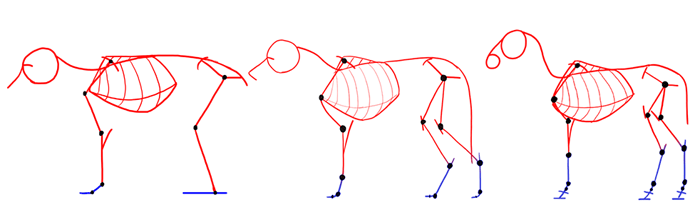
The forepaws can be plantigrade or semi-plantigrade.
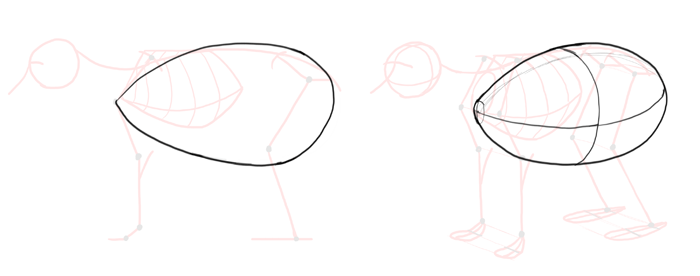
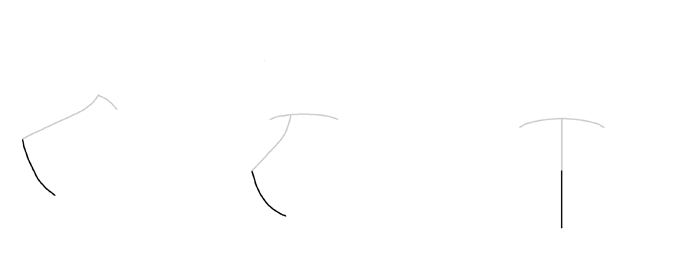
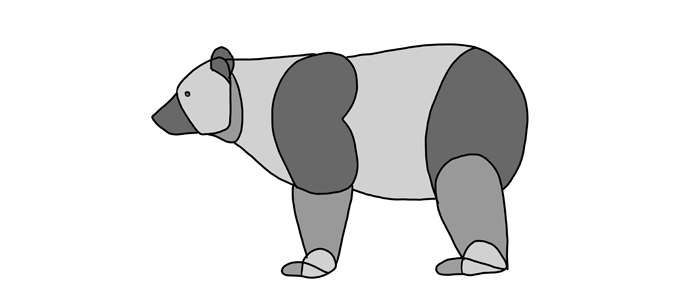
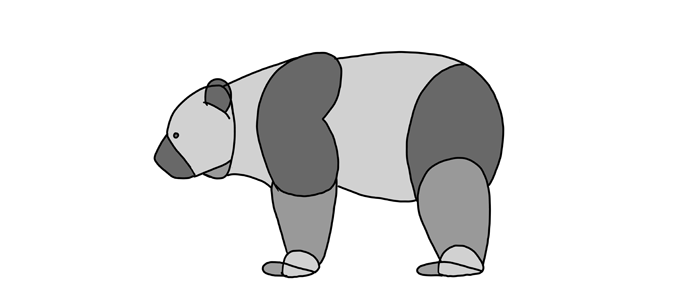
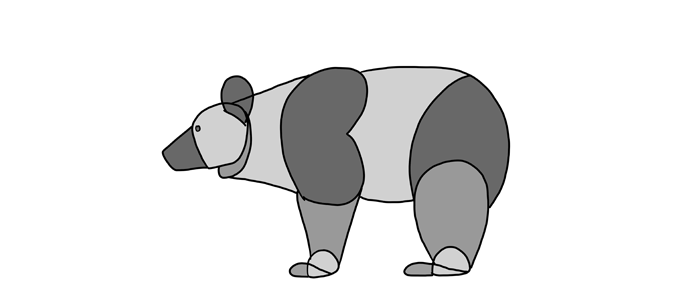
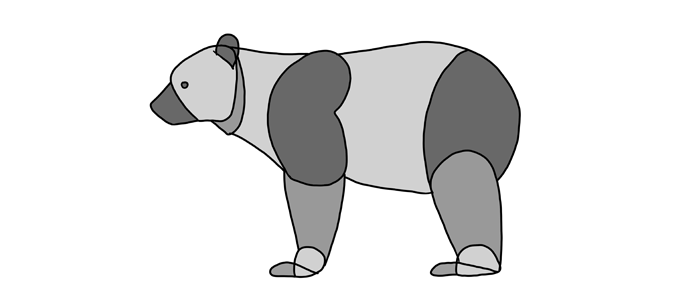
Let’s add the body now. Bears are actually pretty simple to draw – their silhouette is very clear and can be achieved without using advanced musculature. The main body, for example, can be drawn as a huge teardrop or a sack:
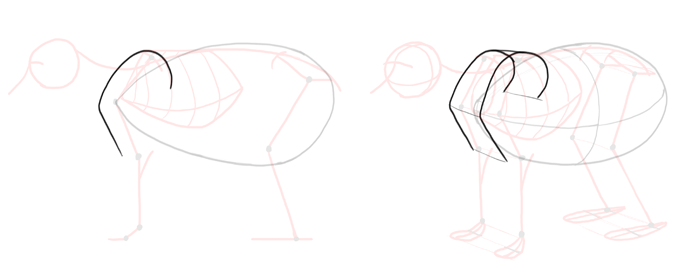
Add the forequarters…
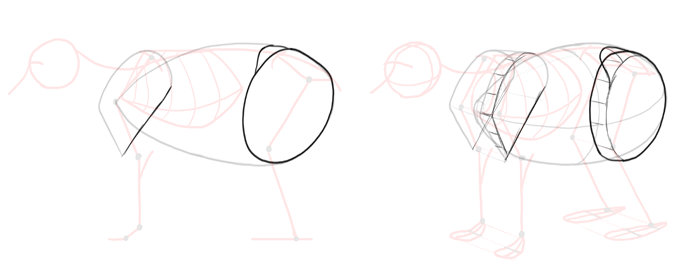
…and the hindquarters.
The feet can be sketched very simply as well. More about it later!
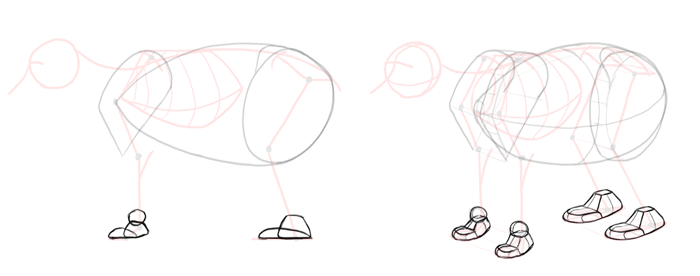
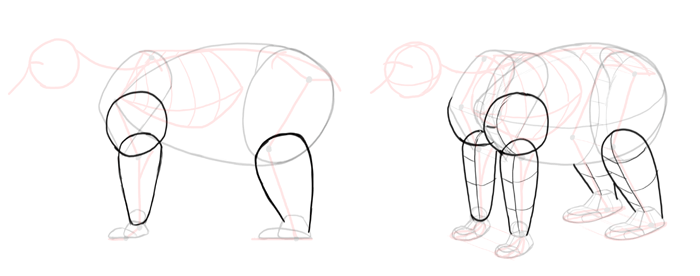
Draw the rest of the limbs.
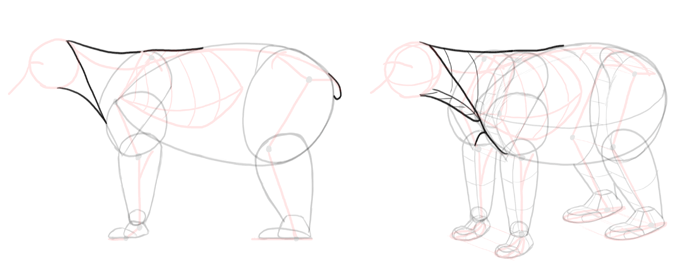
Finish the body by adding the neck. The tail is just a flap of skin without any function, and it can be almost non-existent in some species.
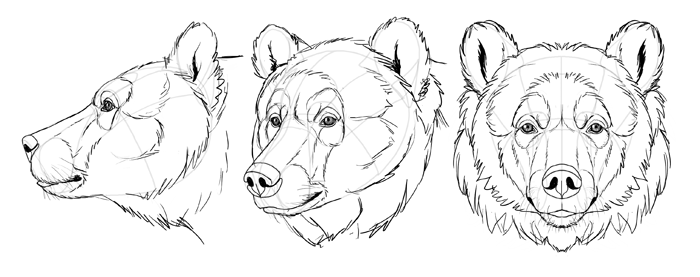
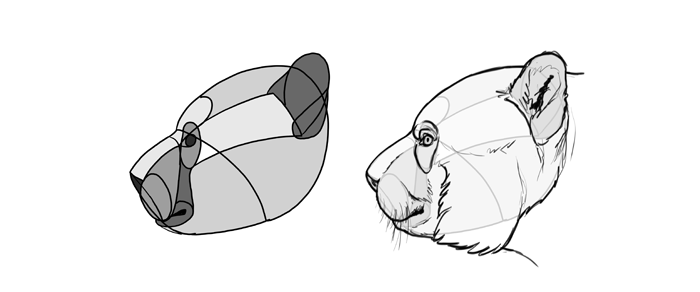
How to Draw a Bear Head Step by Step
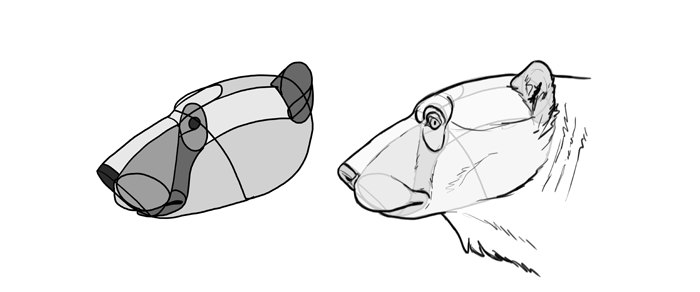
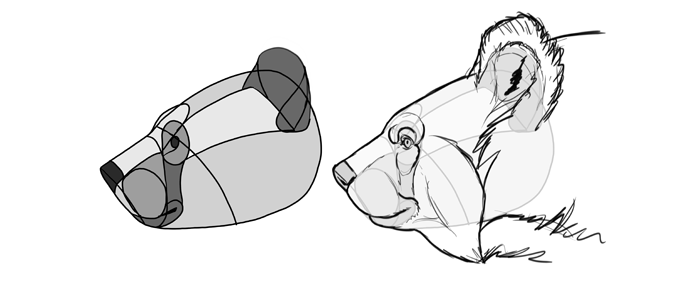
Let’s draw a universal bear head now. Don’t treat this process as a rigid step-by-step instruction – rather, use it to learn the relations between the elements of the head. Create your own process of drawing the head of a bear, something that will be the easiest for you to follow.
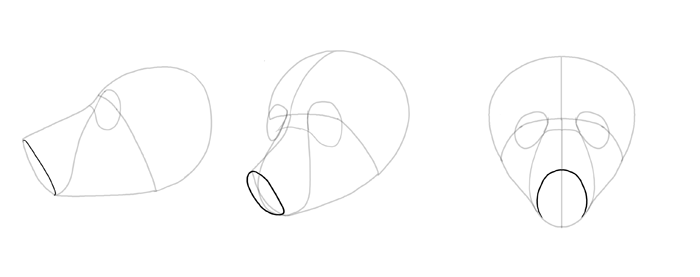
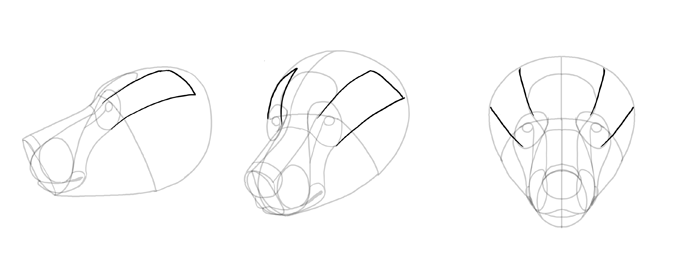
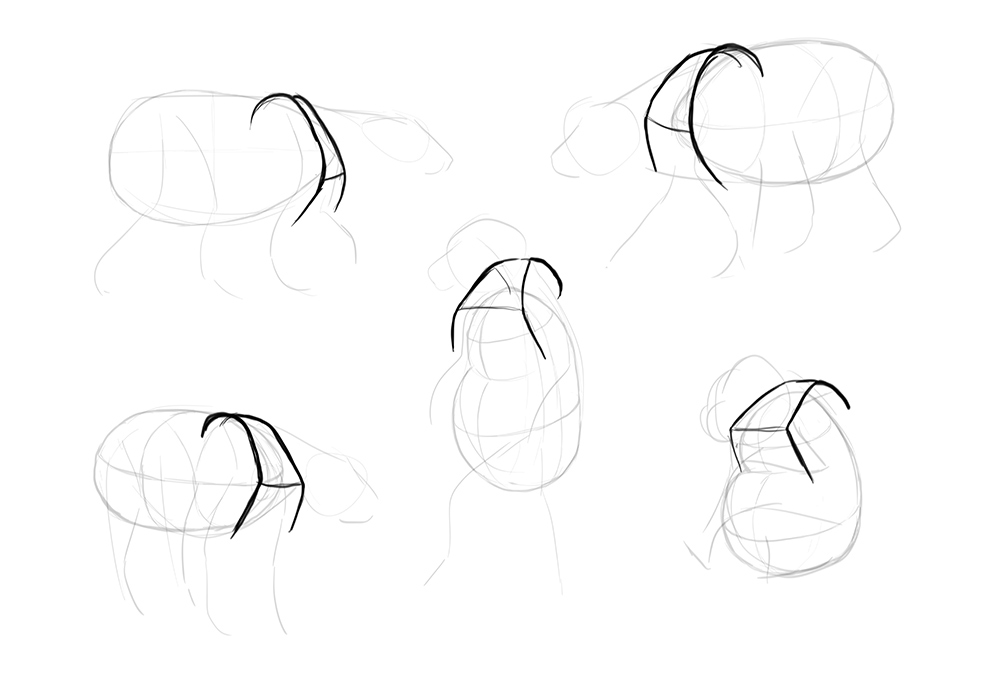
Start by defining the line of the eyebrows and the direction of the muzzle. Keep in mind that they’re all affected by perspective!

Add the length of the front of the muzzle. Bears have it quite wide.
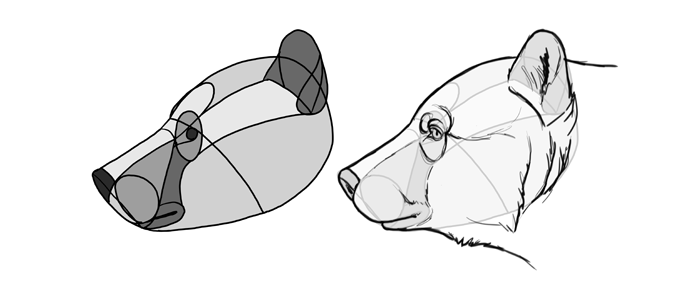
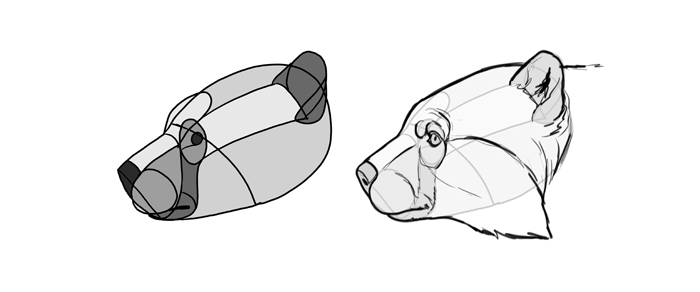
Outline the skull. No matter the species, it’s better to draw the head as a skull first, adding the characteristic shape created by fur later in the process.
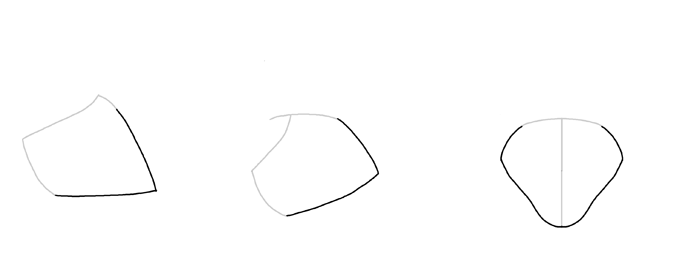
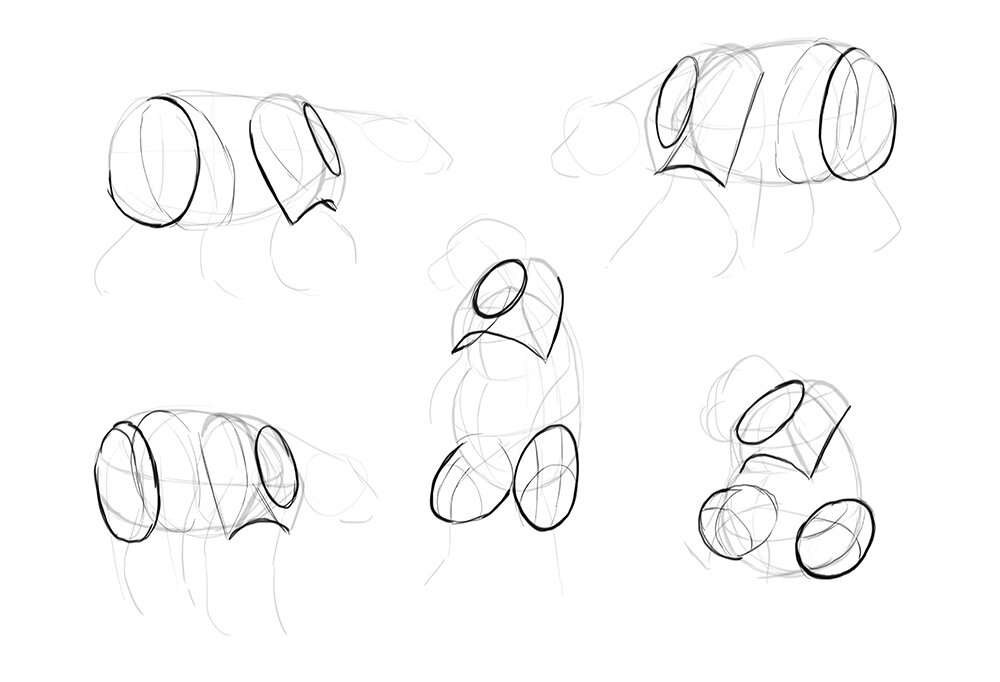
Draw the shape of the muzzle. In bears it has a wide base.
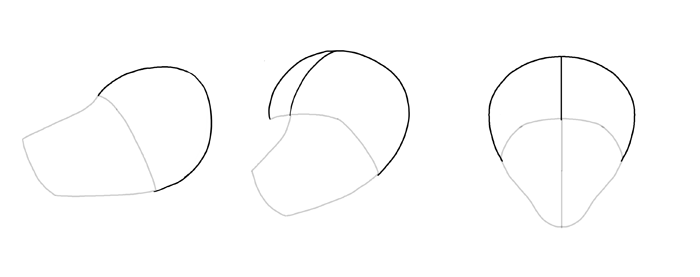
Add the eye sockets, drawing them like upside-down glasses in the upper part of the muzzle.
Draw the flat front of the muzzle. This will help us see the perspective and adjust other elements to it.
Draw the flat nasal bridge and the forehead.
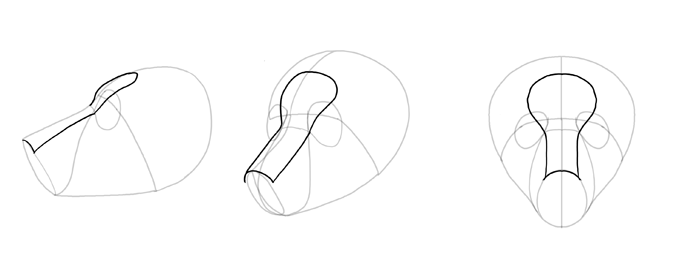
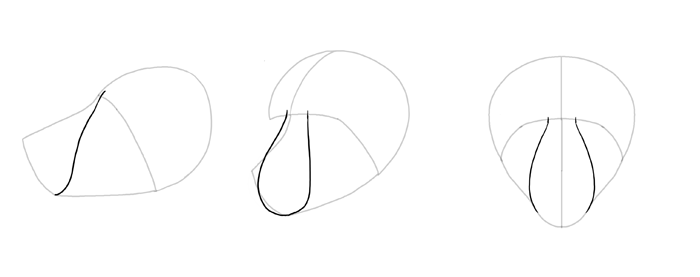
Draw the tiny circular eyes on the sides of the muzzle. Tiny eyes in a big head are characteristic for bears.
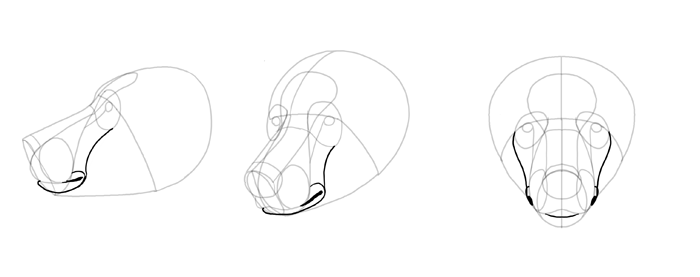
Outline the huge nose.
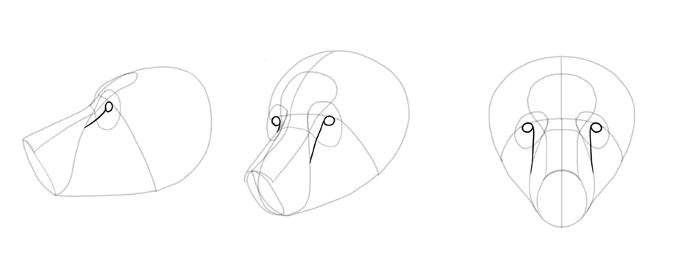
Draw the lips. They’re very loose and prehensile, and they seem to have the life of their own.

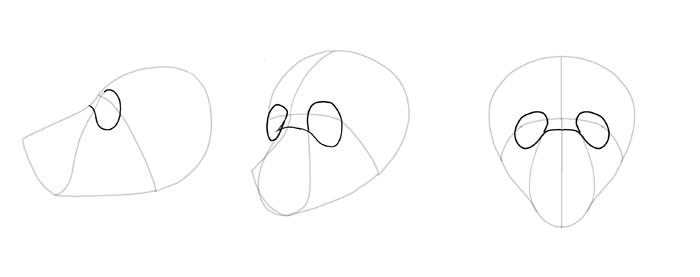
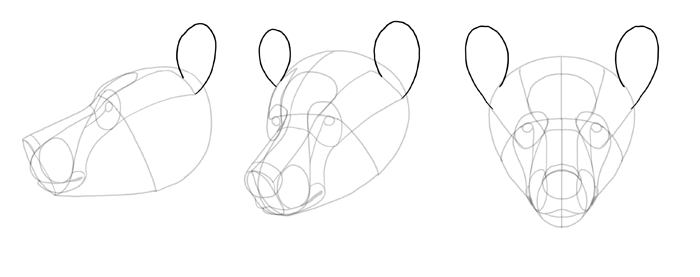
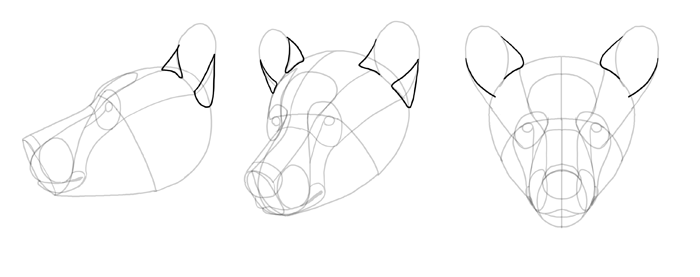
Draw the ears, drawing them in the back of the skull, right behind the eyes. They are round and quite long under all this fur.
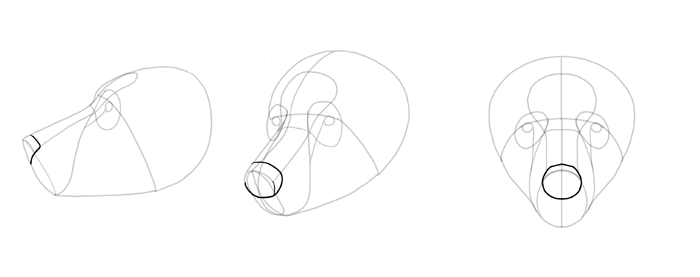
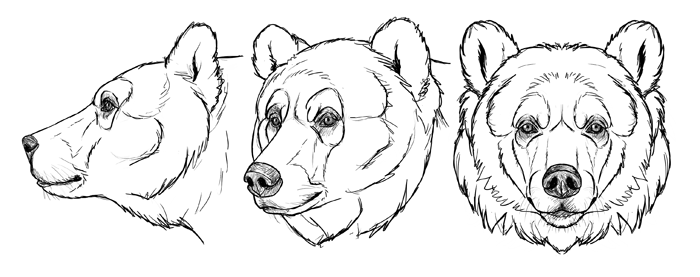
Before you add the details, make sure your head already looks bear-like. Details will make it look nicer of course, but the proportions are the most important!
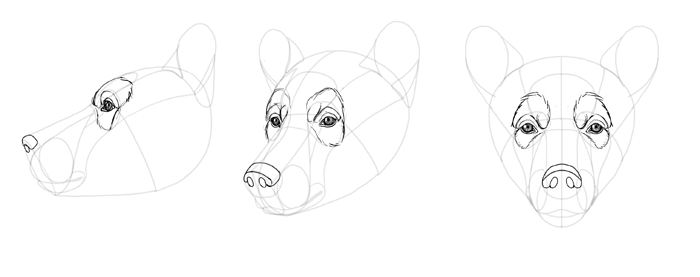
Outline the eyes, and give them the edges of the eyelids and the eye corners.
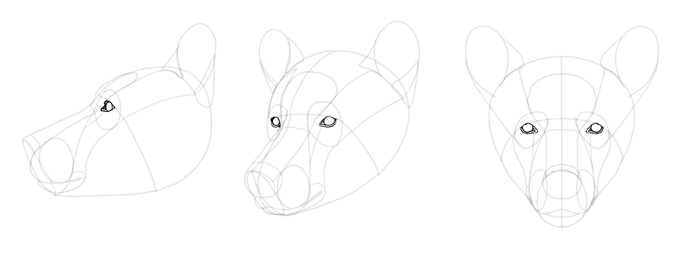
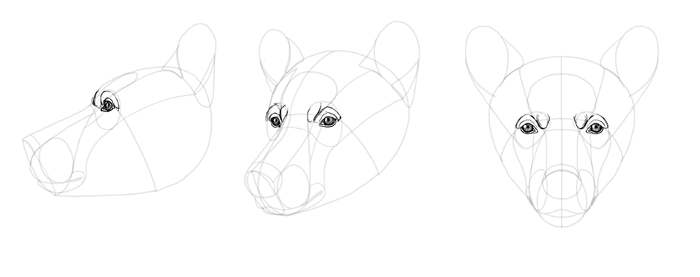
Draw the round pupils. The iris has a black outline, and there’s often some white of the eye visible.

The eyes are brown or black, and darkening them may be necessary to get a real bear look even if you don’t want to shade your drawing.

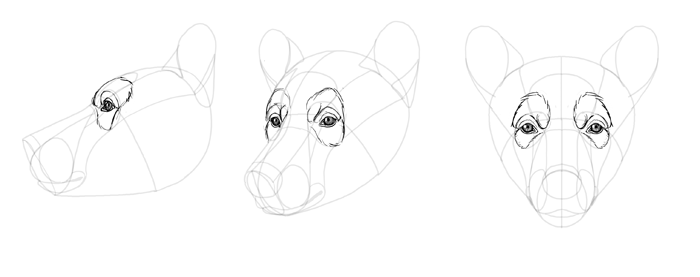
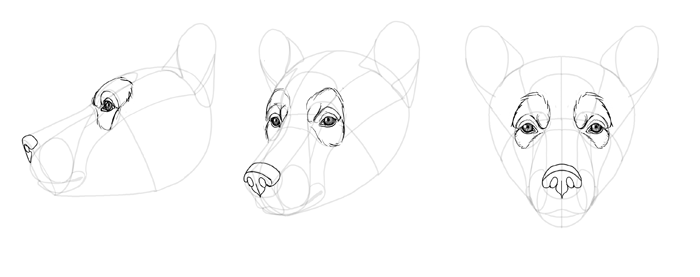
To achieve a characteristic look of bear eyes you need to draw some more details, especially the folded eyelids. The fur dots are not very pronounced; instead, the wrinkle right behind them is quite visible.

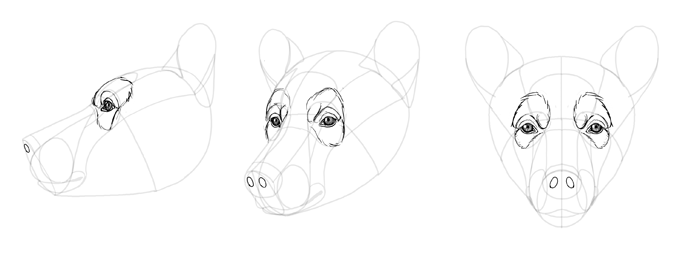
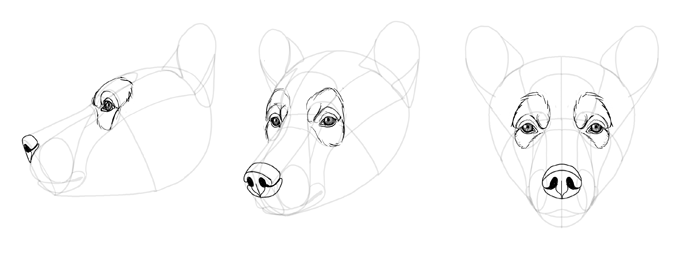
Draw the nose. It’s big and quite mobile.
Time for the fur. Quick, short lines along the guide lines may help pronounce the form of the head and make it look more detailed.
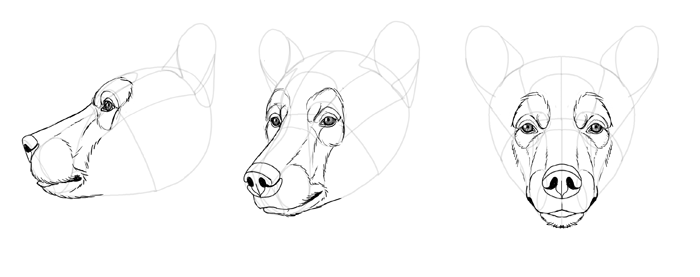
The shape of the head is heavily affected by the fur on it. Adjust it to the species.
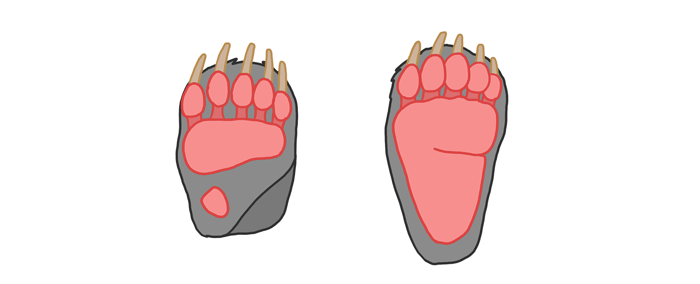
How to Draw Bear Paws Step by Step
Because bears are plantigrade, their feet look very much like ours. The front paws are similar to the feet, and they don’t have any thumb or even a dew claw. They still have the pisiform on the wrist, though.
To draw bear paws you can use your own hands and feet as a reference. First draw a simple pose of them, keeping the joints in mind. Again, this process is just a suggestion – modify it to your will.
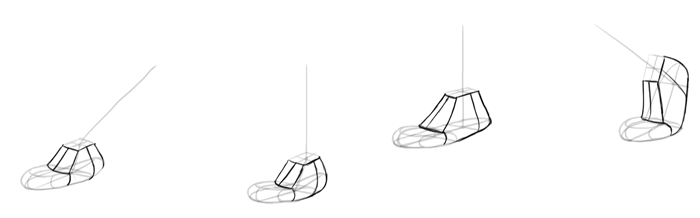
The semi-plantigrade forepaws will be easier to draw if you treat them as shorter feet, with a “heel” on the back.
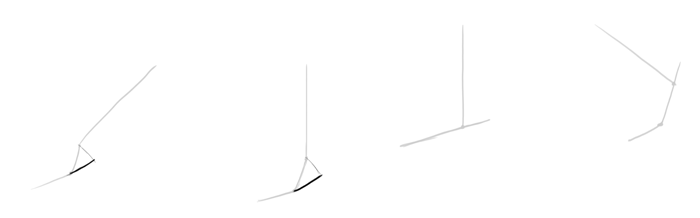
Cross the joints with width lines following the perspective of the ground.
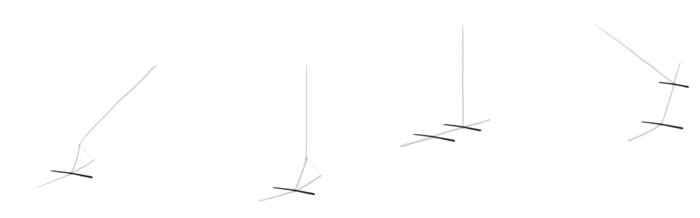
Outline the rounded front of each paw.
Outline the back of each paw.
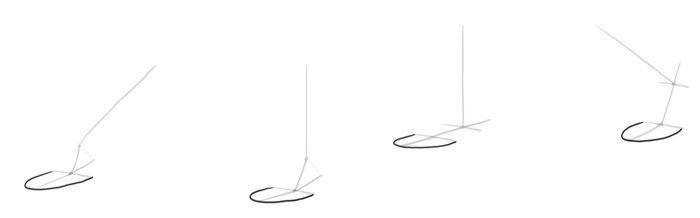
The toes make rounded, flat cushions.

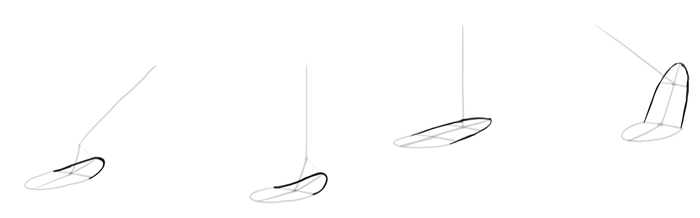
Finish the form of each paw with this 3D shape:

The forepaws will be easier to position with little spheres on top.
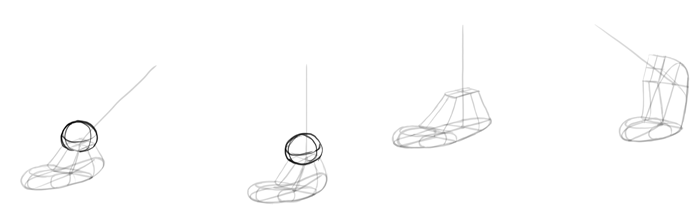
Now, time for the claws. They’re very long and curved (longer on the forepaws), but also blunt by constant contact with the ground.
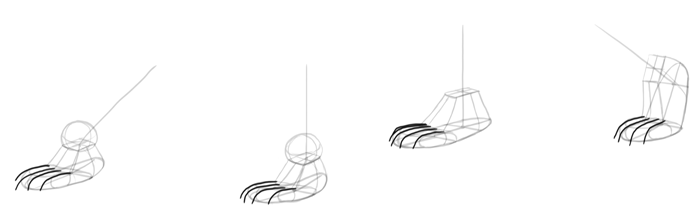
After you have all these guide lines, you can finish the drawing.

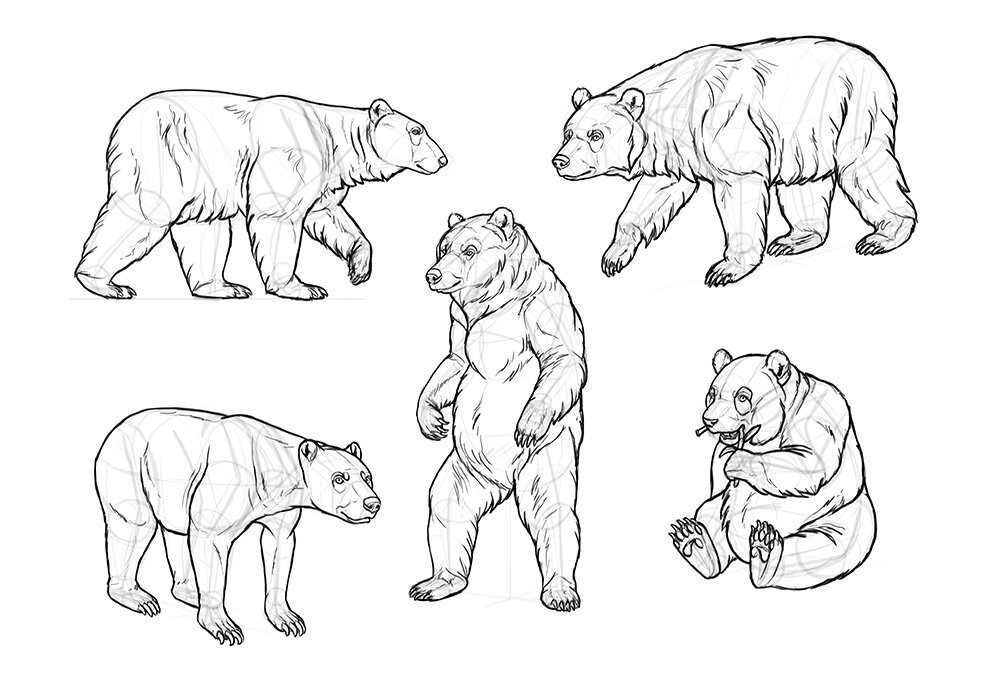
How to Draw Bear Species
There are eight species of bears, and many subspecies. Let’s take a look at the various species to learn more about the variety of bear body types and features.
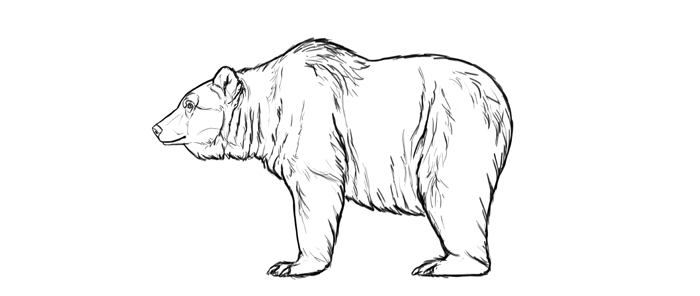
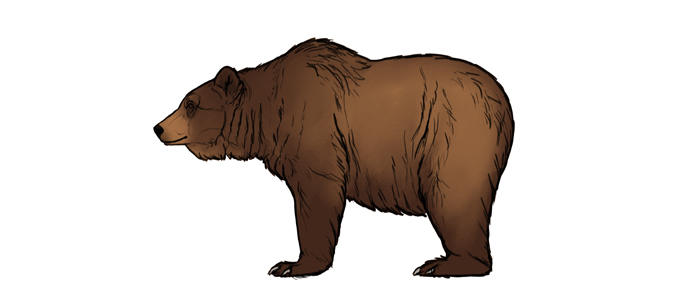
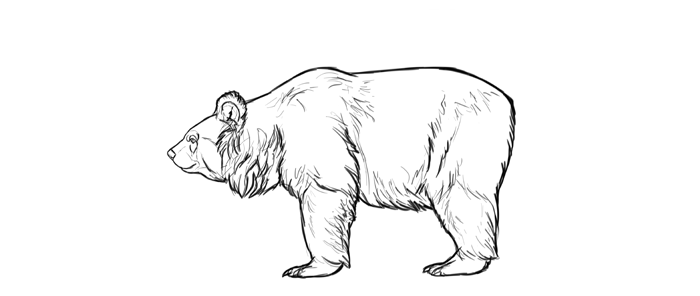
Brown Bear
This is certainly the most popular bear species, and also the largest one. You can study it as a “model bear” and modify its body to create all the other species. A characteristic feature of the brown bear is the hump on its shoulders and its tiny eyes. The head may look huge and round because of all the fur around it.

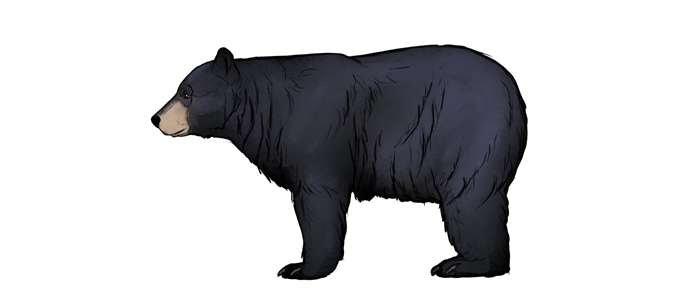
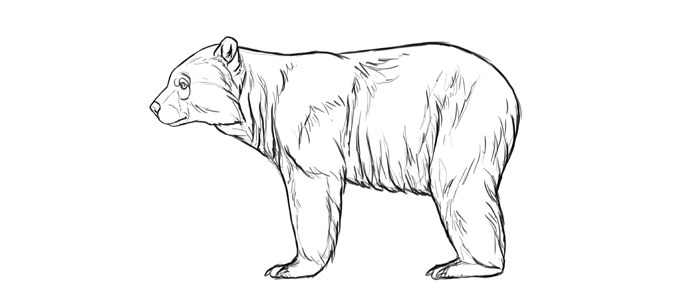
American Black Bear
It’s very similar to the brown bear, but it’s smaller, so its eyes seem bigger. It doesn’t have the shoulder hump, so its silhouette is more streamline.
Polar Bear
This is another popular species. Its silhouette is characteristically streamline, and so is the head with very smooth profile. The ears are small.


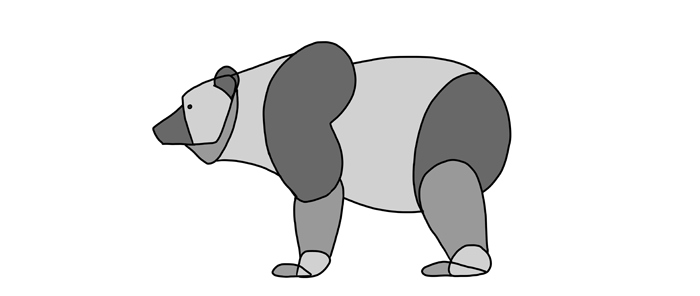
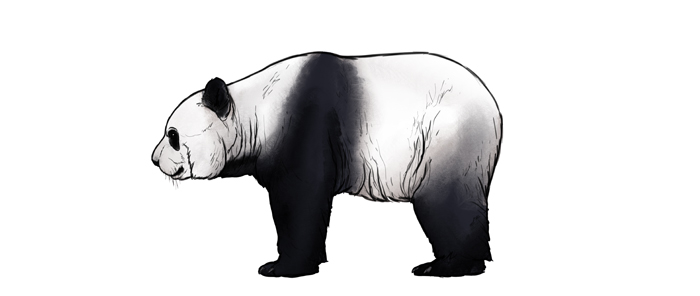
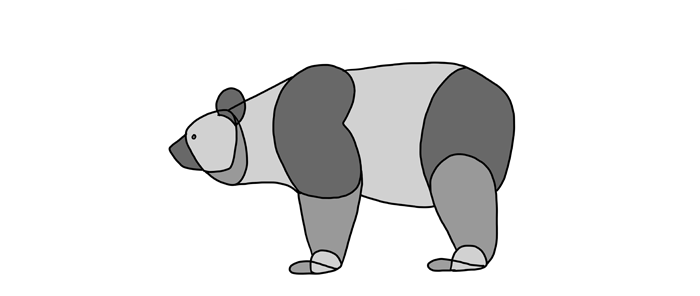
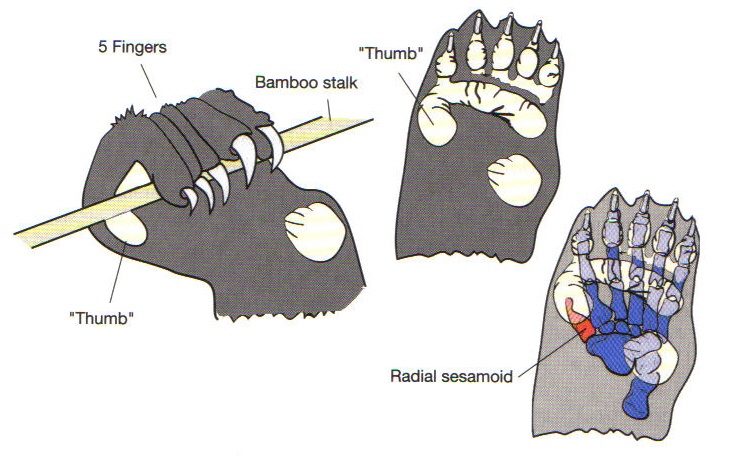
Giant Panda
This bear is the icon of species conservation. Besides its unusual colors, it has other unique features: huge round head with short, thick muzzle, a cat-like nose (with only the front visible), and front paws with false thumbs.
Sun Bear
You may know this bear from a popular meme of the “confession bear“. It’s quite unique, because its hair is smooth and not very thick, so the silhouette is not concealed by it. It has loose skin that sometimes wrinkles around the head and neck. It has super long tongue, and its claws look very long too because they’re not covered by too much fur.
Sloth Bear
This lesser known bear looks very cute because of its big round ears and fluffy appearance. Its name comes from its long and curved claws in the fore paws. It has a long muzzle surrounded by a fluffy mane.

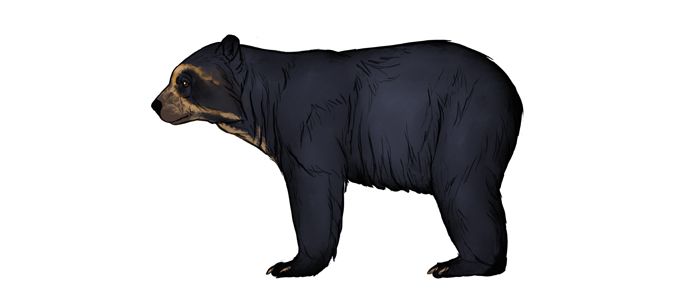
Spectacled Bear
This another less know species lives in South America. It has a very cute, short muzzle, and big eyes.
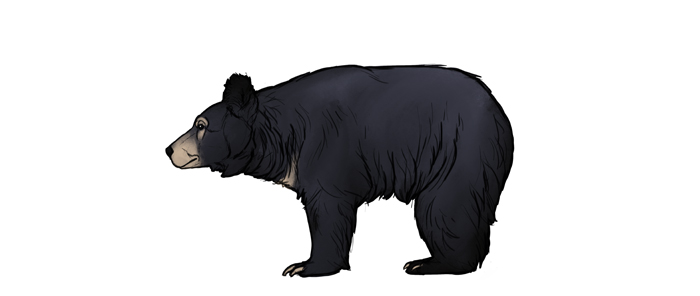
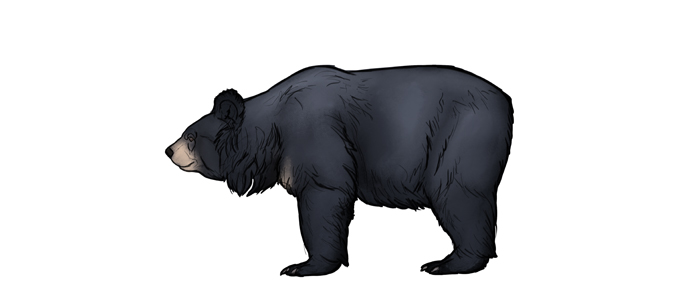
Asian Black Bear
This bear looks very much like the American black bear with huge round eyes and a thick mane around the head. It’s so fluffy that sometimes it may look as if it wore a fur coat!
How to Draw a Bear Step by Step
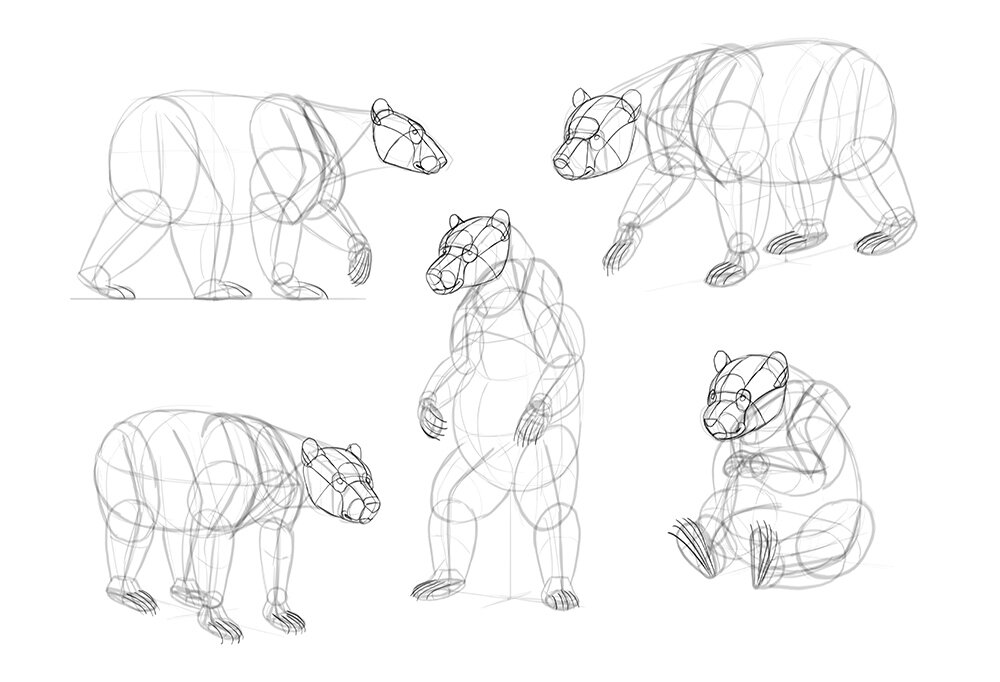
Let’s draw a few bears step by step now to see how to put it all into practice. To make this exercise more effective don’t follow me directly, but choose some other pose and adjust it to my process. You don’t need to use the same process everytime you draw a bear – instead, try to understand how to achieve the same results in your own way.
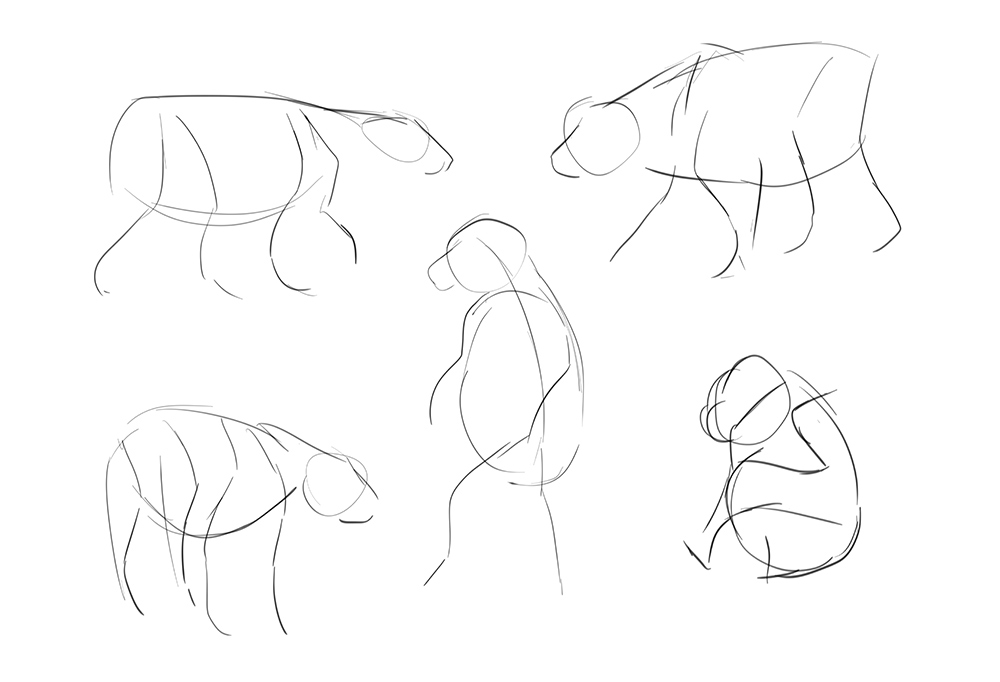
Step 1
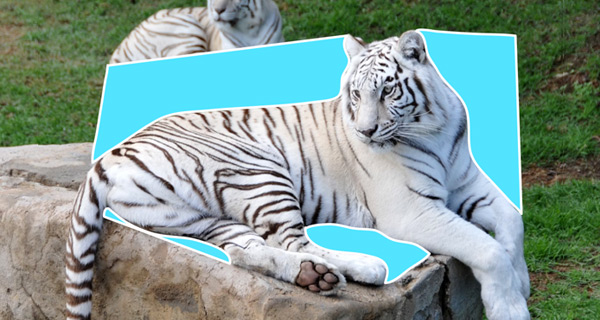
Draw some quick sketches of the silhouettes. Don’t draw any details, but rather try to capture the impression of a bear. Pay attention to the proportions and perspective – these should be roughly correct even without the details.
Step 2
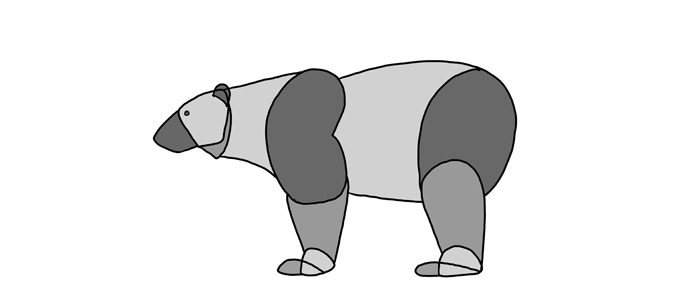
Draw the huge main body of a bear. Adjust its form to the pose of the animal.

Step 3
Draw the forequarters. Imagine the shoulders as a kind of a horse collar at the end of the main body.
Step 4
Draw the hindquarters – big, round thighs – and add the opening for the neck.
Step 5
Once you have the main body done, find out where the ground is. Don’t forget about the perspective!

Step 6
Draw the legs and the position of the paws. Imagine they’re loops of wire to easily adjust them to the perspective.

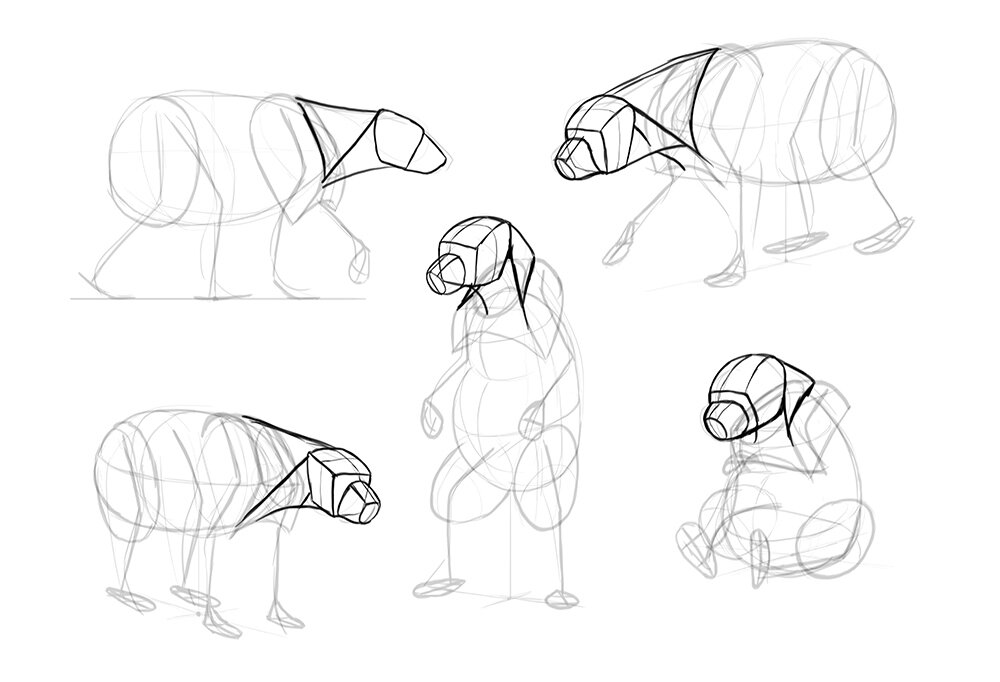
Step 7
Draw the basic form of the head and attach it to the body with the neck. Use the simplified scheme of the species’ body to draw it correctly at this point, or simply draw a direction of the head and add the detailed shape later.
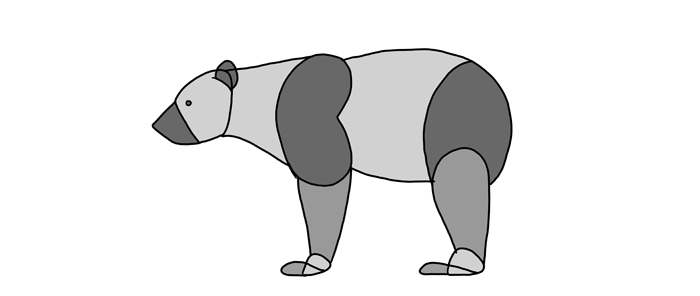
Step 8
Add the volume to the paws without adding any details yet.
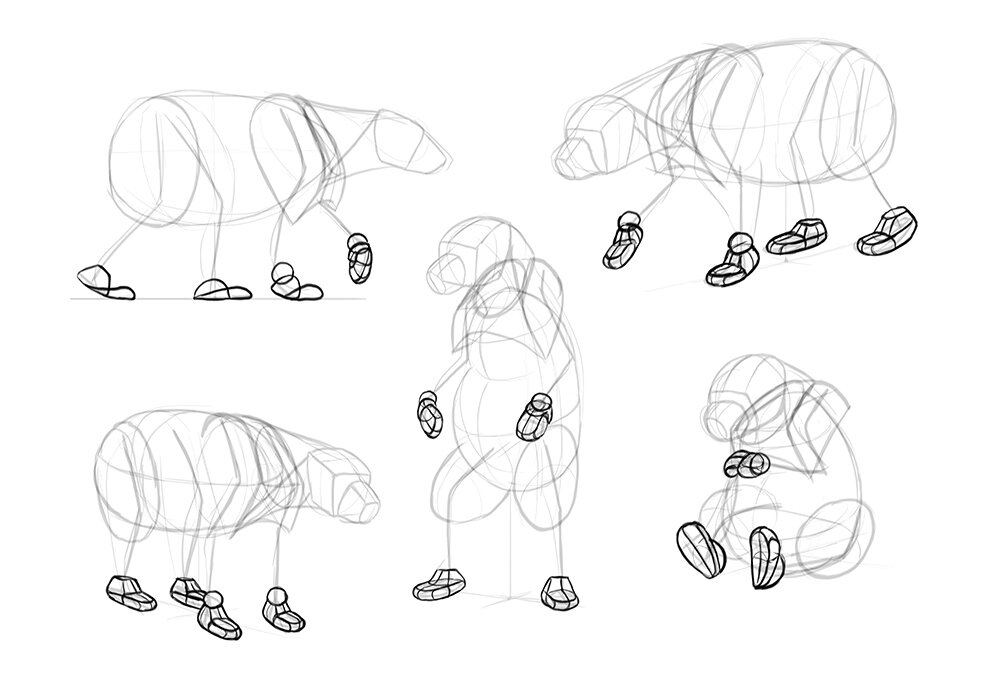
Step 9
Add the volume to the limbs. Make them thick!
Step 10
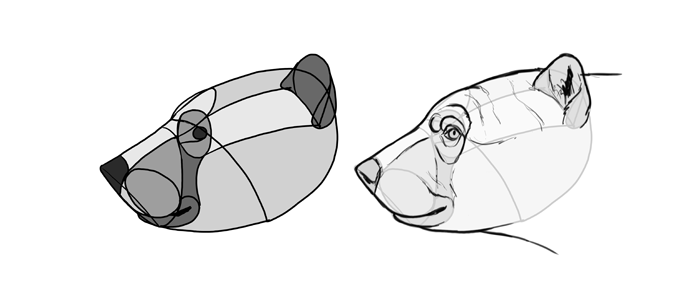
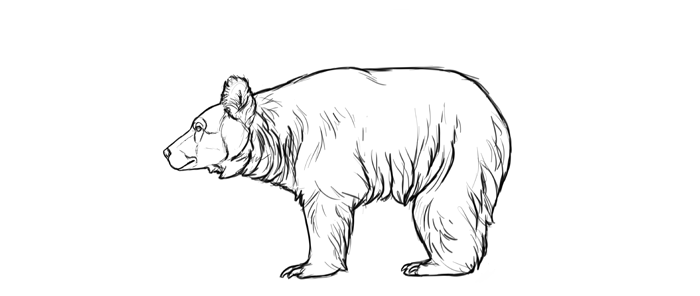
Add the detailed guide lines to the head.
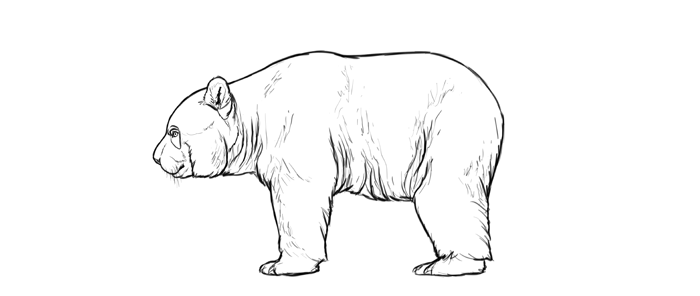
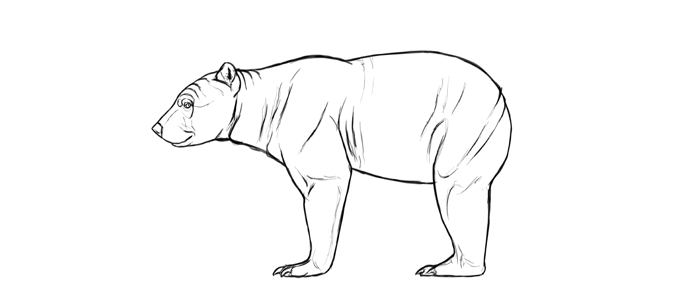
Step 11
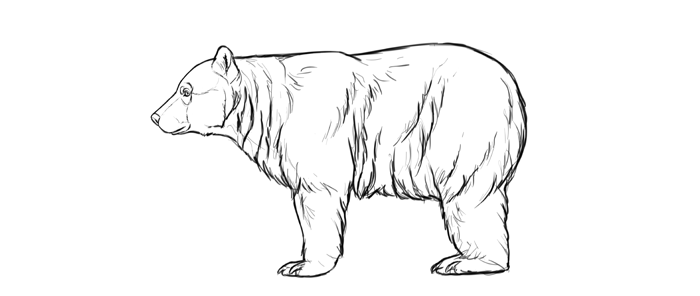
Add the final details.
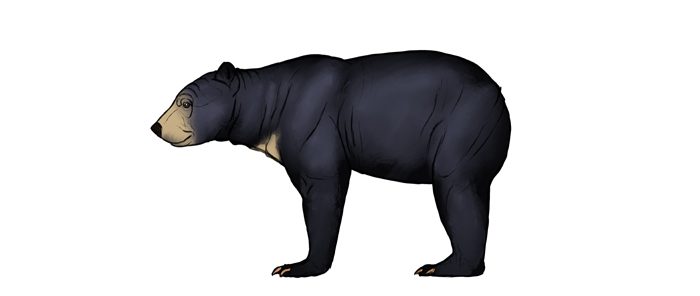
Step 12
If you want, you can add colors to your drawing. Some species may look wrong until you color them with a correct pattern!

That’s All!
This is the end of this tutorial, but not the end of your learning. I’ve shown you the theory, but now it’s time to study it thoroughly. Search for images of various bears in various poses, and sketch them quickly using the tricks you learned today. Regular practice is the only way to drawing from imagination!
And if you’re having problems with following my instructions, you may want to take a look at my series How to Draw from Imagination. In this series you’ll have a chance to get more control over your drawing, you’ll also learn the basics of perspective and art studies.
5 Comments