People will always tell you to use a reference, but sometimes you have a photo right in front of you, and your drawing still turns out bad. You may think that you lack the manual skill, but the truth is, the manual activity of creating marks on paper accounts for just a minuscule fraction of the drawing skill. The other part is observation.
To draw something accurately, you need to draw exactly what you see. But we’re not used to paying attention to what we see! You can see that the sky is blue, without knowing its exact shade of blue. You can see that giraffe has a long neck, without knowing the exact measurement. You can even see there are many people in the room, without knowing the exact number. That’s just how our brains work—we turn the raw visual information into practical conclusions, quickly and efficiently.
But in drawing, this raw visual information is crucial for creating an accurate representation of something. So we need to act against our instincts and intentionally direct our attention to what really matters. Here are a couple of ways to do it!
Look at the Big Picture
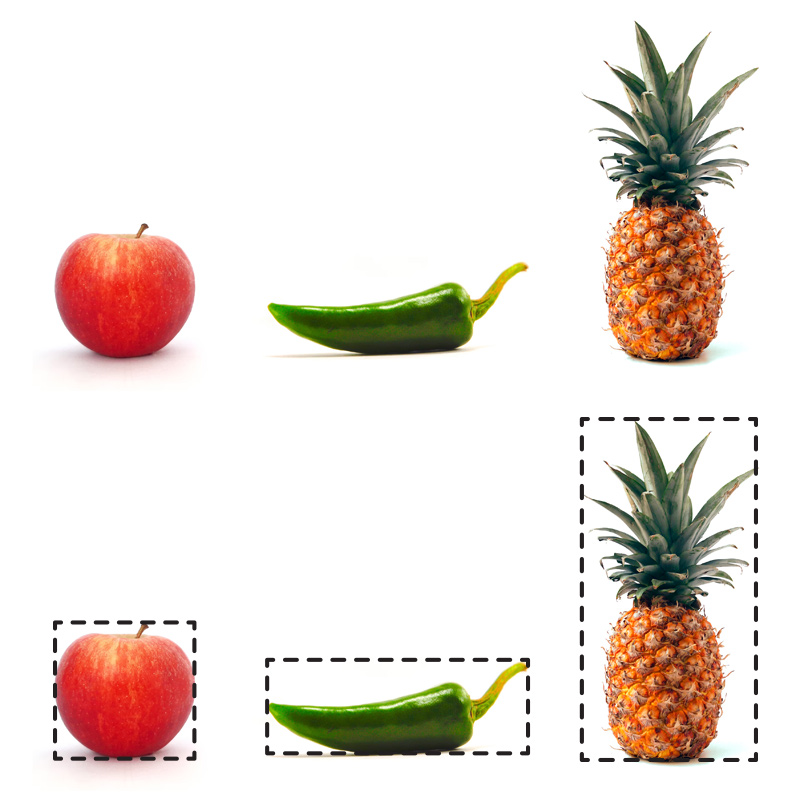
The objects we see may have very complex outlines, but you don’t have to look at the details straight away. The whole silhouette can be wrapped into a rectangle—this rectangle, although simple, already tells us something about the proportions of the object.
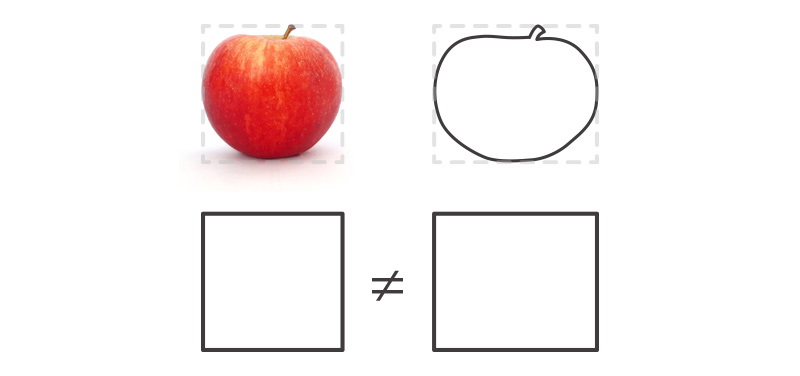
This trick can be used in two ways. The first one is to sketch your subject the normal way, and then compare the rectangle in your drawing to the rectangle of the reference. This will tell you what kind of corrections you need to make to eliminate the difference. For example, here I’d need to make the outline of my apple look more like a square.
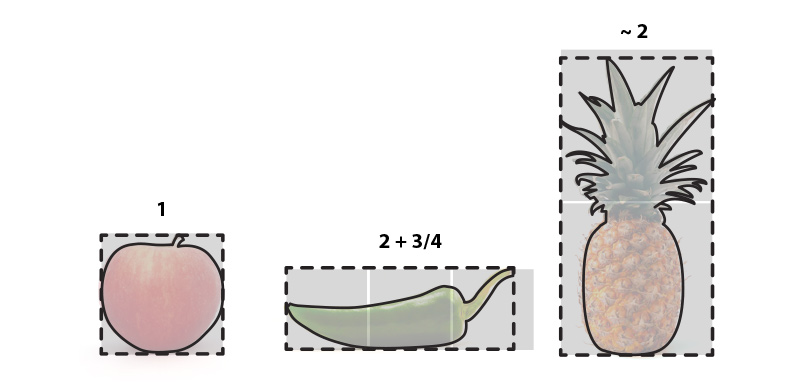
It’s easy to tell a vertical rectangle apart from a horizontal one, but recognizing the difference between two horizontal rectangles may be harder. So you can use this extra trick for them: imagine how many squares would fit inside your rectangle. Squares are easier to recognize and draw, so this will convert your rectangle into a more manageable form.
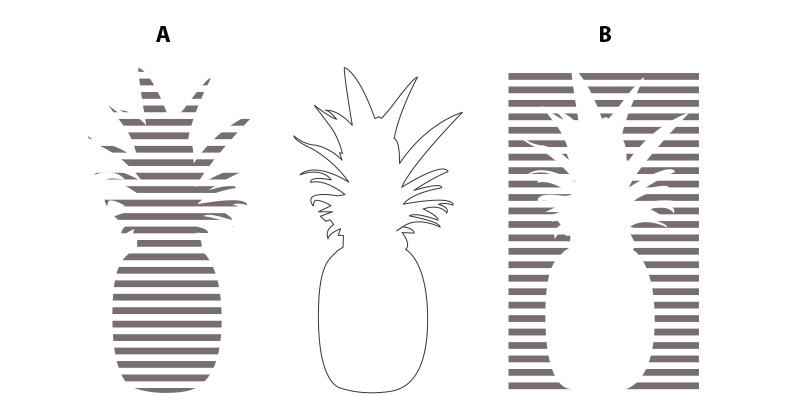
The second way is to start your drawing with the rectangle, and then sketch the subject inside it. This way you start with the biggest proportions already established, and you only need to take care of the smaller ones. However, this second part may be tricky, and you’re going to need another method for it:
Pay Attention to Negative Space
Lines are nothing more than a virtual border between an object and its environment. So when drawing a line, you’re drawing the shape of the object, and the shape of the environment around it. It’s the same line, yes—but seeing it as an edge of a different shape will help you see it more clearly, aside form any unconscious biases.
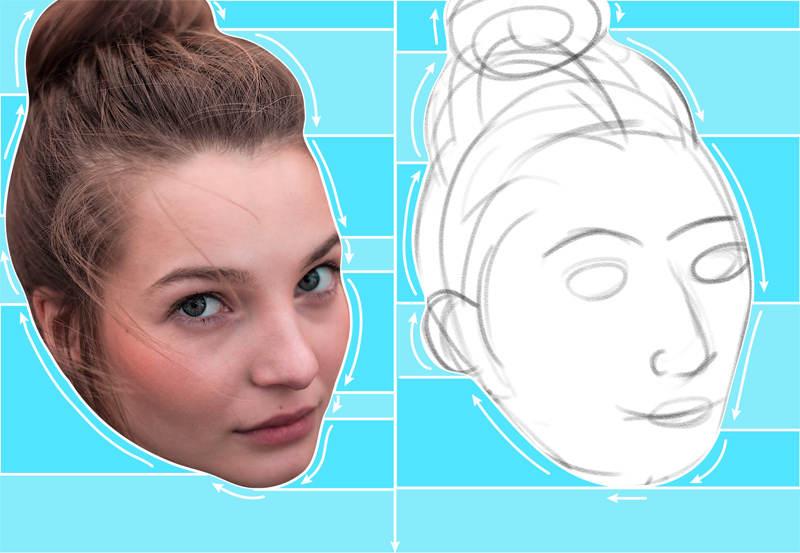
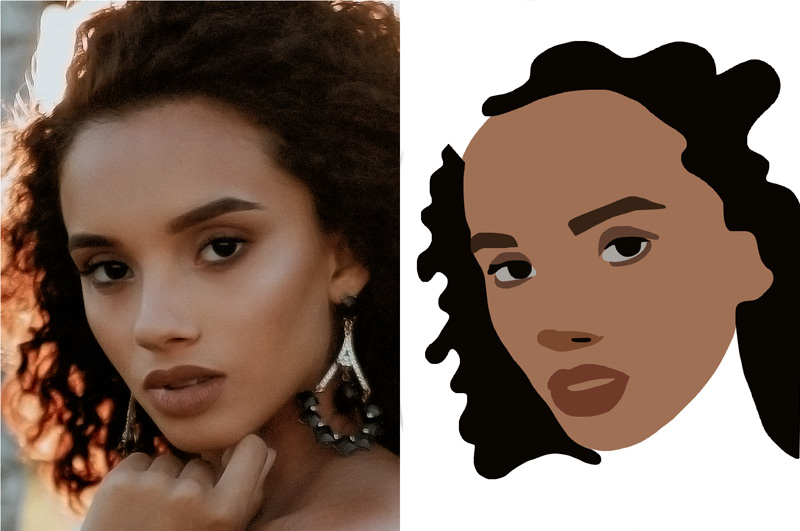
For example, it may be hard to tell how exactly my sketch differs from the reference, if you keep focusing on the “content” of the face bound by the main outline.
But if I imagine the areas outside the main outline, the curves become more apparent and it’s easier to compare them.
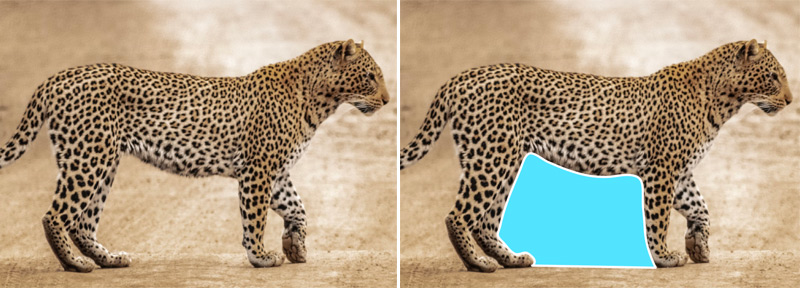
I find this trick extremely useful when I try to capture the proportions of the body. For example, if I imagine the shape between the front and hind legs, it often turns out mine is too long—because I confuse this area with the general length of the torso. So once I look at this area this way, it’s much easier to see what needs to be fixed.
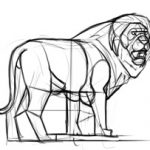
This method is also helpful for very difficult poses. All you have to do is to forget for a moment that you’re drawing something 3D, and just draw the shapes around the main outline.

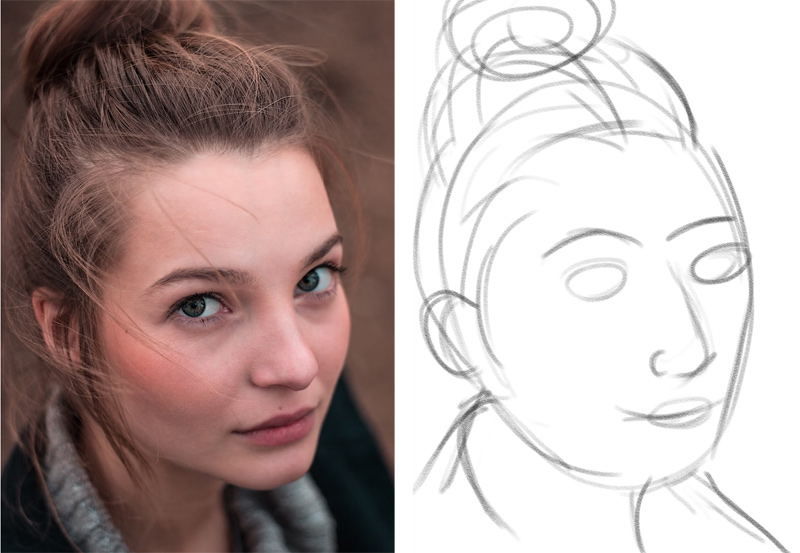
See the Parts as a Whole
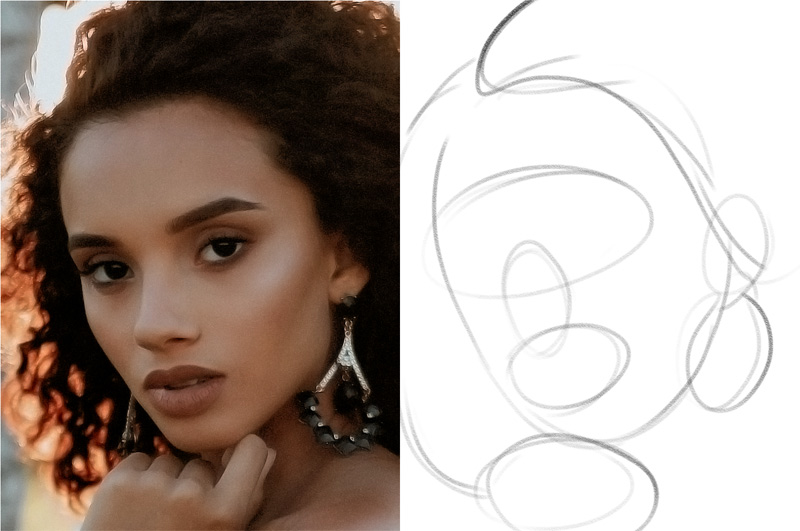
When looking at complex objects, we see them as a whole, but we know they consist of many smaller objects. For example, we see the whole face, but we know it consists of the main face oval, two eyes, two eyebrows, a nose, lips, ears, and hair. But if you try to draw all these elements one by one, it’s easy to lose the proportions in the process. Here’s a solution to this:
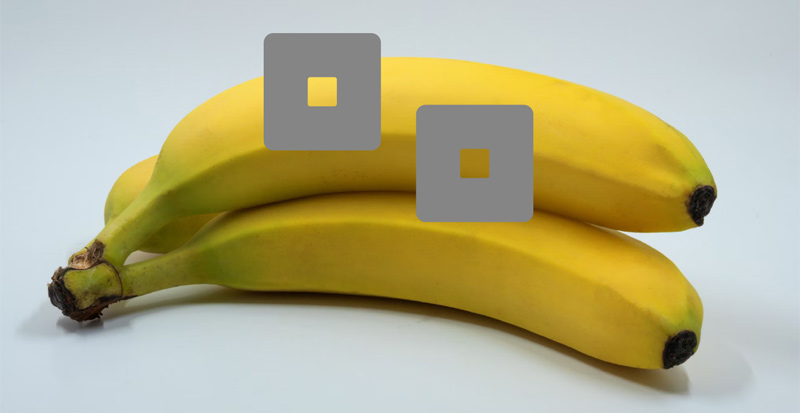
Sketch the “placeholders” for the elements first. Define a general area where you expect to see them, without making a final decision yet. It’s much easier to hit a bigger target, so make your target bigger on purpose!
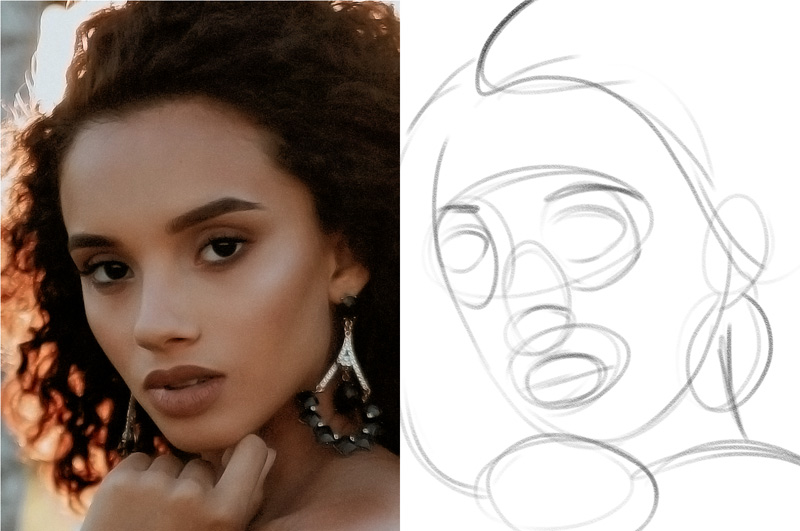
Then you can define smaller areas inside the bigger ones:
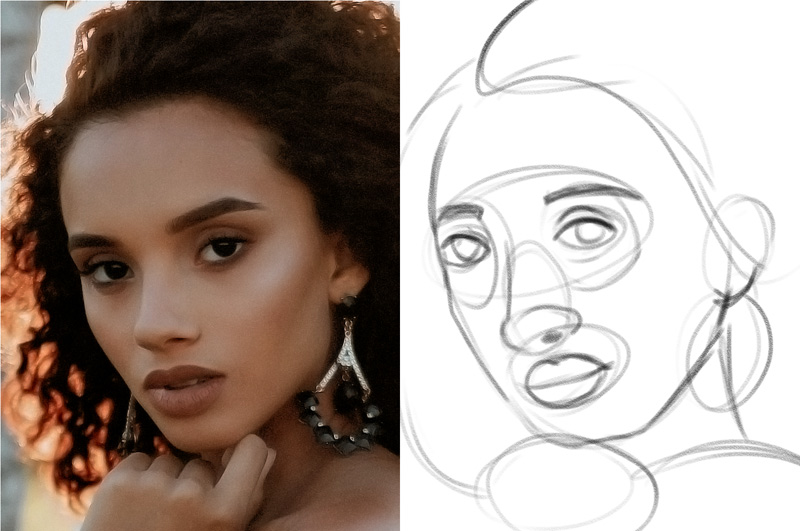
And only then add the actual elements of the face.
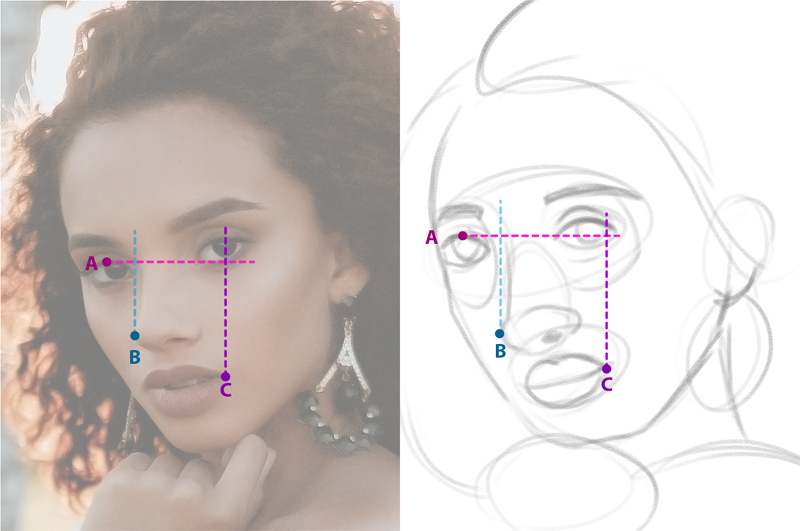
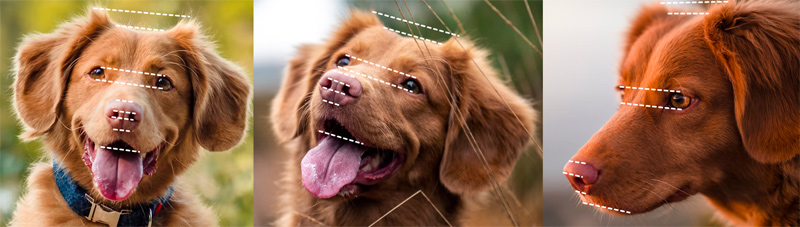
Once you do that, it’s time to compare your result to the reference in a more precise way. Imagine vertical and horizontal lines between various elements, and see if the distances in both images are the same. For example, in my sketch:
- A: the left eye is completely above the right eye in the reference, but slightly lower in my sketch.
- B: in the reference, the line from the tip of the nose touches the corner of the right eye. In my sketch, there’s a distance between them.
- C: the line from the left corner of the lips crosses the eye at around 60% of its length, and cuts the iris in half. In my sketch, it’s more like 90%, and the iris lies entirely to the side of the line.
These are only three examples—you can, and should, imagine many lines like this, to try and correct the placement of the elements in relation to each other.
Make Abstractions
Sometimes we are so sure we know what something looks like, that we don’t even bother to look. That’s the reason why beginners often draw the long, vertical eyelashes, or big, round nose holes. Or every single hair when drawing the hair.
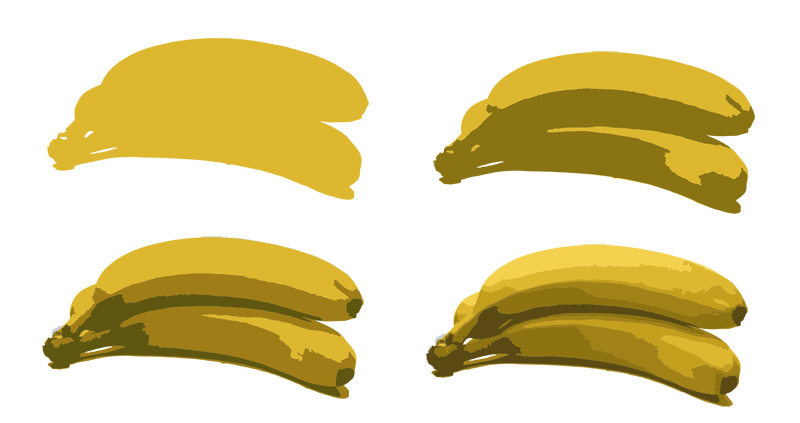
To solve this issue, try to turn what you see into more abstract shapes. Ignore the details—blend each element in your imagination, reducing it to just one color. And then, instead of drawing the eye, the nose, the lips, just draw these general shapes. This method will not only help you with proportions, but also with coloring and shading!
Make Measurements
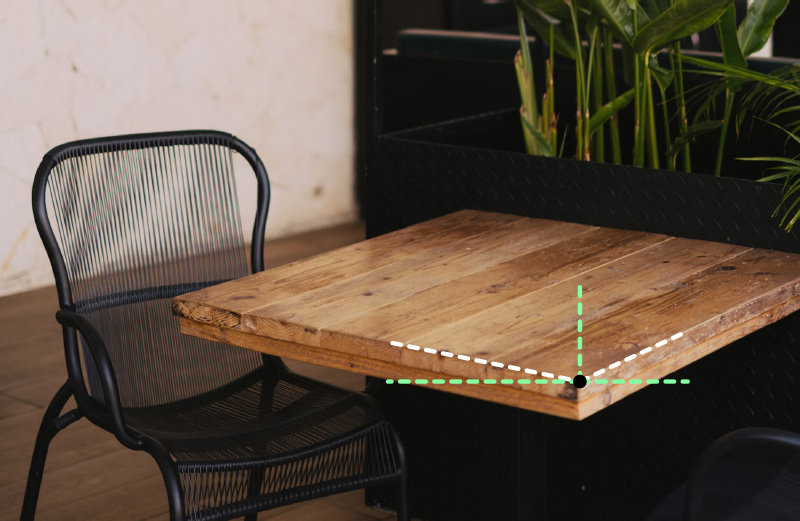
The same object can look different depending on the perspective, and yet we recognize it as the same object regardless. It’s because our brains actively subtract the effects of perspective, making you see the object in its “default” view every time. For example, if you try to draw a tabletop, you’re likely to make its angles close to 90°—because you know the tabletop is rectangular, and rectangles have four 90° angles.


To counter this effect, you need to add imaginary lines to the reference. For example, if you’re drawing the tabletop, imagine an actual 90° angle in the corner, and observe the distance between the imaginary lines and the actual lines. These are the angles you need to draw!
You can also use your fingers for quick measurements. The side of the body may seem long to you, but if you put it between your fingers, and then look at the actual distance between your fingers, it will be easier to see how short you really need to draw it.

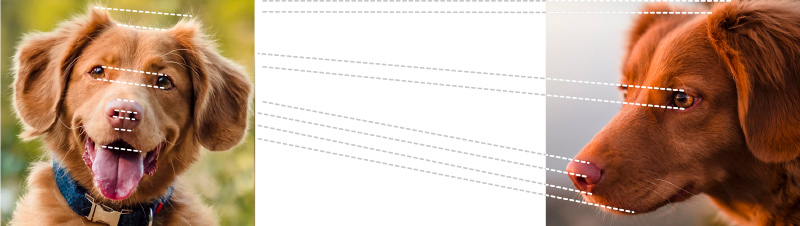
Find the Vanishing Point
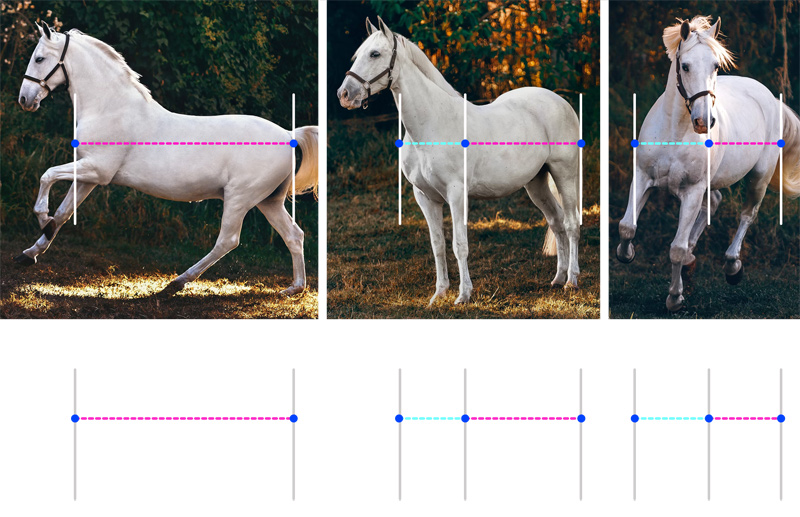
Beside the foreshortening, perspective has one more visible effect on the objects: if two lines are (objectively) parallel, in perspective they are also parallel, or converging towards some imaginary point in the background. This is extremely helpful: just measure the angle of the top of the head and the bottom of the chin, and make sure that all the other elements follow the same rhythm.
There’s one important caveat here: in the front view, these lines will be perfectly parallel, but they get tilted towards each other when the head is rotated. The degree of the tilt depends on the camera’s lens, but the general rule is: the farther front the front view you are, the stronger the lines must converge.
Find the Objective Color
Just like your brain tries to subtract the effects of perspective to tell you the “real” angles of an object, it also tries to subtract the effects of the lighting to show you the “real” color of an object. For example, in the image below, your brain tells you all these objects are white.
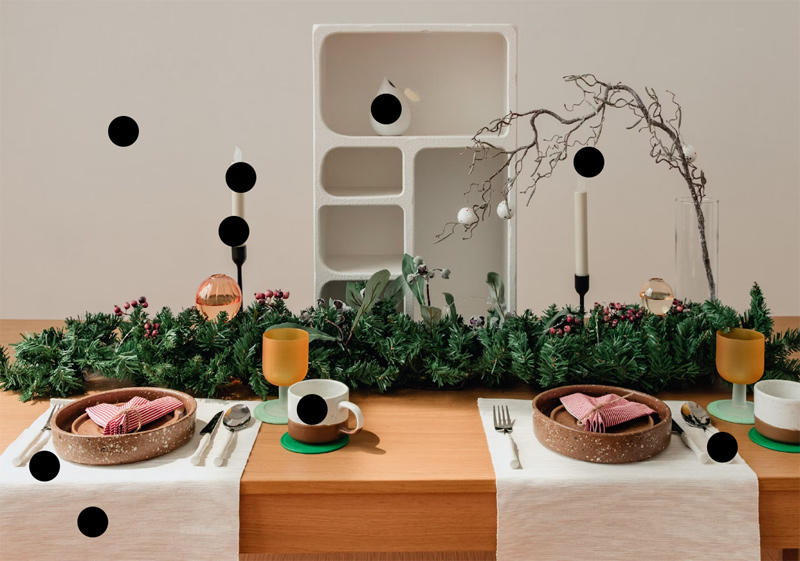
But if you use actual white in your painting, this scene would look like this:

So even though these objects appear white, we know they must actually be a variety of shades similar to white:
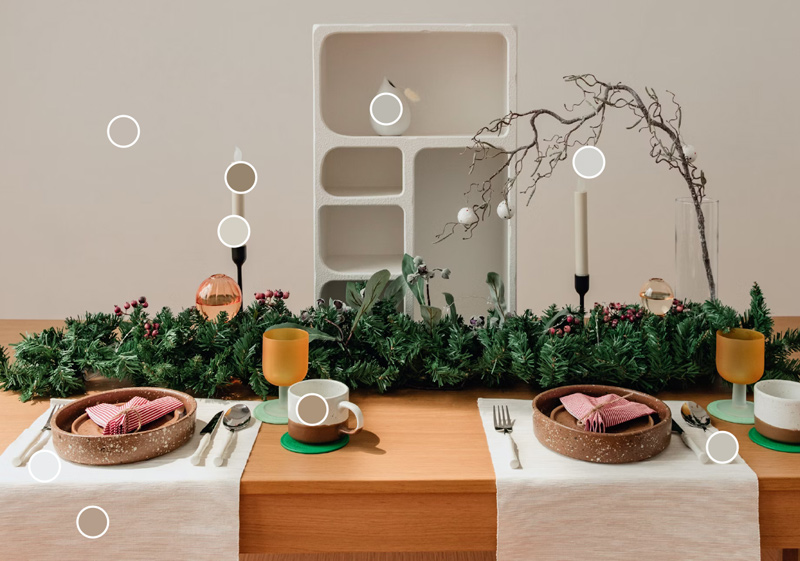
And if you separate them from their environment, it turns out most of them are not close to white at all!
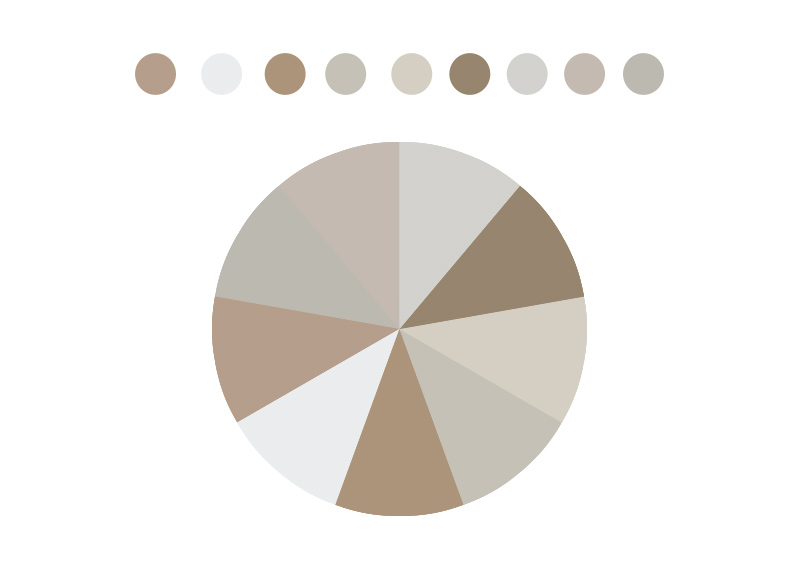
To capture the colors accurately you need to separate the color from its environment. The easiest way is to simply roll your hand into an imperfect fist, leaving a tiny gap. If you cover the reference (or the scene) with your hand this way, you should be able to see one area of color at one time, with a neutral background of your own skin. You can also take a piece of cardboard and cut a small hole in it, to use it for the same purpose.
Another method, which you can combine with the previous one, is to never add colors separately. Look at your reference, try to find the most dominating color, and fill your scene with it. Then find the second most dominating one, and add it proportionally to your scene. If you add a few of those dominating colors, capturing the other ones should be easier, because your environment will be similar to the one in the reference.
Pay Attention to Contrast
Just like with colors, brightness is relative. As you add more colors to your scene, a color that previously seemed dark may suddenly get brighter, or vice versa. To make sure you’re keeping the right contrast all the time, you can use of these two methods:
First, you can convert both your reference and your image to grayscale—this will allow you to quickly compare the values of both images. In traditional art, you can do it by taking a photo and adding a black & white filter to it. In digital art, you can add a black layer on top of the stack and set its Blend Mode to Saturation—this layer can then be switched on and off as needed.
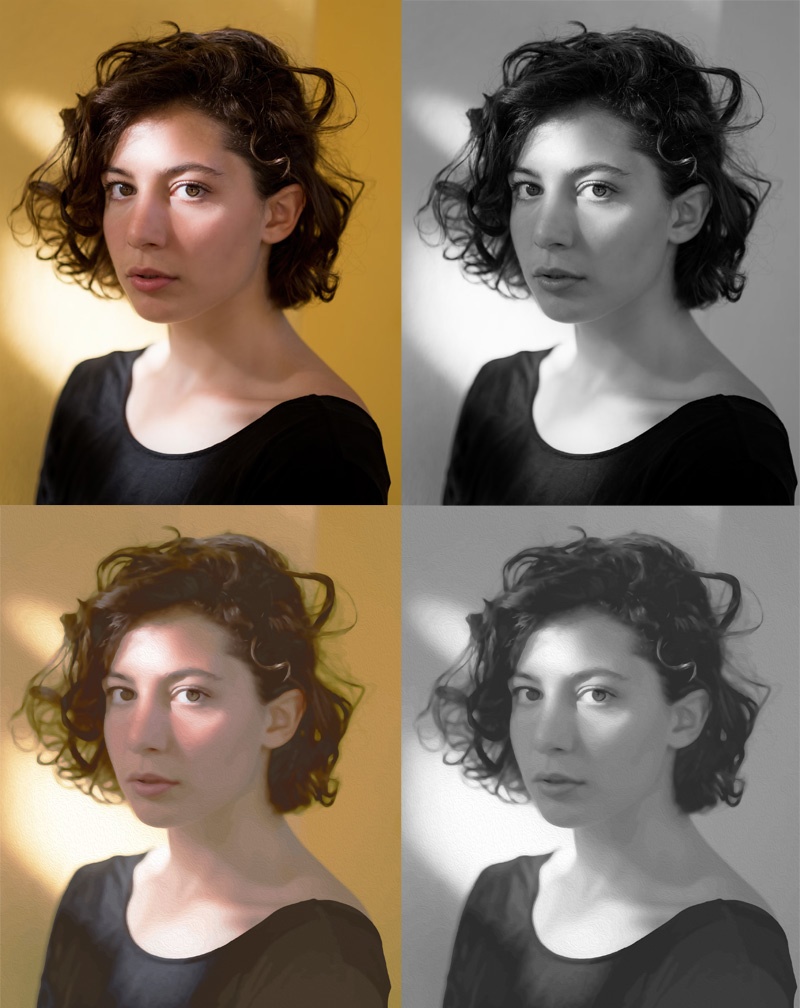
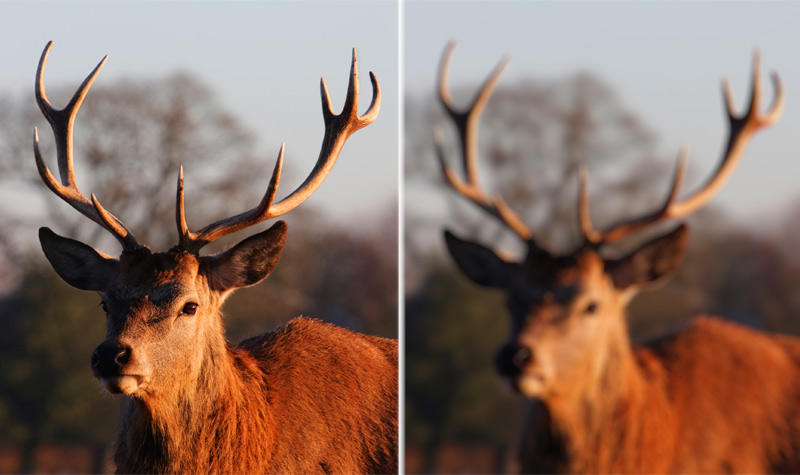
The second method is faster and can be used for life drawing, too. Just squint your eyes a little—this will decrease the range of shades, blending them all into just a few sets. Do this both for the reference and your drawing, and see what you need to change to make the effect the same in both. This method can be also used for quickly setting up the values, if you create your sketch in grayscale first.
Conclusion
With these techniques you should be able to look at your reference and really see its visual content, rather than just the conclusions your brain has made. Good news is, if you keep using them, they will become a part of your intuition with time, and you’ll be able to switch between “knowing” and “seeing” modes at will.
Another cool thing about these methods is that you can use them for practice—wherever you are, you can consciously observe the world around you and learn from what you see. Becoming observant like this may also make you more aware of the beauty around you, which is another perk of being an artist!
So, make sure to practice all these techniques today—just reading about them may already positively affect your process, but nothing beats some active, conscious practice!
0 Comments