In digital art, your brush is the main tool for bringing your vision to reality. And while in theory you can draw anything with a simple round brush, creating a set of custom brushes designed for different purposes can make your workflow more efficient.
Sketchbook is my favorite art program, but it’s not very popular, so it may be hard to find any tutorials about it. That’s why I decided to create one—and show you how to create your own custom brushes in Sketchbook!
How to Create New Brushes in Sketchbook Pro (Windows & Mac)
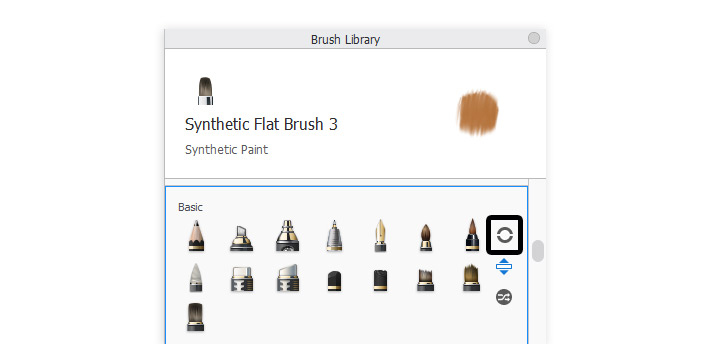
Open Brush Library.

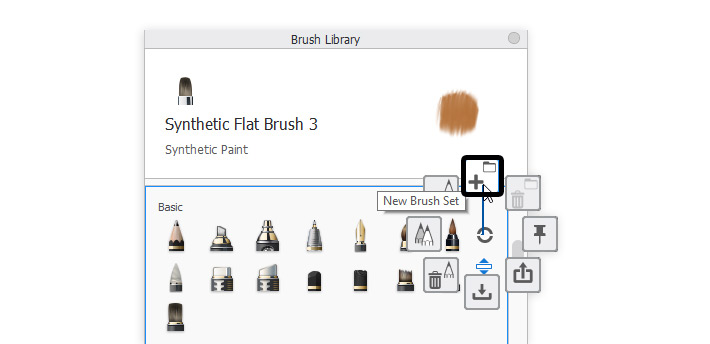
Select any of the brush sets, and press and hold the circle icon. When a new menu appears, drag the cursor up and select New Brush Set.
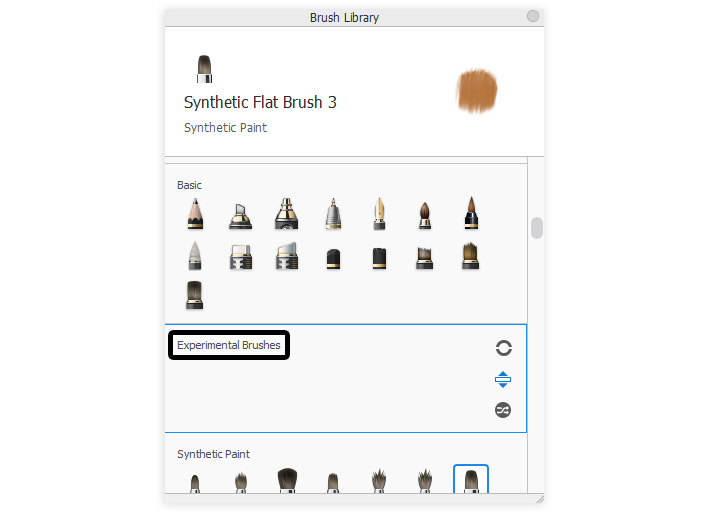
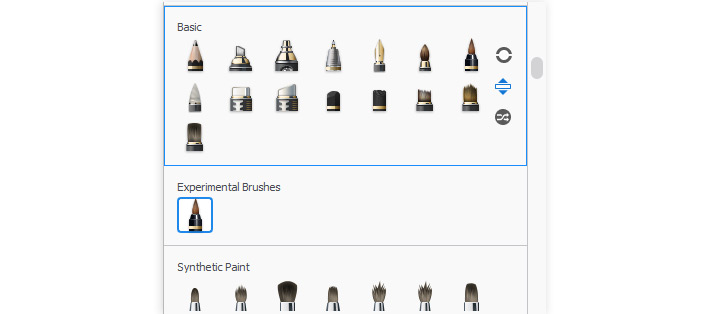
Give your new set a name, for example “Experimental Brushes“. It’s good to keep the WIP brushes separated from the others, to avoid a mess.
Now, you can technically create a new brush from scratch, but it’s more convenient to use an existing brush as a base. So scroll through the brushes you already have and see if you can find one that’s the most similar to your vision. Then select it, open the radial menu again, and drag to the left to select Copy Brush.
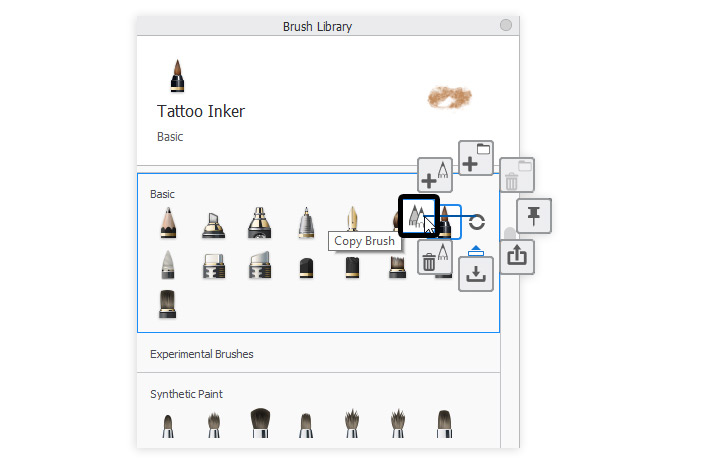
Drag your new brush to our new set. And that’s all—you can now customize this new brush to your needs!
How to Create New Brushes in Sketchbook (iPad & Android)
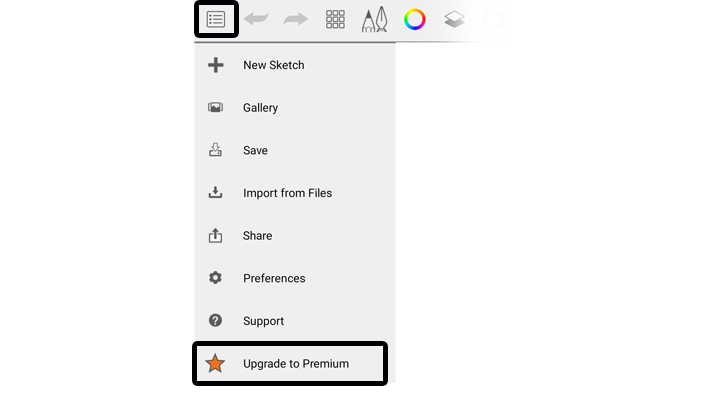
You can also create and customize brushes in the mobile versions of Sketchbook, but the process is slightly different. First, brush customization is a part of the Premium Bundle, so make sure you purchase it if you want to get access to this feature.
Open Brush Library.
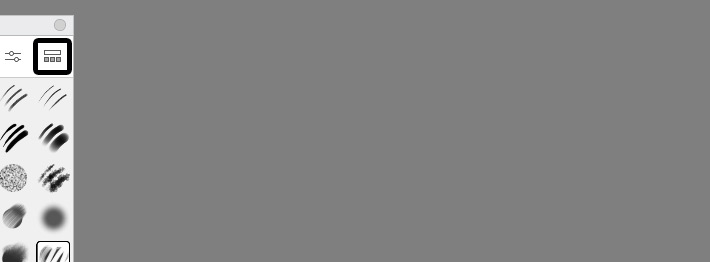
Then, select any of the brush sets, and press the menu icon.
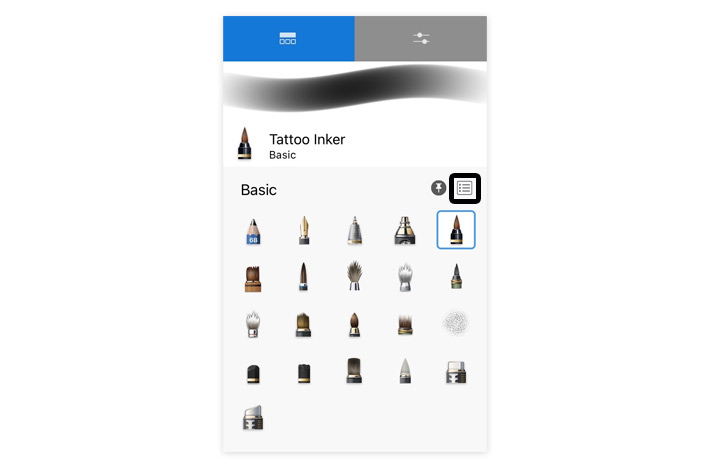
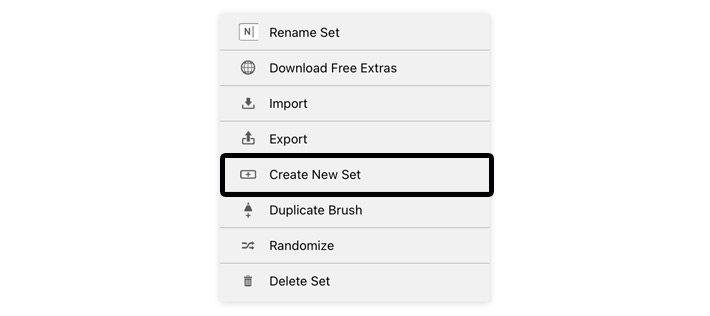
In this new menu, select Create New Set.
A new, empty set will appear. Now, select any of the current brushes that you’d like to use as a base for this new brush, and click the arrow in the new set—this will duplicate the selected brush and put it directly in the new folder.

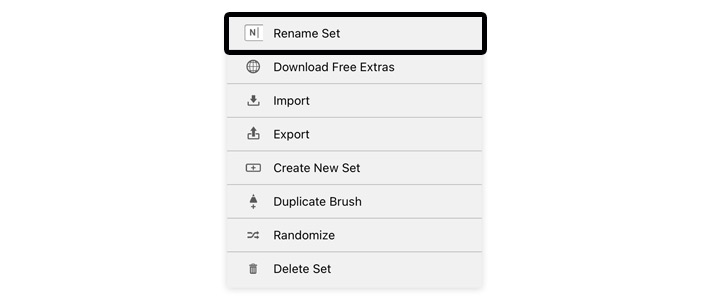
Click the menu icon again and select Rename Set.
Give your new set a name. That’s all—your new brush is done! If you want to create a copy of it, like in the desktop version, just select Duplicate Brush in the brush set menu.

How to Customize Brushes in Sketchbook
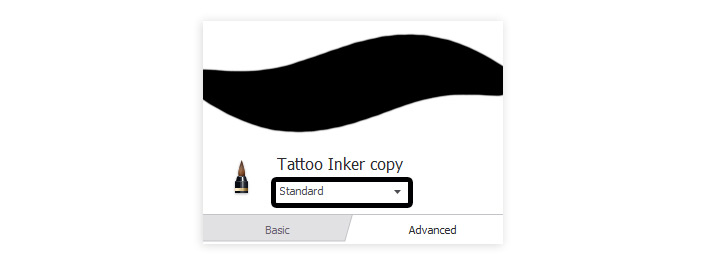
To customize a brush, just double click its icon to open the Brush Properties panel. To make sure the brush you’re working on behaves similarly to the one in my presentation, set the Blend Mode to Standard for now.
Each brush has three main properties: stamp, stamp properties, and blending properties. Stamp is basically the shape that gets repeated along the stroke, creating an illusion of a continuous line (or not, if you choose so!).
By default, all brushes are round, but you can replace this shape with anything you desire. To do this, open the Advanced tab and find the Nib menu.
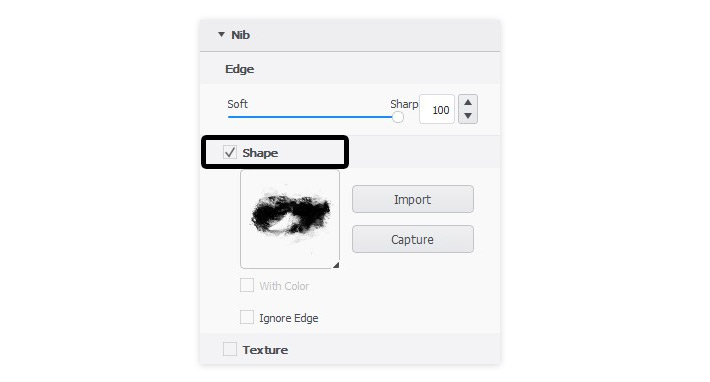
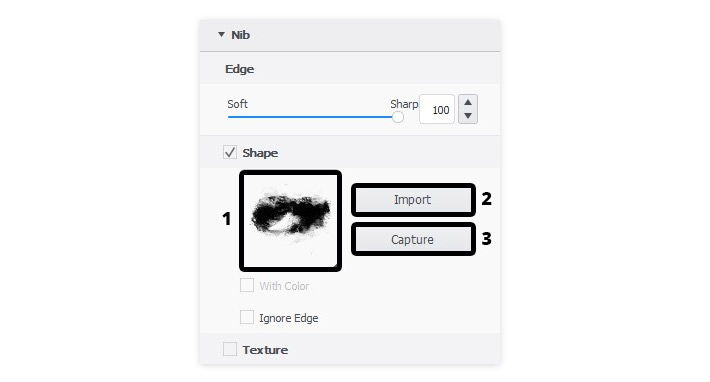
You can assign a shape to your brush in three ways:
- Choose one of the build-in shapes.
- Import a shape from an image (preferably a PNG with a transparent background).
- Capture a shape directly from the canvas (available only in the desktop versions of Sketchbook).
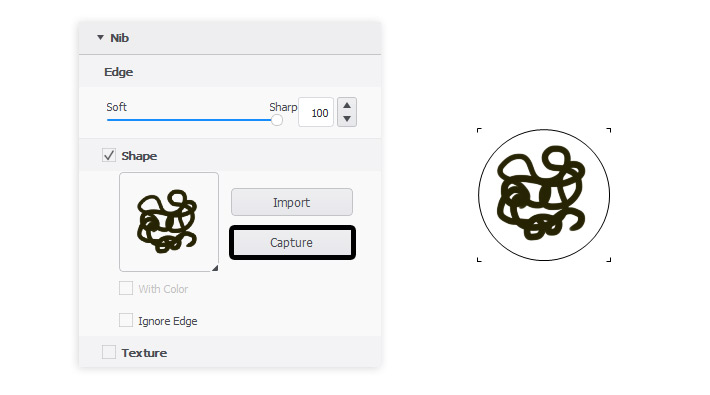
Out of these three, Capture is the most interesting, because it allows you to create the shape directly in Sketchbook. To do it, create a New Layer (to make sure there’s no background behind the shape) and use any of your current brushes to draw the shape you’d like to use as a stamp.
Then click Capture—a round brush outline should appear. Place it over your shape, and resize the outline to fit the shape perfectly inside (use the square bracket keys, [ and ], to resize it). Then simply click to capture the shape.
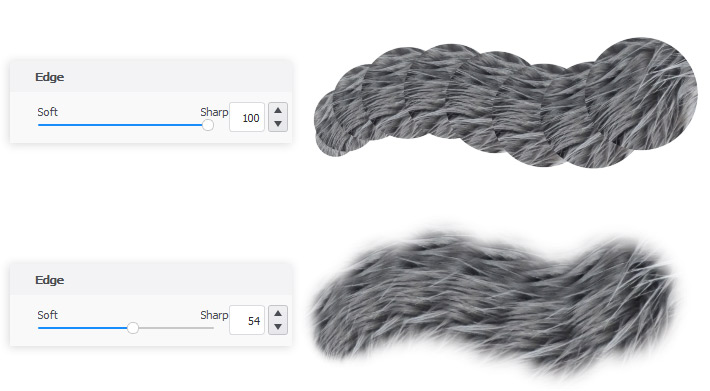
Here’s a cool thing: in Sketchbook you can use a full-color image as a stamp. To do this, open a photo in Sketchbook and capture a part of it you’re interested in. Then check With Color under the stamp’s thumbnail.

If you want the photo-stamp to blend better, make its Edge softer:
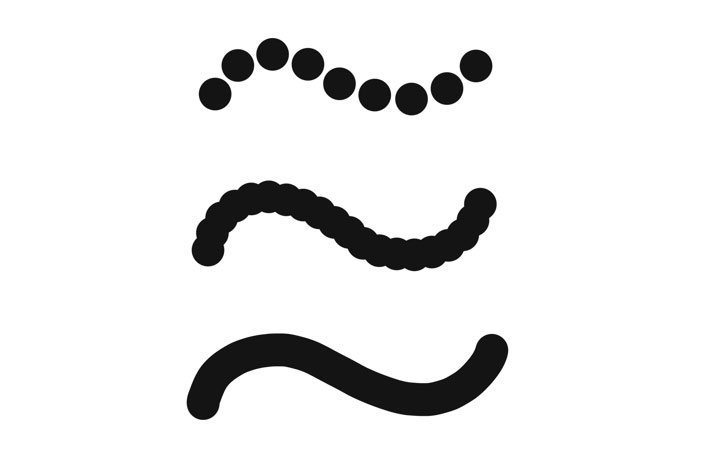
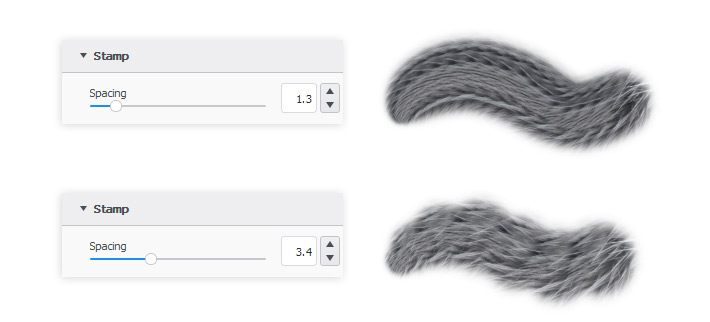
Once you have the stamp defined, you can change its properties in the Stamp menu. First, adjust Spacing to make sure the stamps are repeated in the way you intended. Lower Spacing will give you continuous lines, and higher Spacing will make the shape of the stamp more obvious.
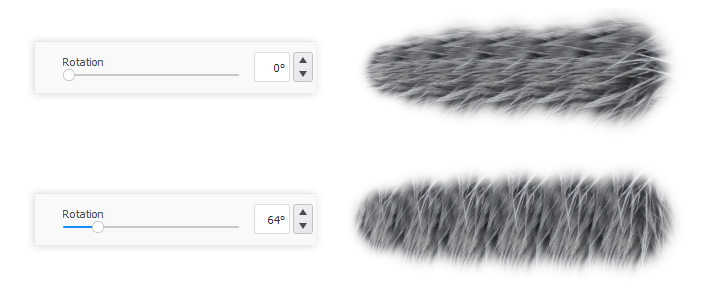
Sometimes the captured shape, especially if it’s taken from a photo, isn’t angled correctly. You can fix it by adjusting the Rotation value.
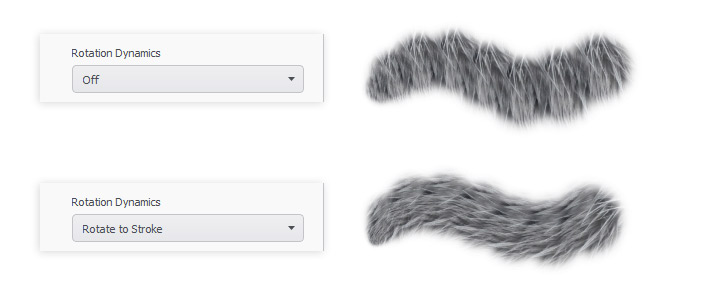
If you want the stamp to change the rotation dynamically, following the direction of the stroke, select Rotate to Stroke in the Rotation Dynamics. You can also also select Controlled by Stylus Tilt, which may be more useful in certain cases.
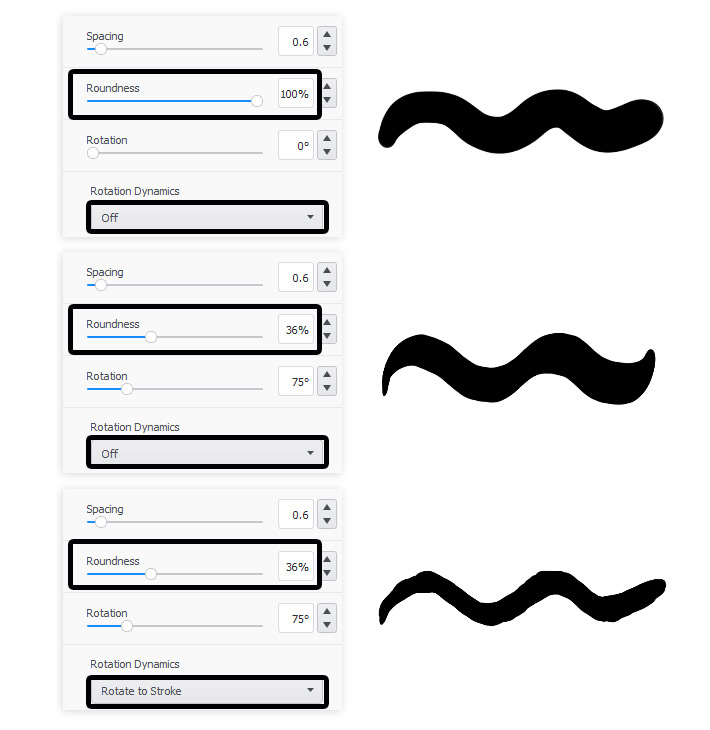
There’s one more option in this menu that can affect your strokes in a very visible way. By lowering Roundness you can change the basic outline of the stamp from a circle to a line, and everything in between. With Rotation Dynamics off, this is perfect for creating a calligraphy brush, or a blocking brush (a brush that you use to quickly sketch blocks of shades/colors).
With Rotation Dynamics on, you can make the edges of your brush more unpredictable. Just be careful—in combination it with low Spacing and a detailed shape this option may make your strokes render more slowly.
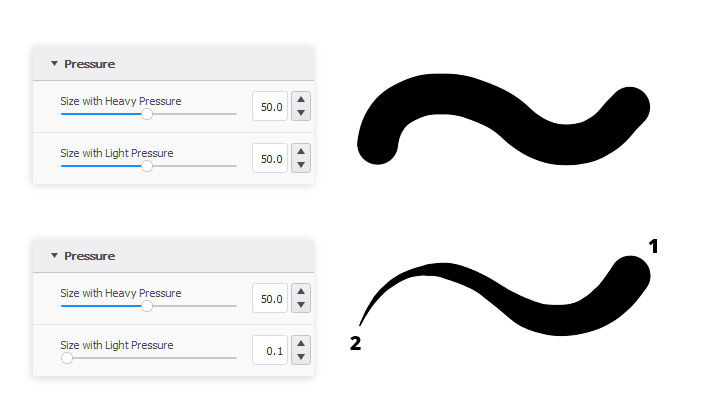
You can find one more stamp property in another menu, Pressure. If you want your brush to change its size depending on the pressure of your pen, this is the place to set it up.
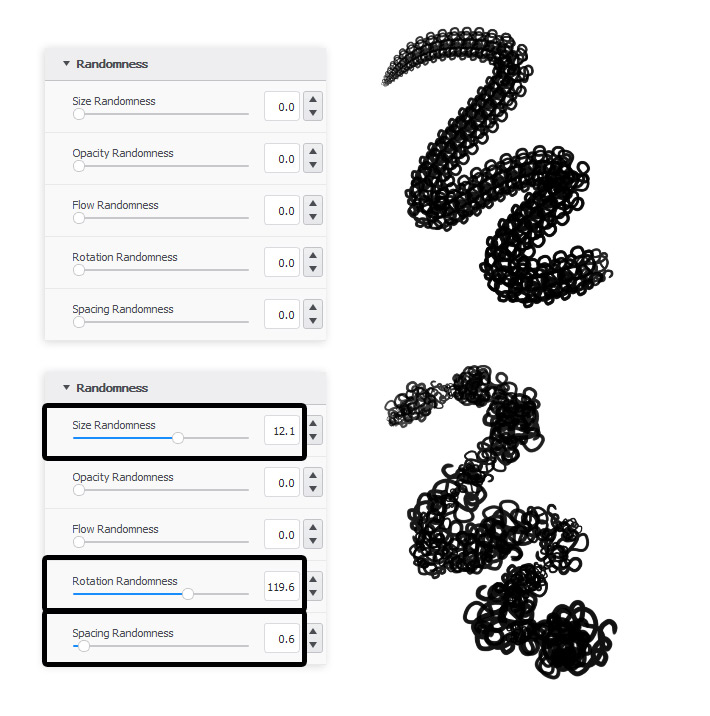
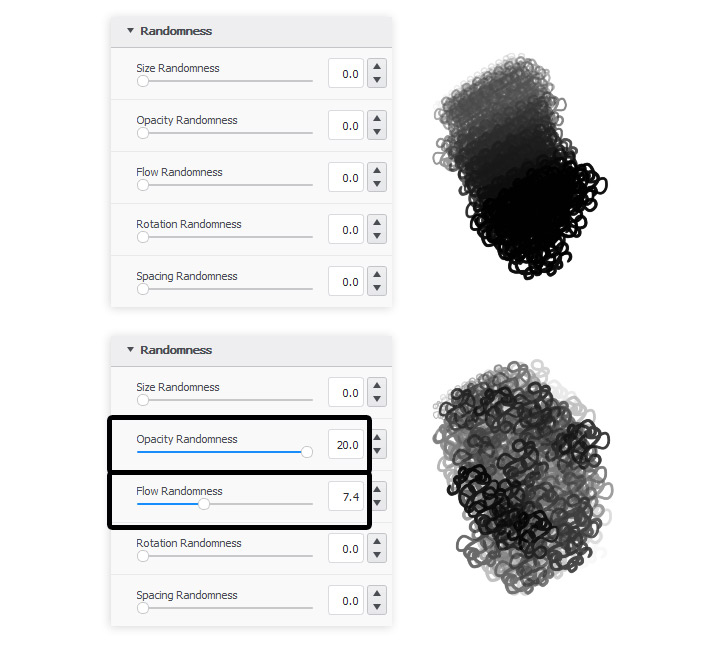
By default, the stamps are placed along the stroke in a neat, regular order, defined by the Size, Rotation, and Spacing. But sometimes this regularity may look artificial, especially if your goal is to create something more painterly. In this case, it’s good to look into the Randomness menu and play with the following sliders to add a little bit of variation to the stroke.
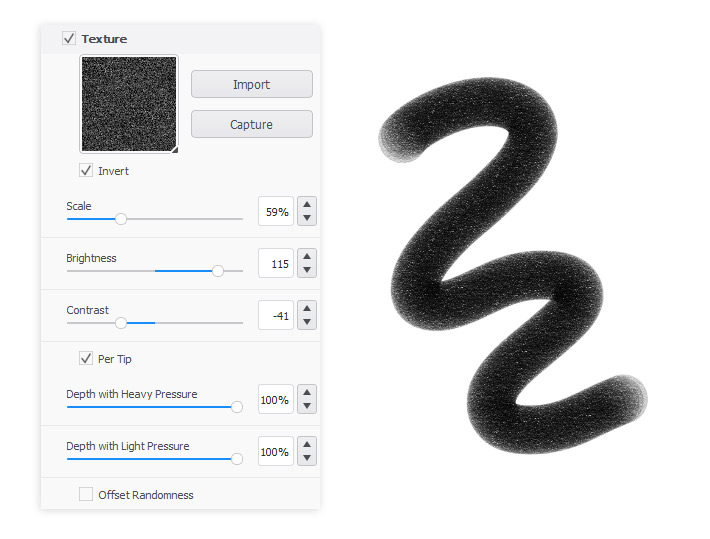
There’s one more option that will allow you to make your brushes feel less digital. To find it, go back to the Nib menu and check Texture. Texture isn’t really a part of the stamp per se—rather, it simulates a texture of the background. It’s like the effect of graphite getting caught between the fibers of the paper—except here you can use any pattern of “fibers” you need.
Because texture isn’t a part of the stamp, its size isn’t connected to the current size of the stroke. Using a bigger pencil doesn’t make the texture of the paper bigger, after all! In practice, this means that a texture that looks great in smaller strokes, may be completely invisible in bigger ones. That’s why you should adjust the settings of Texture to the most practical size of the current brush, and create multiple versions of it for various sizes, if needed.
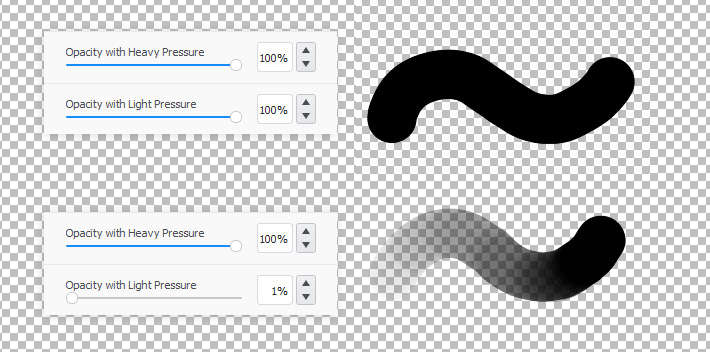
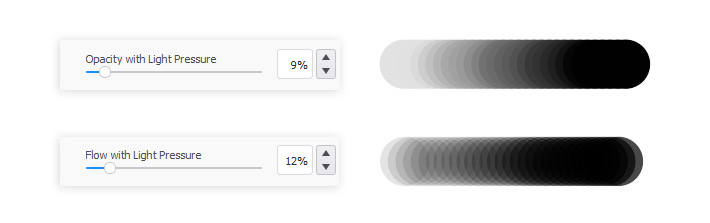
Ok, these were all the properties relating to the behavior of the stamp. But we’re not done yet—there is a bunch of other properties that define the blending of the strokes, or, in other words, how the strokes interact with each other. Let’s start in the Pressure menu—here you can decide whether you want your strokes to be fully opaque, or lose some of the opacity in reaction to lower pressure.
There’s also a second option related to pressure and opacity, called Flow. To understand the difference between Opacity and Flow, remember that the stroke is made of a series of repeated stamps. In Opacity, these stamps cover each other, no matter how low the opacity—the transparency is applied to the stroke as a whole. In Flow, the transparency is applied to each stamp separately, which often results in a softer effect. These two properties can be mixed, so don’t be afraid to experiment!
In more chaotic, textures brushes, it may be a good idea to make these two properties more variable by increasing their respective Randomness:
Finally, let’s talk about the Blend Modes. You can find them on top, right under the name of the brush.
There are two types of modes on the list: 1) traditional blend modes, and 2) digital blend modes. The latter are classic, math-based Blend Modes you may know from the layer properties. For example, if you set a layer’s Blend Mode to Multiply, this layer will darken the layer below. If you do the same to a brush, each stroke will darken the previous stroke. You can learn more about the digital Blend Modes here:
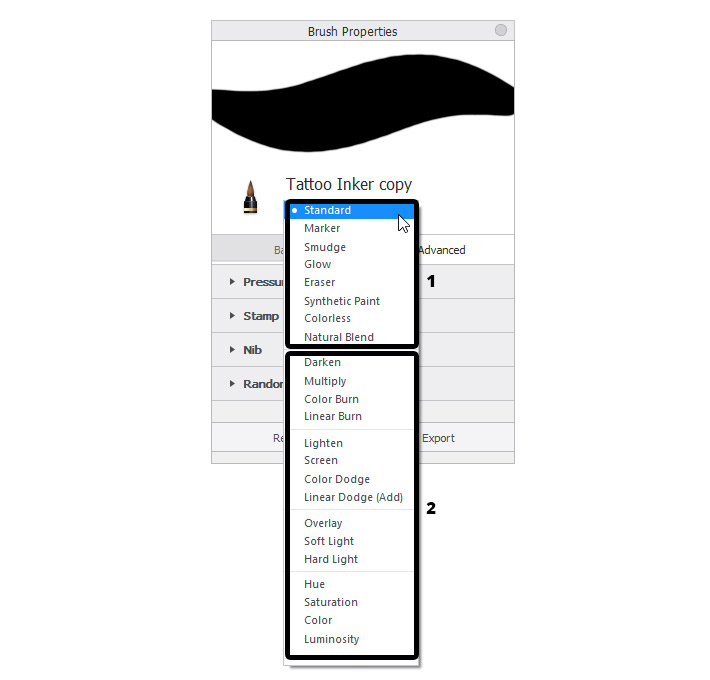
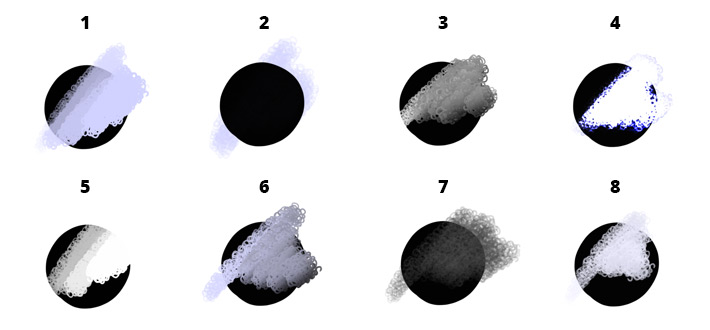
The first part of the list is more interesting to us, because these modes completely change the behavior of the brush. Here’s what they do:
- Standard: with 100% Opacity, it can cover the other strokes completely. Standard brushes feel the most digital, which makes them predictable, but they require manual blending.
- Marker: it works like watercolor paint—when crossing another stroke, it can darken it, but never cover it fully, regardless of the Opacity.
- Smudge: it turns the brush into the Smudge tool. Smudge brushes don’t add any color to the canvas, but instead they take parts of the previous strokes and drag them elsewhere. This makes these brushes perfect for hard, texture-making blending.
- Glow: this mode brightens your strokes, making them white on the inside and brightly colored at the edges.
- Eraser: this mode turns your brush into an eraser.
- Synthetic Paint: this is a hybrid of the Standard mode and the Smudge mode. The selected color is the strongest at the beginning of the stroke, and then it slowly blends into whatever it crosses.
- Colorless: this mode is designed for soft blending. Instead of smudging the outline of the previous strokes (like the Smudge mode), Colorless brushes create a thin layer of their color over those strokes.
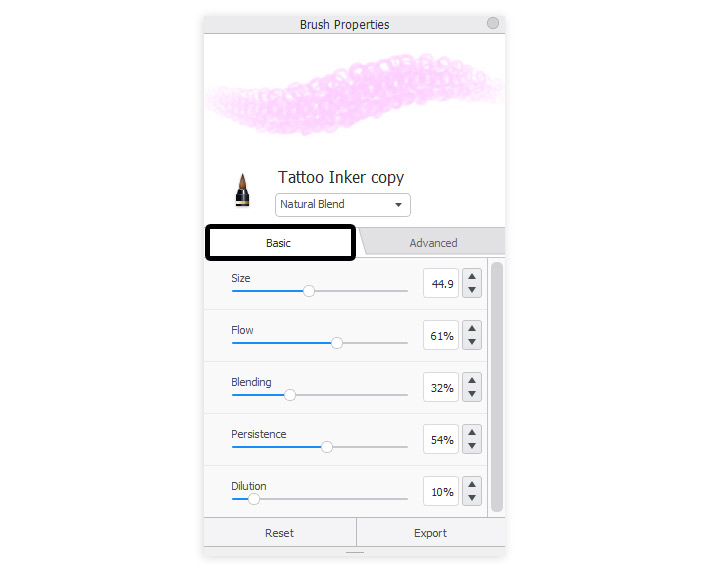
- Natural Blend: it’s similar to the Synthetic Paint mode, but it blends right from the beginning of the stroke, so it works better as a blending tool than a painting brush.
As you choose the Blend Mode, it will define what you’ll see in the Basic tab. In the Standard mode, you’ll only see two properties here: Size and Opacity, which can be changed dynamically during drawing, so there’s no need to adjust them during brush customization. Other modes will show you properties connected to their specific behavior, giving you more control over it.
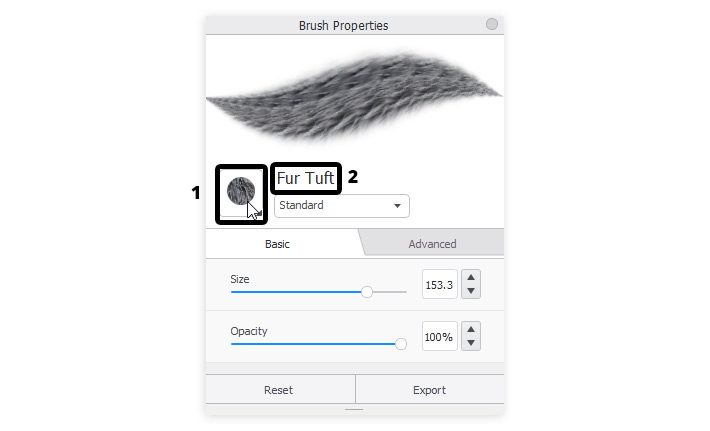
It looks like we’ve covered all the properties! So once you set them all, all you have left is to change the icon of the brush (1), and its name (2).
Conclusion
As you can see, creating and customizing brushes in Sketchbook isn’t that hard! That’s why there’s really no need to look for any special brush sets on the Internet—you can create anything you want on your own, just by experimenting with all these settings. But if you need some inspiration, here are two great sources of Sketchbook brushes:
0 Comments