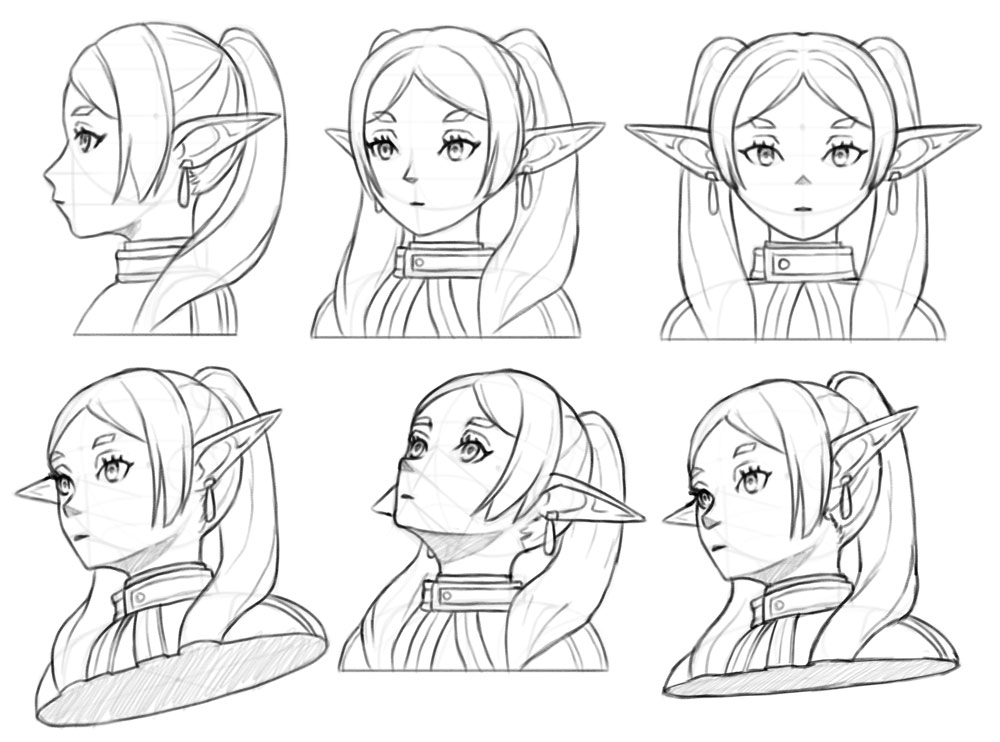
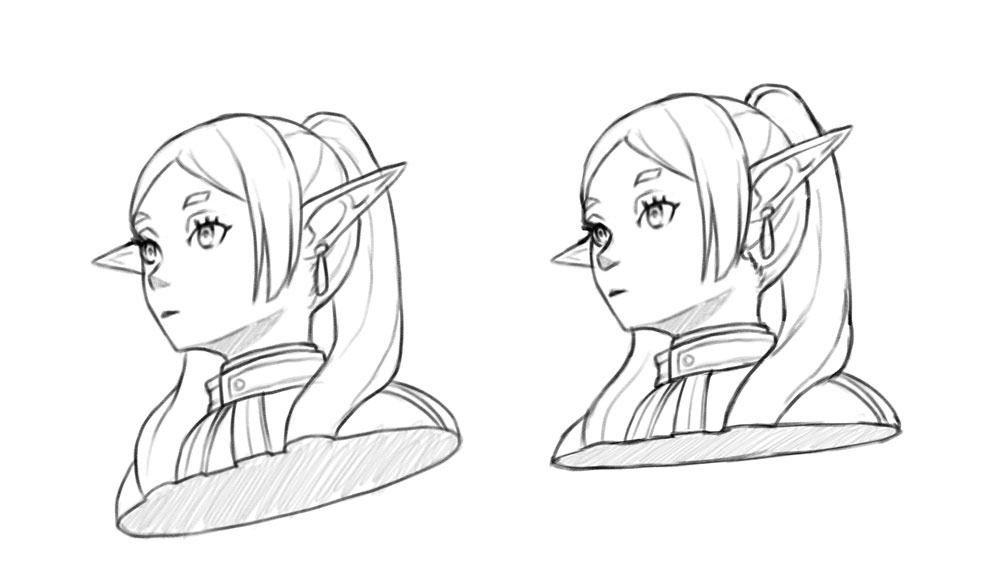
On November 13th, 2025, user SpaceDev1 posted some fan art on Reddit (specifically, r/Frieren), and it quickly went viral. See, what SpaceDev1 did was to attempt to draw Frieren, a character from the series Sousou no Frieren, from a notoriously tricky angle. And they failed so (endearingly) badly that the drawing became a meme, inspiring lots of people to try their hands on the “frieren challenge”—and see if they can do better.
Let’s use this unique cultural moment as an opportunity to learn something about perspective! How do you properly draw the head in 3D views, where the character is looking not only left or right, but also up or down at the same time? Let me show you!
Perspective in a Nutshell
In order to rotate a 3D object on a 2D sheet of paper (or your screen), you need to use the rules of perspective. To learn these, it’s easiest to start with a simple object, like a cube. You can easily rotate it using 1-point perspective:

This isn’t how a cube rotation looks in reality, actually, but it’s close enough—and close enough to draw a convincing anime head rotation:
In this type of rotation, all horizontal lines stay horizontal—there are no weird angles, which makes it pretty easy to grasp. The problem is, it only allows you to draw two planes of the head at once—for example, the left side and the front, or the bottom and the front. So your choice of views is quite limited.
To solve this issue, you may try to follow the general rule and create a 3-plane view the following way. Unfortunately, it’s not that easy—can you see the right angle in the inner corner? It’s physically impossible to see one in reality in such a view. That’s why using this way for drawing a head will give you an angle just as cursed as the friangle.

So what do we do instead? There are two solutions here. First—let’s call it A—is to use the 2-point perspective. In this type of rotation, instead of “squeezing” only one plane towards the center, you need to squeeze another one away from the center as well:
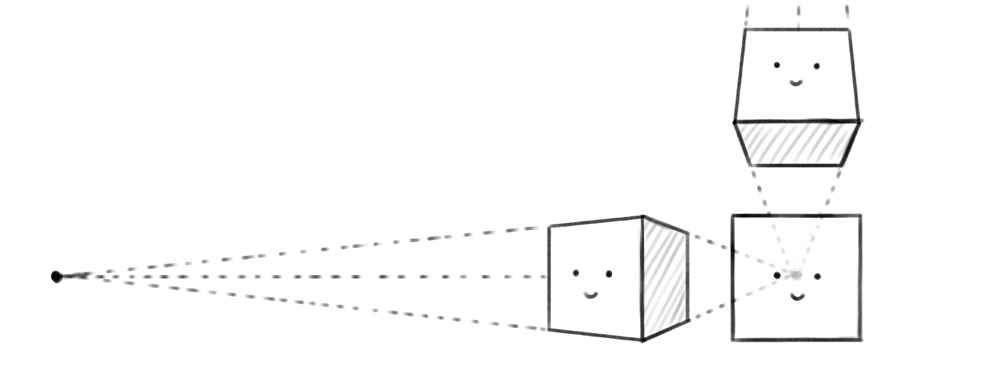
And then the 3-plane views are easy to create—with two planes squeezed towards center, and one squeezed away.

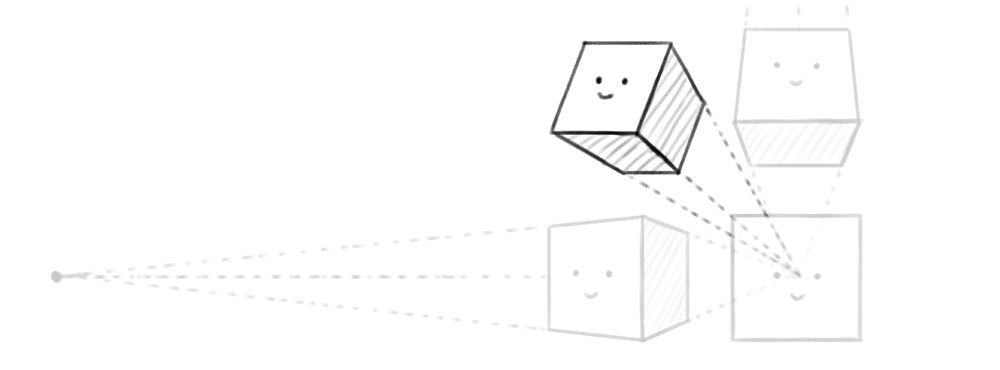
The other solution—let’s call it B—is to get rid of that pesky right angle by tilting the frontal plane. Then you can still use the 1-point perspective rules for the other planes:
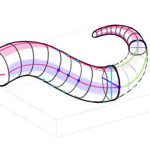
Here’s some good news: how much the planes are supposed to be squeezed depends on the scale. If the object is big (like a building), or at least big relative to the viewer (“worm’s eye view”), there needs to be a lot of squeezing. For smaller objects the distortion is less visible.
So you can, for simplicity’s sake, keep all these lines parallel. It won’t be wrong—it will just mean the head is seen from such a distance that there’s little to no distortion in the view.
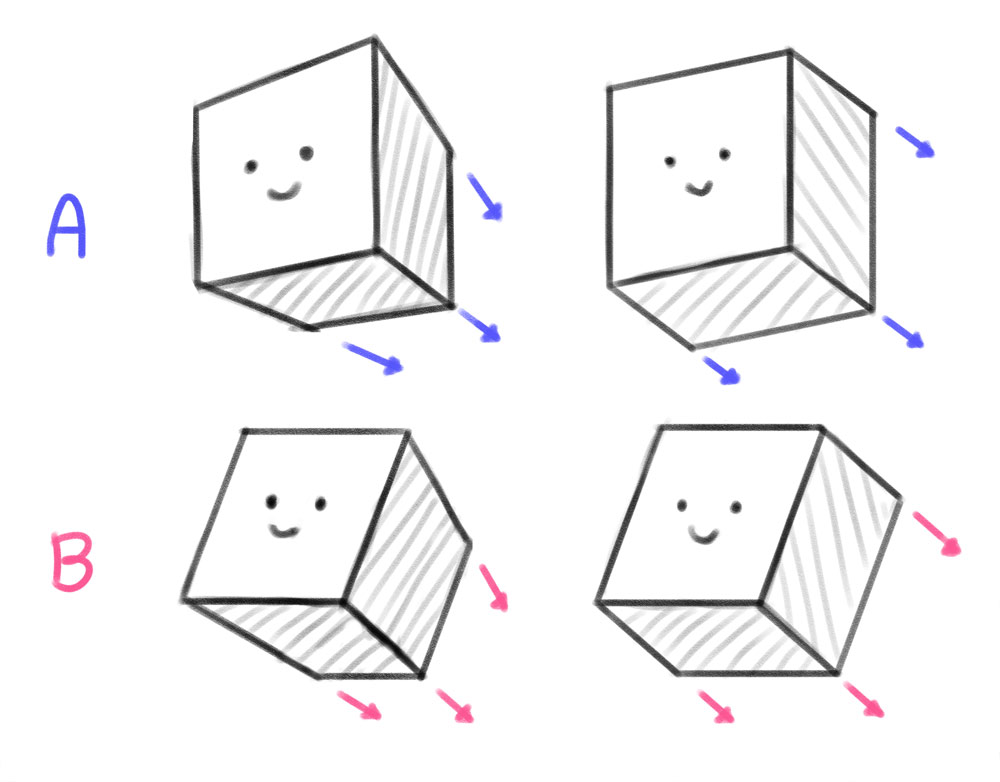
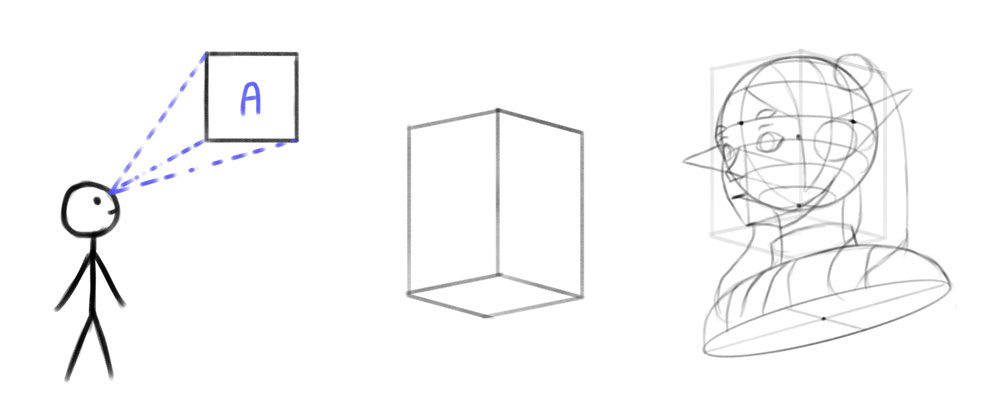
So, which method should you use to draw a head? That depends on the view you want to show. In A, you can see the bottom of the cube, because the cube is above the viewer’s eyes. So in this view Frieren is not looking up—it’s you who’s looking up at Frieren!
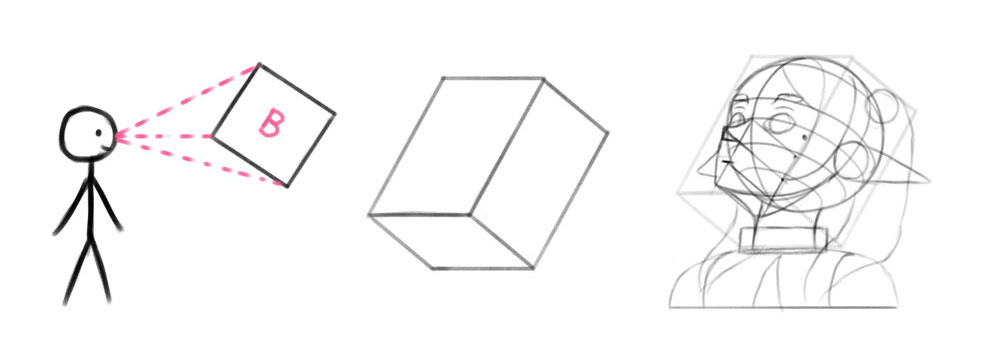
In B, the bottom of the cube is revealed by tilting the cube—rotating its front up. So if you want to show Frieren looking up, this is the view you need to pick.
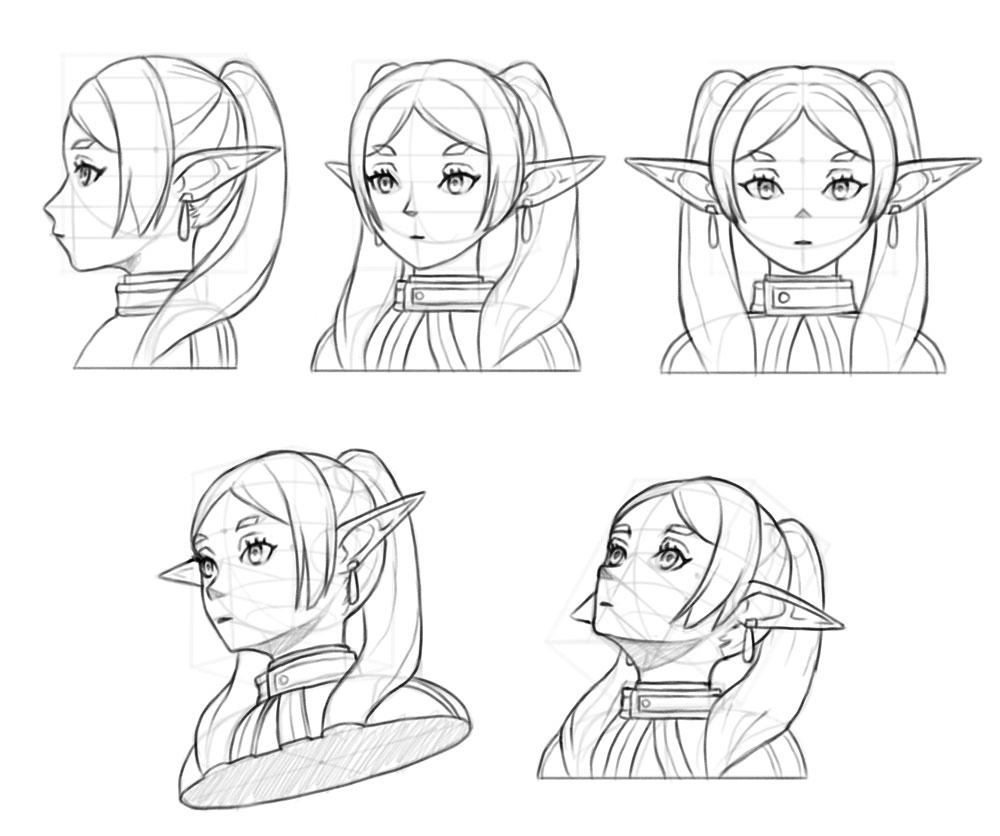
How to Draw an Anime Head in Perspective
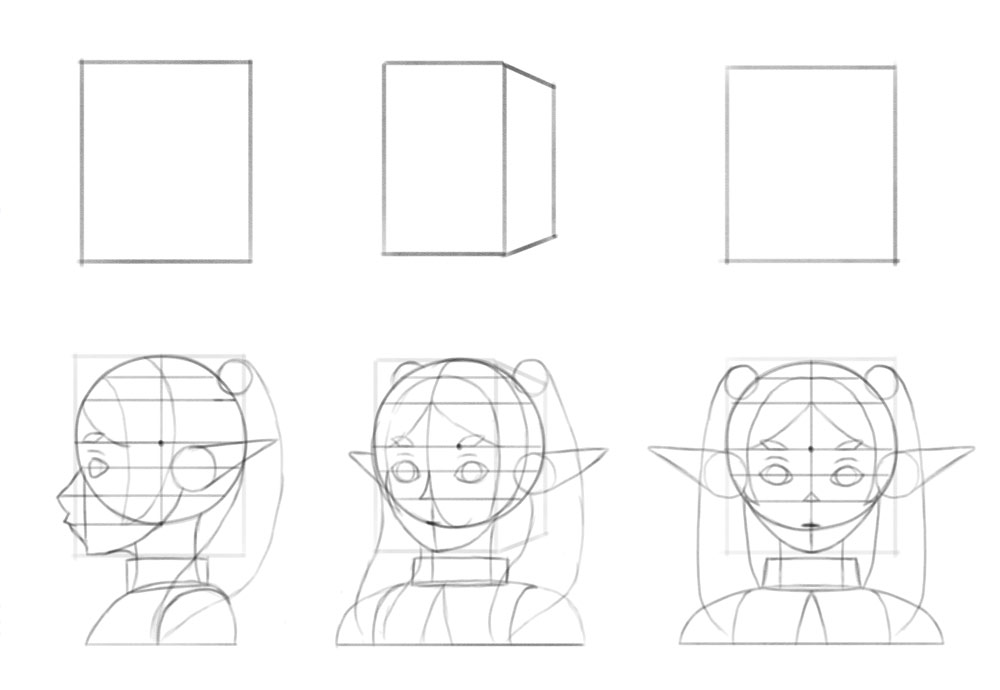
Ok, but haven’t we skipped a step here? How to go from a cube—or a box—to a spherical head with all its details?
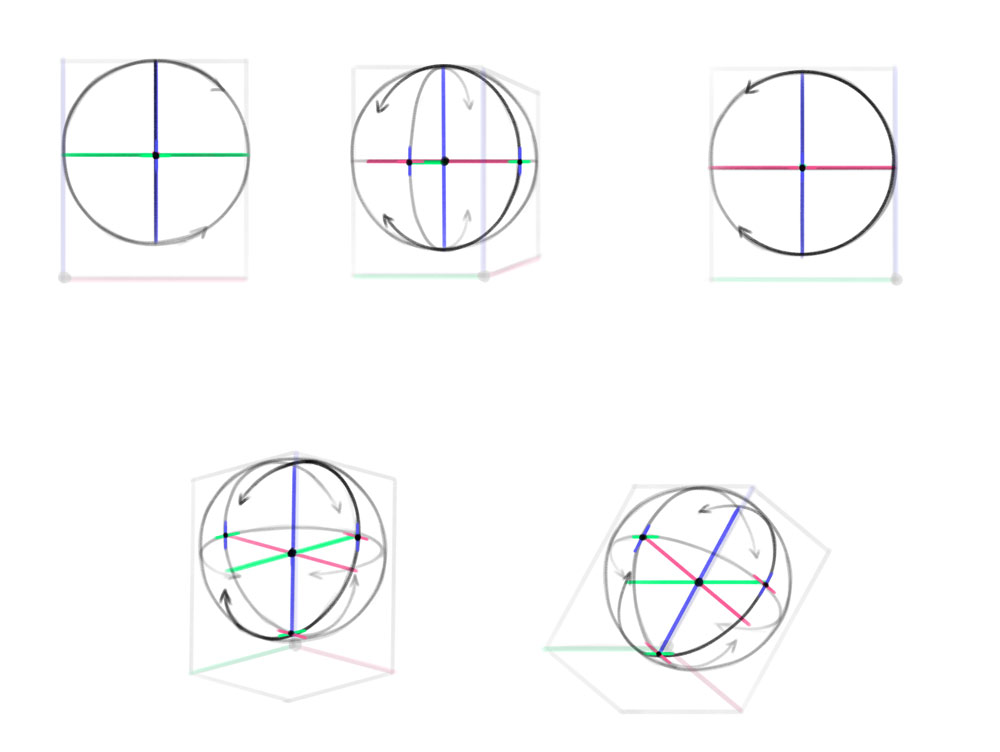
Just like a cube is made of three sets of parallel lines, called axes, so is a sphere. And the axes of a sphere inside of a rotating box will be identical to the axes of that box.

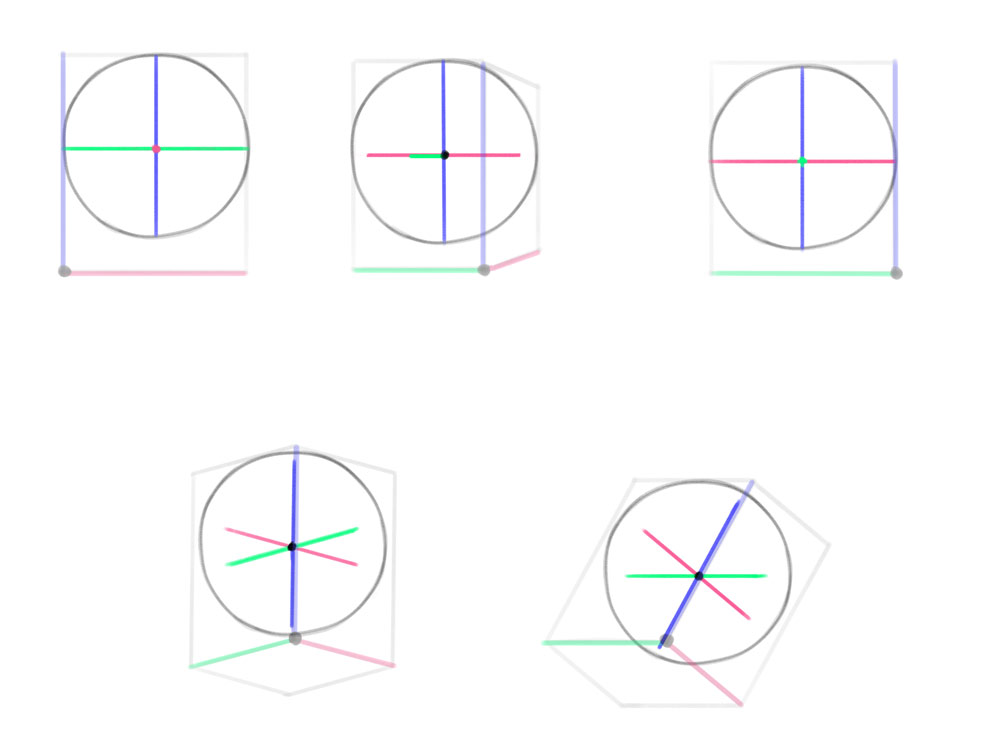
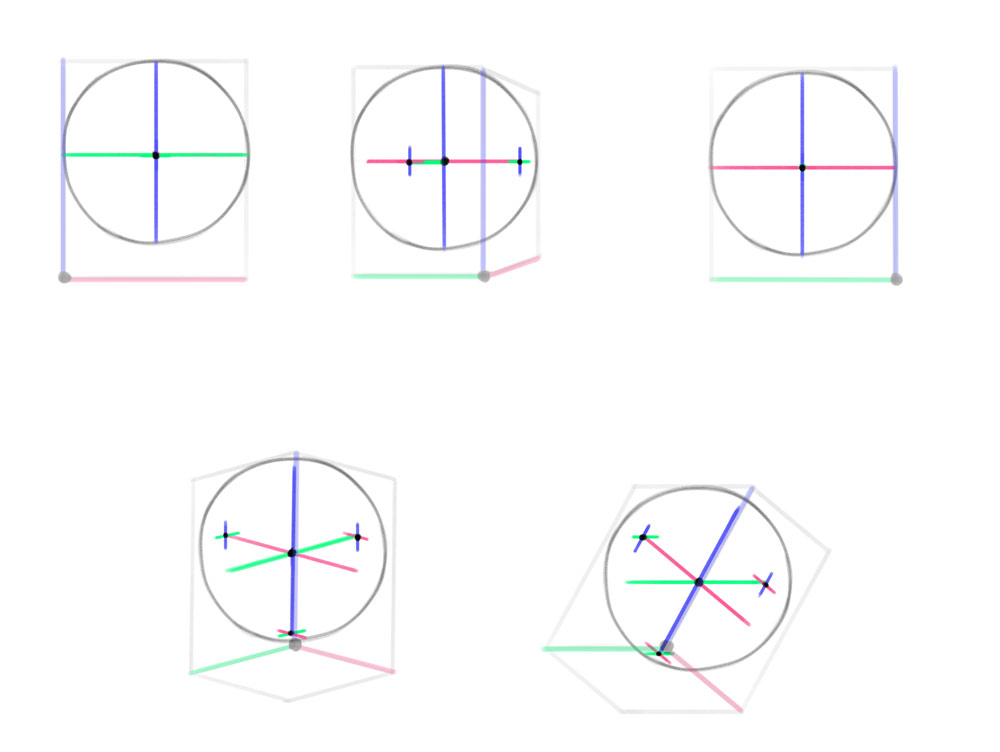
These axes don’t touch the outline of the sphere in the 3D views—instead, their tips should land on the imaginary walls of the sphere. You can mark them like this:
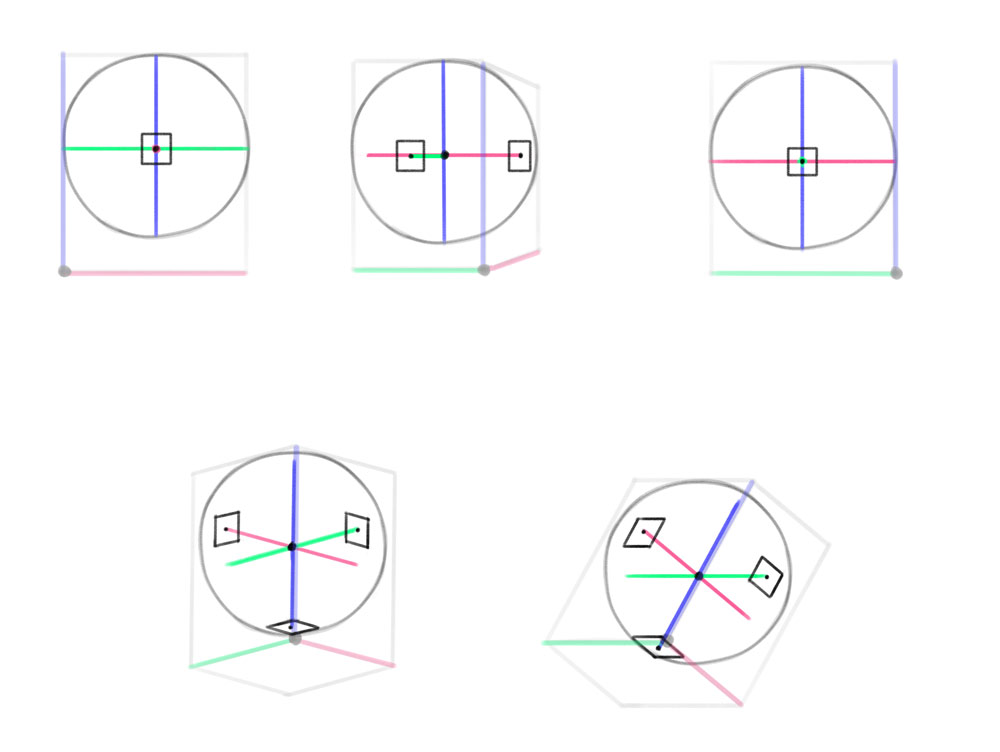
Or even simpler, like this:
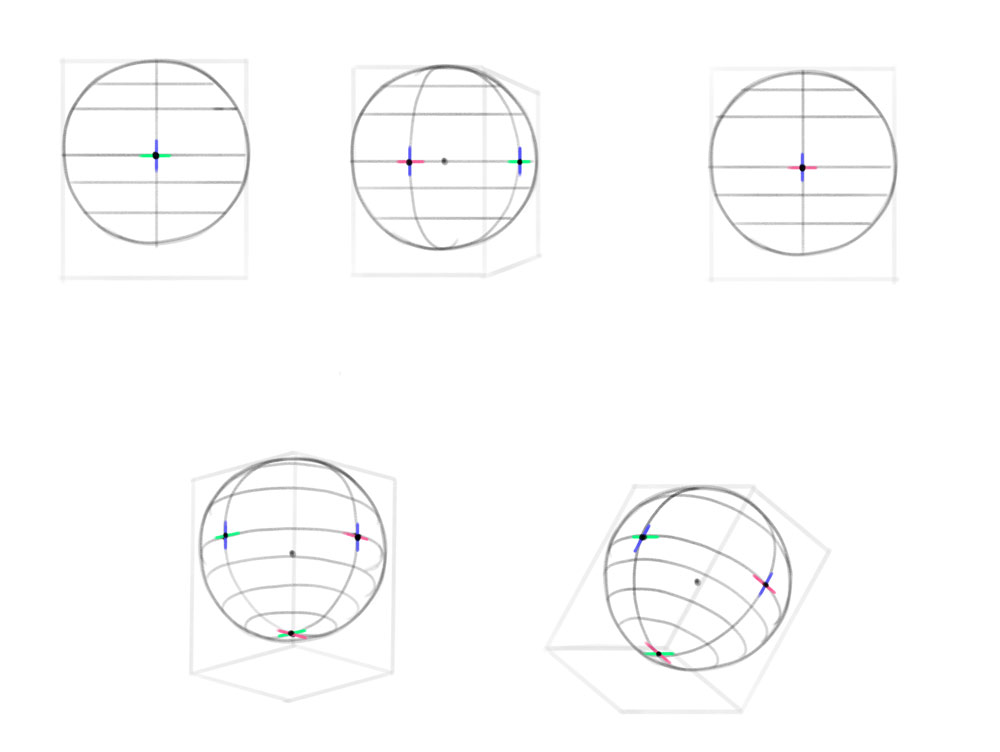
Once you have those, you can turn them into ellipses—simply by connecting the lines in such a way to curve around the center of the sphere:
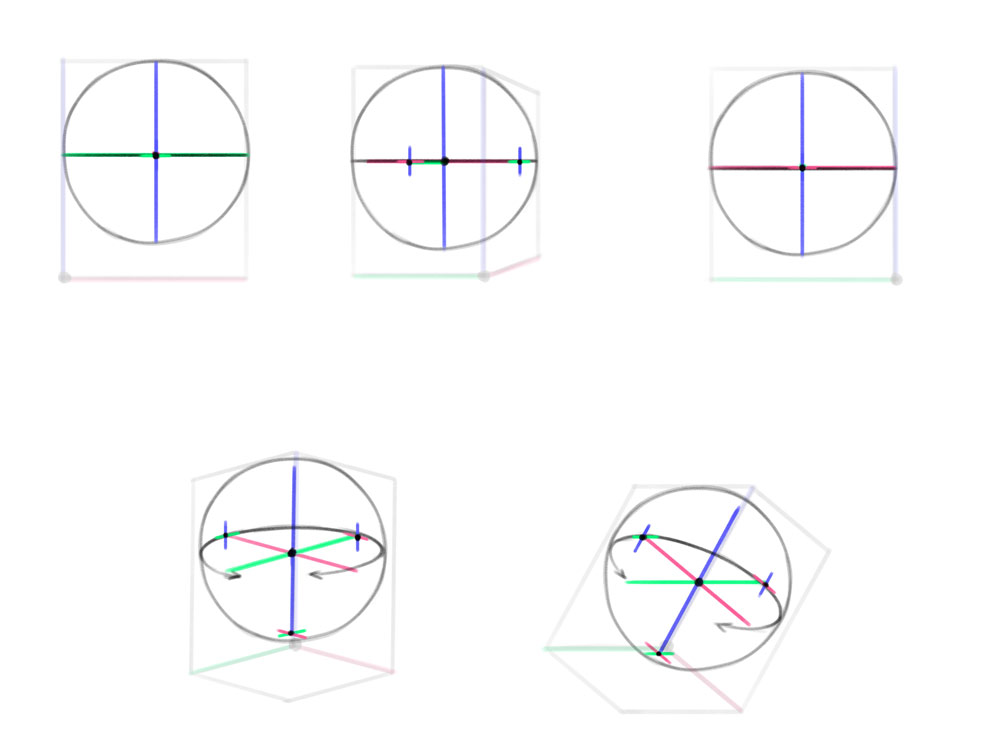
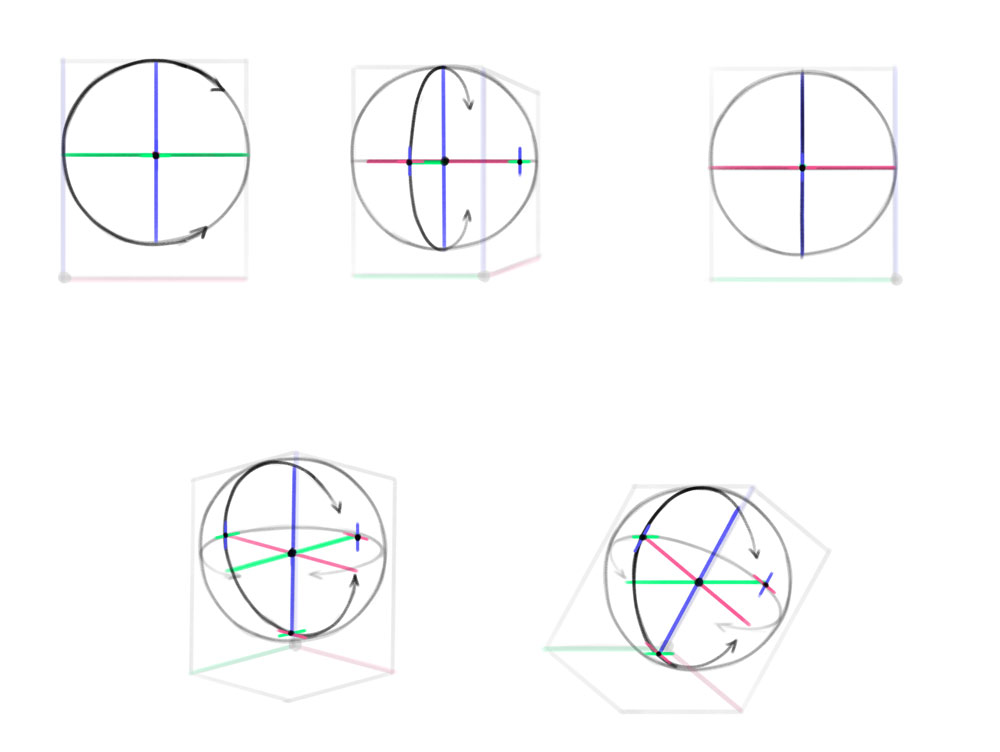
And with these, you can easily apply the proportions of the simpler, 2D views—just turn the parallel lines into parallel ellipses.
When drawing the elements outside of the sphere, you can project the lines farther to find their location. Just remember to keep the smaller 3D parts in mind—e.g. if you can see the bottom of the big box, you should also see the bottom of the nose (not just its side), or the lower jaw.
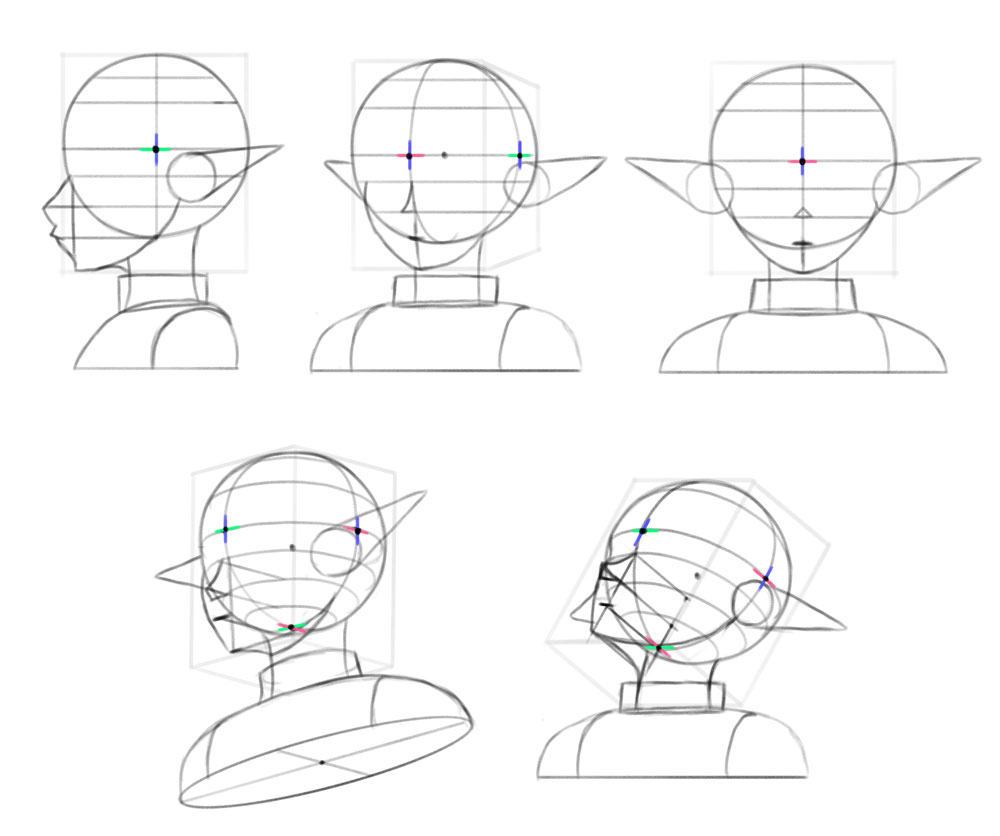
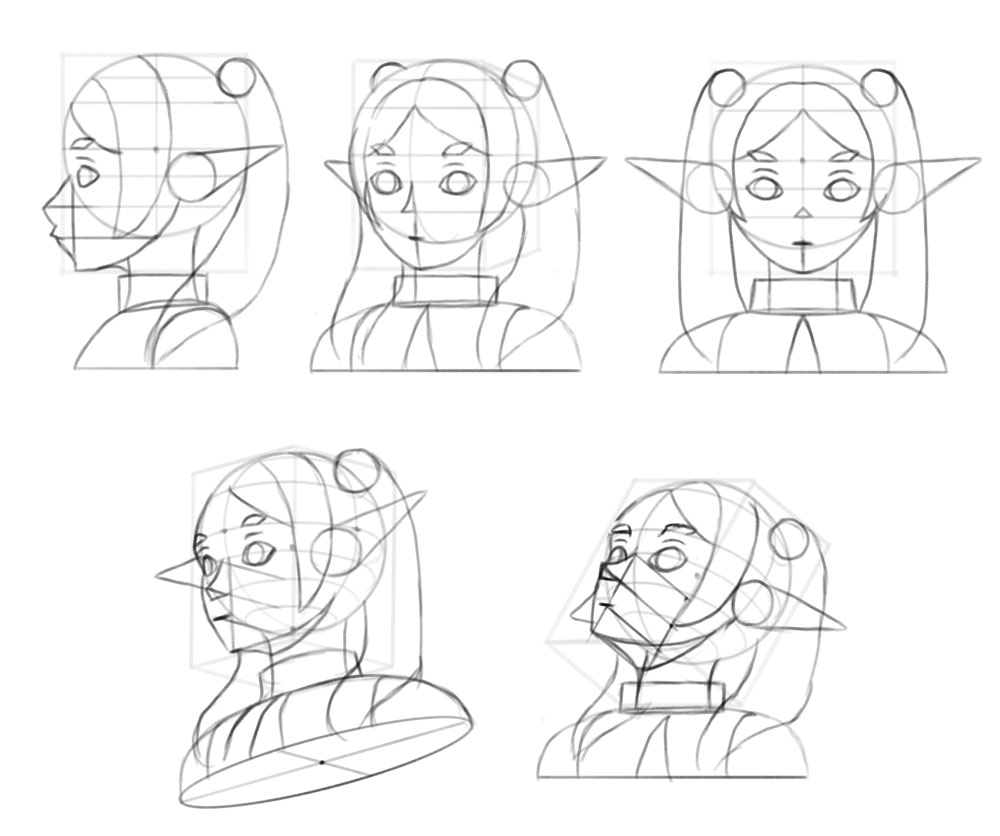
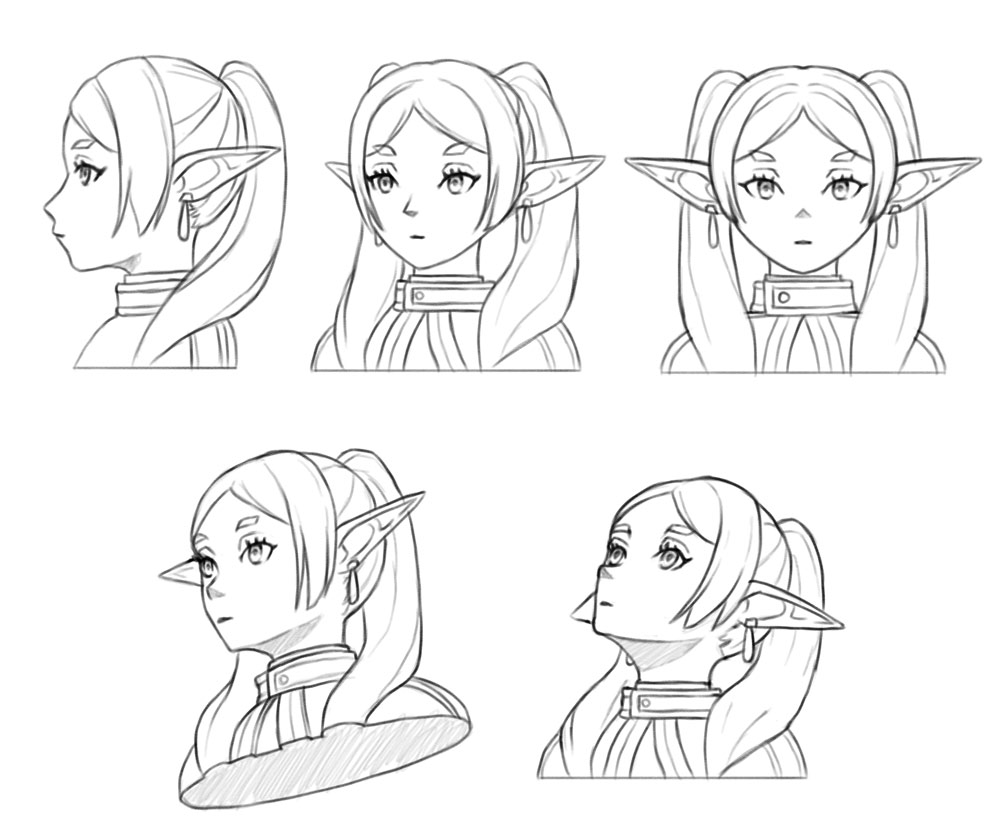
Once you have the proportion lines/ellipses, putting all the details in place should be as easy as drawing the head in the front view.
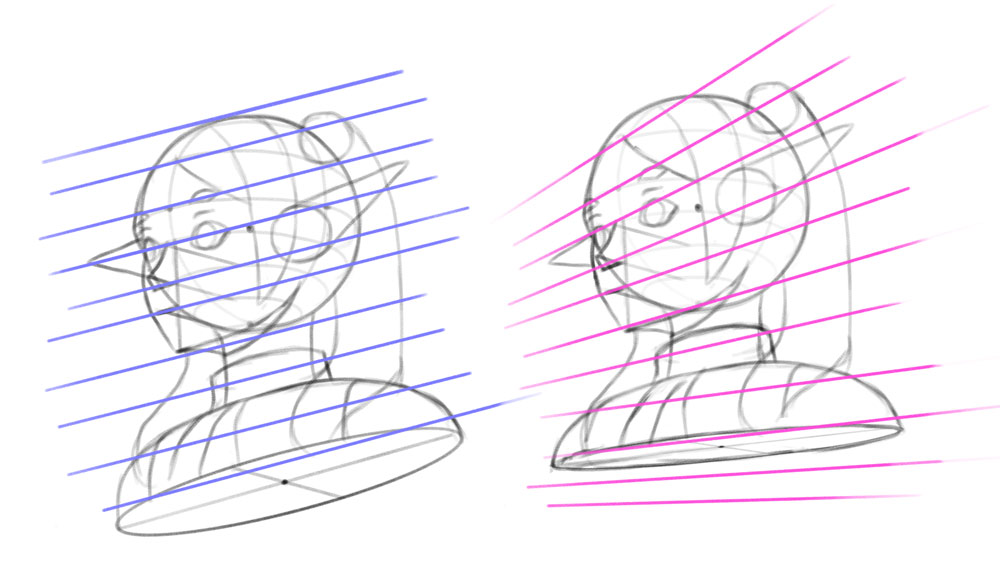
Perspective: Level 2
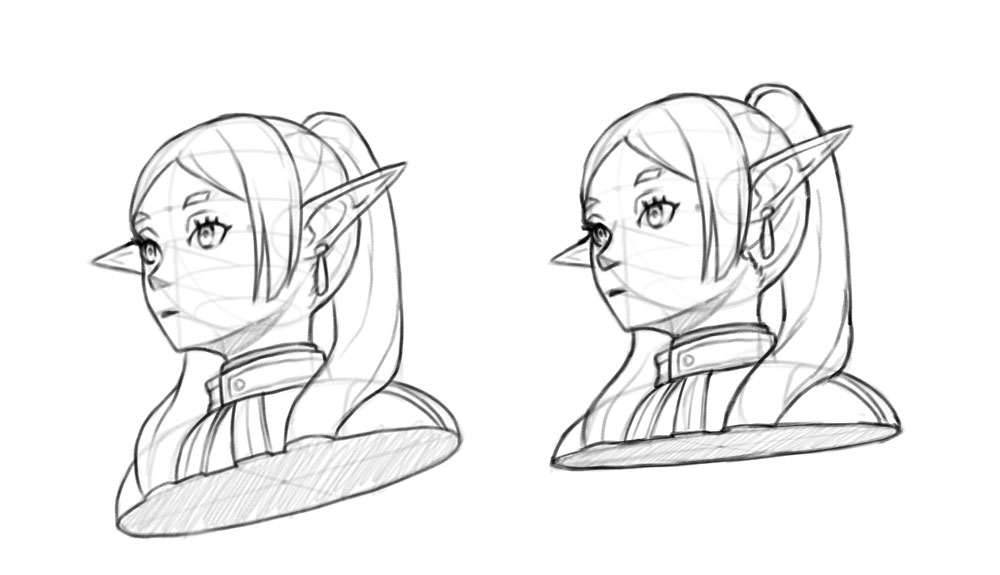
Now, let’s go back to the distorted view for a minute. If you want to draw the head in a more realistic, dynamic way, or if the head is just a part of a larger drawing, you need to follow the rules of the 2-point perspective (or even the 3-point one for larger scenes). Which means the axes need to be converging, instead of being parallel.
So how to apply this rule to our drawing? It’s easier than it seems—you can create the basic sketch the normal way, and just angle the parallel elements towards each other. You don’t have to draw the horizon line and vanishing points—as long as the lines seem to point in the same direction, you should be fine!
Conclusion
So, what went wrong with the Frieren angle? I think the awkwardness was caused by mixing the two methods—A and B—as well as by trying to guesstimate the view, rather than follow the perspective rules.
If you want to learn more about perspective, you should definitely check out the tutorials below!

0 Comments