Most artists learn how to draw 3D forms through the process of trial and error, and after a while their intuition tells them what to do. They make plenty of decisions without even being aware they make them. Things just “feel right” or “feel wrong” to them.
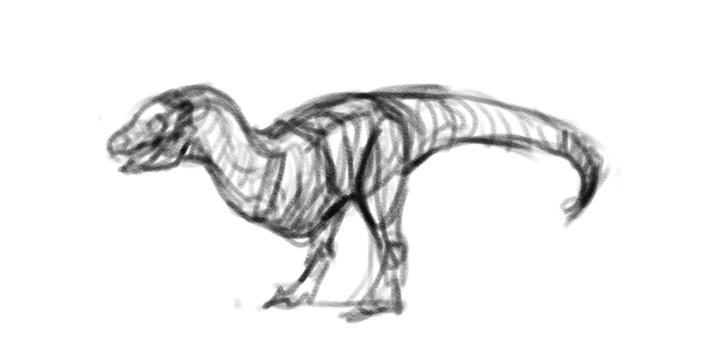
In the past I’ve made multiple attempts to explain the theory behind drawing in 3D. But I always felt they were too theoretical–full of useful knowledge that was hard to apply in practice. This time I’ve decided to take a different approach: to take a closer look at the decisions I make while drawing. To find both the questions and the answers, and serve them to you in a more digestible form.
Here’s the result of the weeks of work: a straightforward, practical approach to drawing organic objects in 3D. Keep in mind that these techniques may not be objectively correct–a 3D program may show you different results. But I don’t think that matters, as long as they work for the artistic purposes!
1. The Plane
What Is It?
The plane has two meanings: first, a plane is an imaginary ground under your object. You can add some thickness to it to make its position clearer.
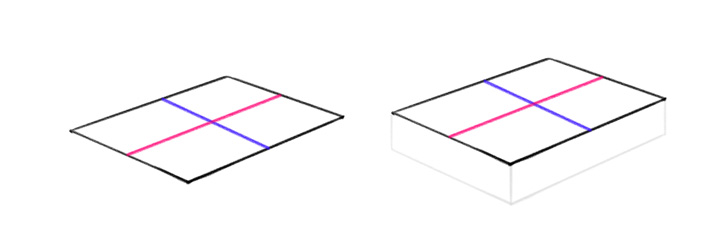
Second, a plane is simply a flat part on the surface of your object. The sides of a box are all planes, and cylinders have round sides only. Most organic objects have a mix of them. To avoid confusion, we’re going to call these planes “sides”.

What Do I Need It For?
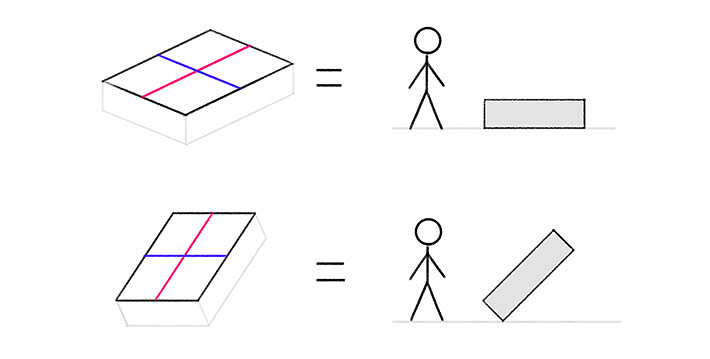
Even if your object is floating in space, you still need to know its orientation in relation to the viewer/camera. The plane, even if imaginary, helps establish that orientation.
What Is It Made Of?
A plane is made of two crossing axes. These two axes can then be copied to create four edges.

A third axis can be added for thickness.

At What Angle Should I Draw These Two Axes?
Depending on How Much of the Top You Want to Show:
When you cross two axes, you create an ‘X’. The narrower this X, the closer the plane to the side/front view; the wider it is, the closer to the top/bottom view. You know you’ve reached the limit once the X turns into a cross.
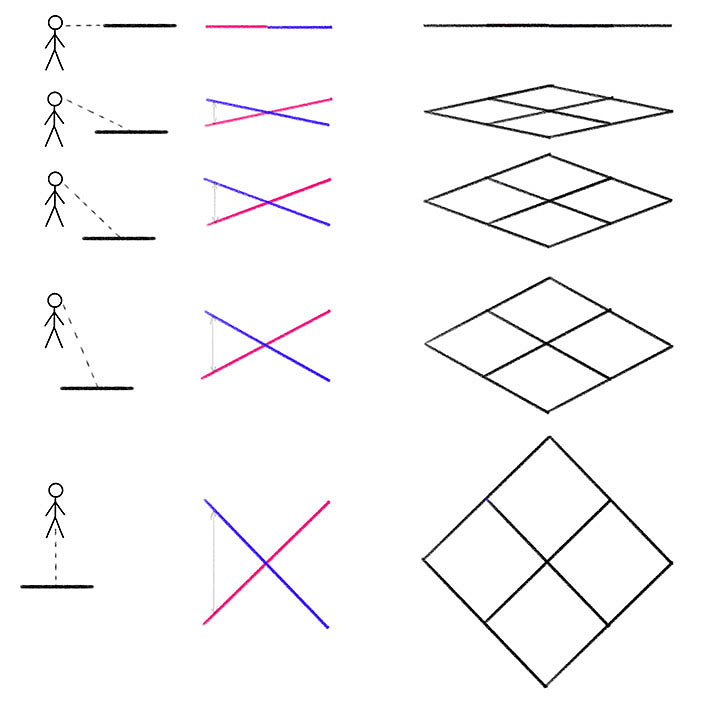
Depending on The Orientation of the Plane in Space:
Imagine a horizontal line crossing the center of your plane. If you want to draw a horizontal plane, this line should cross the acute (narrower) angle between the axes.
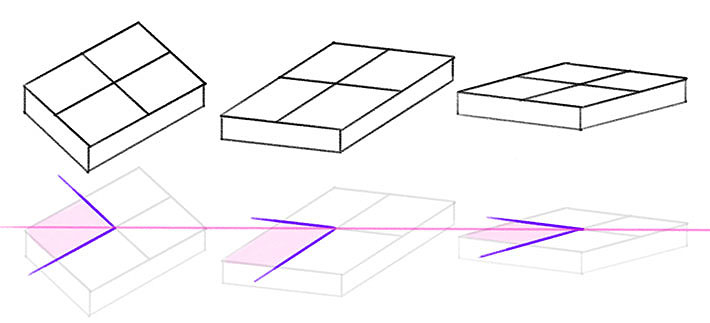
By breaking this rule you can draw a plane in many other, more dynamic orientations. I’m not going to explain them here, because as this point it should be easy for you to experiment with them on your own (and to be honest, that’s exactly what I do when I need one of those!).
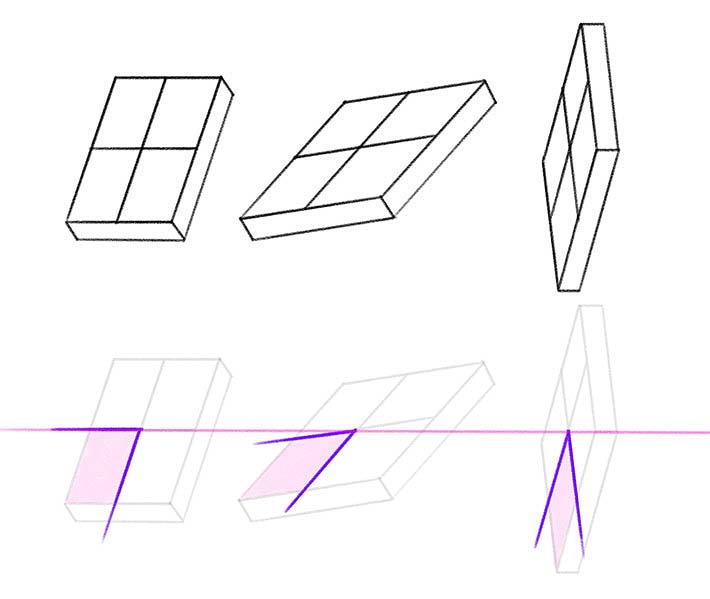
How Long Should I Make The Axes?
It doesn’t matter–the plane is an imaginary section cut out of the ground, so you can use any lengths you want. Drawing one axis longer than the other however, helps distinguish the side from the front.
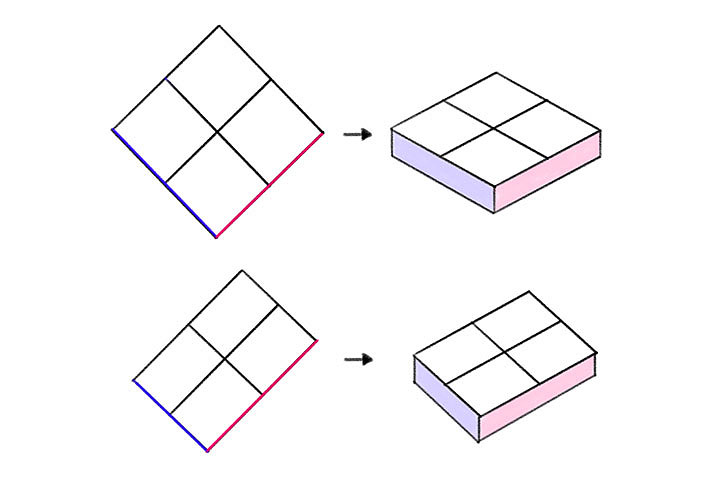
Where Should I Add The Third Axis?
If your plane looks like a rectangle, you need to draw the third axis as an extension of one of them, or skip it altogether to create a pure top view. So if there are right angles between your axes, you can only draw a view with one or two sides visible.
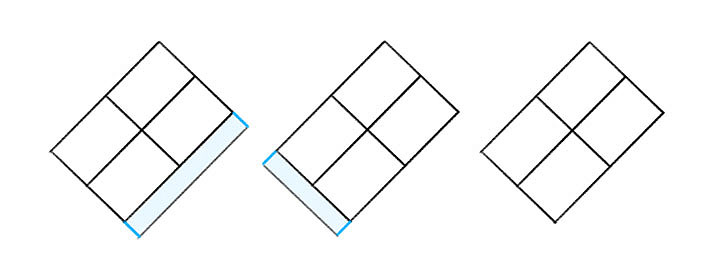
If your plane looks like a rhomboid (a slanted rectangle), locate its obtuse angles. Pick one of them–the upper one if your plane is supposed to be seen from below, or the lower one if the opposite is the case. This is where you should attach the middle third axis.

At What Angle Should I Draw It?
Is your plane horizontal? Then just make the third axis vertical.
Sketch a vertical third axis. After that, you should be able to see three angles in the attachment corner. Are these angles greater than 90°? Then you can keep the third axis vertical.
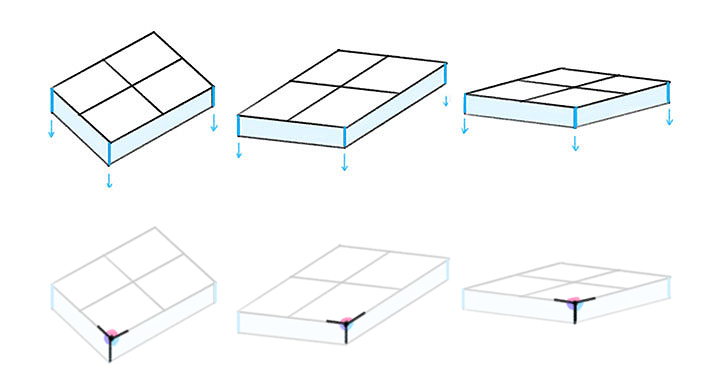
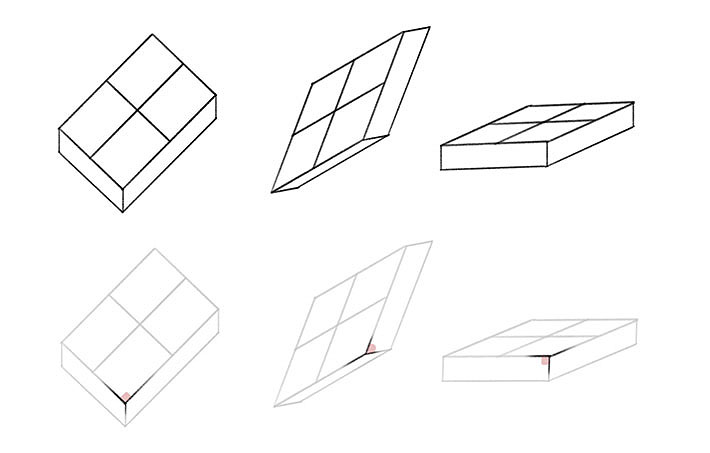
If they’re not, tilt the third axis in such a way to make all the angles greater than 90°.
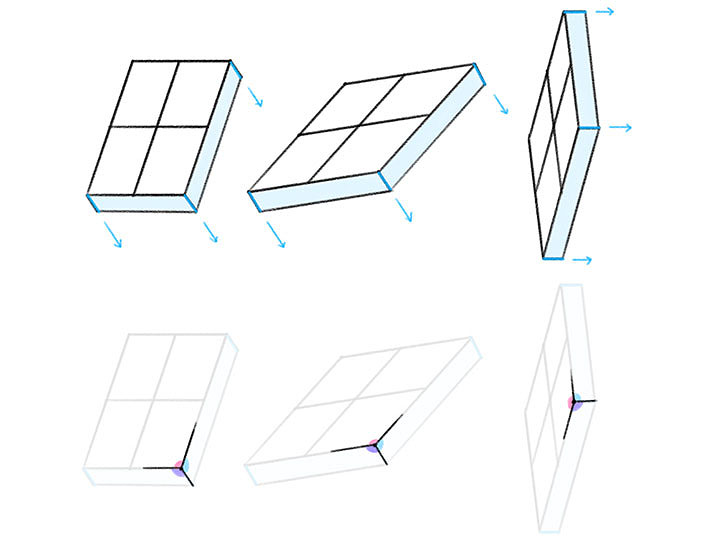
So if your plane looks wrong, just look at the angles–you’ll probably find one 90° angle, or one angle smaller than 90°.
What About the 2-Point Perspective?
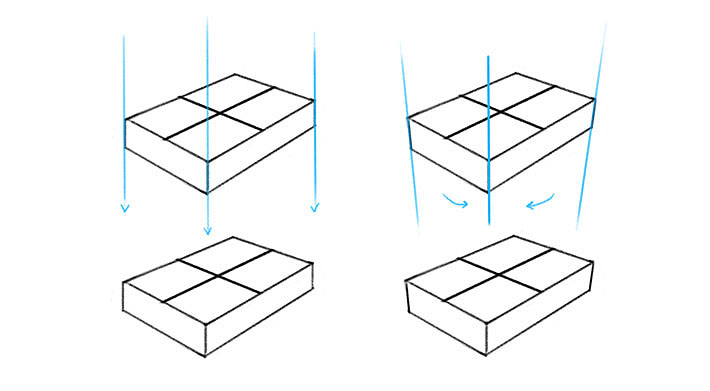
If you create the edges of your plane by copying the axes, you’ll get two pairs of parallel edges. But this isn’t how it works in reality.
If you want to make it more realistic, tilt both edges towards the axis they were created from. It doesn’t matter how strongly or subtly you do it–as long as you keep it consistent for all objects in the scene.
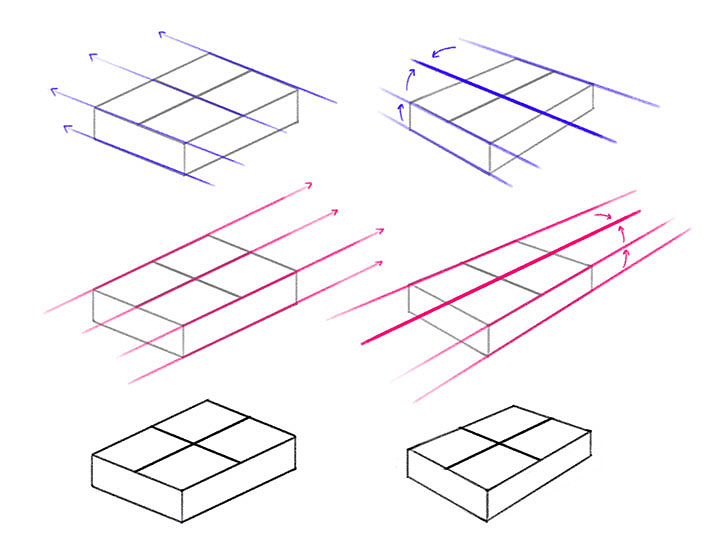
You can also create the 3-point perspective this way–although in most cases the effect of perspective on the third axis is not that noticeable (unless there’s supposed to be a huge size difference between the object and the camera/viewer).
This is a multi-page article. Go to the next page using the controls below:

0 Comments