The last time, when I painted a dragon with an open mouth, I had some troubles with its look. I decided to study animal mouths to get a little more experience and to be less reliant on references the next time I design a creature. Here’s how I did it!
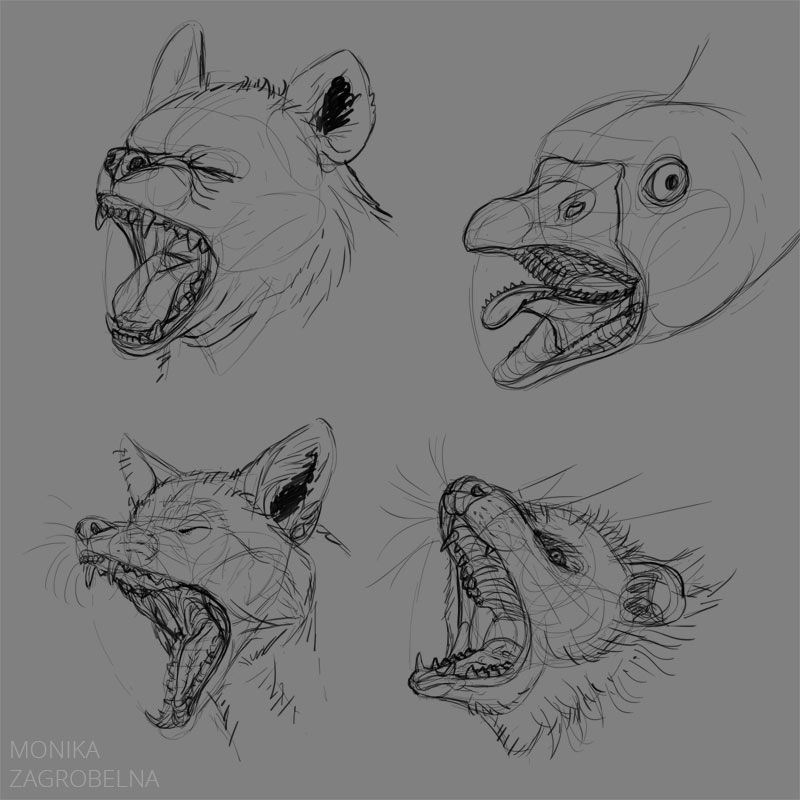
1: Line Art
Nothing new here—I sketched the whole head, using this opportunity to remind myself how to draw jaws in relation to each other.
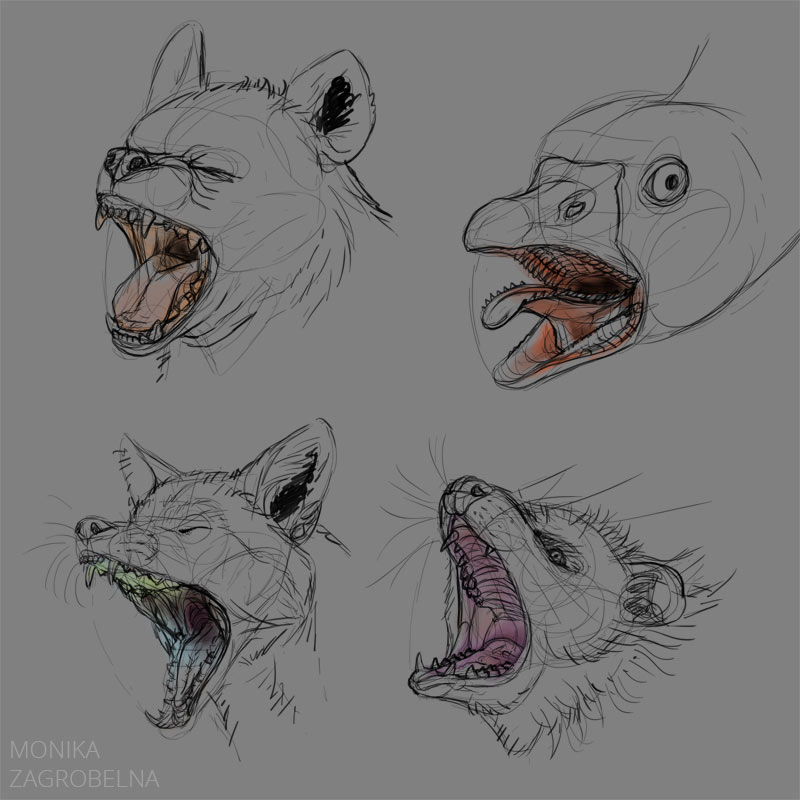
2: Basic Colors
I created a new layer and painted the colors without shading and shine. I made sure to keep teeth bright, but not white—I couldn’t add the highlights later if the teeth were white.
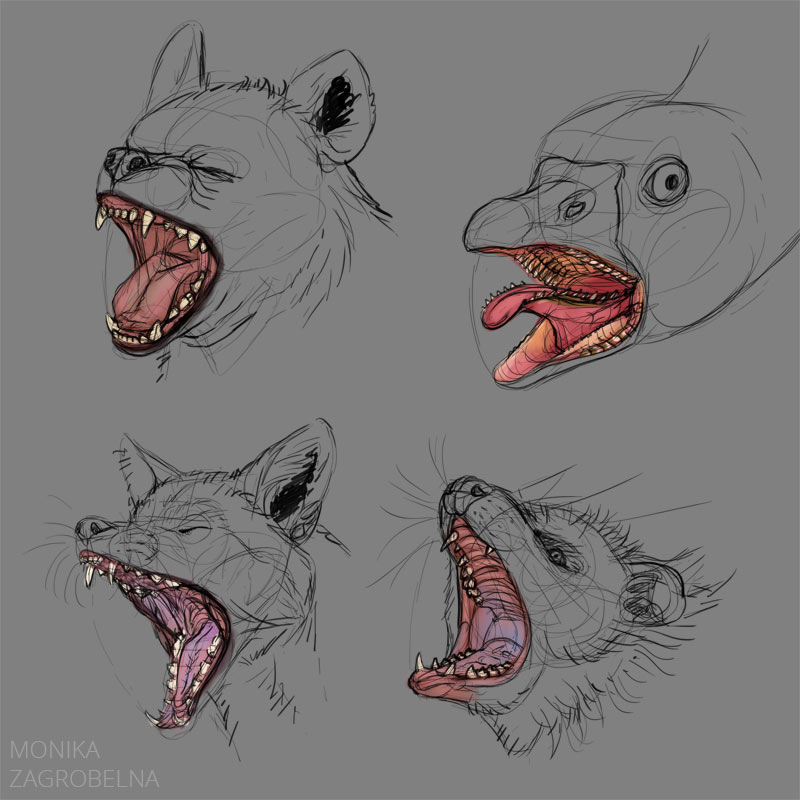
3: Shadows
I created a new layer in Mutliply mode. I painted the shadows using various colors, depending on the environment. This is a good time to include subsurface scattering—shadows affected by it are warm and saturated. Using classic blue for all shadows would make the tongue and gums look plastic and dead.

4: Details
I created a new layer over the lines, made the brush smaller, and started painting the details. I picked the colors with the Eyedropper tool and painted over the lines to cover them. I also used a textured brush for the hyena tongue.
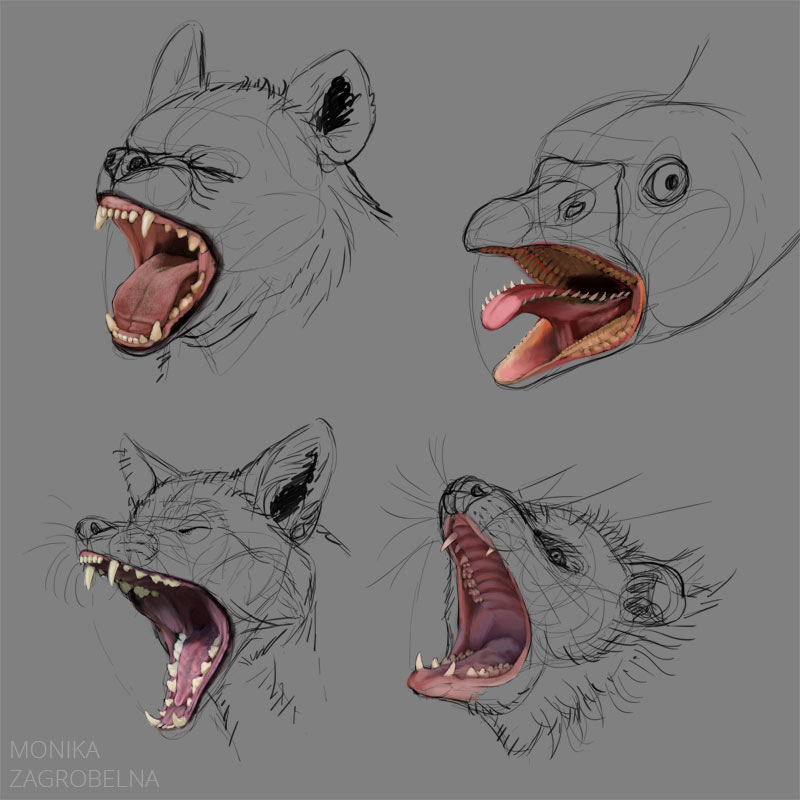
5: Shine
I added a new layer in Screen mode and painted some shine. I was surprised to see that there’s not much shine present in my references—I was under impression that mouth should look very wet.
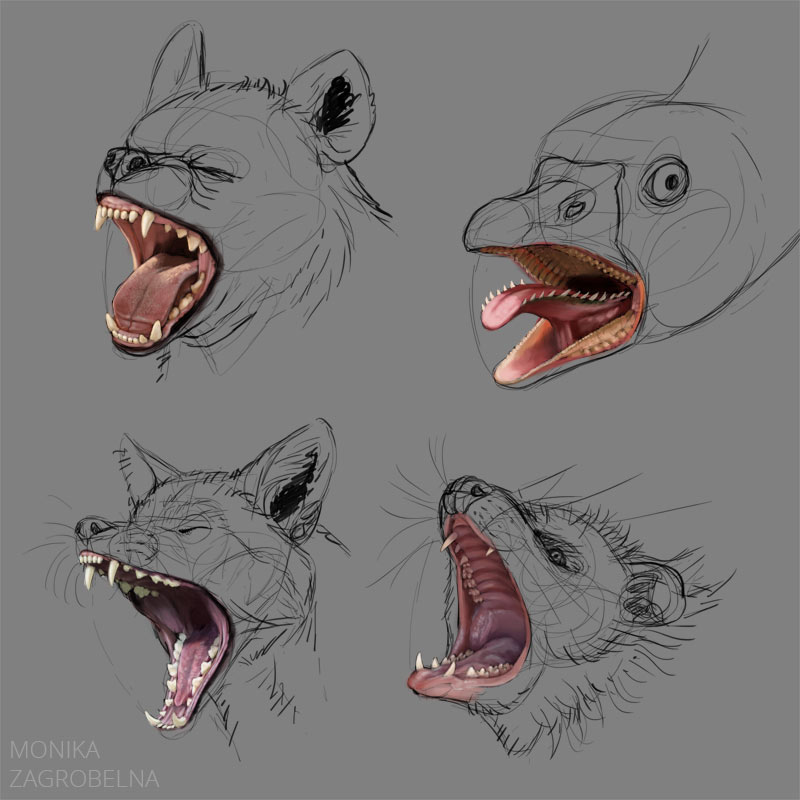
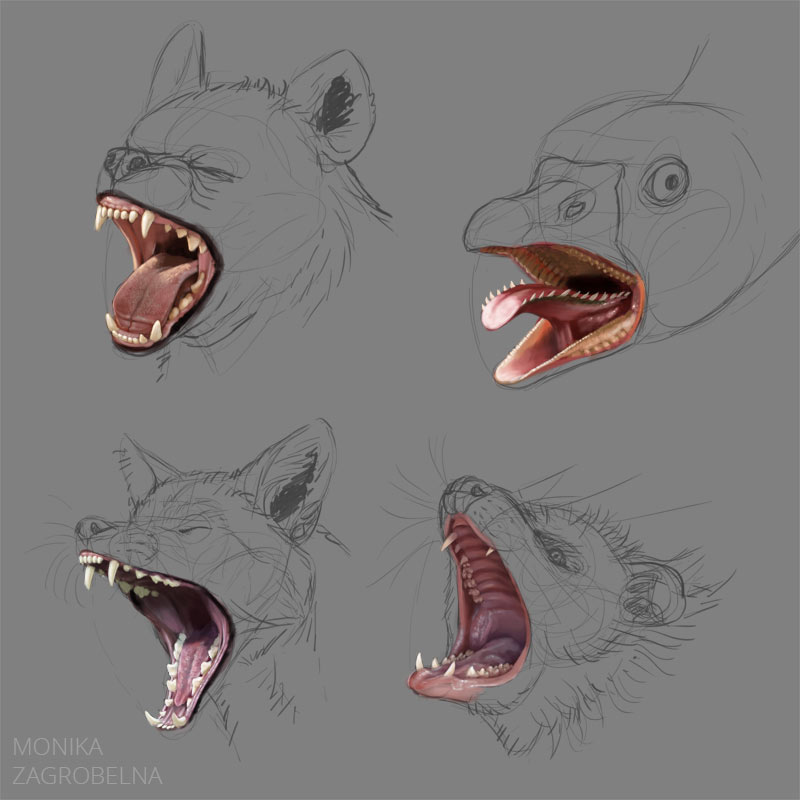
6: Highlights
Finally, I added tiny dots of shine. Again, fewer than I expected.
0 Comments