This post has been originally commissioned for SketchBook Blog in 2016. After the site’s migration, the original is no longer available, but you can still access the content here. Enjoy!
We’ve learned how to draw dogs and wolves, cats and big cats, and today it’s time for another animal: the horse. Because there so much to tell about them, we’re not going to grasp all of it in one go. Today, I’ll show you how to draw a basic body of a horse, and how to animate horses with all the popular gaits: walk, trot, cater, and gallop. We will be using the FlipBook feature in SketchBook for this How to Animate Horses tutorial.
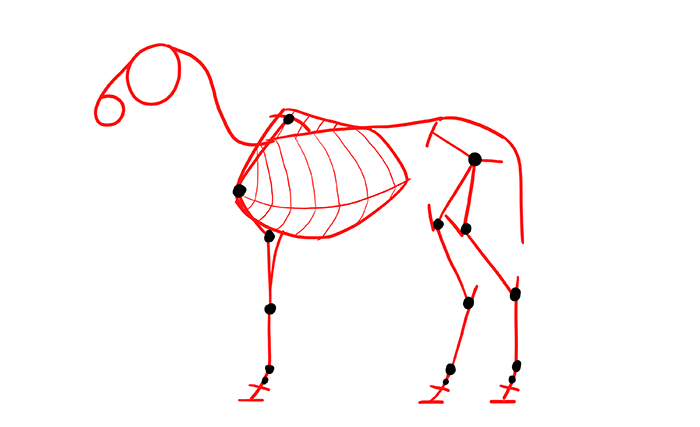
Horse Skeleton
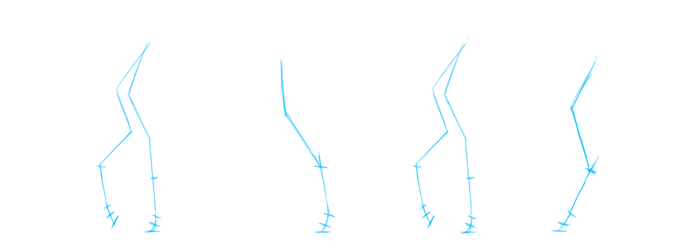
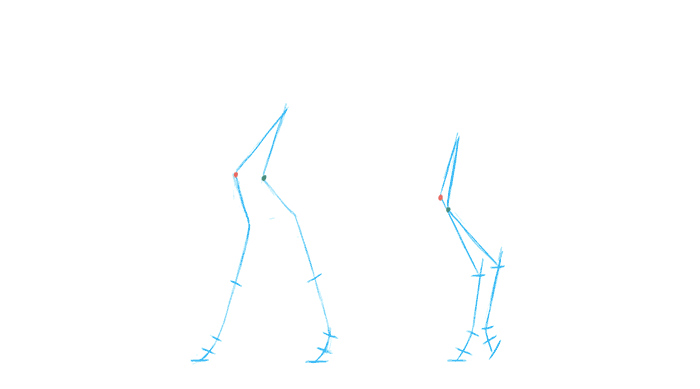
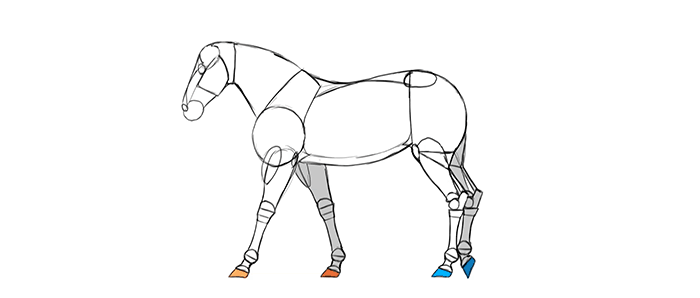
As always, let’s start by taking a look at a simplified skeleton of the animal. Horses seem to have a very distinctive anatomy, with weird “backward” knees, but if you look closely, they’re actually not that different from dogs or cats. They simply have longer feet!
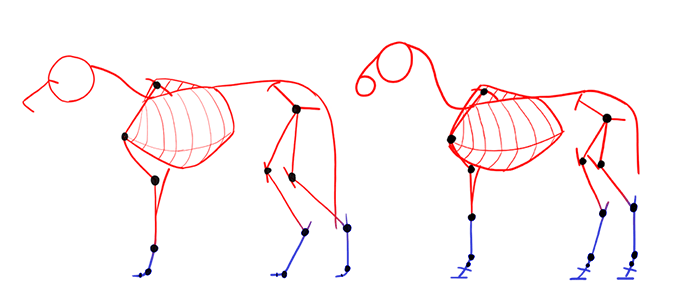
Wolf skeleton vs. horse skeleton (not to scale).
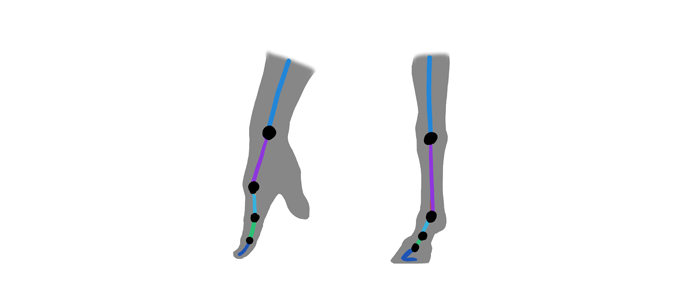
The most peculiar thing about horse anatomy is that horses walk on the very tips of their fingers and toes, and the hooves are actually nails. Therefore, you can use your hand as a reference to understand how and where the leg can bend. The same works for the foot!
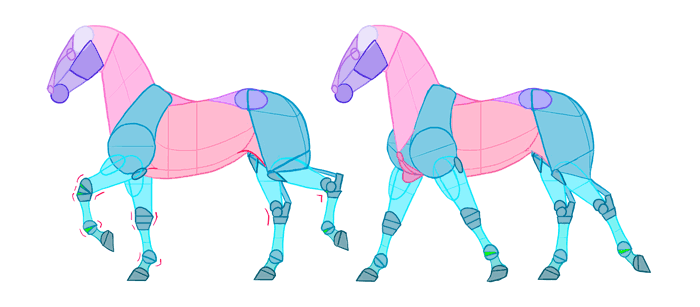
Simplified Horse Body
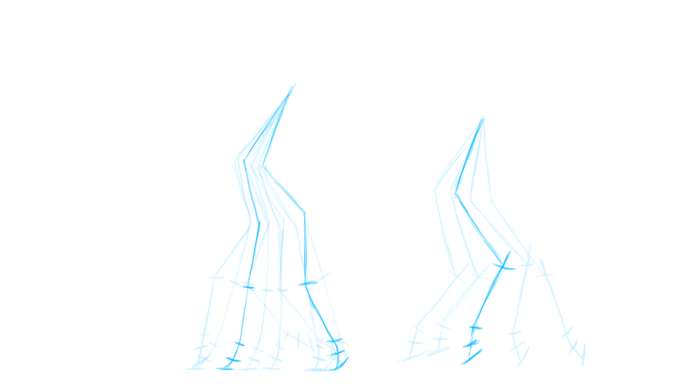
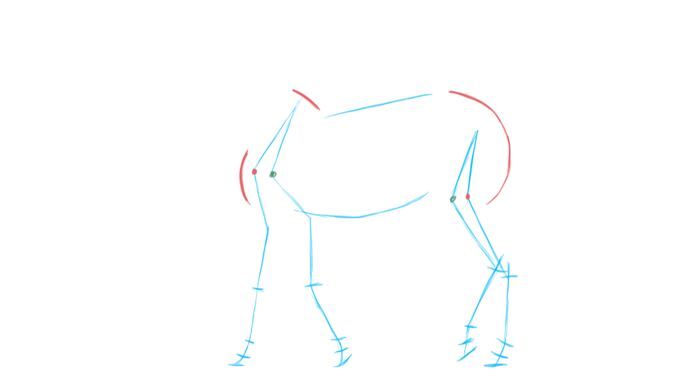
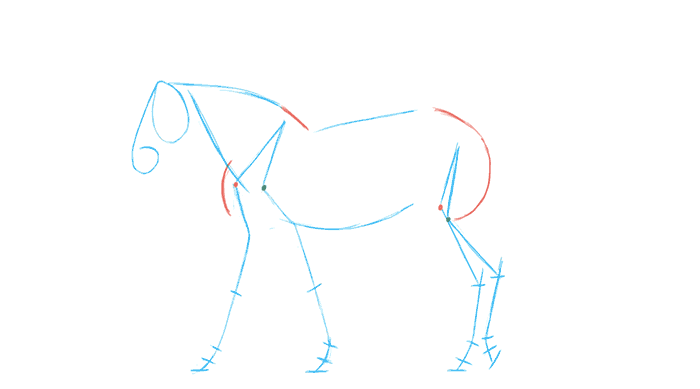
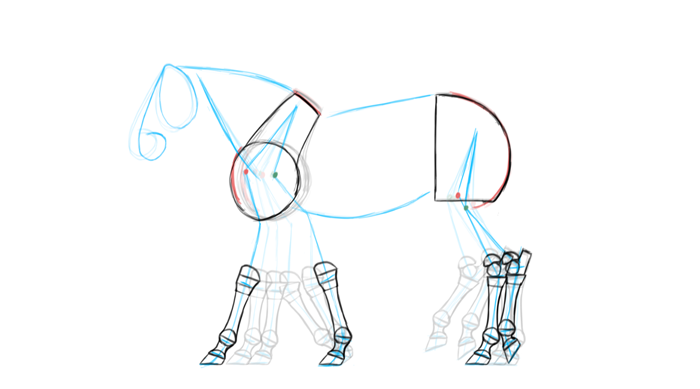
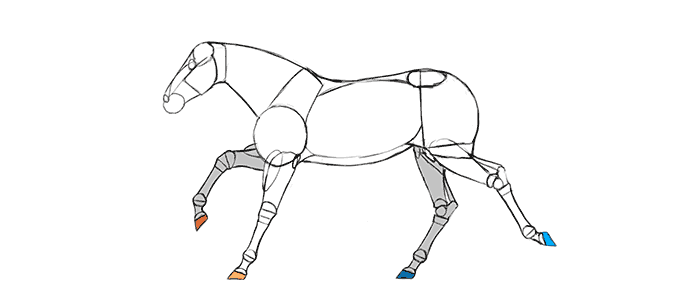
The horse body can be simplified to really neat blocks that you can use to create any pose. These blocks must be understood in their 3D form – otherwise you’ll be limited to only 2D poses. If the diagrams below are not clear enough for you, a good method can be buying a high quality horse figurine (Schleich, Collecta) and sketching it in various views.
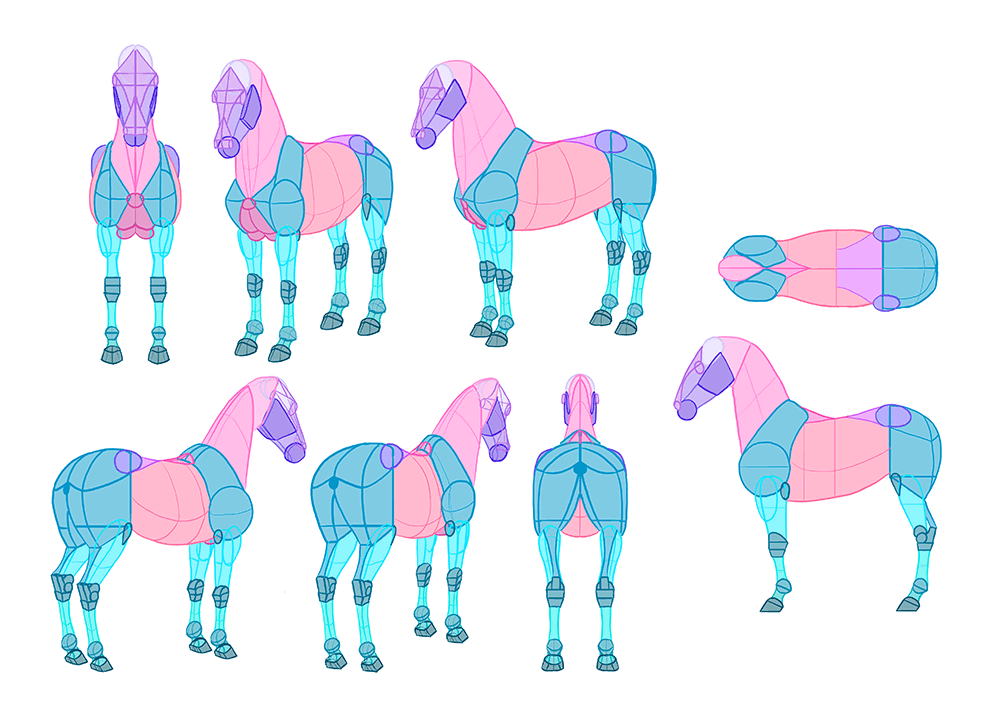

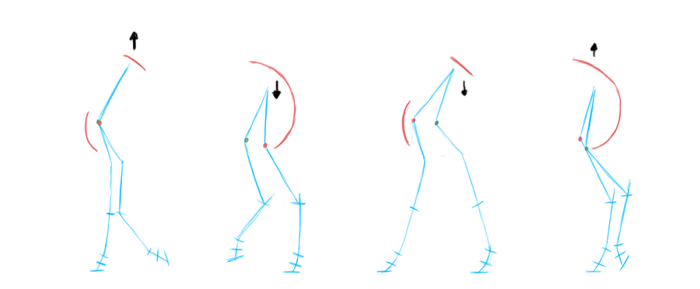
Horses are all about dynamism, so you need to understand how the body moves as well. I’ve divided the joint-blocks into even more blocks so that you could see how they “break” when the legs bend. Also notice the loose skin between the upper leg/thigh and torso. These pieces are stretched in many poses.
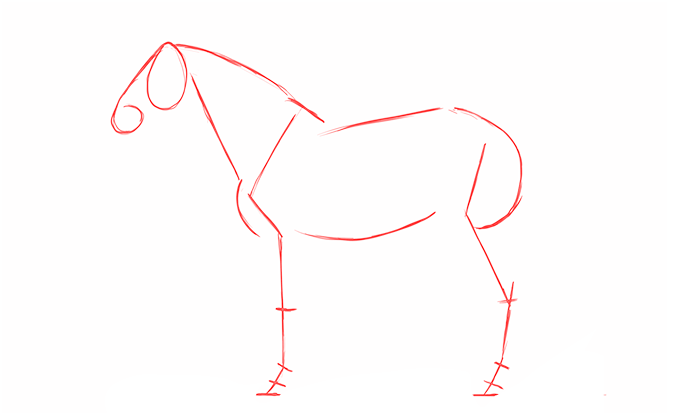
It all got complicated pretty quickly, right? You don’t need to draw all these blocks right on the start. You can quickly sketch the basic pose for your horse using this combination of skeleton and body masses:
How to Animate Horses: Walk
As I said, horses are all about dynamism, and you need to understand how they move if you want to draw them from imagination in dynamic poses. The best way to do it is to animate them – you’ll have a chance to see every step of their motion. Let’s start with a simple walking gait.
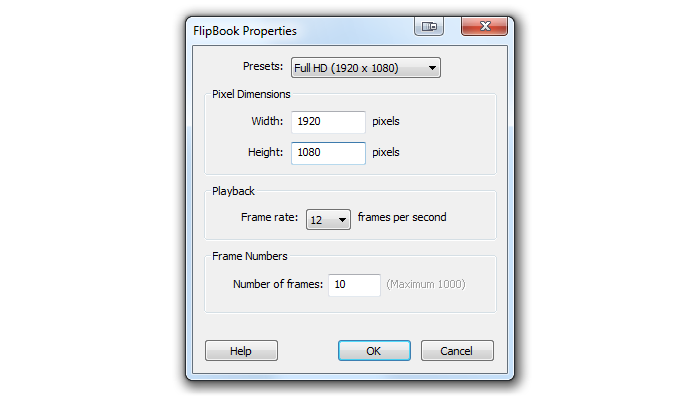
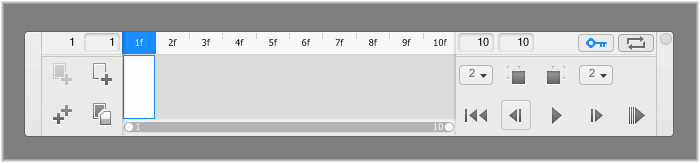
To animate our horse we’re going to use FlipBook – a very simple and intuitive feature set that’s a part of SketchBook Pro. To create a new animation go to File > New Flipbook > New Empty FlipBook. Select:
- Pixel Dimensions: anything you wish
- Playback: 12 (this will be a pretty slow motion, so we don’t want too many frames)
- Frame Numbers: This can be changed later, but let’s choose 10 to start.
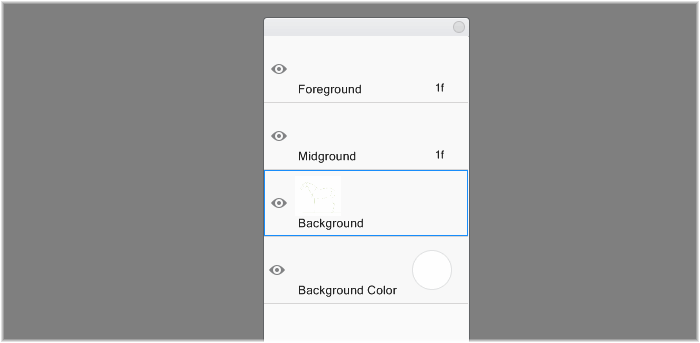
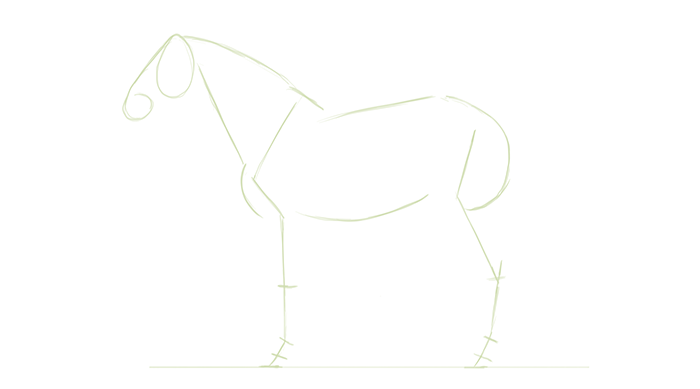
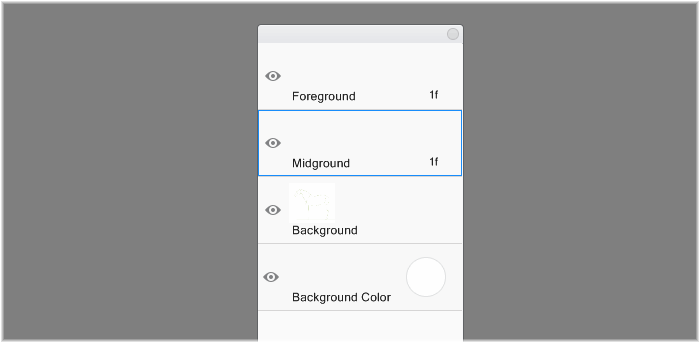
FlipBook has three layers. We’re going to use Background for a reference, Midground for a skeletal sketch, and Foreground for the final frames. For now, select the Background layer.
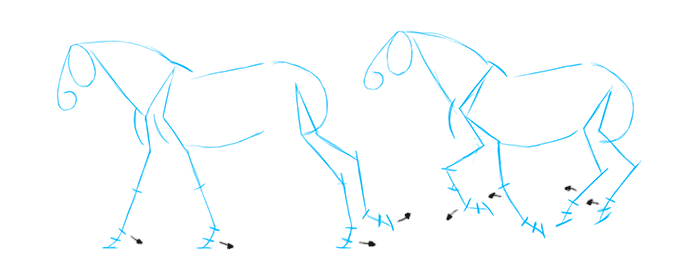
Select a very dim shade of green and sketch the basic pose of a horse. It doesn’t need to be overly clean.
For now we’re on the first frame. All the frames share the Background layer, so the “skeleton” will be visible on each of them.
Select the Midground layer…
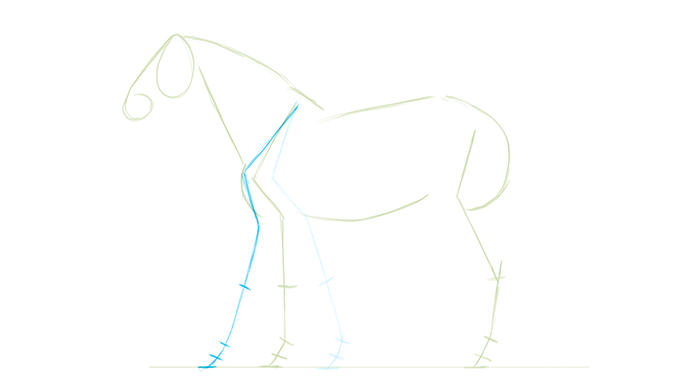
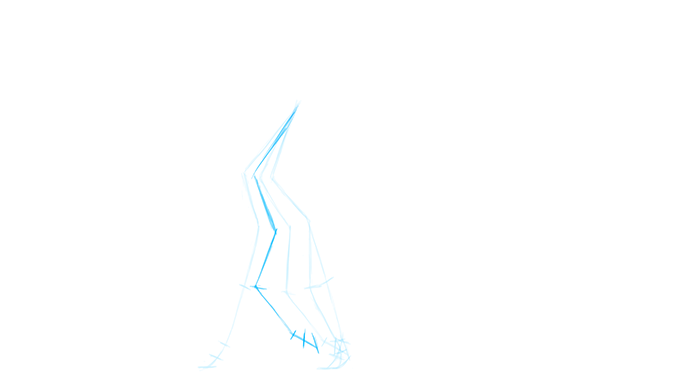
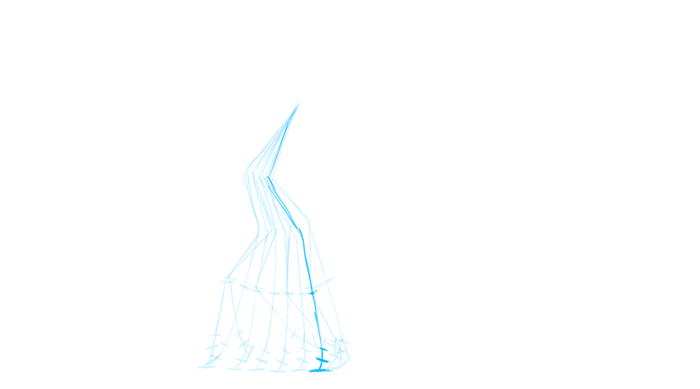
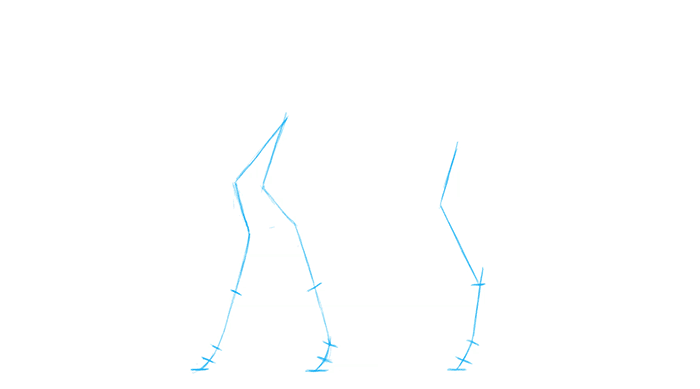
…choose a bright blue (to make it barely visible), and sketch the front limb stretched back – here the horse pushes itself from the ground to gain momentum. The leg can’t go any farther back without losing contact with the ground.
This was the first frame, time to add another. FlipBook has two kinds of frames:
- Keyframes (white) are the frames where something changes
- Empty frames (grey) are the frames where nothing changes (they’re a “filler”, a copy of the keyframe right before them)
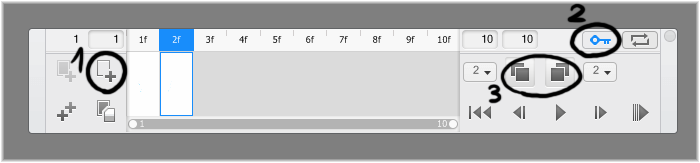
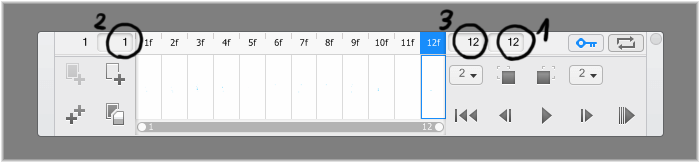
Our animation has only 12 frames per second, so we don’t need to add any empty frames in between. To add only keyframes, make sure the key (2) is blue. Then you can simply click Insert Empty Frame (2) and start drawing – it will become a keyframe automatically.
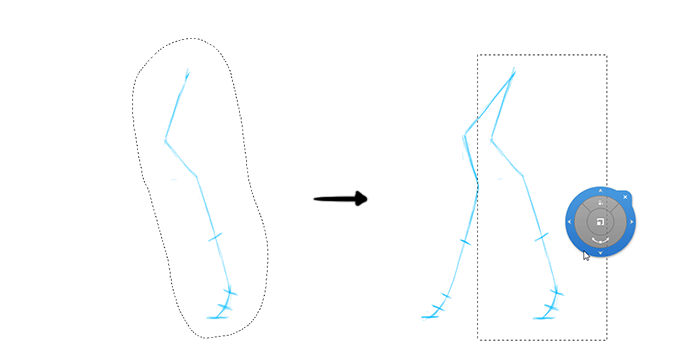
FlipBook has one more amazing function: ghosting. If you select their buttons (3), you’ll see “ghosts” of the other frames to create a precise, smooth transition. You can turn it on and off whenever you want, and adjust the range of ghosting as well.
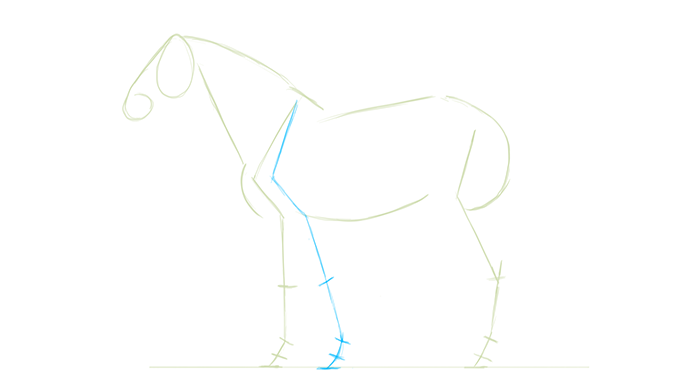
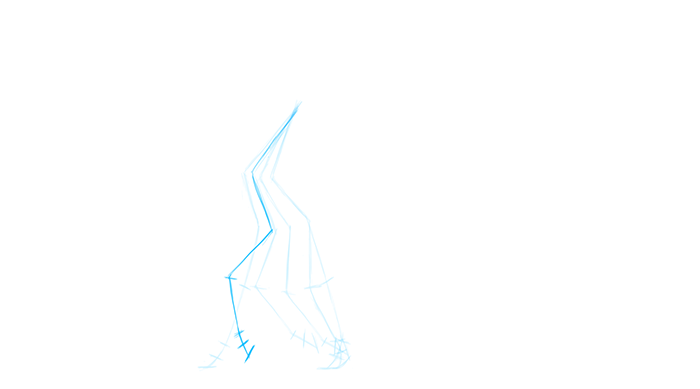
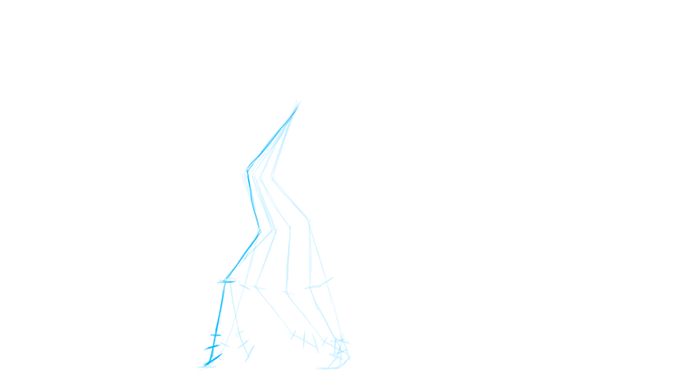
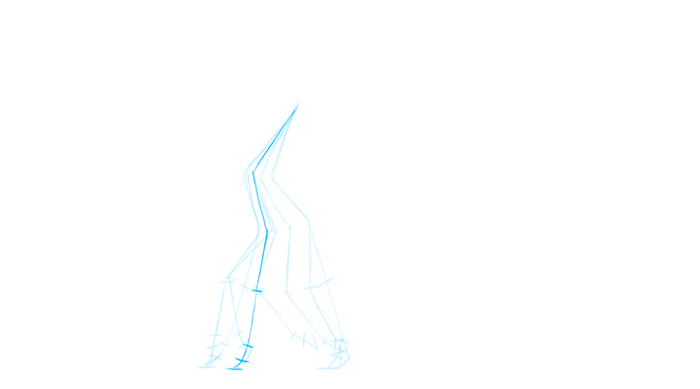
So, create a new keyframe, make sure you’re still on the Midground layer, and draw the other extreme position: the leg reaching for the ground to push back.
Notice how ghosting helps you see the whole range of motion.
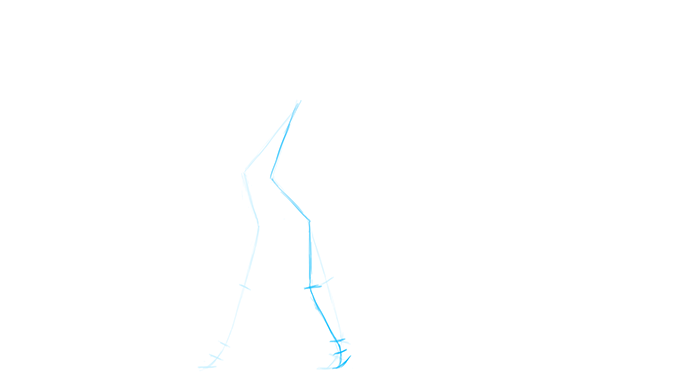
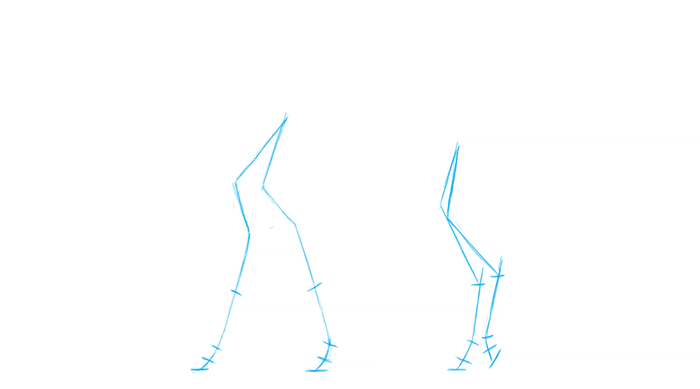
Now we need to draw all the steps in between. Select the first keyframe and create a new keyframe that will land right between these two. Draw the leg losing contact with the ground.
You can hide the Background layer now.
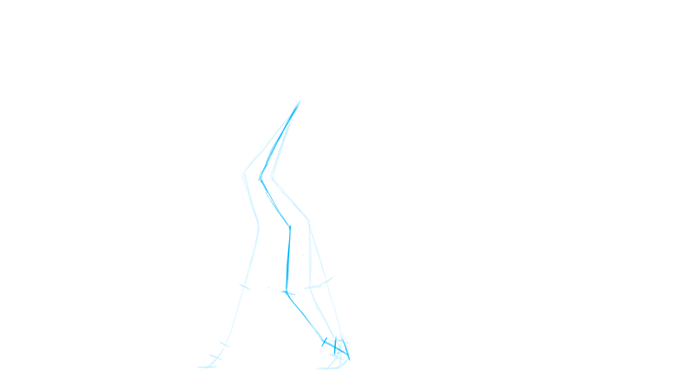
Another keyframe: the leg is in the air and it’s being dragged back to the front.
More…
…and more…
…until it’s right over the ground in the front, ready to touch it. The forward motion cycle is complete!
Let’s go back now. This movement is simpler – just slide the hoof over the ground straight to the back.
Use the same number of frames you have used for the forward motion.
Before you test your animation, make sure it’s set up properly. Field 1 show you the overall number of frames, but the other fields are more important to us: Field 2 shows which frame is the first frame of animation (yes, you can change it!), and field 2 – which is the final one. Adjust the numbers to your animation.
Now you can press Enter to see the motion.

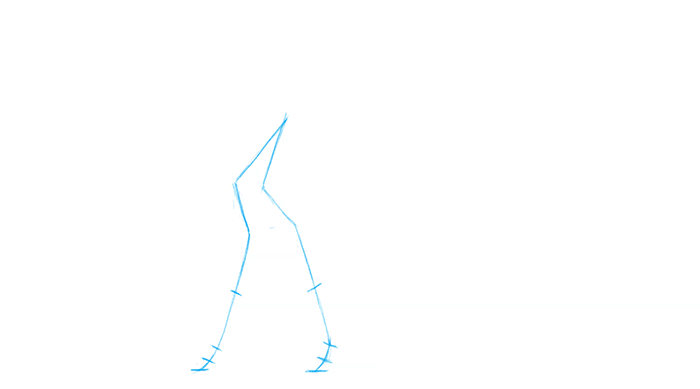
But one jumping leg isn’t enough to make the horse walk. Let’s create the other front leg using a trick to make it faster. Use the Lasso Tool (L) to select the backward reaching leg. Copy it and paste on the frame with forward reaching leg.
Do the same with all the other frames, paring the ones that have the same distance between each other as those two. When you’re finished, your animation should look like this:
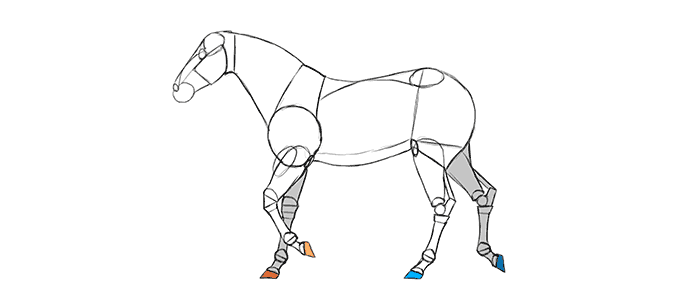
That’s quite neat, but our horse has four legs to walk on! Let’s work on the other pair now. Select one of the frames with both hooves on the ground and draw the hind leg in a neutral position. You can use your Background layer as a reference.

Draw both extreme positions for this leg: both occur when one of the front legs is in the neutral position.

Draw all the frames in between: make the leg go forward, then backward.
Our animation is almost complete!
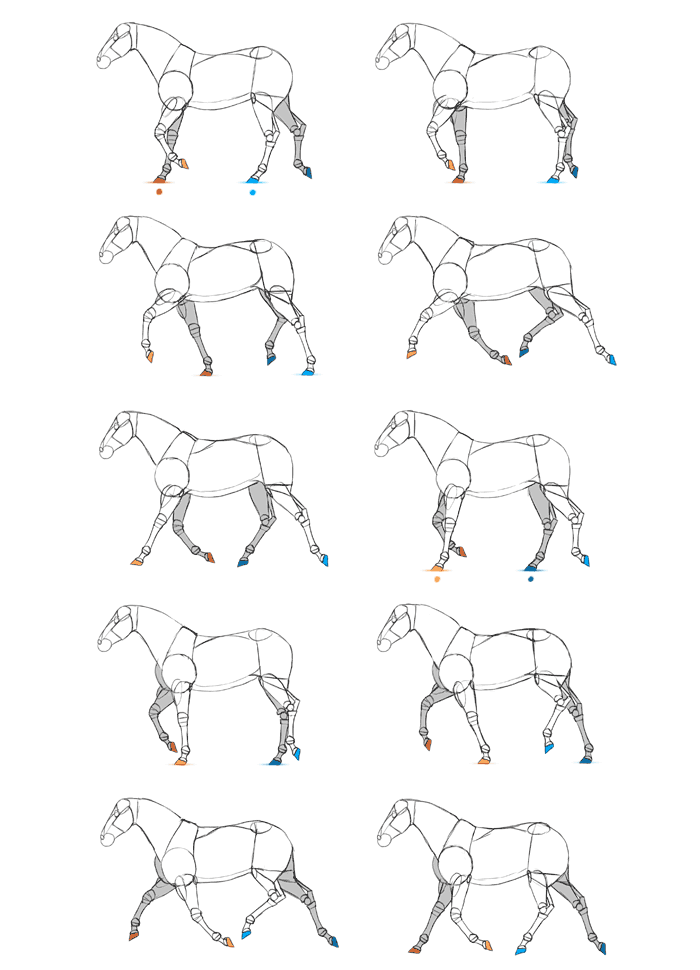
Just like you did with the foreleg, make pairs out of the hind legs.
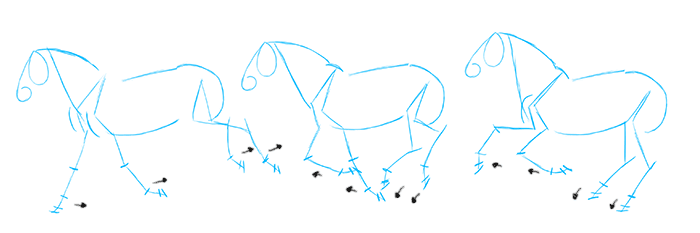
Now we need to consider the fact that two legs are closer to us, and two are farther away. Let’s mark them to see the interlacing motion.
Now we can add the other elements of the forequarters and hindquarters. They don’t stay motionless: the shoulder rotates slightly along with the leg, and both it and the hips move up and down depending on how straight the leg is beneath it. This motion is very subtle in walking gait, but the faster the gait, the clearer it is.
The head doesn’t stay still either. To avoid random rocking, observe the hips: when they’re up, the head goes up and slightly forward. When they’re down, the head goes down and slightly backward.

Now all you need to do is to cover these lines with body on the Foreground layer. Using the diagram I’ve shown you before, draw all the parts one by one. Then simply copy them over other frames, rotate and modify if needed. Hide the Midground layers for all the frames when you’re finished.
Our horse is walking! If you want to save your animation as a GIF, go to File > Export FlipBook and select Animated GIF. If you want to open it in Photoshop, for example to adjust the frame rate, save as MP4.
If this was too confusing, here you can analyze the whole motion again:
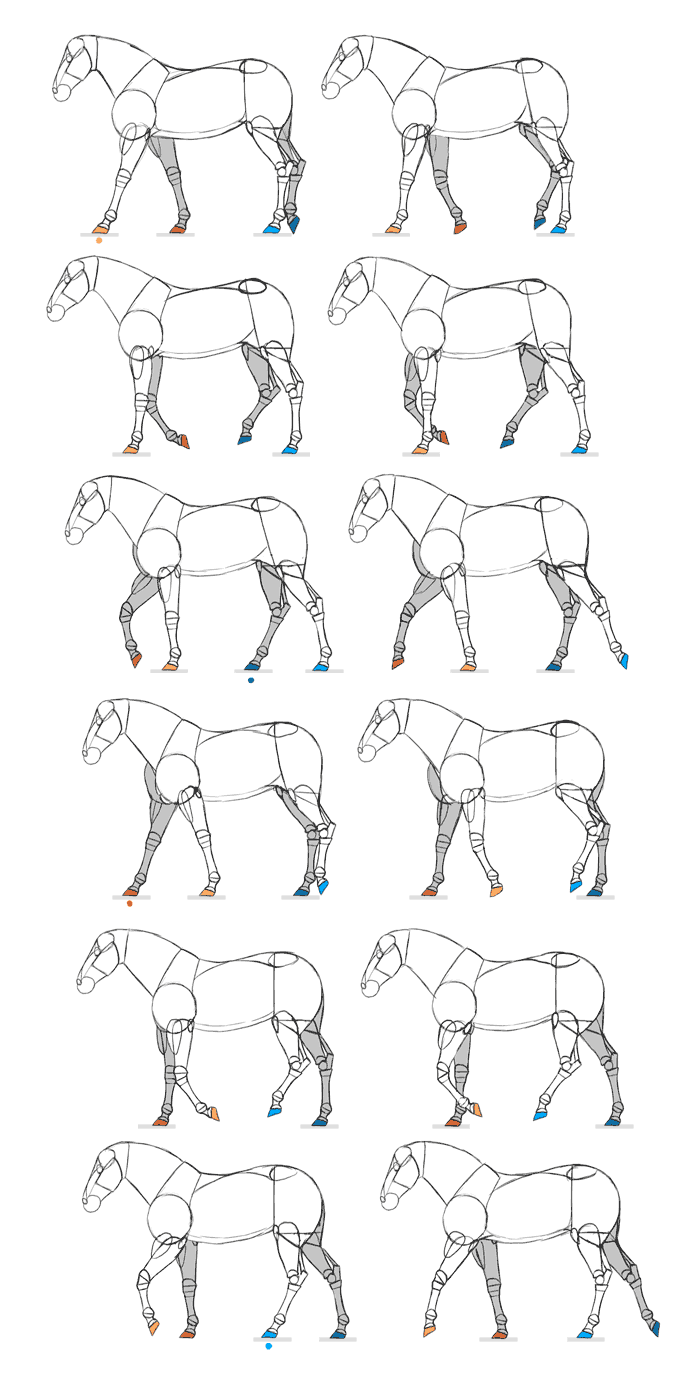
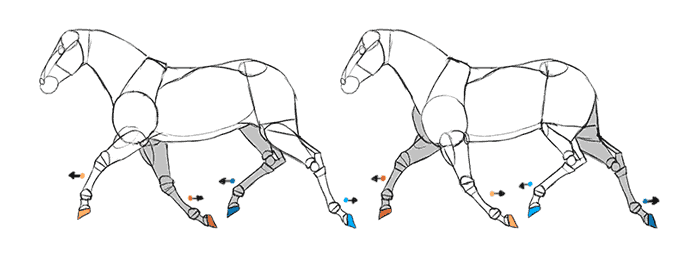
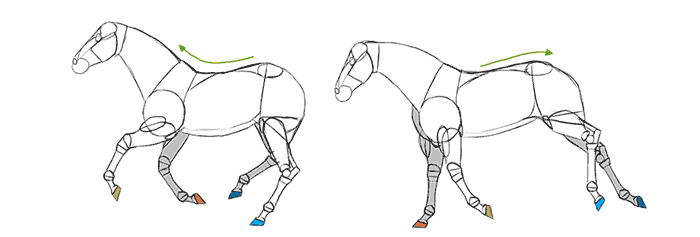
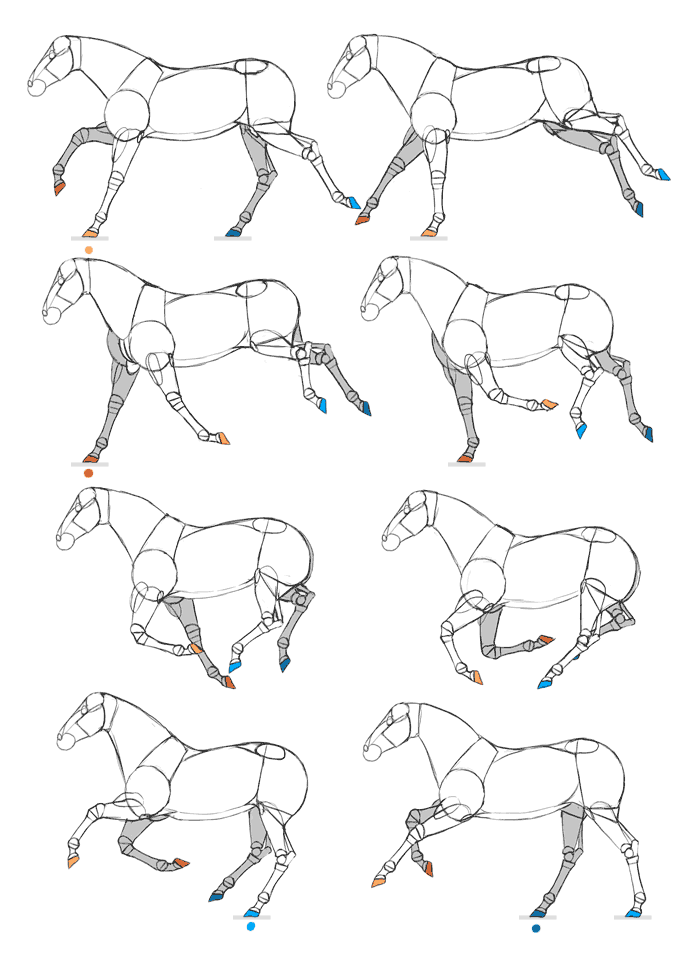
How to Animate Horses: Trot
Trot is a loose gait looking like a quick version of walking. Not all horses can do it, but it’s a very pretty gait suitable for long distances.
You know how to animate the basic movement of a horse now, so I’ll only show you what to pay attention to in trotting. In this gait front leg of one side and hind leg from the other side move in pairs, as if bound. You can make your two base keyframes look like this, and then simply complete them with positions in between.
Your goal is to achieve two “flying” poses during the motion:
How to Animate Horses: Canter
Canter is a quick gait, not so fast as gallop, but still fast. In this motion the horse hits the ground with three beats: first with two hooves, then one, and then the last one.
You can imagine one pair of alternate legs being bound together:
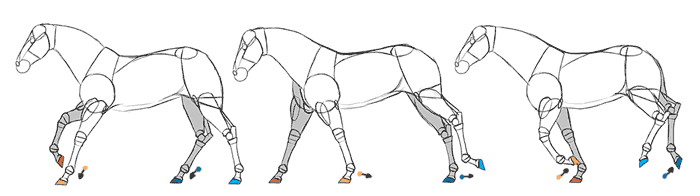
Because canter is so fast, the motion of head, shoulders, and hips will be very visible here:

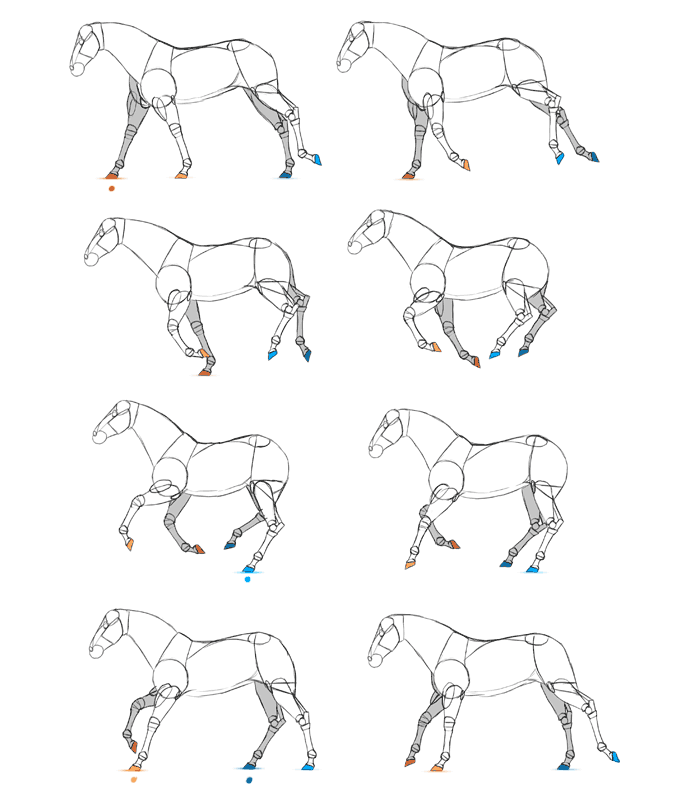
How to Animate Horses: Gallop
Time for the most beautiful of gaits: gallop. It’s very similar to canter, except all the hooves touch the ground separately, one by one, and the limbs are being extremely stretched/compressed whenever the direction changes.
That’s Not All!
You have learned how to animate horses and how to draw a dynamic horse form, but it’s just a base of drawing. Stay tuned for the next part, where we’ll take a look at proportions, muscles, details, breeds, colors, and many more details for drawing horses. In the meantime, your assignment is to draw horses from photos using the simplified skeleton and simple body masses. This will let you draw them from imagination.

1 Comment