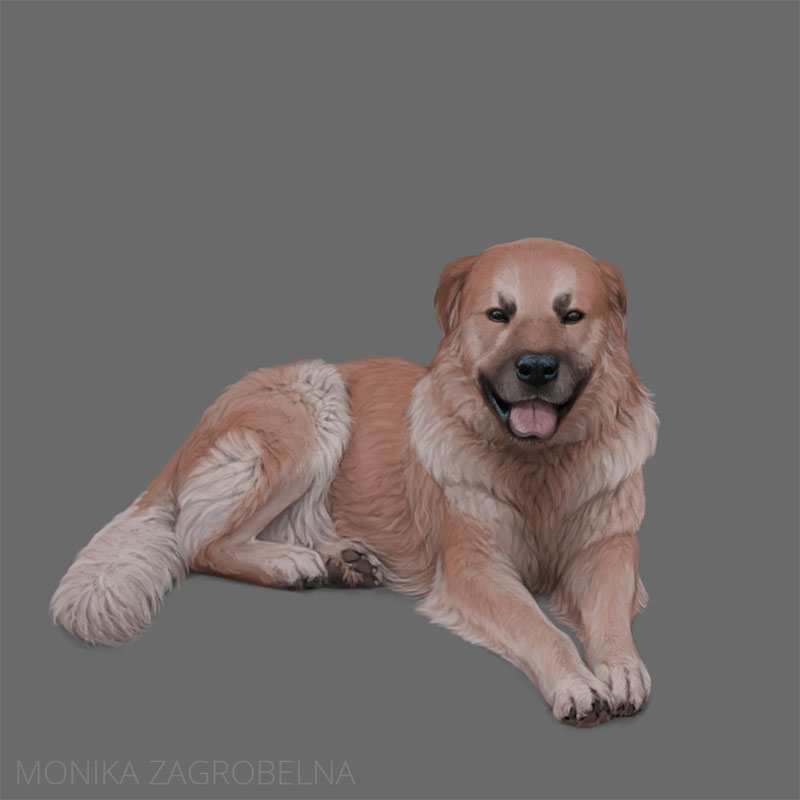
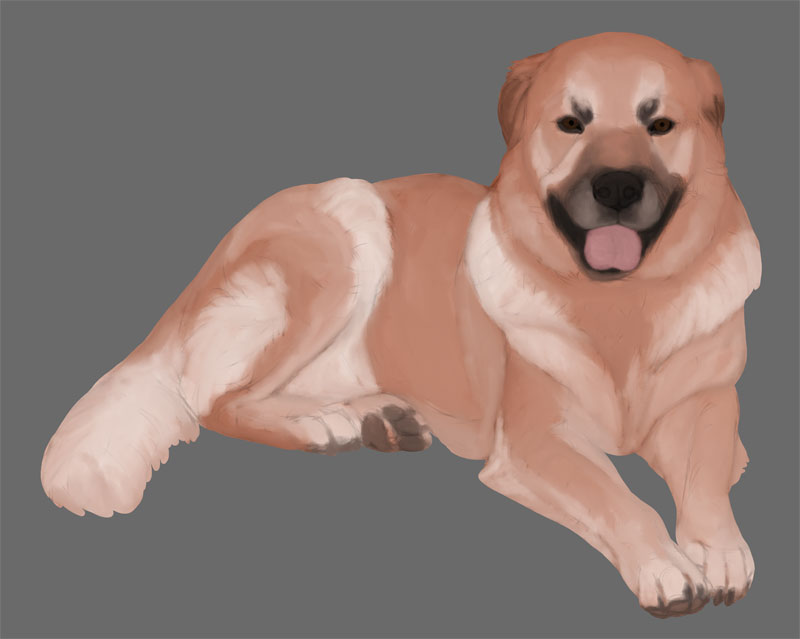
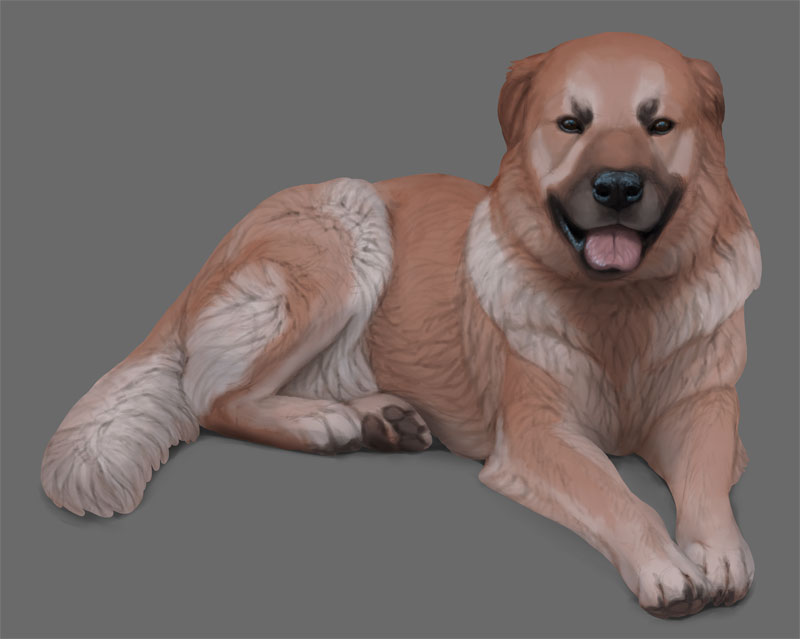
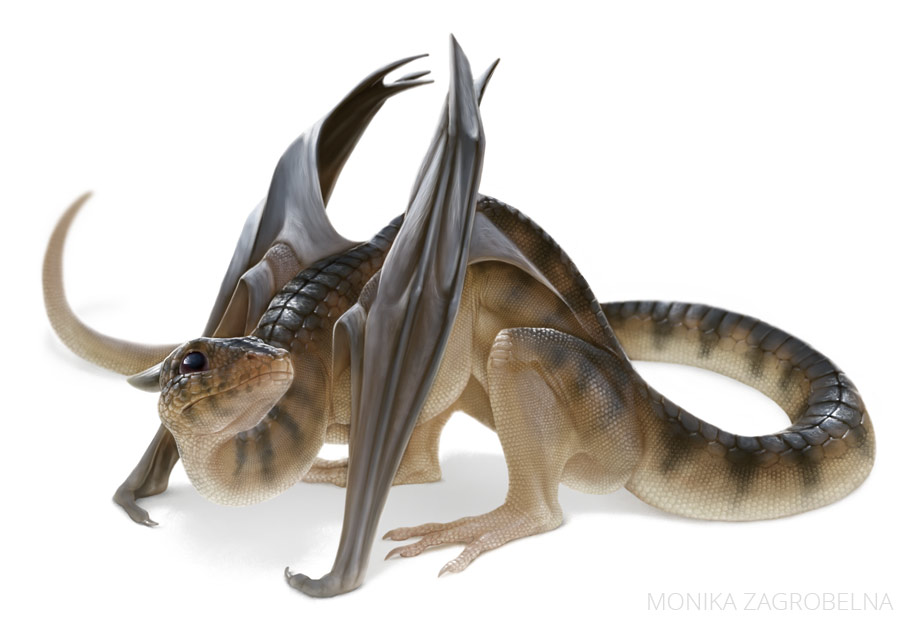
When you paint fur, what you’re actually doing is painting the shadows between the strands of hair. These shadows appear even if the light is weak and ambient, so you can paint them before you decide on the direction of the main light source. In this tutorial I’ll show you how I “sculpted” long fur by painting the shadows created by ambient light.
The main technique I’ll be using here is based on Blend Modes. You can read more about Blend Modes here. And here you can find the reference I used.
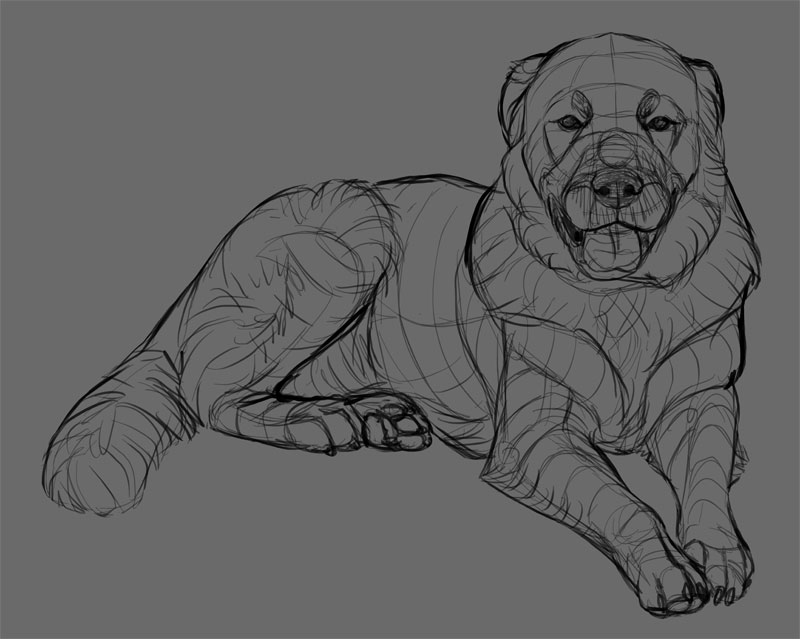
1. Draw the Sketch/Line Art
Create a New Layer and draw your sketch. Don’t draw the details of the fur, but mark its direction and define the big form it creates.
2. Add the Colors
Lower the Opacity of the sketch and create a New Layer underneath. Create a filled silhouette of the subject (you can use the technique I showed here). Lock Transparency of this layer and paint the colors of the fur without any shadows.
Remember to mix different shades—even if the subject looks “brown”, use more than one shade of brown and blend them roughly. Use a painterly brush that isn’t very precise, but blends naturally.
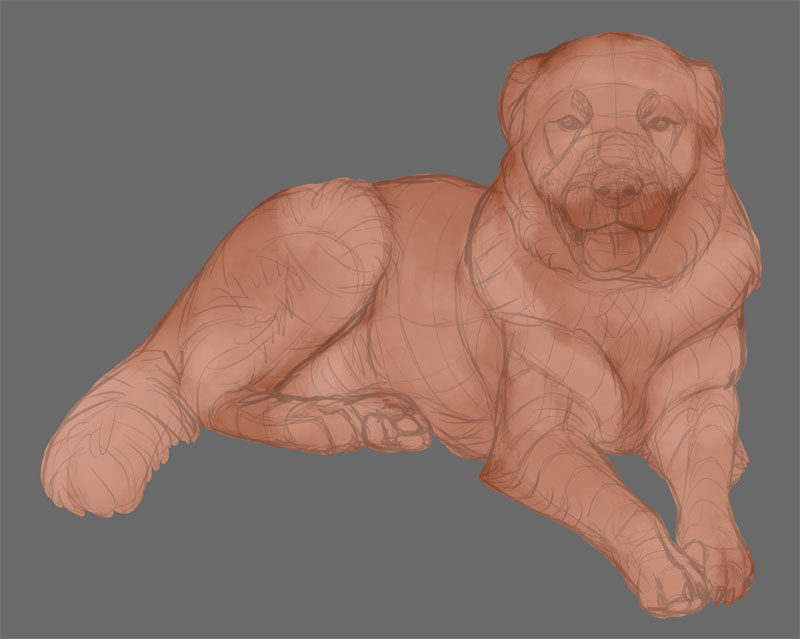
3. Cover the Line Art
Merge both layers and keep the Transparency locked (you can keep a hidden copy of the line art). Cover the lines by painting over the area with a color picked from that area. Pause often to pick the color and paint small areas to avoid overly smooth blending.
Do your best to not add any shadows! Imagine that you’re building a sculpture out of clay of different colors.
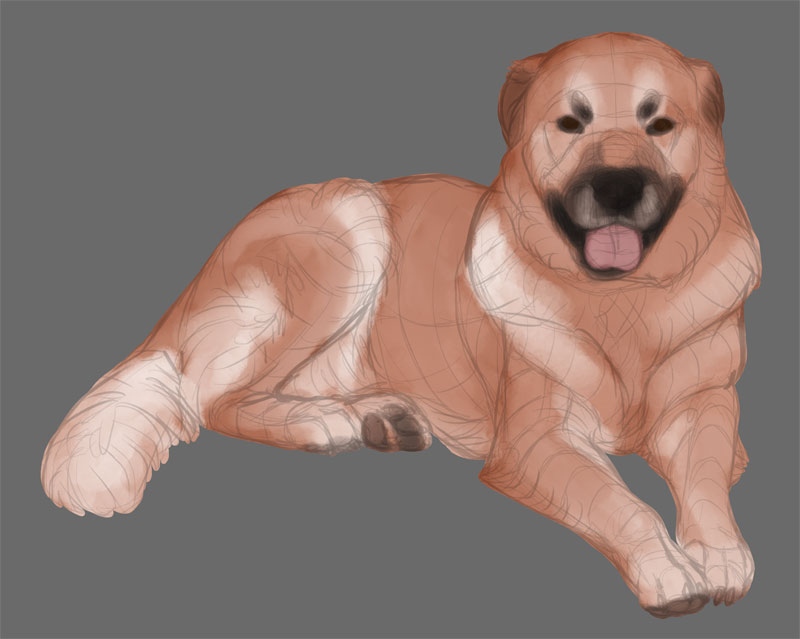
4. Add Basic Ambient Shadow
Create a new silhouette layer (you can copy the previous one and paint it with one color). Fill the silhouette with a slightly darker version of the color of the ambient light (if the ambient light comes from the sky, make it light blue). Then make it as bright as it should be, and paint over the areas that face the light source.
Some parts of the body may cover each other, creating small, dark shadow. Select these areas with the Lasso Tool and use a soft brush/an airbrush to add dark grey to it. This shadow should have no saturation, because the colored light doesn’t reach these areas.
To see what you’re doing, you can use a copy of the line art, lower the Opacity of the layer, or change its Blend Mode to Multiply. When you’re done, keep it in the Multiply mode.

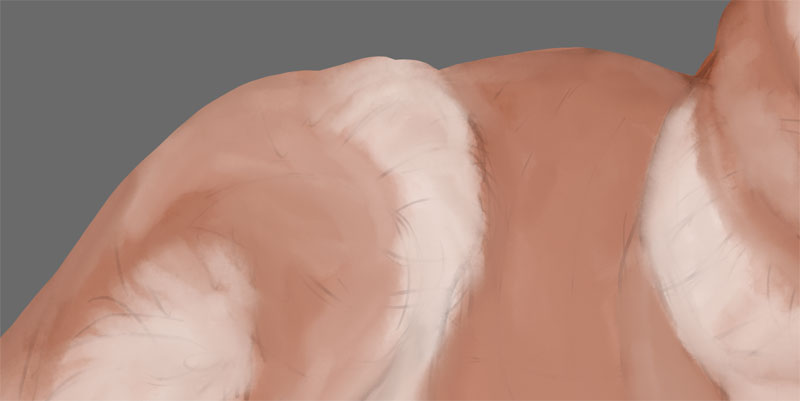
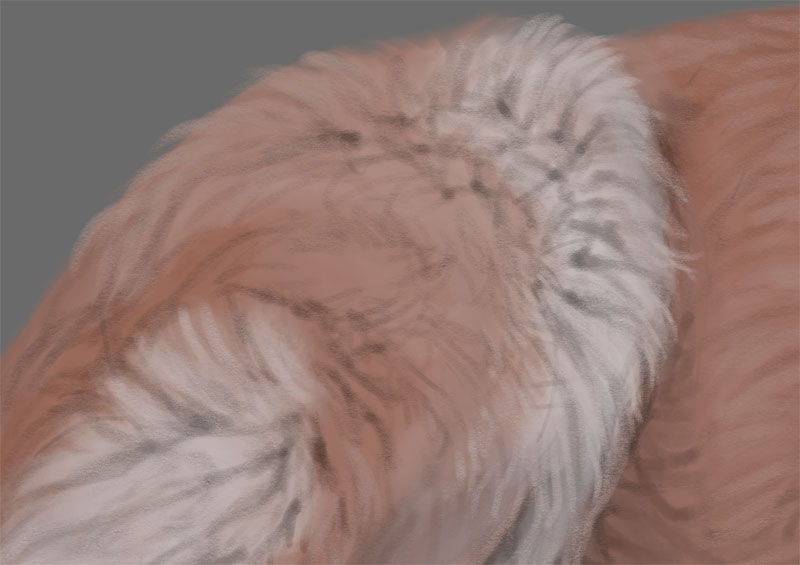
5. Add the Fur Shadows
Time for the micro-shadows of the fur! Take a small and precise brush, that changes its opacity with pressure. I used a brush that pretends to be a pencil—it has a subtle texture that makes the lines less obvious and more natural. First outline the strands of fur slightly, then darken the areas between them. For shadows use different shades of gray, and switch to your original color of the light source when you need to remove them.
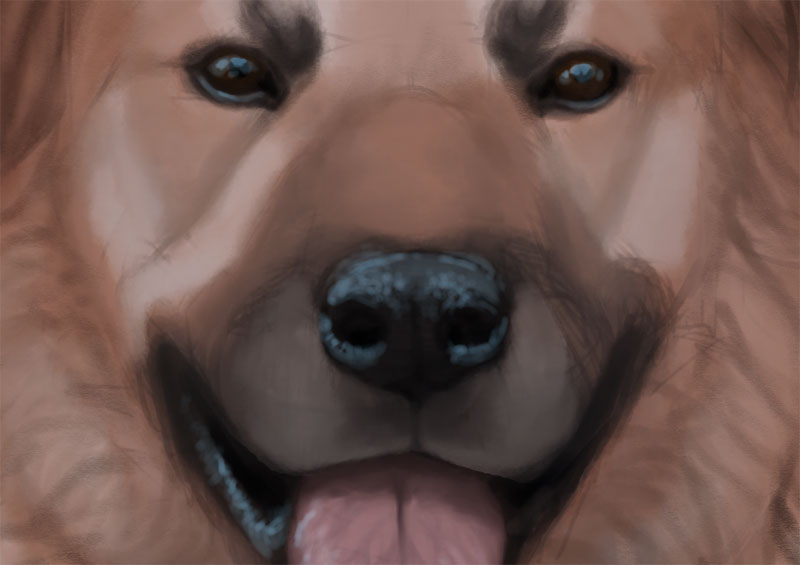
At this stage add the shadows to the details as well—the mouth, nose, and eyes.


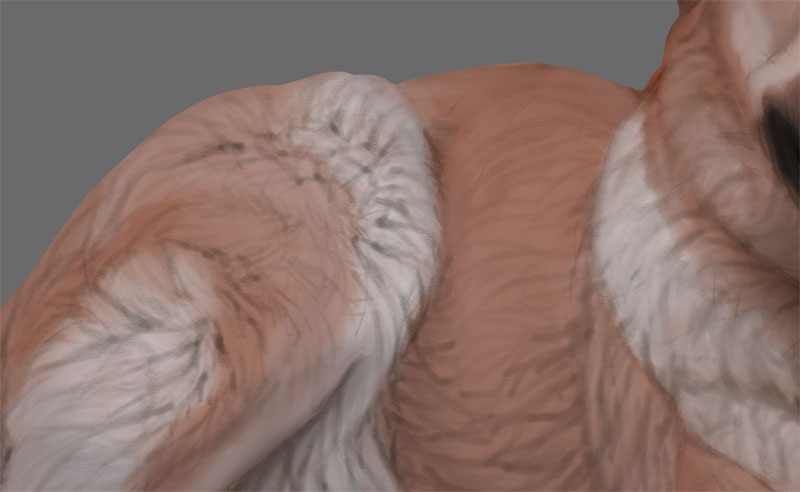
6. Add the Highlights
There are certain areas in your drawing that will reflect the light source in the specular way—brightly and sharply. Create a new silhouette shadow filled with black and use a small brush to paint these tiny reflections with the color of the light source. You can also use this stage to add a subtle sheen to the fur, but only in parts where it’s flat—and use a dark version of the color for this purpose.
To see what’s beneath, change the Blend Mode to Screen.

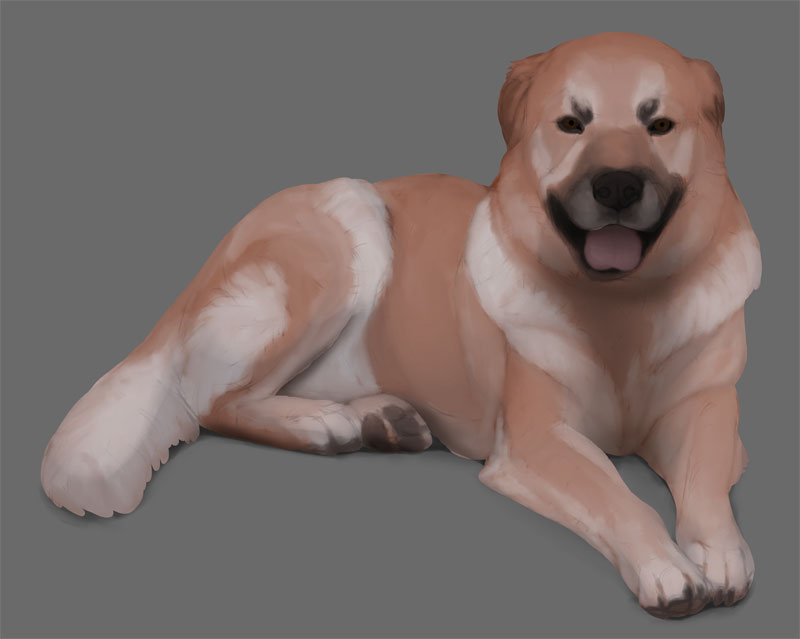
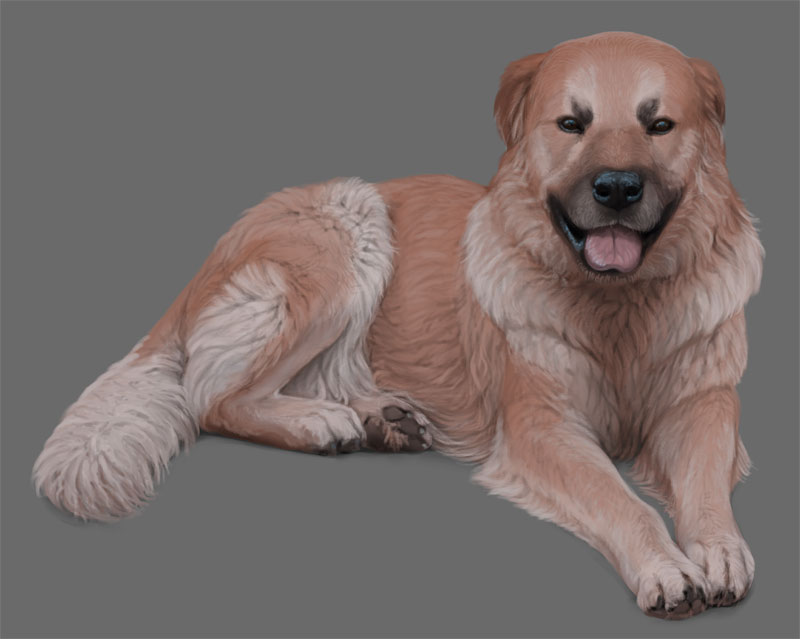
7. Add the Details
If you want to add a directional light source to the image, this is a good time. Paint this new light with white in the Multiply layer to reveal the original color of the subject, or create a new silhouette layer in the Screen mode to add a strong, harsh light, perfect for rim light.
Finally, merge the layers and paint the details, using only the colors picked from the image. Now you have a chance to paint strands of fur over the harsher edges, and even add individual hairs in some areas for a fluffy effect.
More Info
- Tools: iPad 9.7″ (6th gen), Apple Pencil
- Software: Autodesk SketchBook, mobile version
- Time: about 6 hours
Other Tutorials You May Be Interested in:


0 Comments