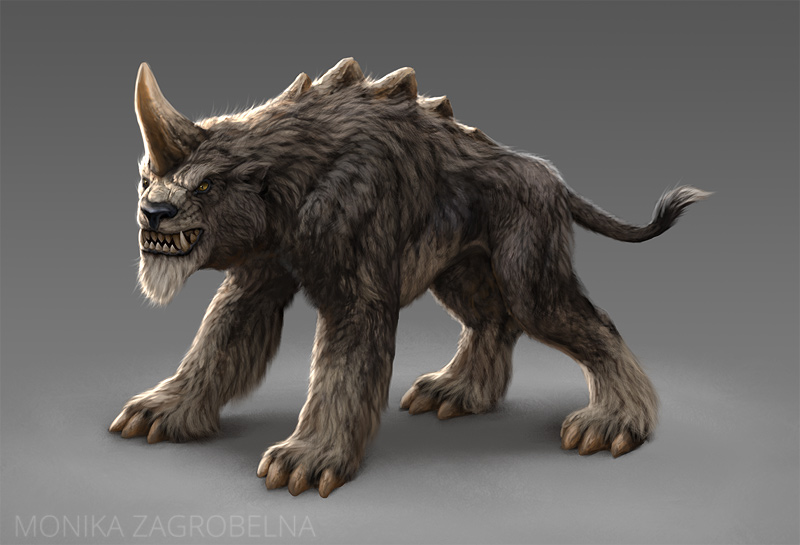
Gothic was the first cRPG game I’ve ever played, and since then nothing really came close to it. Its world felt truly alive, not only thanks to the human characters, but also the variety of realistically designed creatures.
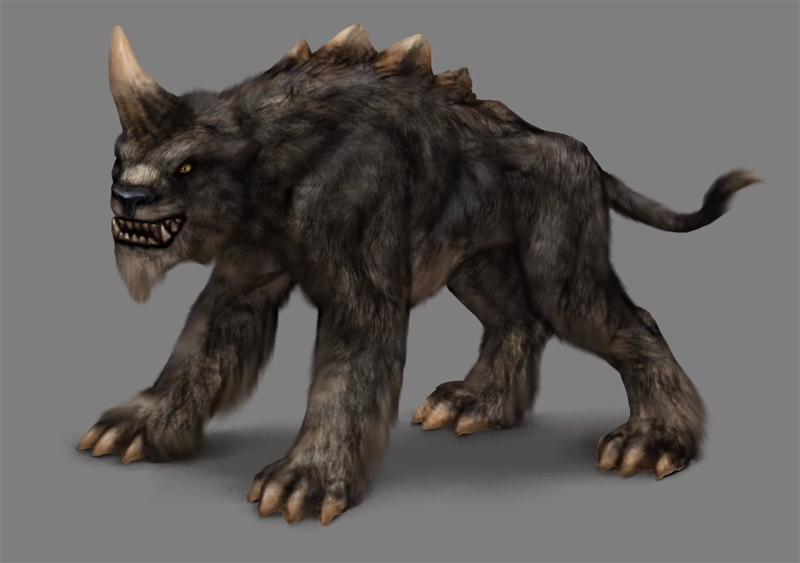
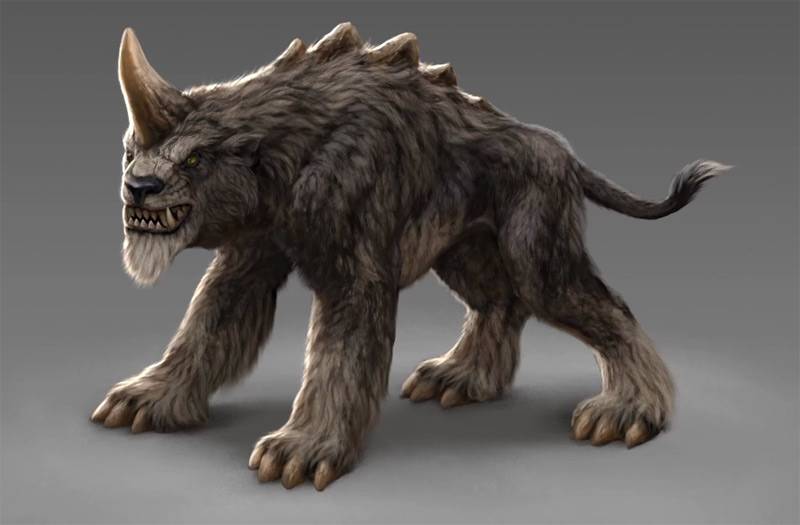
Shadowbeast was the scariest of them—I still remember the awe I felt when seeing it for the first time in a dark forest. The biggest predator in the game, with intimidating growl and huge claws, has captured my imagination immediately.
Today I’d like to share my appreciation for its design by drawing a fan art of the shadowbeast—and teach you a couple of tricks by the way!
If you want to see the whole process in a video form, you can find it on my YouTube channel:
Fun fact: in Gothic it’s possible to turn into every creature in the game. So if you like playing as an animal—for example hunt with the rest of your pack as a wolf, or attack the city with a swarm of giant spiders—this is the game for you! If you’re scared of the outdated graphics, Gothic 2 looks better and has a bigger world (and dragons!).
Ok, enough fangirling, let’s get to drawing!
Sketchbook Brush Pack
If you want to follow my process, here’s a collection of brushes I used:
1. Drawing the Line Art
Step 1
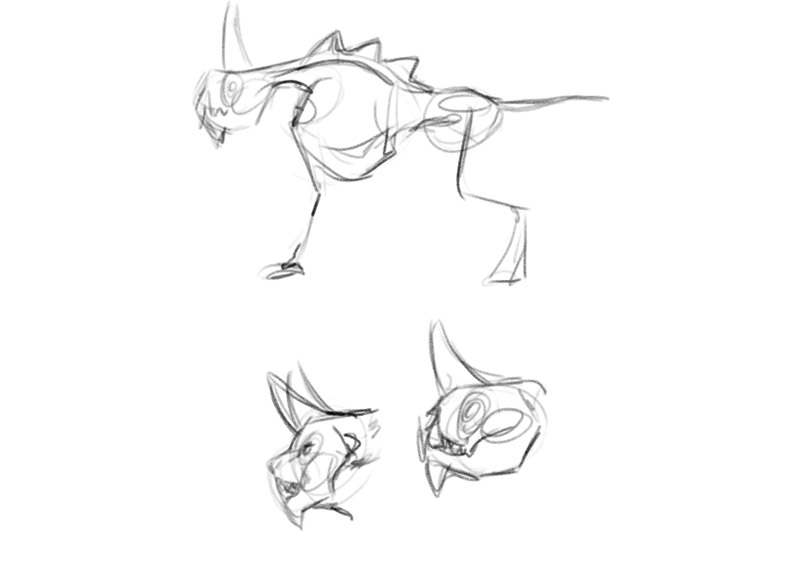
Because this is the first time I’ve ever drawn this creature, I’ve done a mini study of it first. I launched Gothic 1 and 2, brought the shadowbeast in front of me with the help of the cheat codes, and took some screenshots for a reference.
Then I did a couple of sketches, trying to get a basic idea of how the animal is constructed. It wasn’t easy, because the shadowbeast is neither a feline nor a canine—it has its own unique proportions that are not as easy to capture as it might seem.
Brush used: Sketch 1.
Step 2
I’ve sketched the pose first. I decided to go for a straightforward “aggressive stance”—drawing this creature for the first time is going to be challenging enough, there’s no reason to make it any more complicated!
Step 3
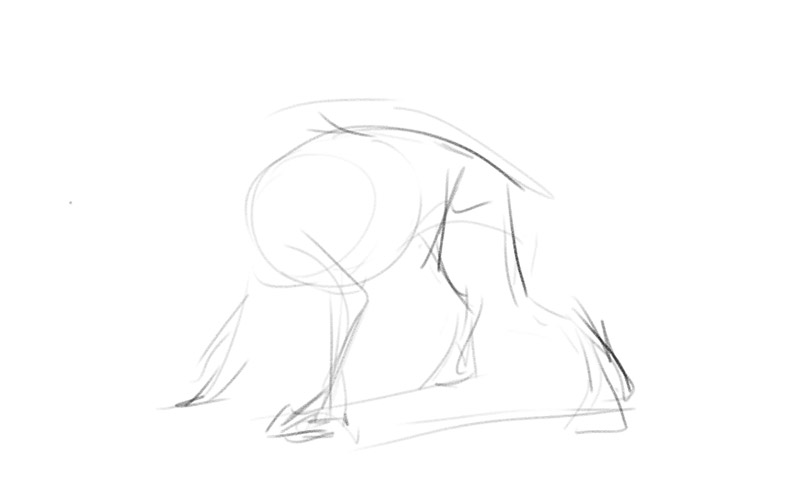
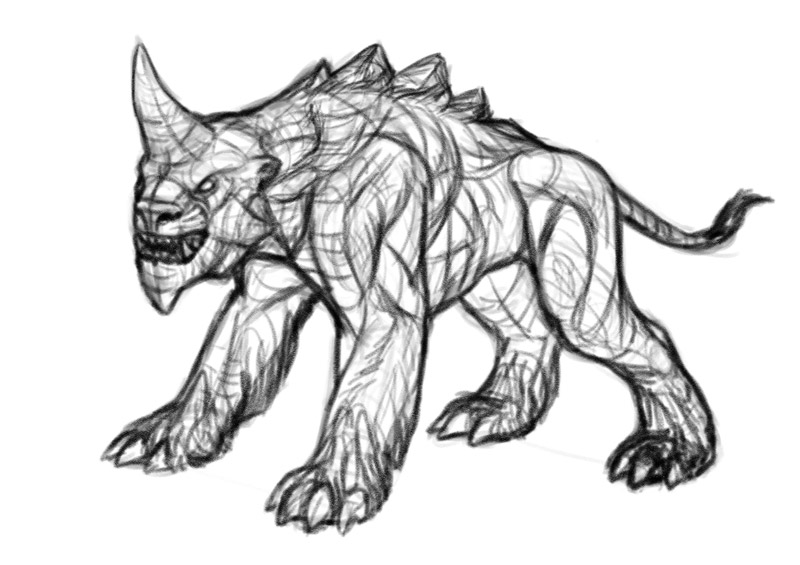
After lots of drawing and redrawing, I finally managed to capture the correct proportions and general forms of the body. Do you see this mess of lines? That’s a clear sign I didn’t know what I was doing.

Step 4
I’ve lowered the Opacity of the sketch and drew a new, cleaner sketch on a new layer. It’s still not very detailed, but I wanted to make sure I haven’t left anything to imagination.
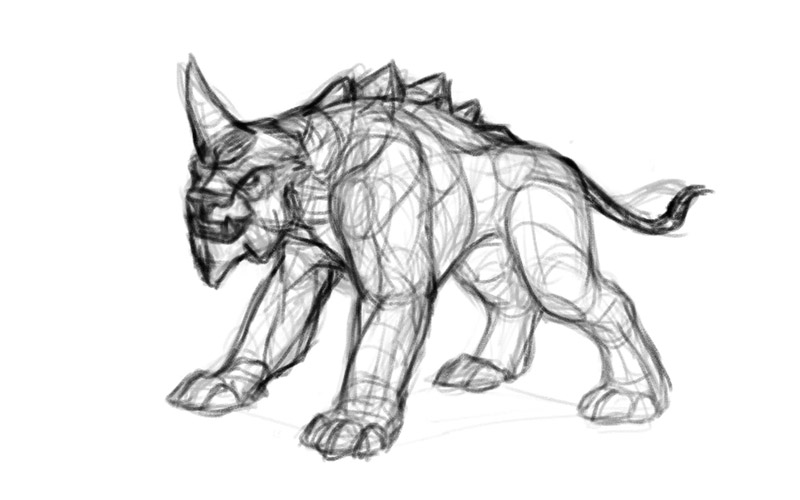
Step 5
I’ve repeated this process—lower Opacity, new layer, new sketch. This time I focused on the details—even though this sketch isn’t very clean, I considered it my line art.
Brush used: Sketch 2.
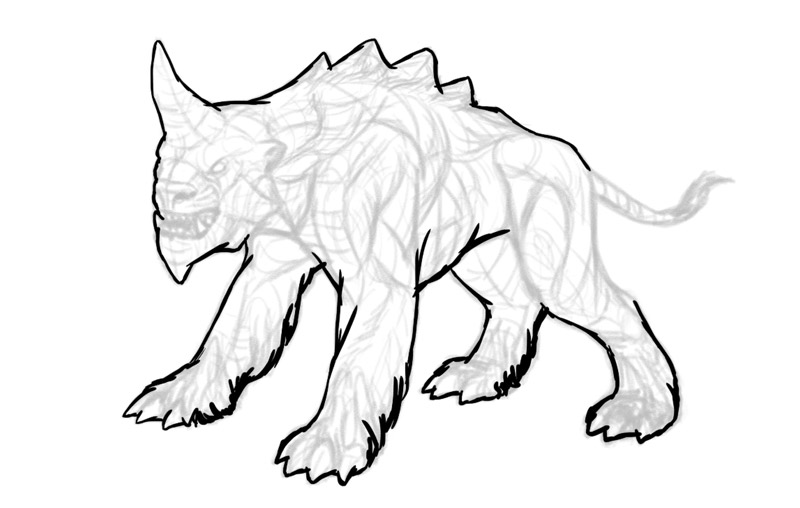
2. Adding the Basic Colors
Step 1
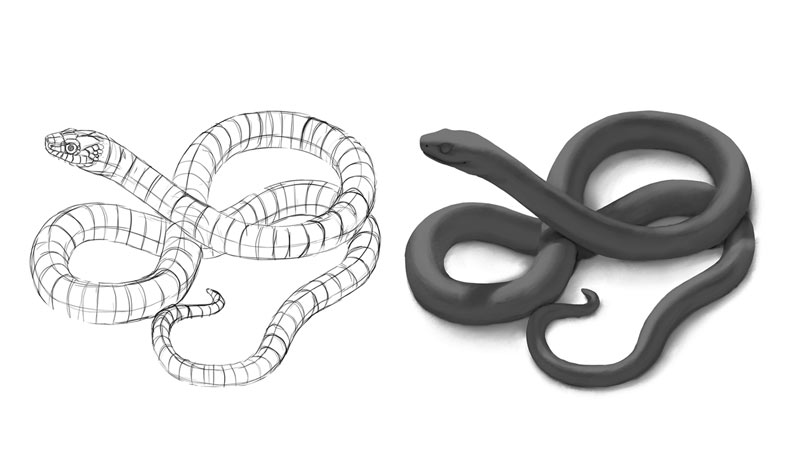
I’ve created a new layer and draw the outline of the body with a sharp brush to create a clipping mask. I’ve described my method of creating the mask here, in the section 3.
Brush used: Inker.
Step 2
Before I get to coloring the fur, I like to draw the details on a separate layer. This way I don’t have to worry abut them when painting the fur.
Brush used: Painter.
Step 3
Time for the fur! To make the fur look detailed, it’s good to use a brush with a scattering effect. In reality even if the fur looks grey, it has a mix of different shades in it. So mixing the colors with a brush like this will help you replicate this effect.
Brush used: Scattering.
Step 4
After capturing the general color of the fur, add the other areas of color. Use a loose brush, don’t make it too detailed yet.
Brush used: Chaotic.
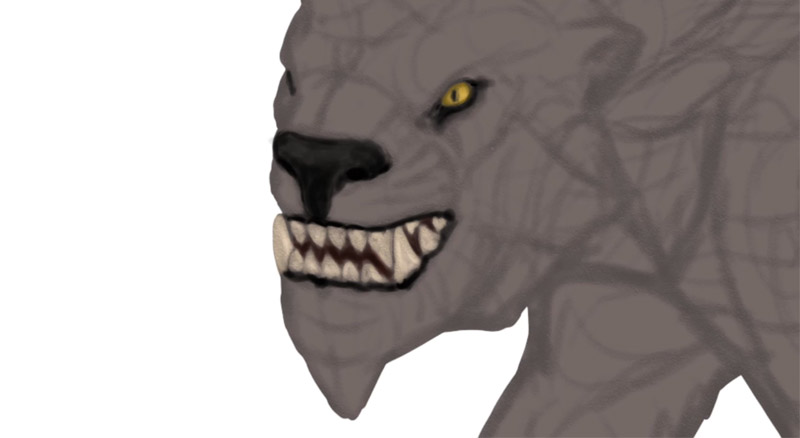
3. Shading
Step 1
I’ve duplicated the main layer and changed its Blend Mode to Multiply. Then I filled it with grey—my main shadow.
Step 2
I took the Lasso Tool and selected the areas that the light has a hard time reaching. Then I took a soft brush and painted over them with a darker grey.
Brush used: Soft.

Step 3
I switched to white and painted over the areas facing the light source. So to paint the light, I just remove the shadow!
Brush used: Painter.
Step 4
I’ve painted with lighter grey on the bottom, to add some reflected light.
Step 5
Adding the cast shadow makes the creature look more 3D. If you keep it blurry enough, you won’t have to worry about its actual shape.
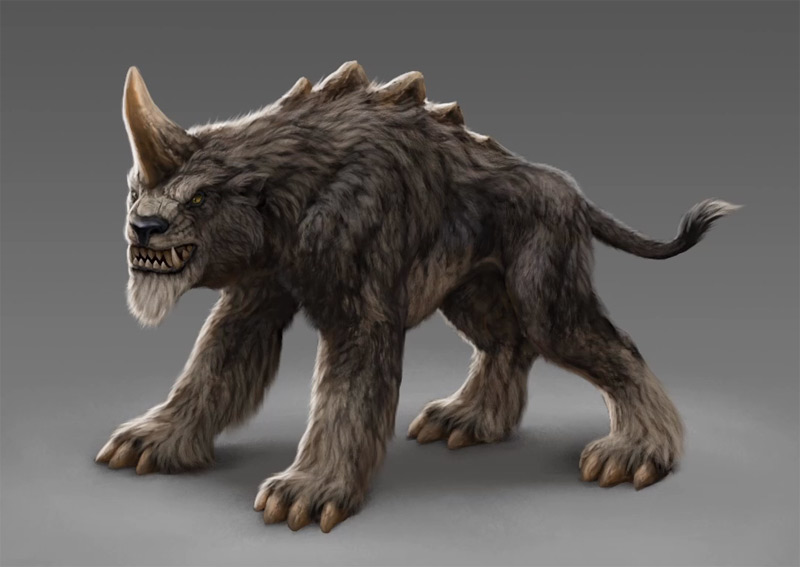
4. Adding Texture and Shine
Step 1
The shadowbeast has thick, shaggy fur. To make it easier to draw, I decided to use a fur texture brush. Here’s how to create a photo texture brush, and here’s the photo I used.
Brush used: Wolf.
Step 2
Changing the Blend Mode to Soft Light helped me reveal the colors under the fur texture, while also keeping its shadows.
Step 3
A painting shouldn’t have the lines of the line art visible on it, but when I remove the line art, something is missing. To keep the information added by the line art without disturbing the painterly character of the artwork, I smudge the lines, turning them into precise shadows. I also erase the lines in the areas where the shadows are not needed.
Brush used: Blender.
Step 4
To make sure the artwork has a proper contrast, it’s good to see how it looks on a white, black, and grey background. After I did this, I decided to keep the grey one.
Now, time for some shine. The fur of the shadowbeast is pretty matte, but it can still use some brightening. I’ve duplicated the shadow layer, filled it with black, and changes its Blend Mode to Screen. Then I accentuated the angles on the illuminated surface. The smaller the shine, the brighter it can be.
Brush used: Painter.

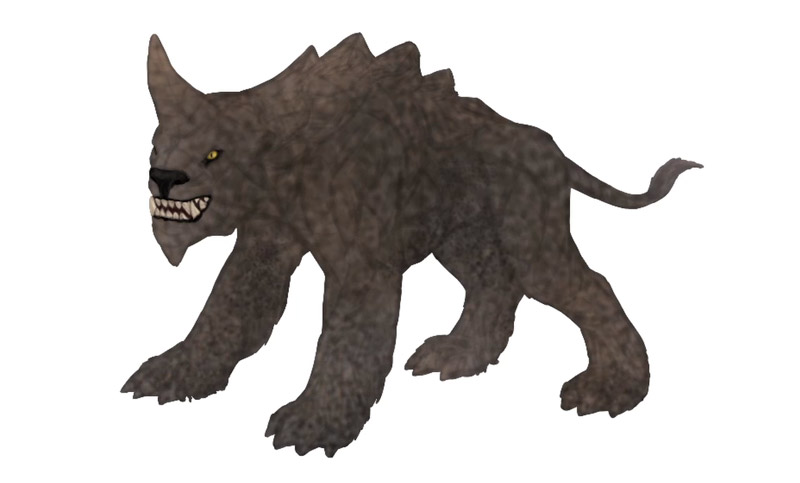
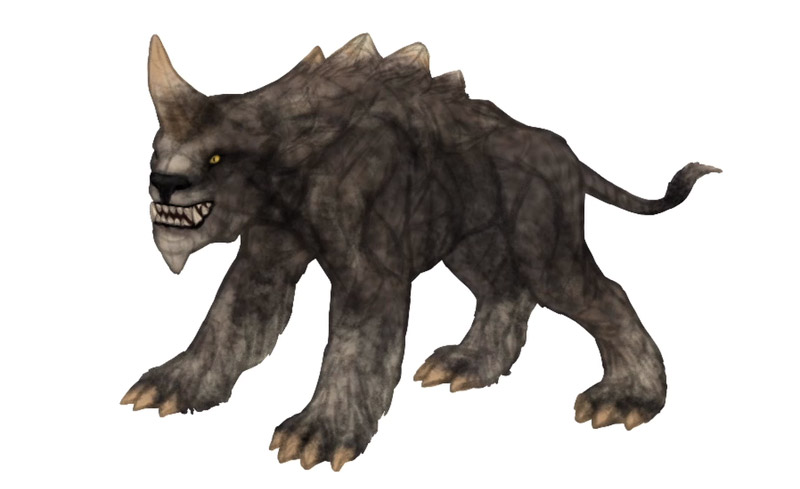
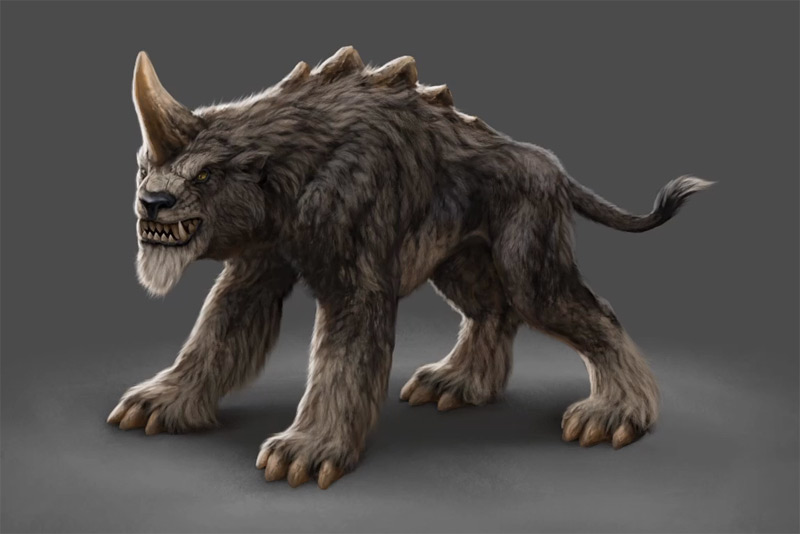
5. Adding the Details
Step 1
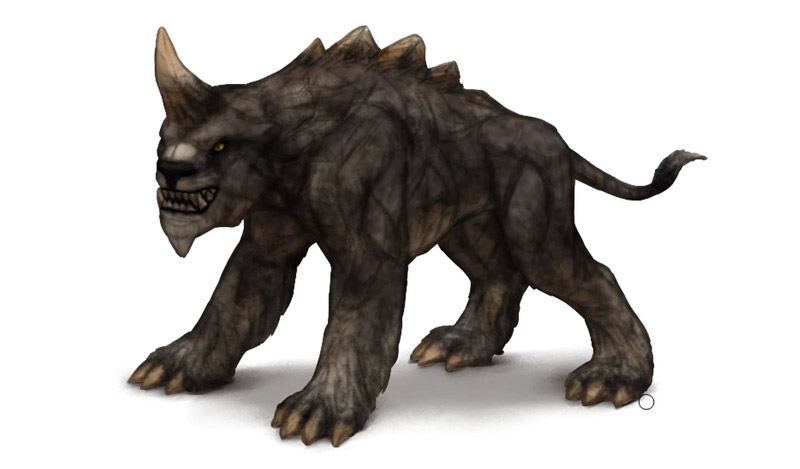
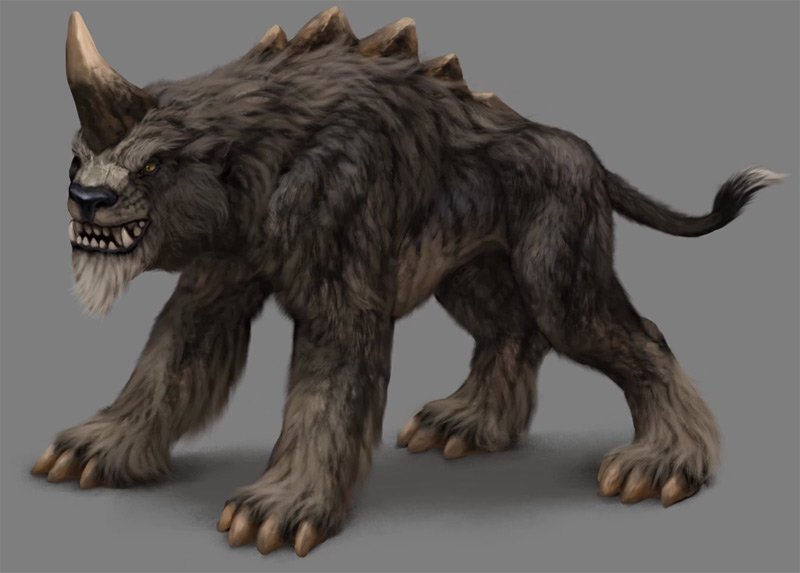
My shadowbeast now looks almost like its poorly shaded, low-poly 3D model in the game, but it’s a good start! Now I “only” need to add some details that will make it look more realistic.
First, I’ve merged all the layers except the cast shadow. Then I resized the image to 6000 x 6000 px—enough to fit all the necessary details.
The first thing that creates that “low poly 3D model” look is the hard edges of the body. This is easy to fix—I dragged the smudge brush over them to create an illusion of fur.
Brush used: Fur Maker.
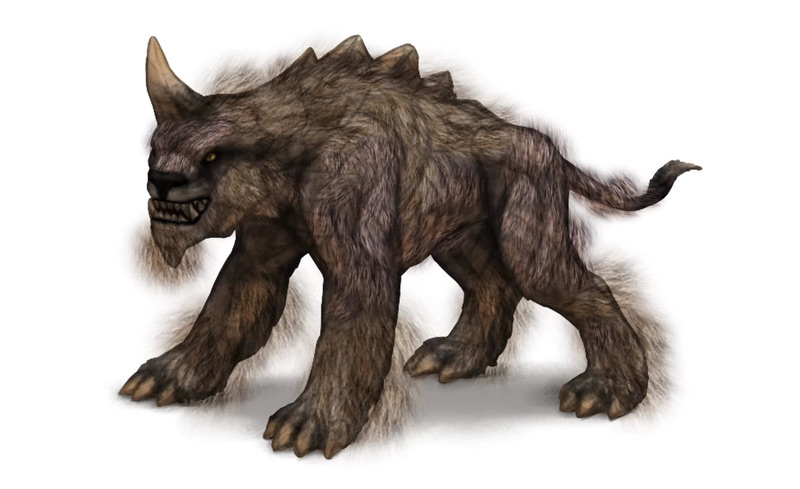
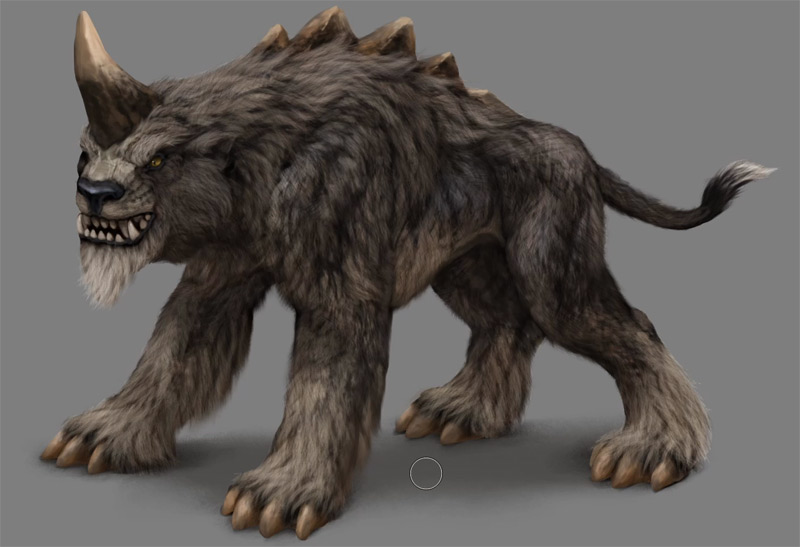
Step 2
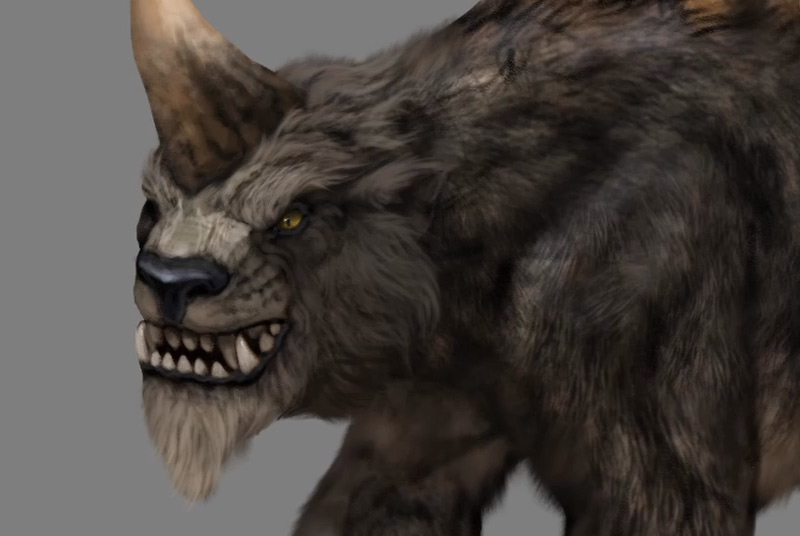
Time to zoom in and start painting the details manually! There’s no shortcut here—if you want a detailed artwork, you need to paint these details. I usually start with the head, because it’s relatively easy to tell when it’s finished. Then I use it as a point of reference for the rest of the painting.
Brush used: Painter.
Step 3
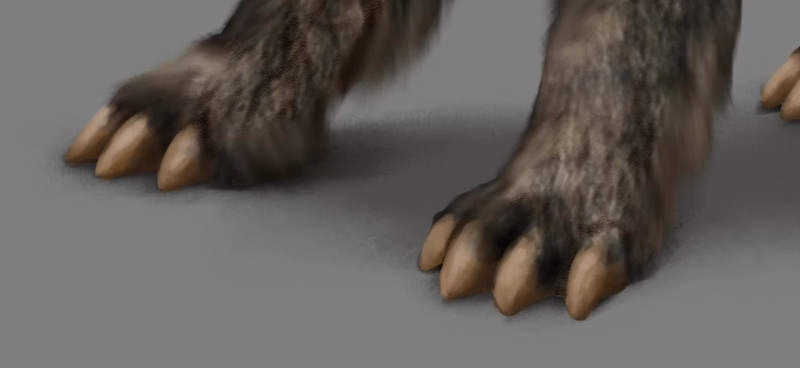
Next I focus on the paws, because, just as the facial features, it’s easy to tell when they look not detailed enough.
Step 4
After I was happy with the head and paws, I moved to the fur. My method of making the fur look more detailed is pretty simple: I draw the shadows between the tufts of fur, then I draw the actual tufts of fur using the color picked from that area. In this artwork I used a fluffy brush to make things faster.
Brush used: Painter & Hair Tuft.
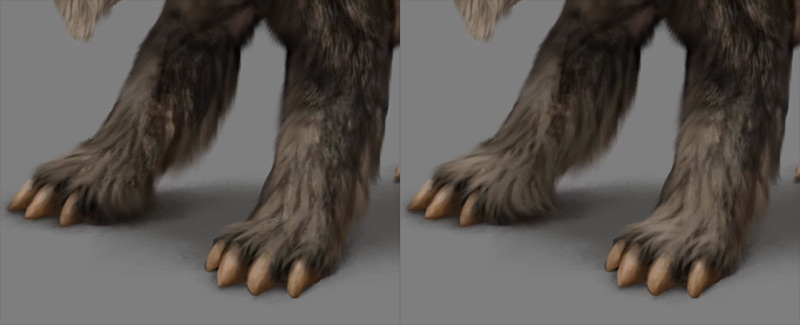
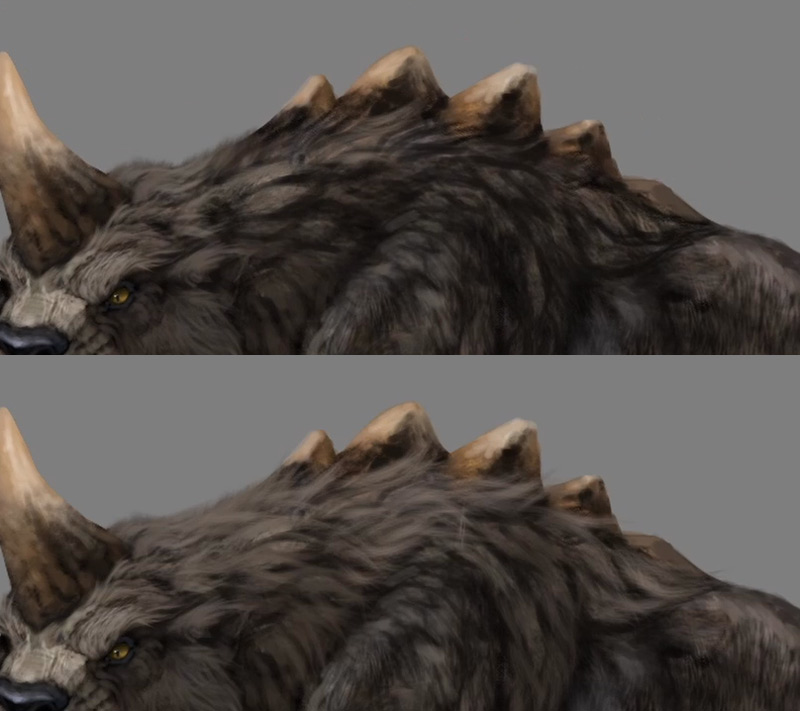
This is how the fur looks after this process.
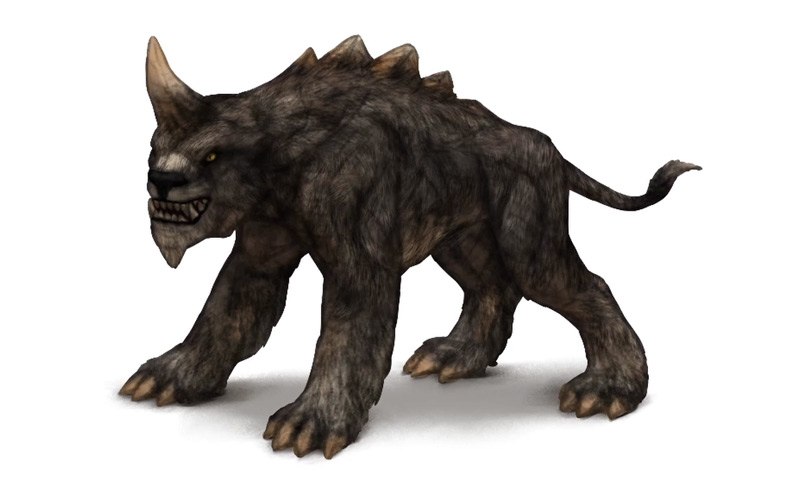
Step 5
To make the fur even more detailed, I used another fur texture brush.
Brush used: Bear.
Step 6
The detailing stage can last for hours—there is no set moment when the artwork is done, you have make the decision when to stop. Sometimes it’s best to just take a break—after coming back it easier to see if the piece is missing anything important.
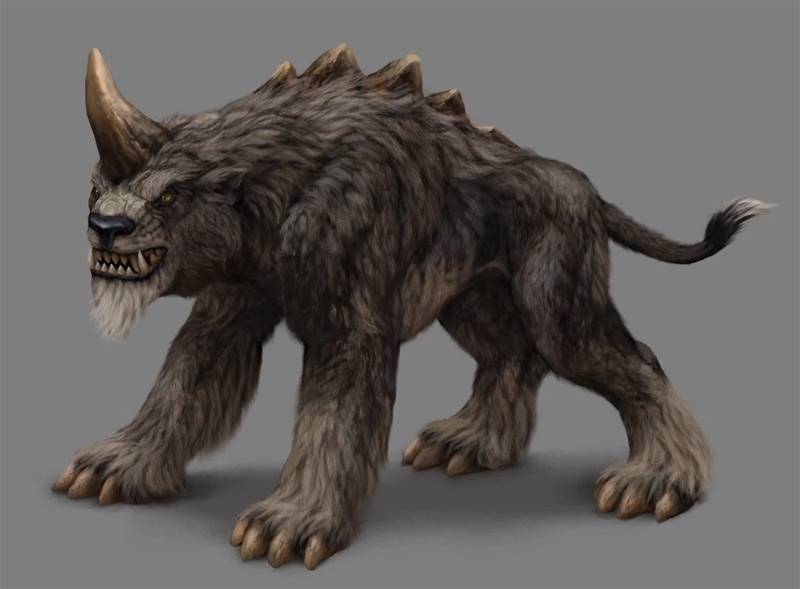
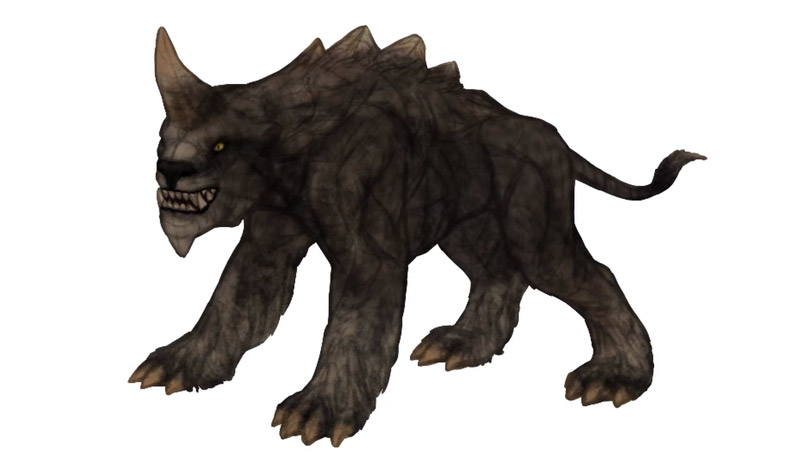
6. Finishing Touches
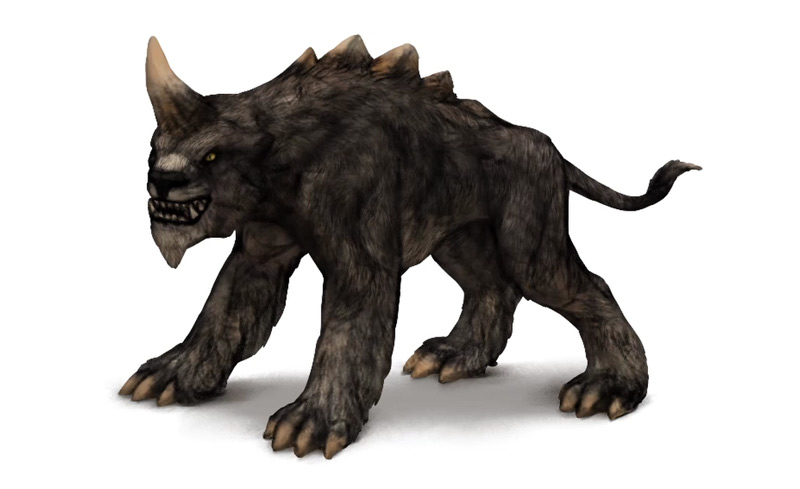
Step 1
I like to add some rim light at the end, to visually separate the body from the background. Here I’ve created a new layer and added some bright grey on the edges of the body, adjusting the shape of these strokes to the texture of the area.
Brush used: Painter.
Step 2
Then switches to white and accentuated this area even stronger.

Step 3
I’ve darkened the background and added some weaker “rim light” over the other edges.
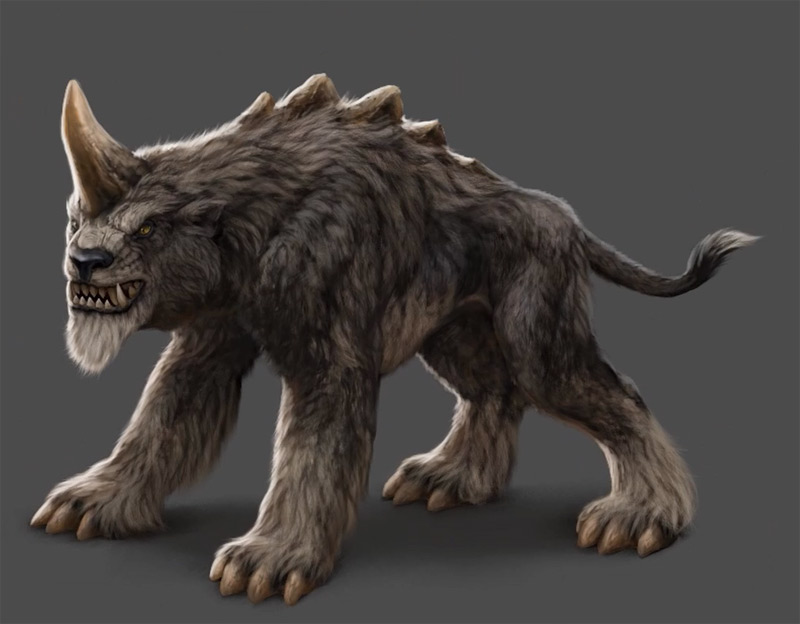
Step 4
The light producing the rim light effect should also reach the ground:
Brush used: Painter & Blender.
Step 5
I’ve added some gradient in the background to give an illusion of an ambient light.
Step 6
I’ve changed the Blend Mode of the second rim light layer to Glow—it doesn’t always work well, but it’s worth testing!
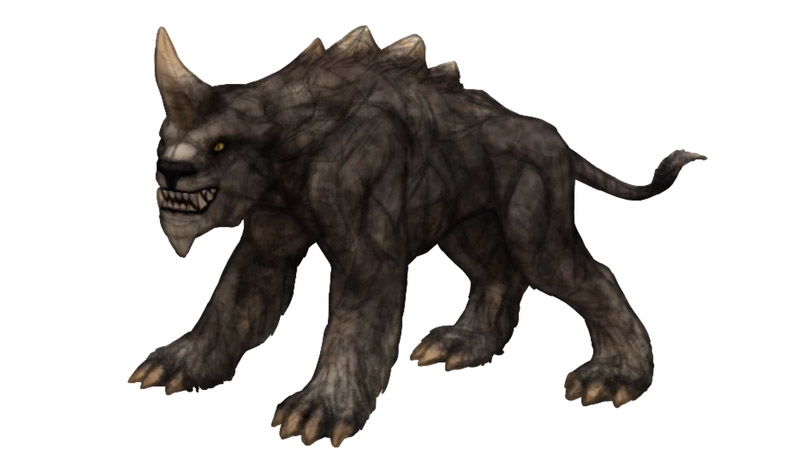
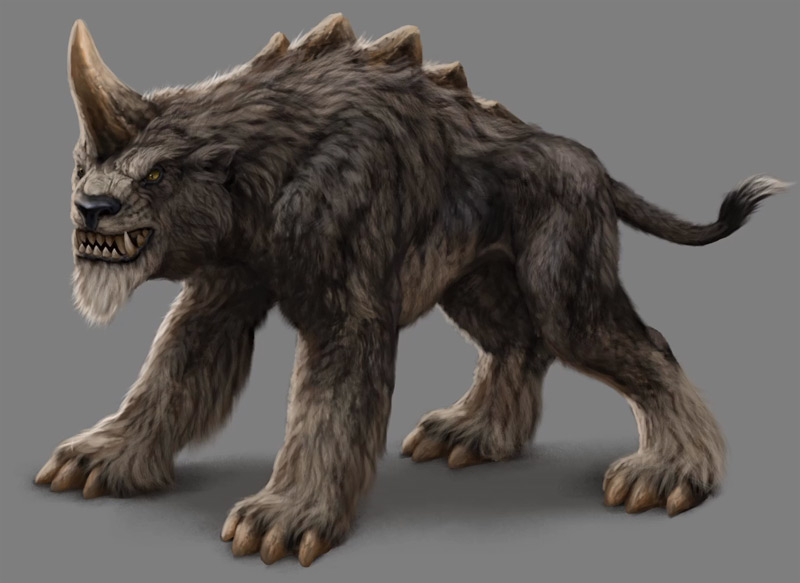
And That’s All!
I hope you enjoyed this article and learned something from it! If you have any questions, I’ll be happy to answer them here or by email.
Did you find this post useful, helpful, inspiring? You can say “thank you!” by sending me a little donation:

0 Comments