If you ask any artist how to become as good as them, they most likely will reply: “you need to practice”. And while this is true, it’s not actually very helpful. Because… how do you practice drawing? What exactly do you need to do, what actions are you supposed to take, and in what order?
Some people will be more helpful and provide you with more details: you need to study the fundamentals, drawing simple forms, shading, gesture, anatomy… But it’s easy to get lost in those and just keep doing things you’re not interested in, hoping that one day you’ll be good enough to finally draw what you wanted to draw in the first place.
So what’s the solution? How to practice drawing efficiently, without putting aside the things you’re actually interested in? I think I discovered a method that will give you exactly that—and it’s based on science! (well, kind of).
The Scientific Method and How it Works
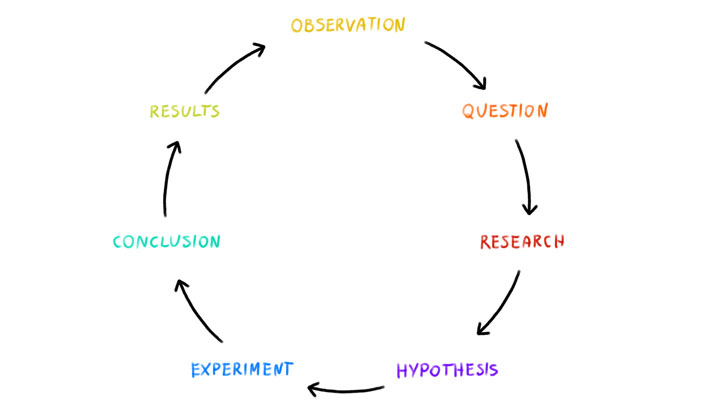
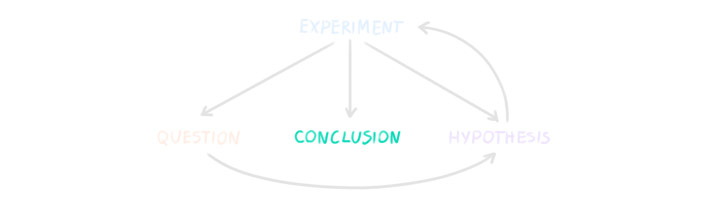
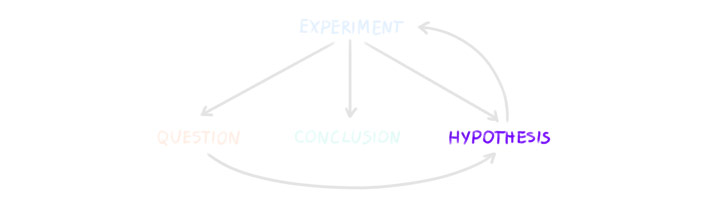
You’re probably familiar with the scientific method—the process of performing specific actions in a specific order to solve problems and reach useful conclusions. It can be illustrated using a diagram like this:
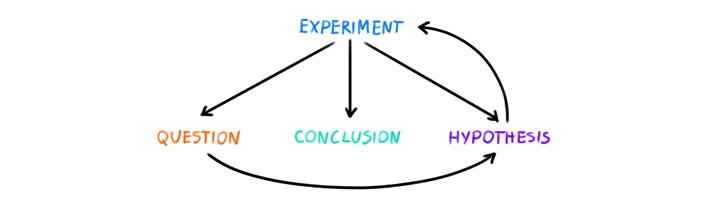
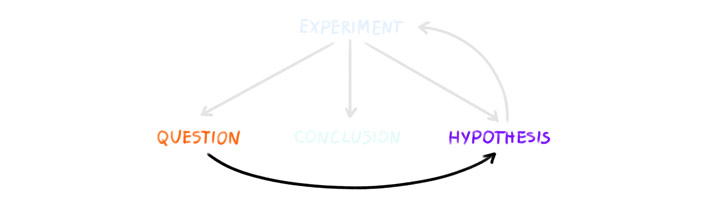
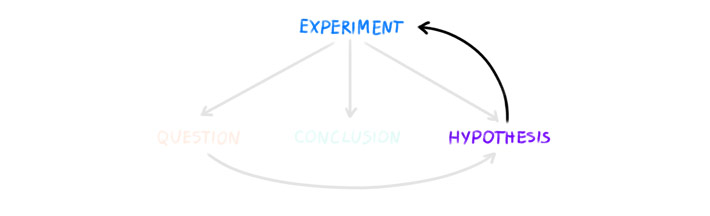
But if we were to create a diagram of “the artistic method”, it would probably resemble this in most cases:

Can you see the problem? In the scientific method you stay focused on the issue, and use the previously learned conclusions to fuel the next stage of experiments. The path is neat, linear, and progress is clearly visible. In the artistic method, you just kind of wander aimlessly, waiting for progress to happen. The conclusions may be there somewhere, but since you gathered them subconsciously, it’s hard to access and reassess them.
So, it’s clear that the scientific method is better, but how can it be applied to your drawing practice?
How to Improve at Drawing using the Scientific Method
First, you need to know that it’s perfectly possible to use the scientific method in the rawest form possible, like this:
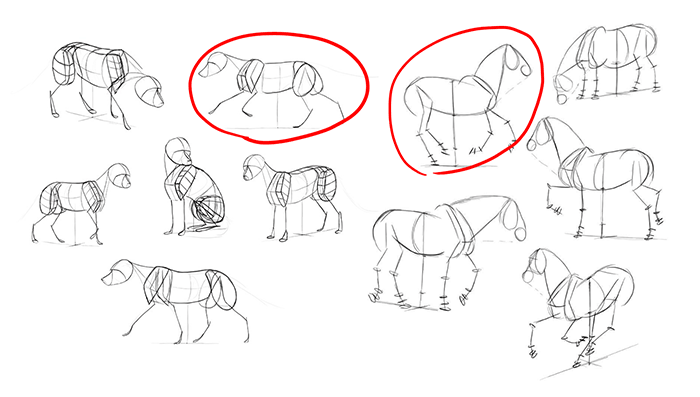
| Observation | “My drawing of a horse head doesn’t look realistic” |
| Question | “How to draw a horse head realistically?” |
| Research | Looking at photos and videos of horse heads |
| Hypothesis | “Using these proportions makes a horse head look realistic” |
| Experiment | Drawing a horse head using the proposed proportions |
| Results | “My drawing of a horse head doesn’t look realistic” |
| Conclusion | “Using these proportions doesn’t make a horse head look realistic” |
However, while this is usable, I feel that it does not fit well with the artistic process. Making a general observation (“this doesn’t look realistic”, “something looks off”) may not tell you exactly what to do in the research stage, or how to form a hypothesis, or how to adjust the hypothesis after it has failed. Especially since we’re not talking about math or physics, but about drawing and perception!
So I suggest a method that is simply an improvement of “the artistic method”. This way you can combine the joy of drawing what you want with getting reliable results. Here’s how to do it!
Just Draw!
Yes, you heard me right! No matter what your skill level is, attempt to draw the thing you always wanted to draw. However, I want you to approach it differently than you normally would. Don’t play any music or podcasts, turn off the TV playing in the background, and eliminate any other distractions like this.
When drawing, pay attention to your thoughts. Observe what you’re doing, and how you’re reacting to it. There are three types of thoughts that will prove to be very useful:
- “This doesn’t work”
- “This works!”
- “Hmm, I wonder if…”
Whenever you catch any of those, note it! To make it fast and less distracting, use these symbols to quickly indicate what each thought is about:
- – (observations, problems)
- + (conclusions, solutions)
- ~ (hypotheses, ideas)
Let’s take a closer look at them, so that you know how to tell them apart:
Observations, Problems (-)
These will be the most common at the beginning. Whenever you do something and react negatively to the result, make a note of what you did and/or why you think the negative result happened. You can word it as a question, or turn it into something more conclusive. Keep it simple—if the problem has to be described in many sentences, break it down into multiple notes instead.
Try to be as specific as possible. “I can’t draw the head” is fine, but “when I [do this], the head looks wrong” is better. Keep in mind that this is also a matter of practice, so don’t worry if you find it difficult at first! Keep making notes, and they will become increasingly productive over time.
Here are a couple of examples:
- – How long is the horse’s neck in proportion to its head?
- – I don’t know the correct angle between the thigh and the shin
- – When I accentuate the main outline with black, the whole drawing looks flat
- – My method of drawing fur is too slow, how to make it faster without losing the details?
- – How to make scales look shiny instead of washed out?
It’s important not to treat those personally. These are your observations and problems to solve, not a list of things you suck at. Being bad at drawing is the default state, so having all these problems is normal and expected. You’ve got a difficult puzzle in front of you—wondering how to solve it doesn’t make you inferior to anyone!
Conclusions, Solutions (+)
Sometimes you’ll notice that something you did actually worked. It doesn’t have to be anything big—maybe the outline of the eye looks just a little bit better, or the hair looks less spiky and more natural. How did you do it? Find the answer, and note it!
Or maybe you discovered why something doesn’t work? Note it as well—you’ll know what to avoid next! In short, these notes should be the most productive and final—telling you exactly what to do and what to avoid. It doesn’t mean they can’t be changed later, but note everything that seems true at that moment.
These notes may be slightly longer, because they’re more descriptive. Feel free to accompany them with little sketches—sometimes it’s easier to explain things this way.
Here’s how these notes may look:
- + When the line between the eyes is parallel to the line between the nose holes, the perspective of the head looks much better!
- + The line art can be smudged to create quick shadows
- + I can use the lasso tool to create a sharp border, even when using a soft brush
- + Big highlights in the eyes make the head look smaller
- + Big black shadows make all the colors look dirty and faded
Think of these notes like the short and simple tutorials you may find on Instagram—they should contain one simple piece of advice (“Do this”, “don’t do that”). While these tutorials are often not very helpful, yours will be exactly the opposite, because you’re aware of the context.
Hypotheses, Ideas (~)
The previous notes were about things you did, that worked or didn’t work. But there are also things that you could do that you haven’t tried yet. Whenever you think of one, note it! Especially if this is something you’re not intending to test right away, or something too big to test it in this drawing, or something completely unrelated to this artwork.
These previous notes were based on very careful observation of your actions and their results. These last notes are based on more subconscious processes in your mind. Multiple observations get linked to create a new possible conclusion, resulting in an idea that may not even have been connected to what you were doing at that moment. If you want to facilitate this idea-generation, take short breaks during drawing—just look out the window, thinking about nothing for a minute or two. This will give your mind the time to make those connections for you!
What may these notes look like?
- ~ What if I leave the line art in full opacity right to the end?
- ~ The torso seems too long, maybe it would look better if I made it shorter?
- ~ Maybe I could measure the ratio between the neck and the head to make them both look more proportional
- ~ Does using blue for the shadows make them look better or worse?
- ~ I could try to draw the torso first, and then the legs
In other words, these notes will describe unchecked ideas, something that may or may not be true. They can describe both positive and negative things—sometimes doing something wrong on purpose can be very educational!
Now, here’s where you can go two ways. You can either react to the notes right away, or ignore them for now and only apply them to the next drawing. Whatever you choose, here’s how you can use them:
Observations, Problems (-)
Turn these notes into hypotheses. That is, give these questions possible answers. Whether they prove to be right or wrong, it doesn’t matter—you’ll learn something either way! Here’s how you can do it:
| – How long is the horse’s neck in proportion to its head? | ~ The neck may be shorter than the head |
| – I don’t know the correct angle between the thigh and the shin | ~ Maybe the angle between the thigh and the shin is 90°? |
| – When I accentuate the main outline with black, the whole drawing looks flat | ~ What if I accentuate only parts of the main outline with black? |
| – My method of drawing fur is too slow, how to make it faster without losing the details? | ~ I could try to ignore the details in the shadow |
| – How to make scales look shiny instead of washed out? | ~ I could use a different Blend Mode for the highlight |
Conclusions, Solutions (+)
These notes are the ultimate goal of the whole practice. You need to simply use them—memorize them or keep them close for reference. But because the notes made during the practice may be so loose and sloppy, it’s good to copy them to a new sketchbook/notepad. You can use this opportunity to re-phrase and categorize them, or add cleaner illustrations.
Just remember, these are not set in stone! You may learn something in the future that will change your whole outlook on some things, so always be ready to cross out the outdated advice and replace it with the new ideas.
There’s one more thing you can do with these notes: you can turn them into a tutorial! You don’t need to be an art expert to help others—if something works for you, it may just as well work for someone else. Just remember not to present your conclusions as the ultimate answer, but only a method that works for you at the moment.
Hypotheses, Ideas (~)
Whatever these notes describe, test it in practice. You don’t have to create a whole new big drawing just for them—many can be tested on a small scale and give you the answer in minutes. For example, “Does using blue for the shadows make them look better or worse?” can be tested on a rough drawing of a sphere. Sometimes all it takes is a simple Google search of the question!
Hypotheses can be quickly tested by drawing the same thing differently multiple times, right next to each other. It may also be very useful to test them on photos, or in real life. For example, the angle between the thigh and the shin can be easily measured on multiple photos showing the animal in the side view.
Some of the hypotheses can be more complex, and not give you a clear answer until the entire drawing is complete. In this case, just test such hypothesis the next time you’re inspired to draw something. It’s best to test one of these complex hypotheses at a time, to see the difference in the end result more clearly.
This testing will hopefully result in conclusions/solutions, but it can also produce more hypotheses, or even more problems. Don’t worry about it—note all of those, and keep repeating the process. Each note is valuable!
So When Does it End?
It doesn’t! Just like the diagram of the scientific method is a circle, so is your learning process—you just get better and better. Of course, you don’t have to keep making notes all the time—not everything you draw must be a part of your practice. You may also realize one day that you don’t want to change anything about your style anymore. Which is probably the artistic holy grail!
Conclusion
So that would be the best way to practice drawing, in my opinion. The coolest thing about this method of practice is that it doesn’t force you to do boring things first. This way you’re lowering your risk of getting discouraged and and abandoning drawing altogether.
It may also save you from the negative emotions linked to the failure. When your goal is to draw a beautiful drawing, and you fail, you feel bad. When your goal is to draw something and make a lot of notes, and you end up making a lot of notes, you don’t see it as failure anymore—even if the drawing looks bad. Because it’s just a side effect of your process of learning!
It also helps you shift your mindset from “I must do it correctly or else…”, to “let’s see what happens if I do it this way”. It replaces pressure with curiosity, which can help overcome perfectionism. Mistakes are no longer something to be avoided—instead, they lead to very valuable notes.
I hope you’ll find this method as useful as it seems to me, and that you’ll see the improvement that you always dreamed about! I’ll also be happy to hear what you think, so please leave a comment if you have a moment to spare.
Did you find this post useful, helpful, inspiring? You can say “thank you!” by sending me a little donation:

6 Comments