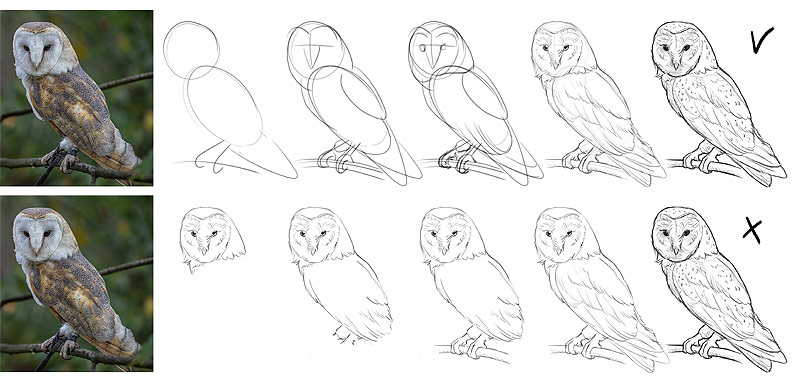
When you think of a thing to draw, in your imagination it’s a real, 3D object. But you can’t draw a real, 3D object—you can only draw lines. So your job, as an artist, is to convert that object into a set of lines.
Some artists do it this way: they draw one line, then another, and another, until the whole drawing is completed. They’re like human printers—the vision in their mind is transferred directly onto the paper. They seem to see their drawing in the empty canvas, and they simply… trace it.
This method seems very intuitive, and many beginners try to start their drawings this way. What they don’t know is that this is the most difficult method they could choose—and that there are other, simpler methods, more suitable for beginners. In this tutorial I’ll teach you these methods.
How to Guess Your Drawing
Drawing from imagination is a guessing game. You don’t really know what you want to draw, until you see it—but to see it, you have to draw it. So how can you start?
The only option you have left is to guess. And that’s what you’ve been doing so far, probably, so you know how frustrating it is—drawing and erasing, drawing and erasing, without ever being satisfied with the result.
I want to propose a modification to your method. Do you remember the Hot and Cold game? In this game, one player is making a guess, and the other tells them if they’re close to the correct answer (“hot”), or far from it (“cold”).
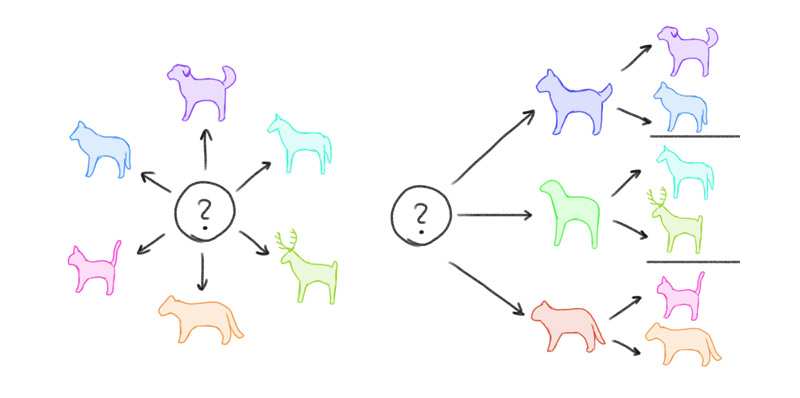
The best way to win this game is to start with very general guesses , and then get more and more specific. You can use the same method in your drawing. Instead of guessing the specific thing (“a dragon with sharp spikes and two pairs of wings”), start with something more general.
What can it be? There are many different options you can use here. Let’s take a look at a few of them.
Gestures/Line of Action
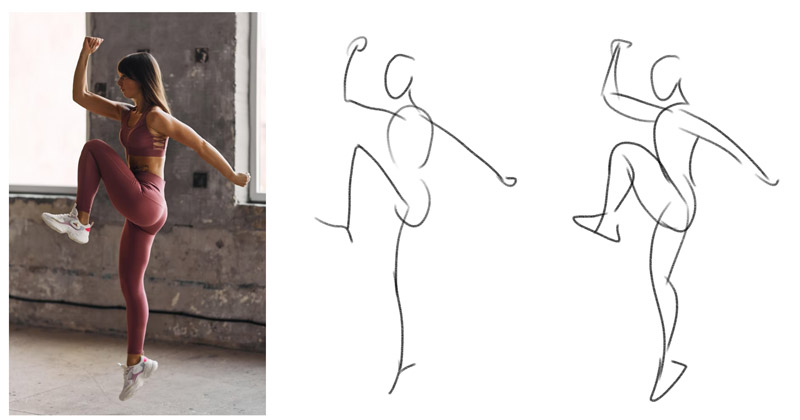
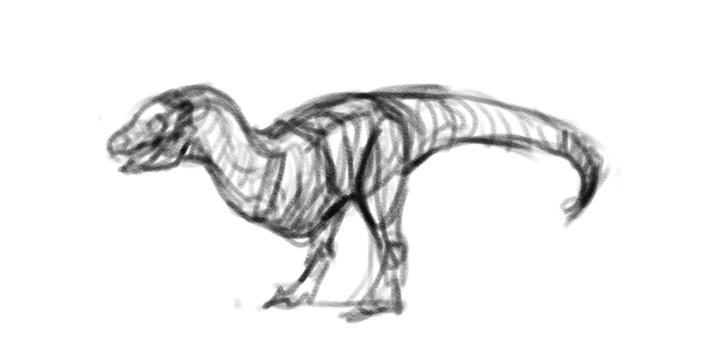
If you look at a photo of an animal/human, you’ll notice that it’s possible to describe its whole movement with a couple of curves. If you start your drawing with them, you’ll guaranteed to achieve a natural, dynamic pose.
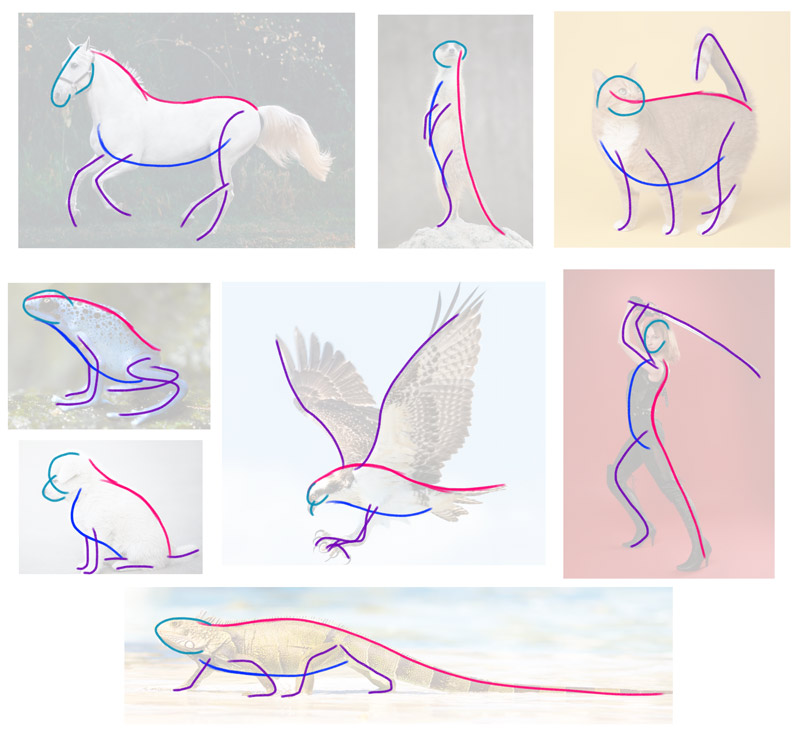

However, if you’re a total beginner, you shouldn’t just jump onto this method and expect good results. It may look simple, but in fact it requires a great deal of practice. Luckily, this is the simplest type of practice you can imagine:
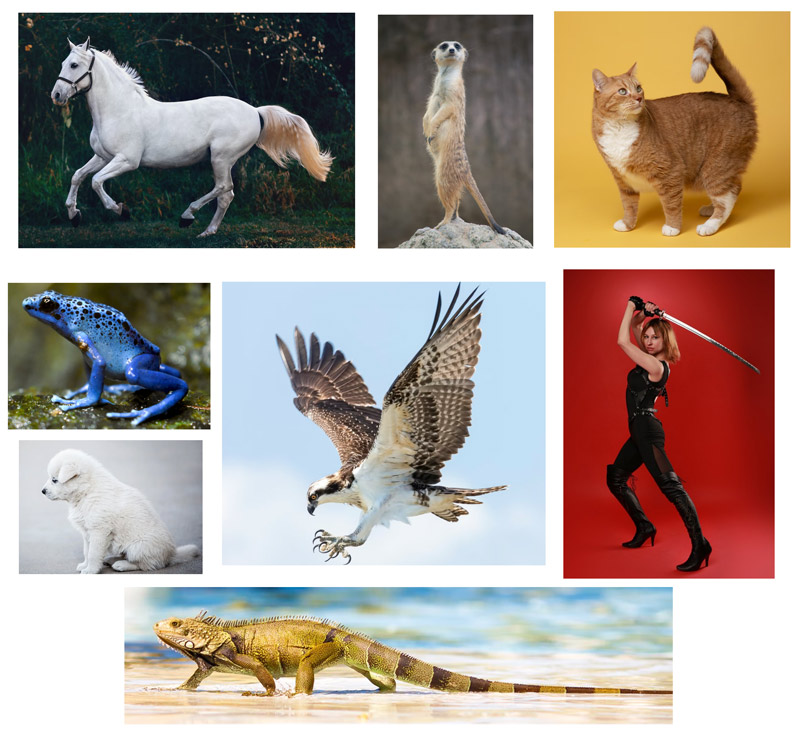
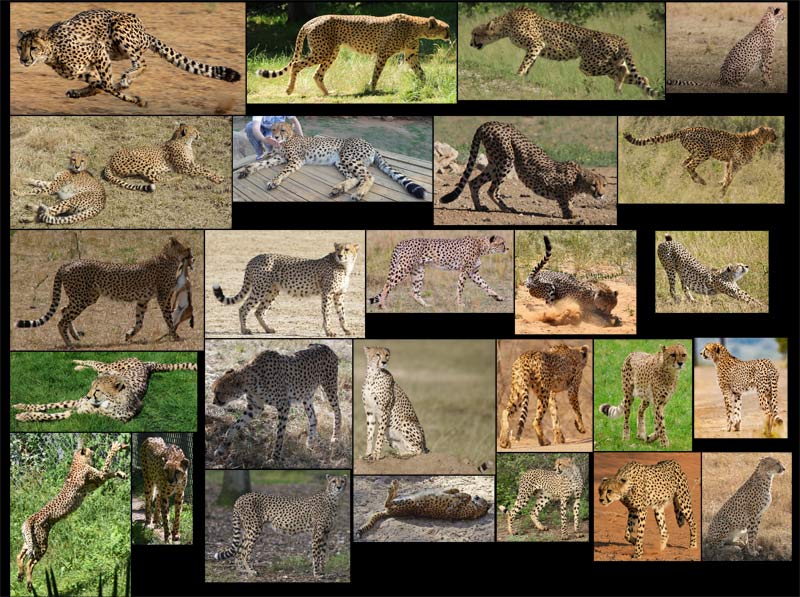
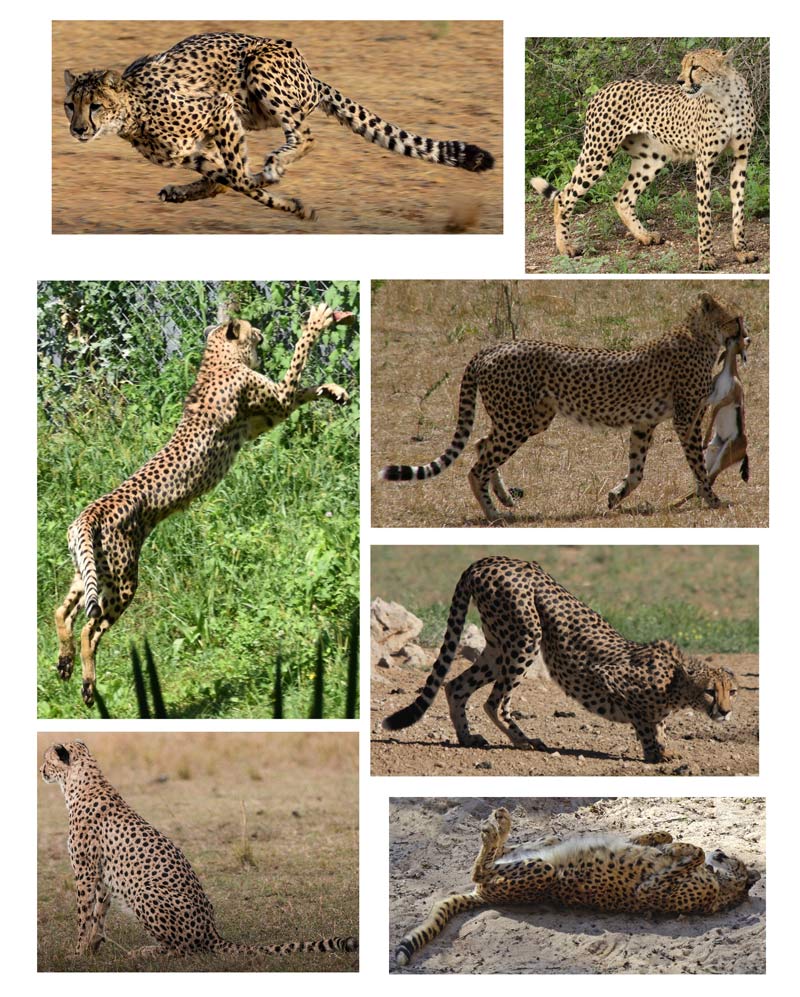
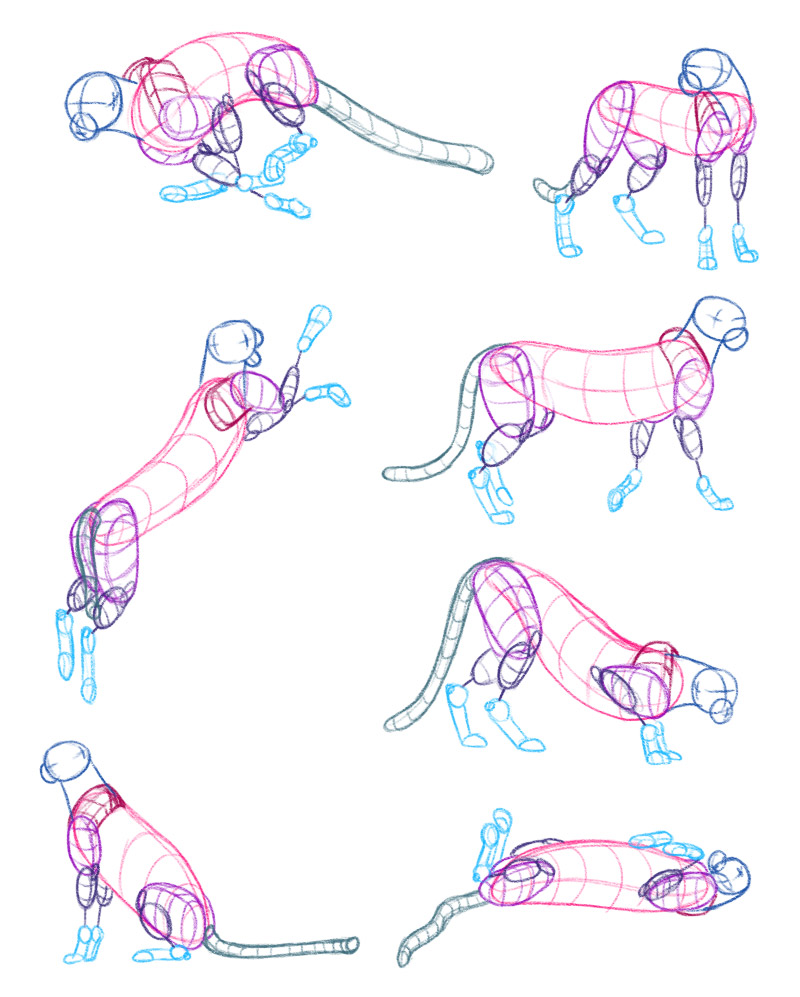
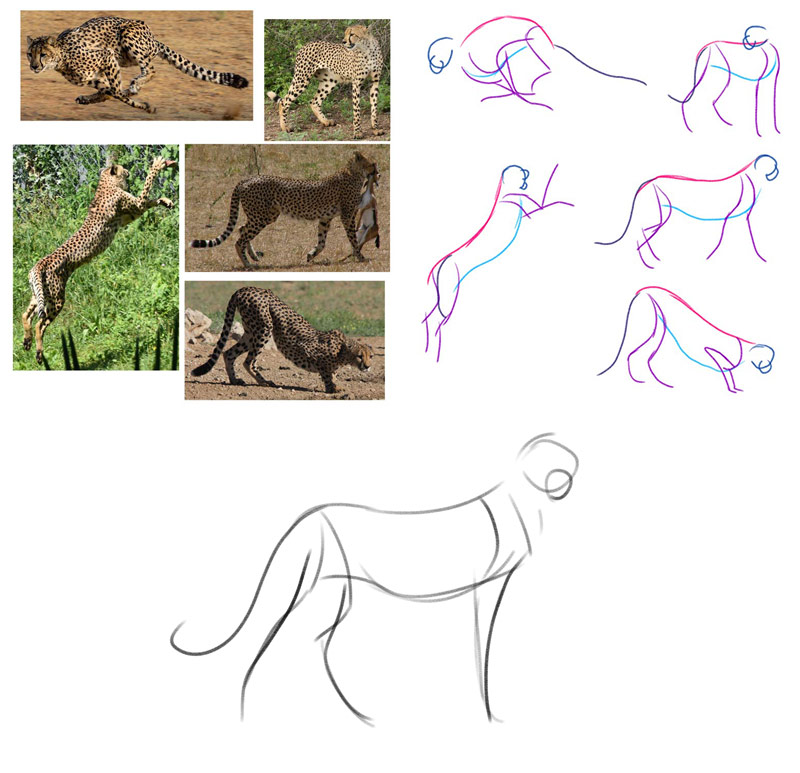
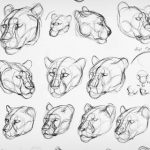
Create a collection of photo references of the subject you want to draw. They should show the subject in many different views and poses. It’s best if all the photos show exactly the same subject—but a similar body type (or the same breed, or species) will work, too.
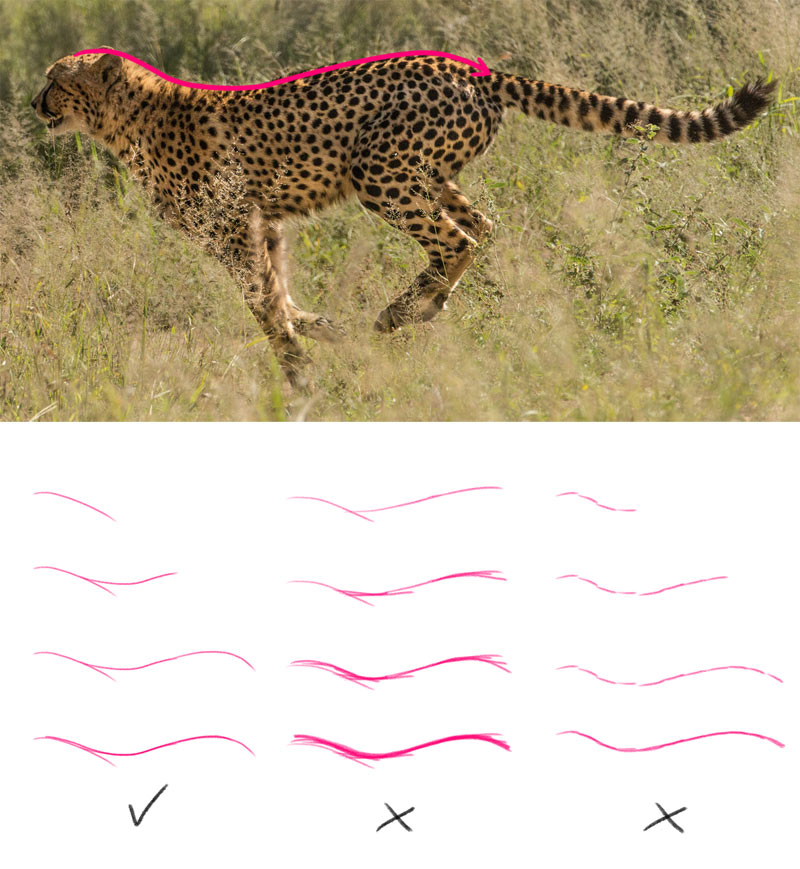
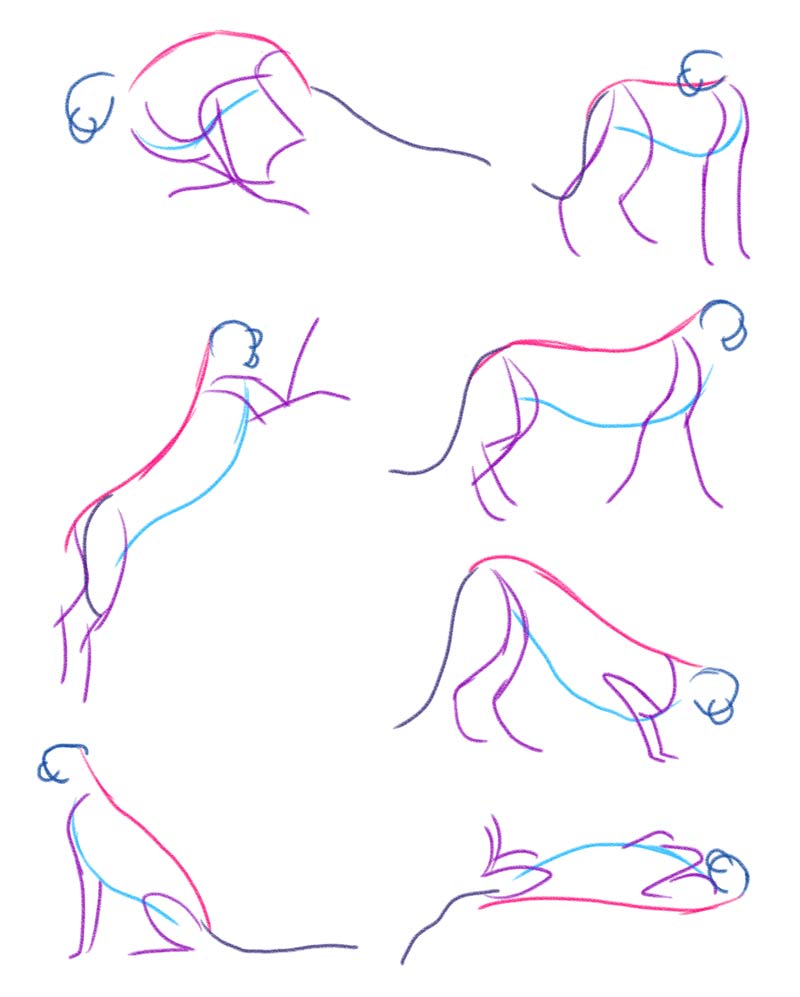
Now, pick one photo and try to see its main gesture/line of action. Then sketch it with a fluid motion of your hand. It doesn’t have to be a quick motion, but it has to be deliberate. It can consists of a few parts, and it’s ok to correct it after it’s drawn—but only once or twice. If it needs more corrections, it’s better to start anew.
There are many ways to draw gestures. They all start with a single line—the main line of action—but then you can build upon it some more, for example sketching the whole torso, and adding the secondary lines of action for the limbs. You can experiment with them during this practice.
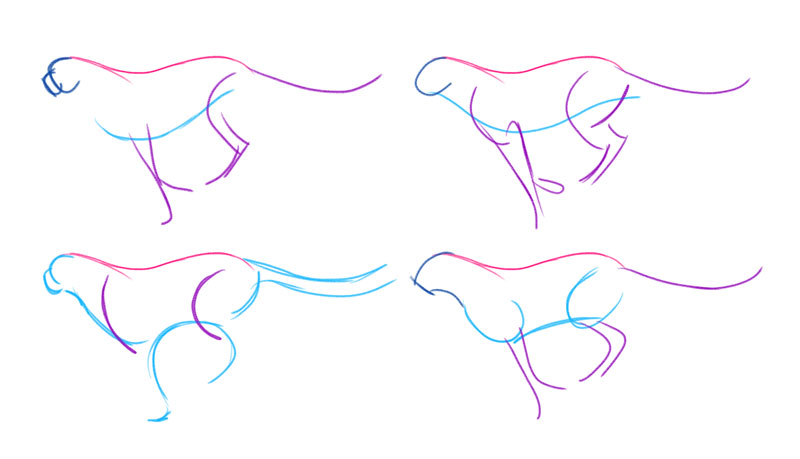
Once you have your first gesture sketch, stop—don’t finish it. Go to the next photo, and use the same technique to draw its gesture. Repeat until you’re bored. Feel free to modify your technique in the process, if you notice a more efficient way to draw your line of action. The goal here is to find the smallest set of lines possible to capture the movement of the creature—universal for all poses and views.
Turn this exercise into a challenge—draw one hundred of these sketches and you’ll be so familiar with the gestures of that subject, that you’ll be able to come up with a line of action without any photo reference. You can repeat this challenge for many different subjects—human bodies, hands, wings, big dogs, small dogs, etc.
Sometimes people create their gestures out of inner anatomy—they draw the spine, the rib cage, the joints. It can be a useful method, but remember that it’s not the only one. You don’t have to start your sketch with a skeleton each time. Usually it’s better to include whatever shape is prominent, regardless of where it comes from. You can use the spine and the knee joint, but also the curve of the thighs and calves—or even the clothes!
2D Sculpting
The problem with gesture lines is that they seem pretty 2D—perfect for drawing side- or front-view poses, but not really helping with the more foreshortened ones. That’s why it’s good to also know the method of 2D sculpting.
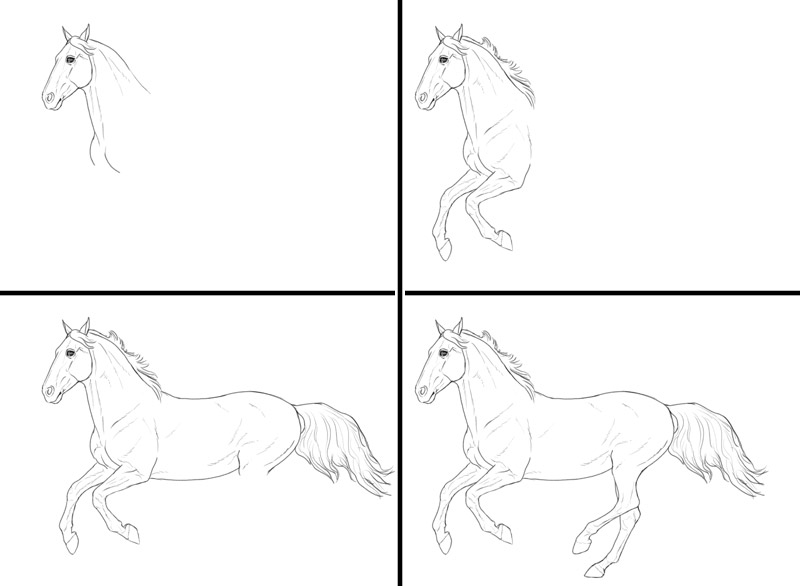
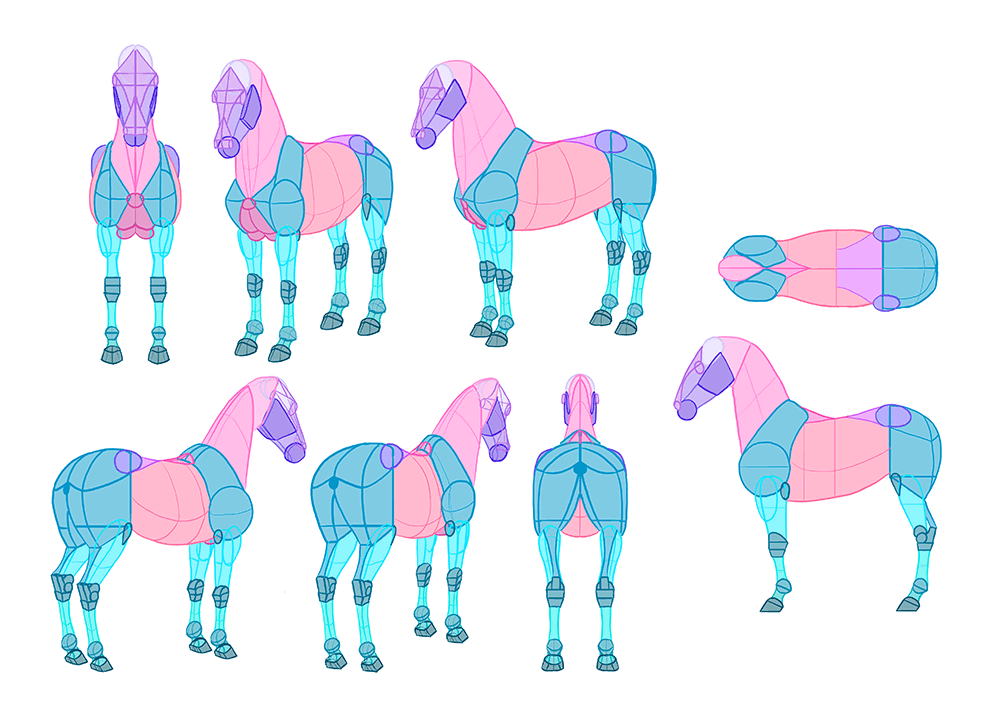
In this method, you’re like a sculptor—taking a big lump of clay, and then slowly shaping it into something resembling your vision. Instead of starting with a curve indicating the movement, you need to start with a curve indicating the outline of a 3D shape.
3D shapes are very complex—they have multiple sides placed at various angles, and these angles visually change depending on the view. However, they can be outlined with a set of very simple lines. And this set—a general outline of the shape—can be used to start a drawing.
This method requires a visual understanding of perspective—you should be able to tell a properly drawn shape from an incorrect one. This tutorial will help you develop it:
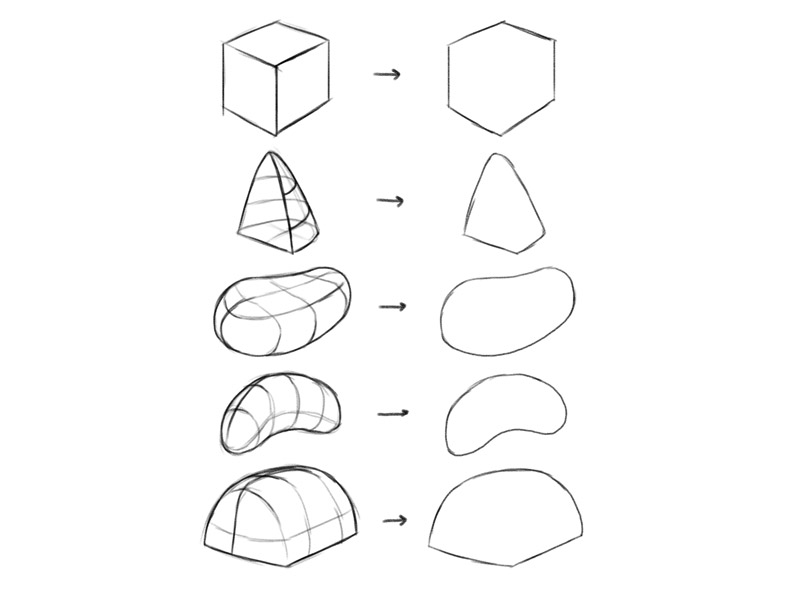
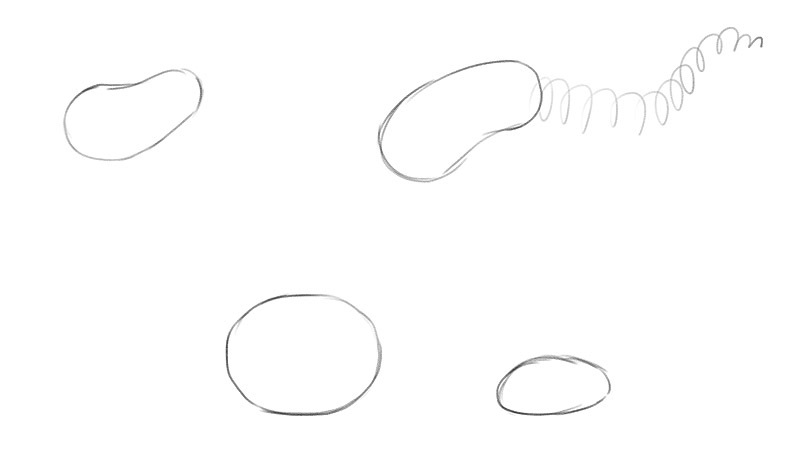
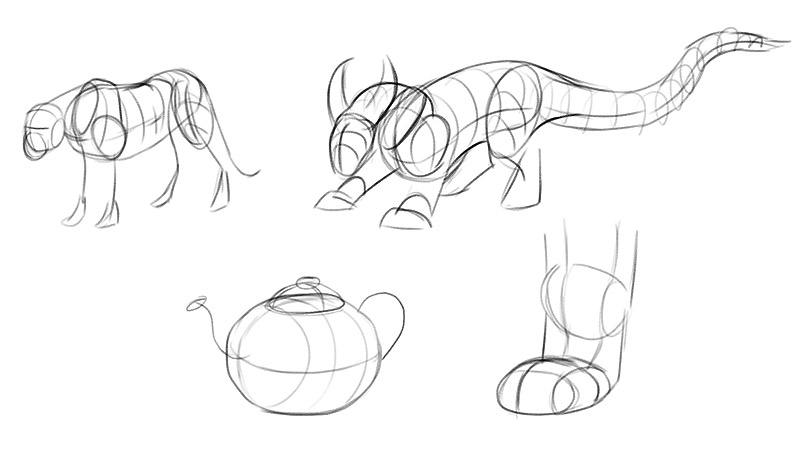
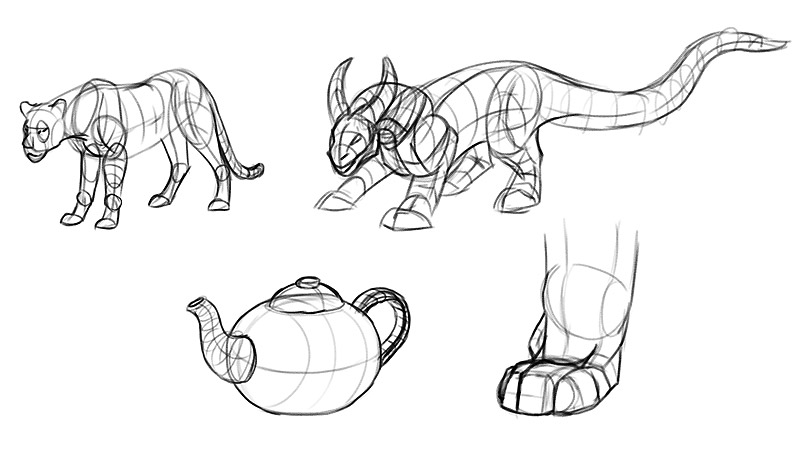
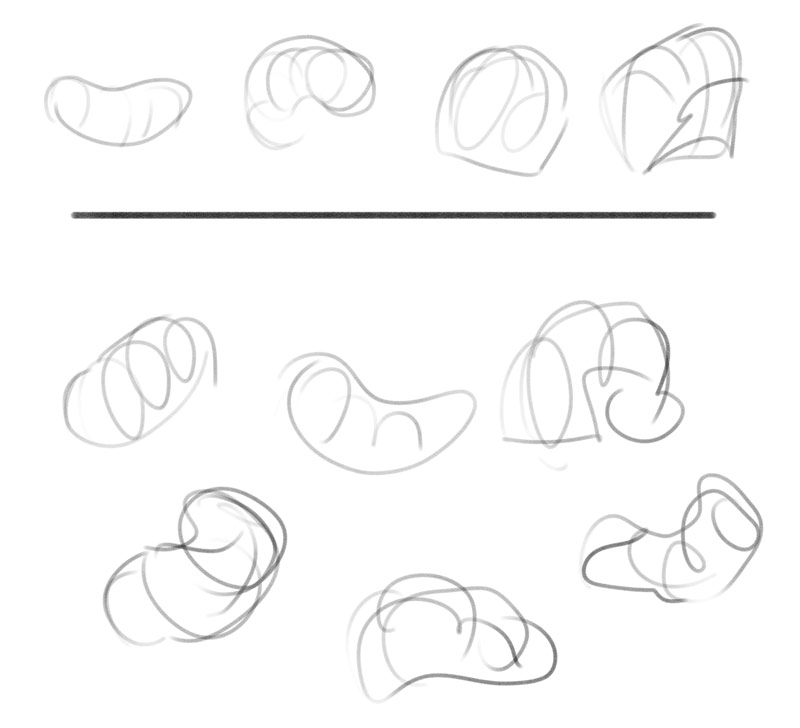
Now, try to imagine what kind of shape your subject/object is the most similar to—at least in part. An ellipsoid? A cone? A bean? A pancake? Sketch its outline to see if you guessed right. Longer, flexible shapes can also be sketched with a coil.
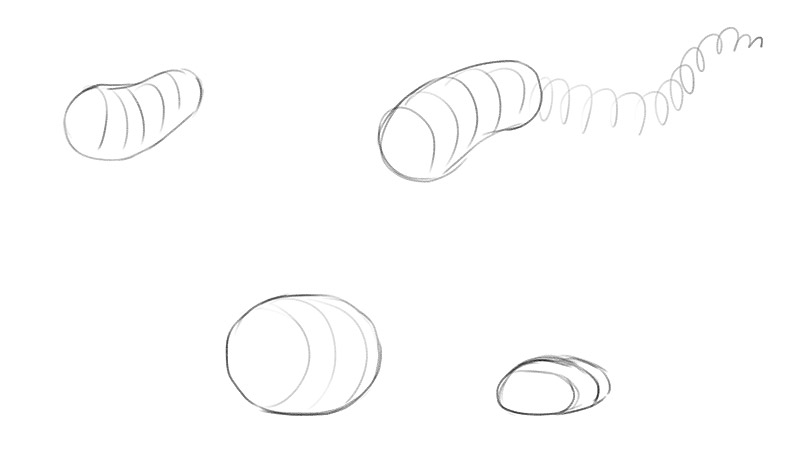
Next, sketch a few contour curves around the shape, to quickly mark its perspective. They don’t have to be complete—keep them sketchy, to leave space for corrections later.
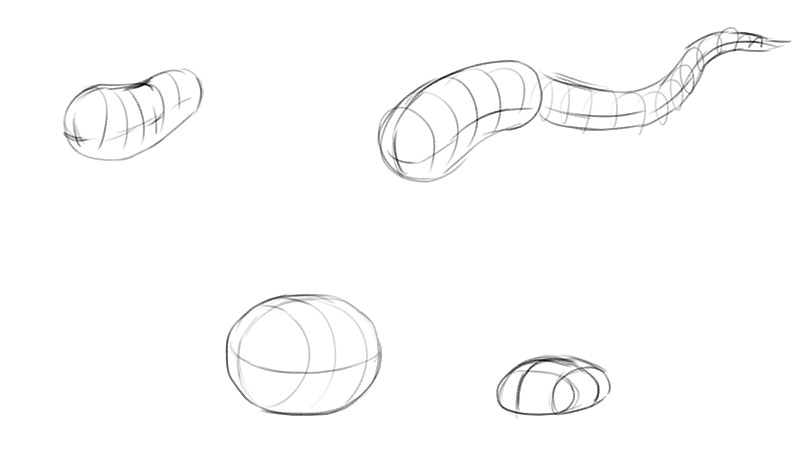
Then, mark the sides. You can draw lines along them, mark them with crosses, or sketch flat planes along the sides.
Your job is half done at this point! Now you can use the same method to add other parts of the subject/object. To keep the pose from being too static, it’s good to apply a bit of gesture to it—for example “sculpting” the torso first, and then adding quick gestural lines for the limbs, finished with sculpted paws.
Keep in mind that knowing animal anatomy will help you imagine your creature more accurately. Even if it looks very vivid in your mind, you may have a hard time trying to sculpt the body part without knowing their usual shape. To practice, you can use a similar exercise as before—sketch one hundred of animal bodies from references, this time focusing on the 3D forms of the body.
You can also learn animal anatomy from my video course!
From Chaos to Order
Sometimes you want to draw something, but you have no idea what it is. How do you start a drawing then?
You can use a curious trait of the human mind called pareidolia—the ability to see familiar objects in random patterns. If you’ve ever seen a lion in the clouds, or a dog in a plank of wood, then you know what I’m talking about!
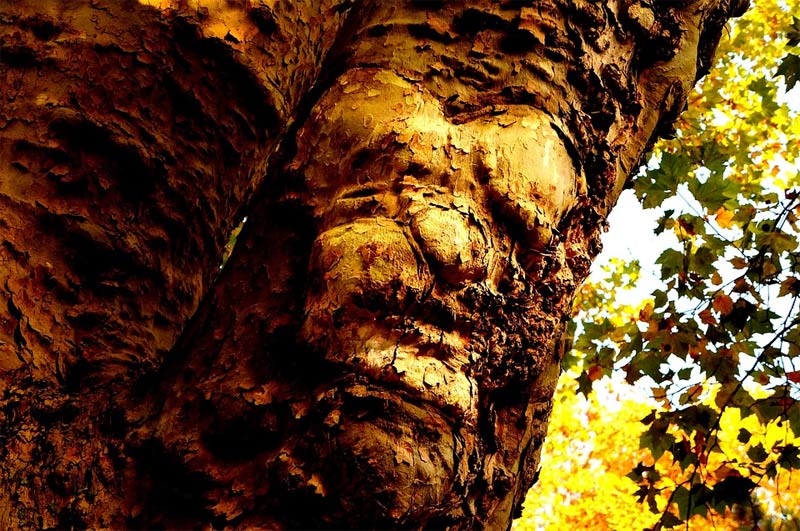
You may sit patiently in a waiting room, bored, and suddenly notice a detailed dragon in the pattern on the floor. You may ask yourself: “how is it that I can’t draw such a beautiful dragon, no matter how hard I try, and here’s one, drawn completely by accident??”.
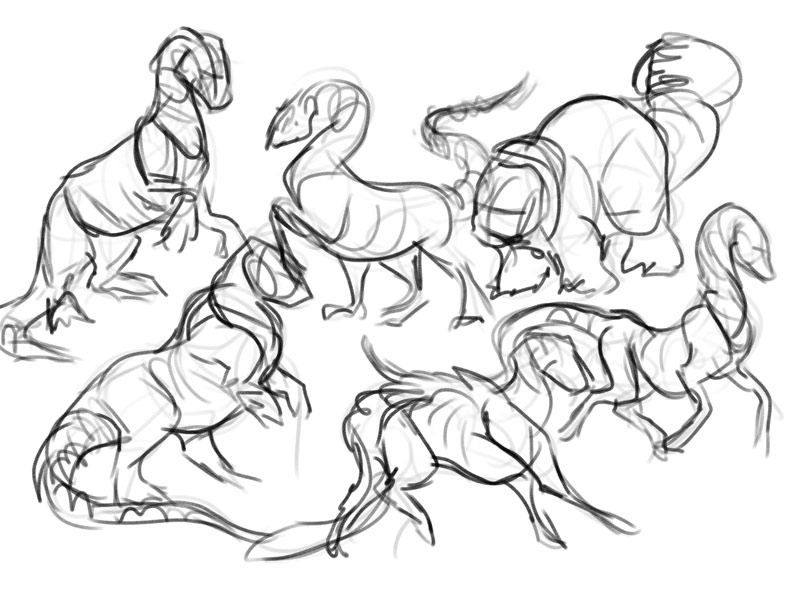
But instead of getting angry, use this mechanism to your advantage! Create a mix of random body parts, and let your mind figure out the rest. First, sketch a series of “torsos” in various shapes and views. Drawing multiple sketches at once is crucial here. Keep them quick and loose. You can make these sketches even less predictable by holding your pen/pencil higher than normally, or by using a more chaotic tool—like a brush or a thick marker.
Add “the legs”—zigzags and curves placed under the torso. You can treat each leg as a separate shape, or try to replicate some kind of movement.
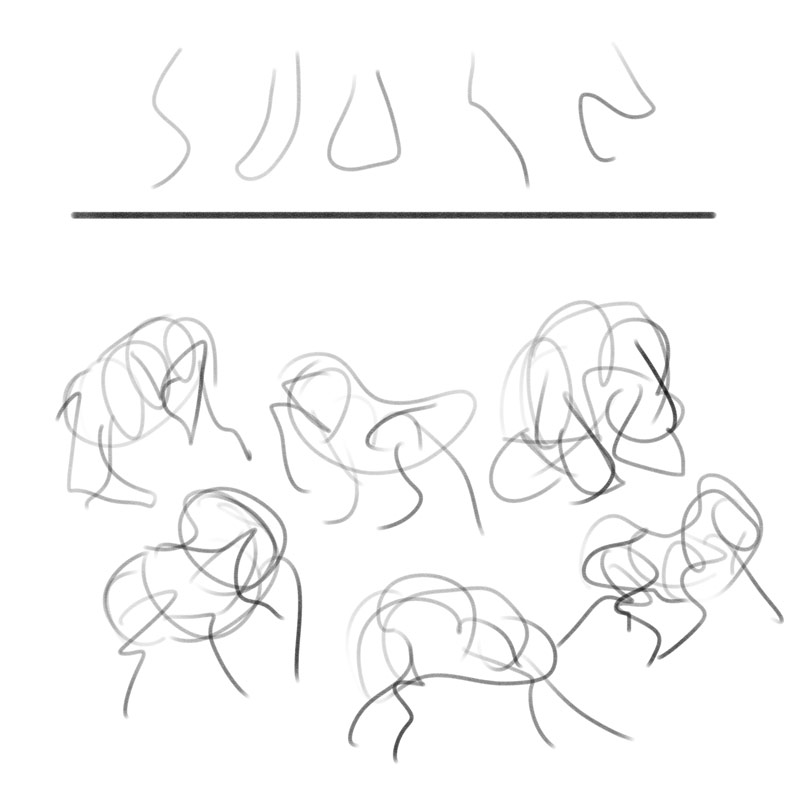
Now, add “the neck and head”. The neck can be long or short, straight or curved, and the head can be oval, elongated, or angular.
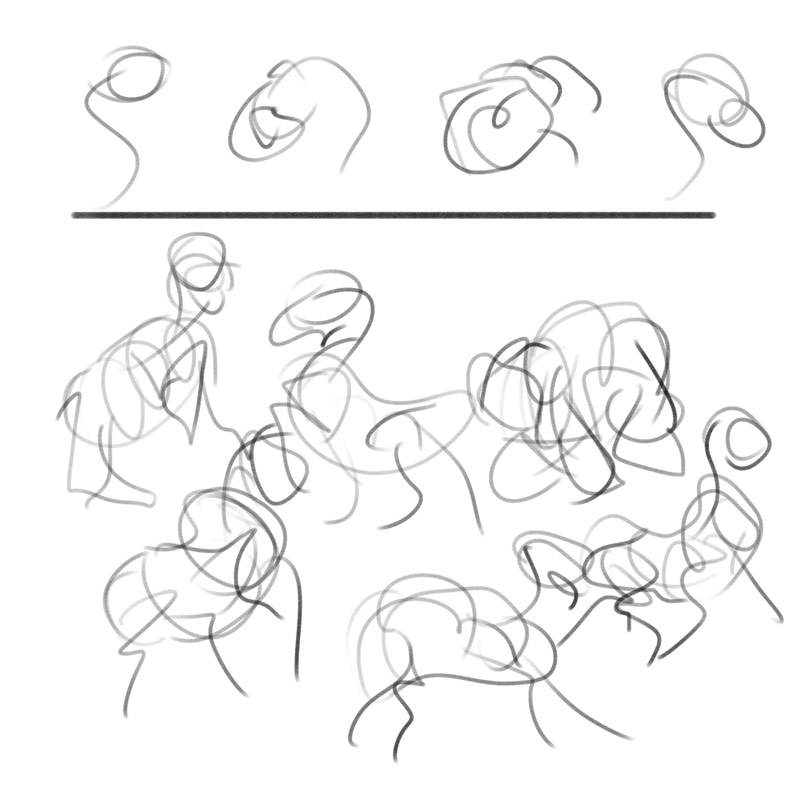
Optionally, you can add “the tail”.
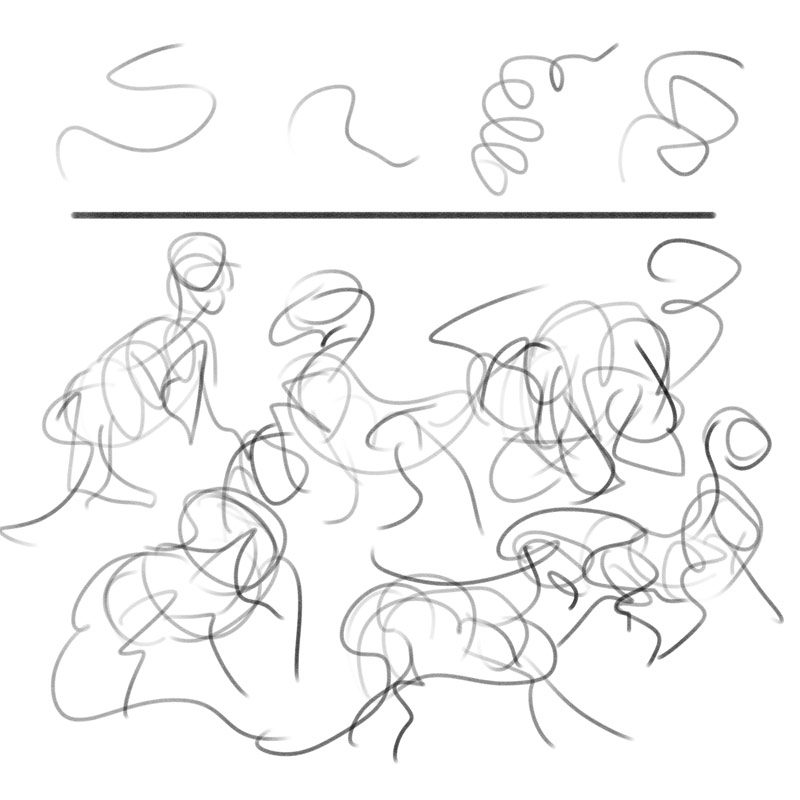
And that’s all! Now just relax, look at the sketches, and see if you can make something out of them. Most of the sketches will probably not make much sense, but if you draw a lot of them, you’re likely to find something worth your attention.
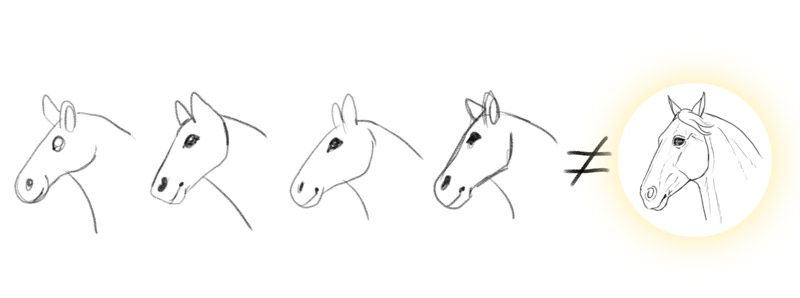
Once you do, draw a new set of lines on it to accentuate the shapes you’re seeing. Keep in mind that this method, although seemingly easy, also relies on your knowledge of the subject—so don’t forget to practice from references!
How to Practice Less, and Draw More
You may feel discouraged now, because it looks like I want you to create hundreds of sketches before you can start your drawing. But it’s not really true—you can simply create three to five sketches as a warm-up session. This should be enough to make your hand and brain prepared for the task.
To save time, you can create these small collections of references when you don’t feel inspired, and use them when the inspiration strikes. This way you won’t feel like you have to do some work before you’re allowed to start the drawing. You can save them as PureRef files, or Pinterest boards.
Now What?
Ok, so you have your sketch, now what? Finishing a drawing is beyond the scope of this tutorial, but I can give you a few tips.
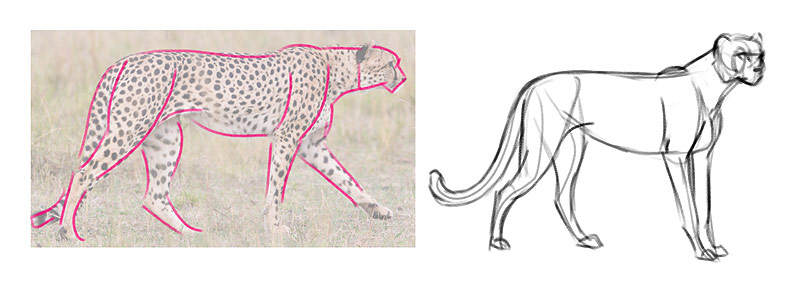
Before you add any details, make sure you got the proportions right. You can use a photo reference, and see if your drawing matches its proportions. For example, if in the photo the body looks similar to a long rectangle, and in your drawing is more squarish, you need to make it longer. If you’ve kept your sketch simple enough, making these changes shouldn’t end up in a mess.

Once you fix the pose, you can use the same reference to adjust the shape of the body parts. You don’t have to know exactly how anatomy works, but you only need to look at the 3D shapes visible in the photo to make your drawing more accurate.
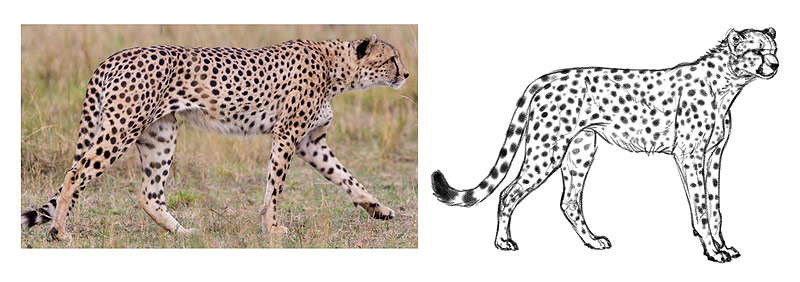
Finally, you can use the reference to add the details, like eyes or the shape of the toes. If you’re drawing an imaginary creature, you can use photos of various animals, and incorporate the details of different species into your creature.
It is possible to draw something from imagination from start to finish—without using even one photo reference. However, achieving this level of skill takes years—and even then, you’re still mostly limited to the subject you’ve been drawing the most.
So don’t feel bad that you use references to finish your drawing—even professional artists do it. I believe it’s much more important to create your sketch from imagination—this is where your creativity can truly shine. And then your only job is to make it more complete, by whatever means possible.
Conclusion
So basically, I want you to think of your drawing process as following a tutorial. Instead of trying to trace invisible lines on paper, construct your drawing step by step—from big, simple shapes and curves, to smaller and more detailed ones.
And if you want to learn more about creating such “tutorials” for yourself, make sure to read this article:
Did you find this post useful, helpful, inspiring? You can say “thank you!” by sending me a little donation:

2 Comments