In many digital drawing tutorials you may be asked to “change the Blend Mode of the layer to Multiply”, or something along these lines. What is this about? In this short tutorial I’ll show you what Blend Modes (or Blending Modes) are and how to use them to your advantage. I’ll also do my best to make this explanation practical, rather then technical.
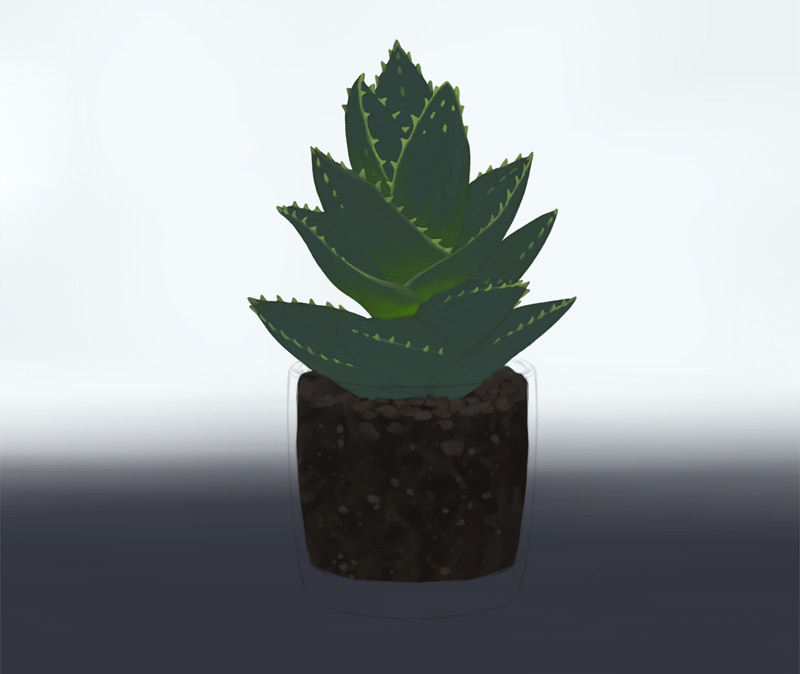
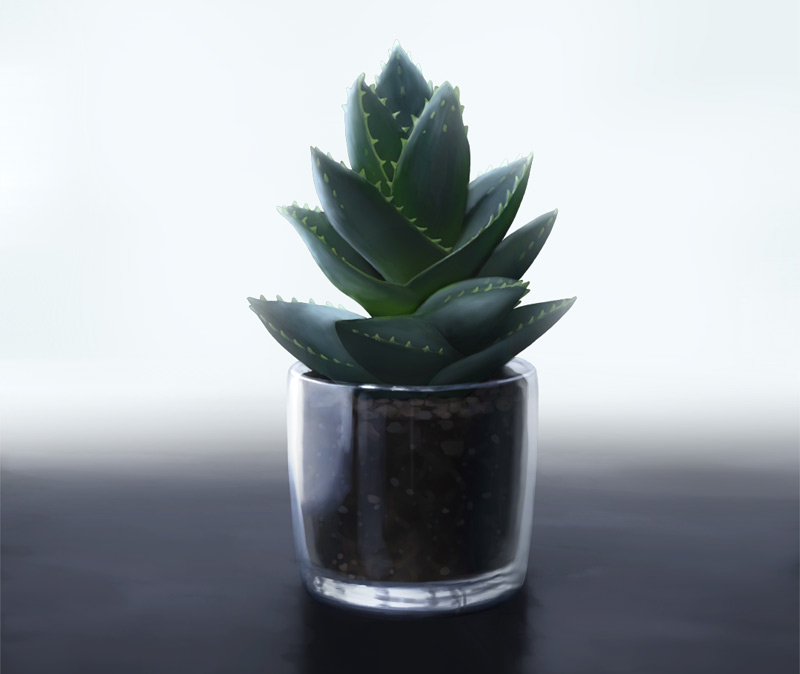
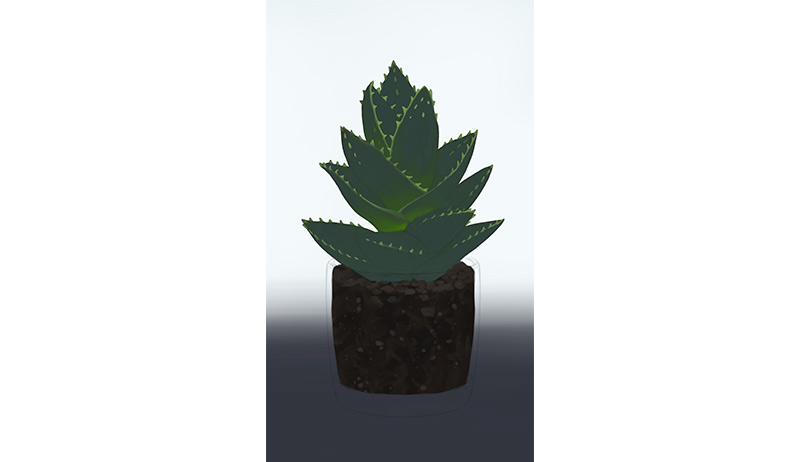
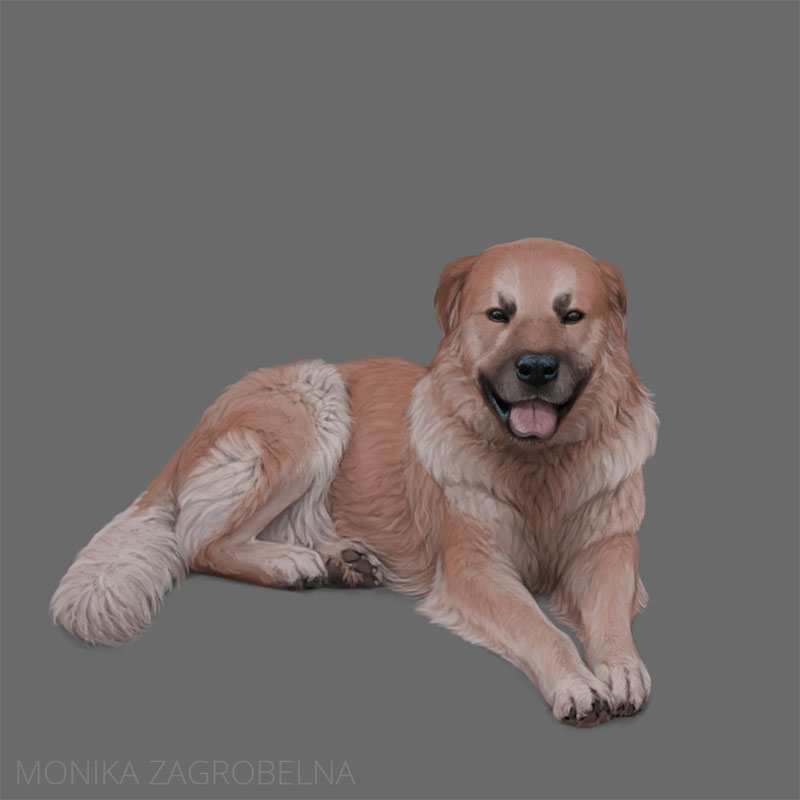
If you want to practice this topic, you can download this template and paint on it the way I describe in the tutorial. Here is the reference I used.
What is a Blend Mode?
In digital art you can draw on separate layers—you can draw the sketch on one layer, ink the line art on another one, and then remove the sketch without affecting the line art.
Although you can’t do something like this in traditional art, traditional painting has layers as well—they just merge by default. A new layer may affect the look of the previous layer in a couple of different ways:
- It may cover it completely (oil paint)
- It may cover it slightly, brightening or darkening it (watercolors)
- It may change the hue of it (alcohol-based markers)
- It may change the saturation of it and add a sheen (varnish)
All of this comes from the physical properties of the pigment. So this is what a Blend Mode is: it’s a set of “physical” properties of the layer.
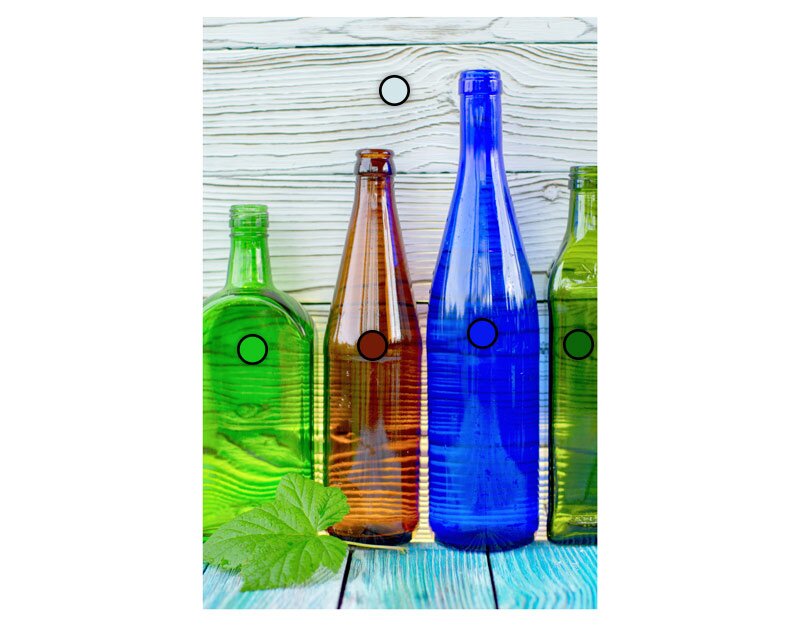
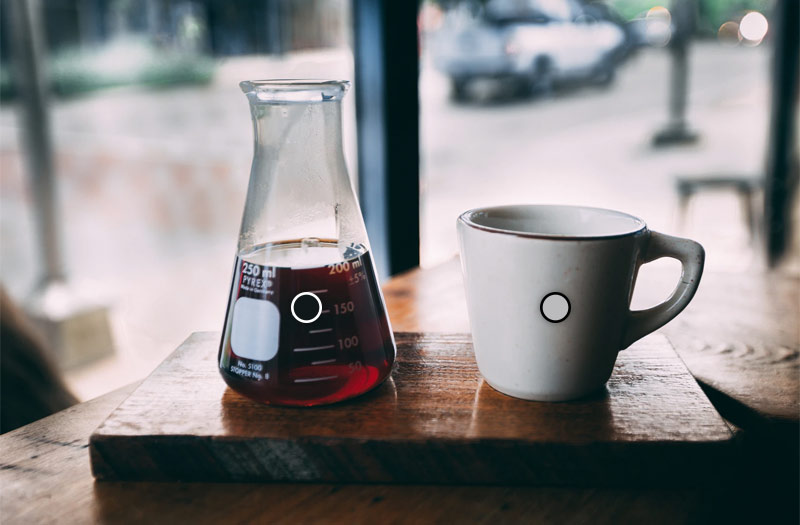
For example, in this image you have two “real life layers”—a wall and a row of bottles. The wall is bluish white, and the bottles have various colors. However, the bottles have a physical property of selective transparency—they let some of the light in and out, so that it can reach the wall and go back to your eyes. This makes you see the wall through them, but it no longer appears bluish white—it has the color of the bottles.
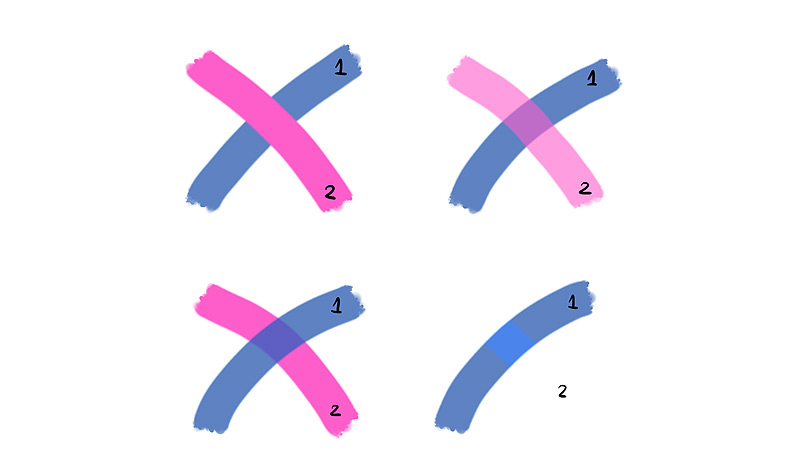
Different materials may have different properties. For examples, both of these containers may contain the same red fluid, but the one on the right is 100% concealing, making it impossible to see “the layer below”.
Thinking about Blend Modes this way will help you conceptualize their function. First of all, you can imagine you’re looking at the layers below through the upper layer. Second, it makes you aware you can change the colors of the layers below by adding a new layer above them. Third, it reminds you that there are many different materials with many different properties, so you’re not limited by default, 100% concealing setting for your layers.
How to Change a Blend Mode?
Every drawing program has a different interface, but if your program has a Layers panel, that’s where most likely you’ll find the option to change the Blend Mode. Look for the text saying “Normal”—click it and you should see a drop-down list of all the Blend Modes available.
You can change the Blend Mode at any time, non-destructively. It won’t affect the content of the layer. So don’t be afraid to experiment and test all the options on the list!
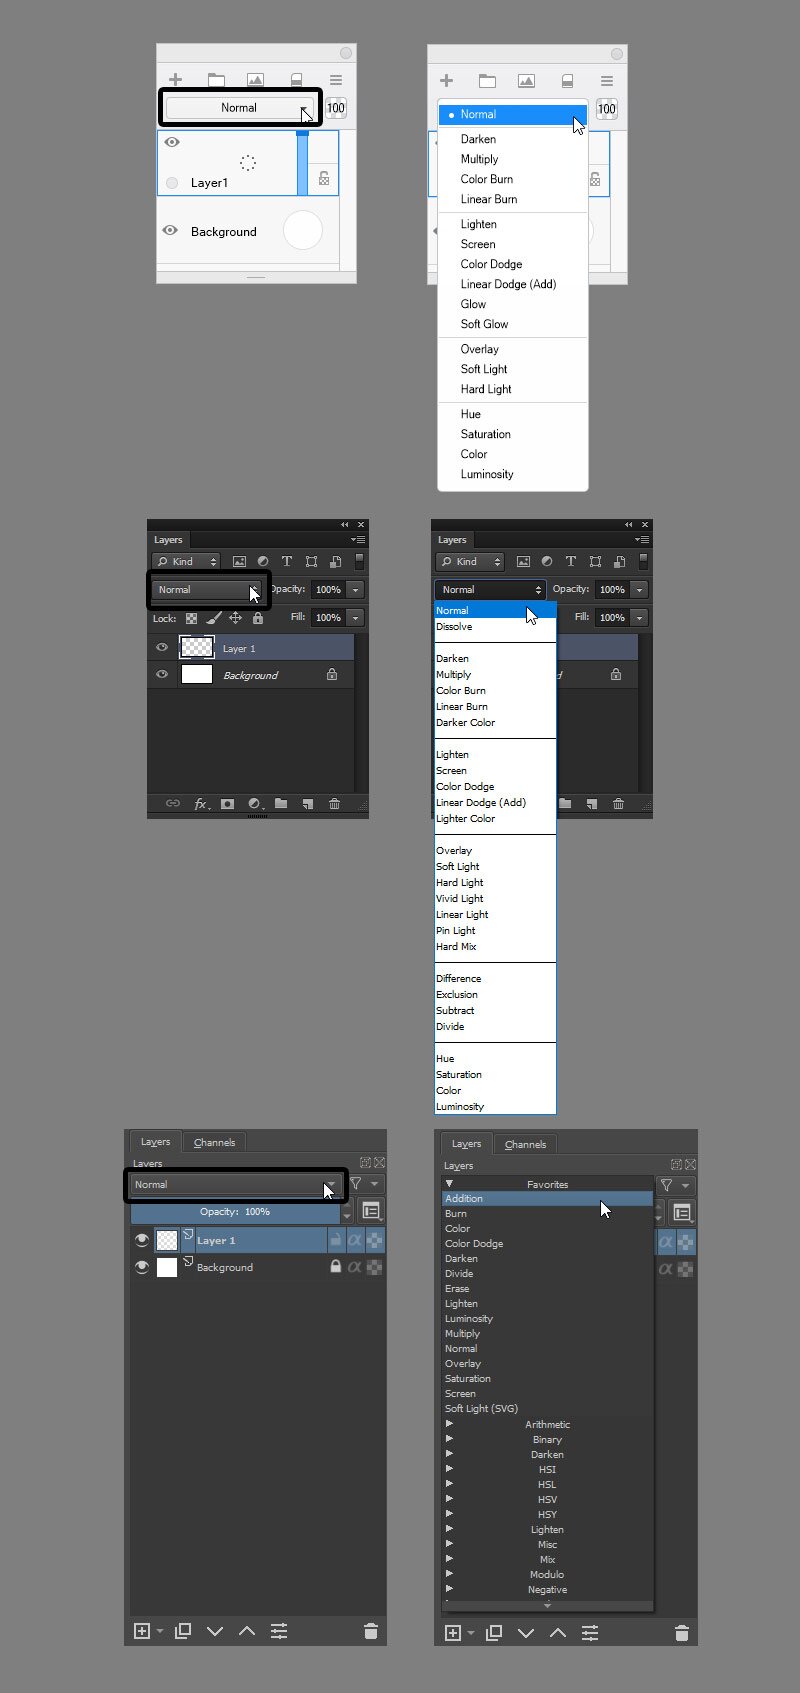
From top to bottom: Autodesk SketchBook, Adobe Photoshop, Krita
What do Blend Modes Do?
You may find a slightly different list of Blend Modes in every drawing program, but there are a couple of popular modes that you should be able to find everywhere. Here I’ll show you what they do and what they’re good for!
Opacity
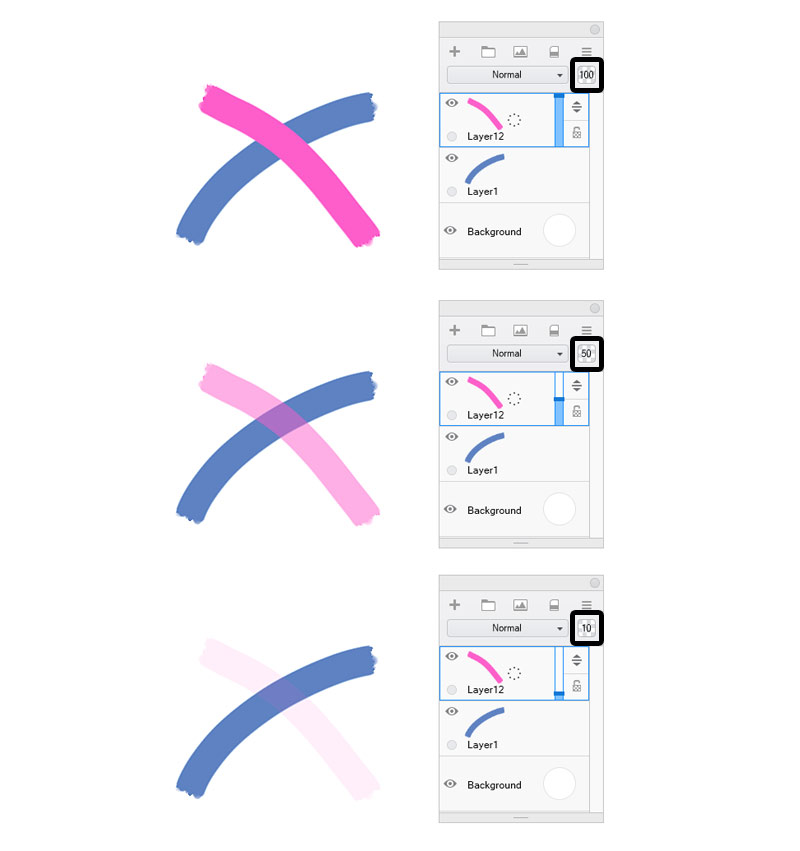
Opacity is not a Blend Mode—it’s more like a modifier of the Blend Modes. It can be changed gradually from 0% to 100%, and this number will define the “strength” of the effect. For example, if the layer is covering, lower the Opacity to make it less covering. If the layer is darkening, lower the Opacity to make it less darkening.
Just like with Blend Modes, you can change the Opacity non-destructively. It gives you more control over the properties defined by the Blend Mode.
Normal
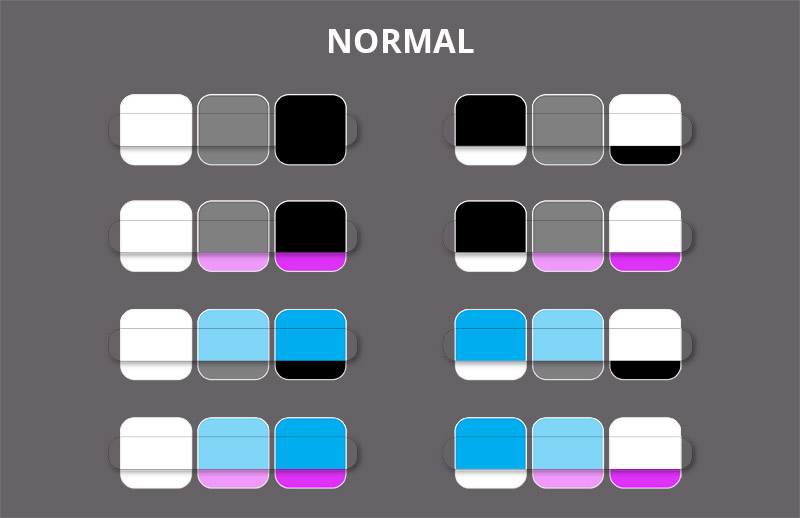
The Normal mode is the default mode. In this mode your lines have the potential to be 100% covering, if only your brush settings allow it—this makes it similar to oil paint properties. This mode is best for sketching, inking, and coloring. It’s the most predictable and the easiest to control. That’s why I’m going to use it for comparison and the standard of “normal” layer behavior.
Darkening Modes
Darkening modes are the easiest to understand, because they share properties with real things. Let me show you!
Darken
The Darken mode gives your layer the properties similar to those of alcohol-based markers—you can only cover the colors below, if you use a darker color. The Hue also changes in the subtractive way.
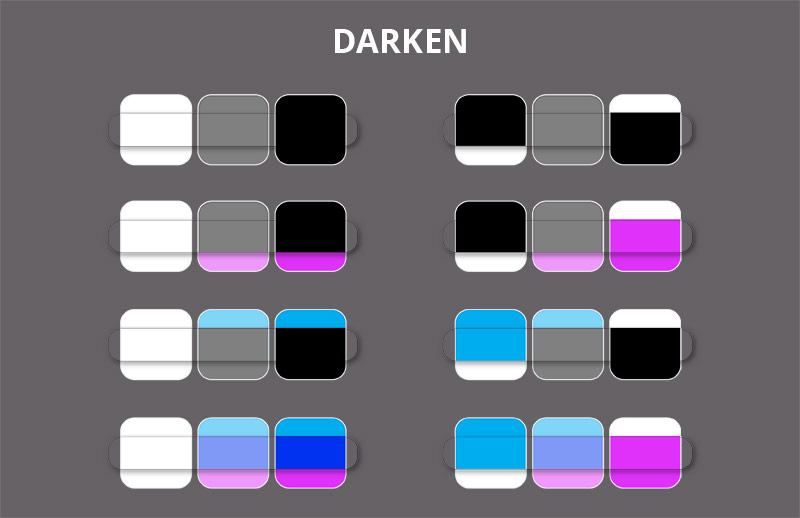
You may feel tempted to use this mode for darkening, but I wouldn’t recommend it—in this mode bright areas are darkened more strongly than the dark ones, significantly lowering the contrast. We have something better for this purpose!
Multiply
The Multiply mode gives your layer the properties of colored glass. Once you think of it this way, it’s pretty easy to imagine what Multiply will do!
First of all, colored glass always has a darkening effect on its content—the more saturated the color, the stronger the darkening. The content is also colored—clear water in a green bottle will appear green. Just like in case of the Darken mode, the color mixing is subtractive.
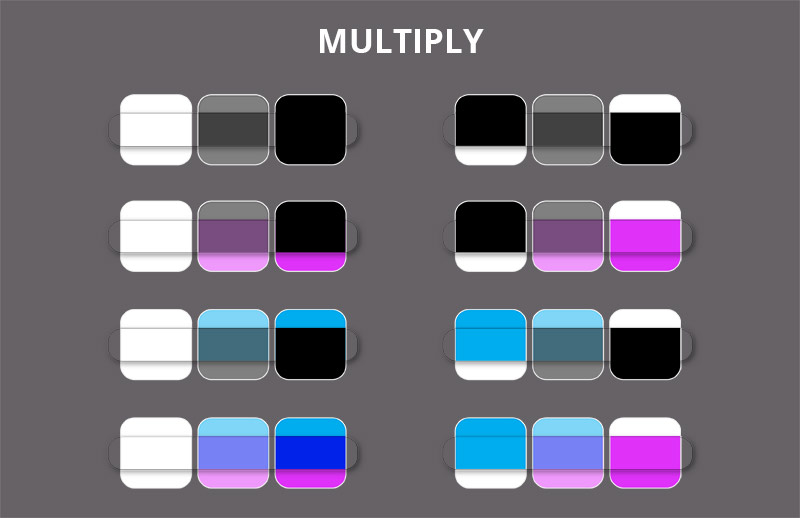
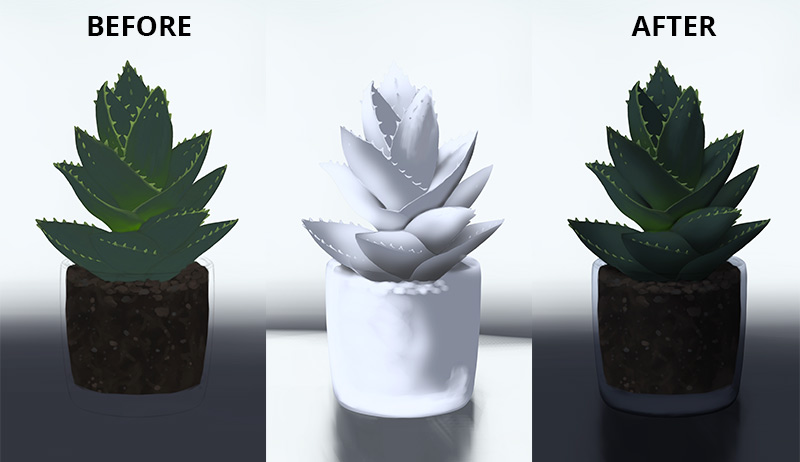
Because of the predictable darkening effect, the Multiply mode is perfect for adding shadows to the layer below. You don’t have to darken each color separately, adding darker red to red areas, and darker blue to blue areas—instead, you can just paint with the color of the shadow, and the colors will be darkened (and mixed) accordingly.
In the Multiply mode white does nothing—it doesn’t cover or darken anything, which makes it invisible. That’s why this mode will also be good for removing white background from scanned/photographed sketches.
Color Burn
The Color Burn mode has the properties of a darkening varnish, that also mixes in a subtractive way, but doesn’t affect white at all. In contrast to the Multiply Mode, the hue of the colors below is more dominant in the mix.
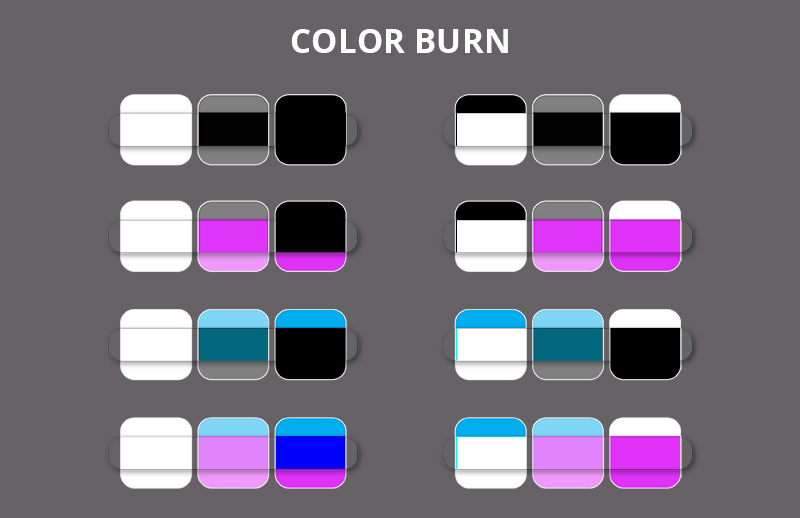
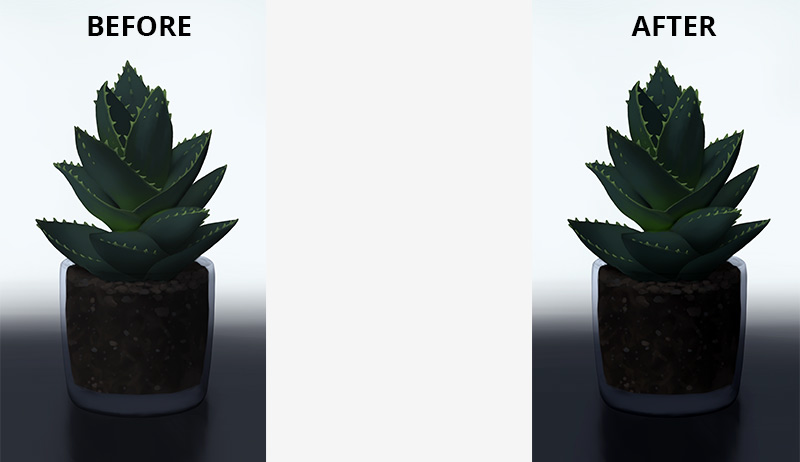
Because the Color Burn mode doesn’t affect white, you can use it to darken everything except the brightest areas of the layer below (for example, to darken the shadows the most, darken the midtones slightly, and not darken the highlights at all). It will also help you create an underexposed effect.
Linear Burn
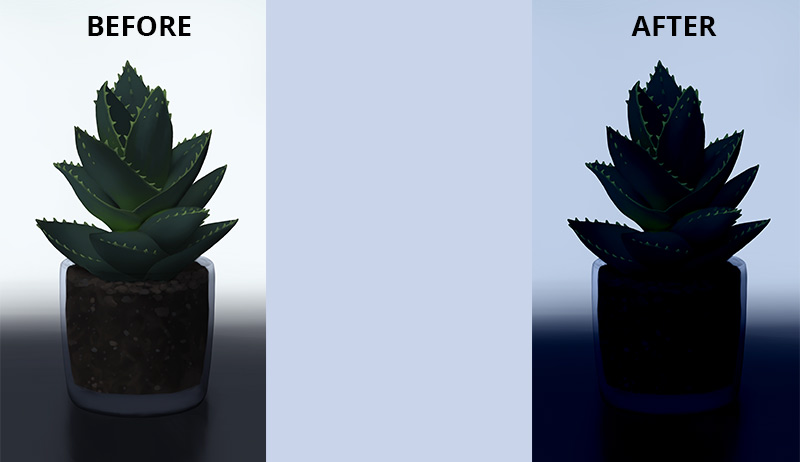
The Linear Burn mode has the properties of colored glass, like Multiply, but it’s thick glass that doesn’t let a lot of light through. Only the highlights can be seen through it, but even they are darkened. The higher the saturation, the more pigment the glass has and the more darkening the effect.

It’s best to think of this mode as a combination of The Multiply and Color Burn modes—The Color Burn darkens everything except the bright areas, and then you add Multiply that darkens these areas.
Because this mode is more selective than Multiply, it’s better suited to simulate the night conditions, in which only the brightest areas stay bright. Also, if you want to paint real colored glass, this mode will give you a less cloudy effect than Multiply.
Brightening Modes
The brightening modes are direct opposites of the darkening modes. In reality drawing tools don’t have direct opposites, but here we come into the realm of “physical” properties that are focused more on light rather than on pigment. Because of this, you’ll need to think more abstractly about these modes.
Lighten
The Lighten mode is the opposite of the Darken mode. So imagine a marker that mixes in the additive way, brightening and changing hue of everything brighter than it. In a sense, it’s a heavily pigmented highlighter!

Just like the Darken mode, this mode lowers the contrast of the image, which makes it pretty unpredictable. And just like with the Darken mode, we have something better for brightening!
Screen
The Screen mode is the opposite of the Multiply mode, and it’s just as useful. It brightens all the tones uniformly, mixing them in the additive way. No matter what color you use, it will have the same brightening effect—so it’s perfect for adding highlights or rim light.
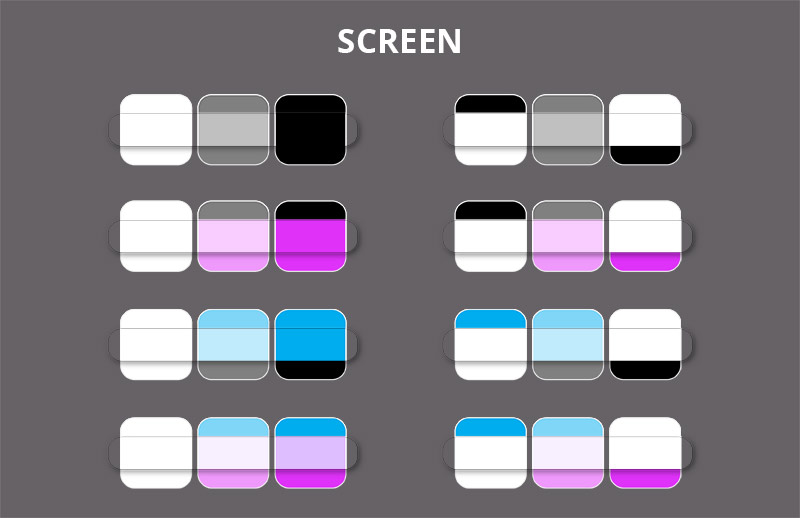
However, this mode shouldn’t be used for “adding light” to objects. Remember that shadow is the lack of light, so the light area will simply seem illuminated by the lack of shadow (created by the Multiply mode)—no need to add anything to it, it will be bright just because it’s not dark. You can only make the un-shadowed area brighter if it’s overexposed, if the light hits the object at a sharp angle (rim light), or if the surface is shiny (and then you paint the reflection of the light source on it).
Color Dodge
The Color Dodge mode, the opposite of the Color Burn mode, does exactly the opposite: it brightens the bright parts heavily, ignoring the darkest ones. It can be used to create an overexposed effect.


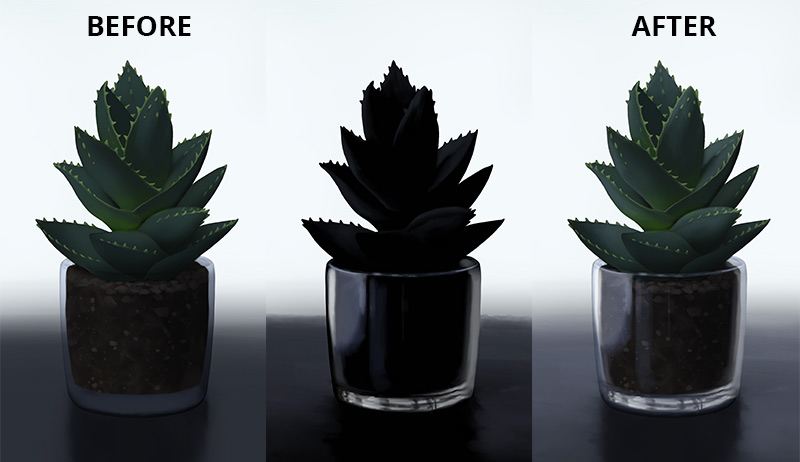
Linear Dodge
The Linear Dodge mode is the opposite of the Linear Burn mode, which means it’s also a mix of the Screen and Color Dodge modes. The Color Dodge aspect makes all the bright areas much brighter, and the Screen aspect brightens the darker areas as well—just more subtly.
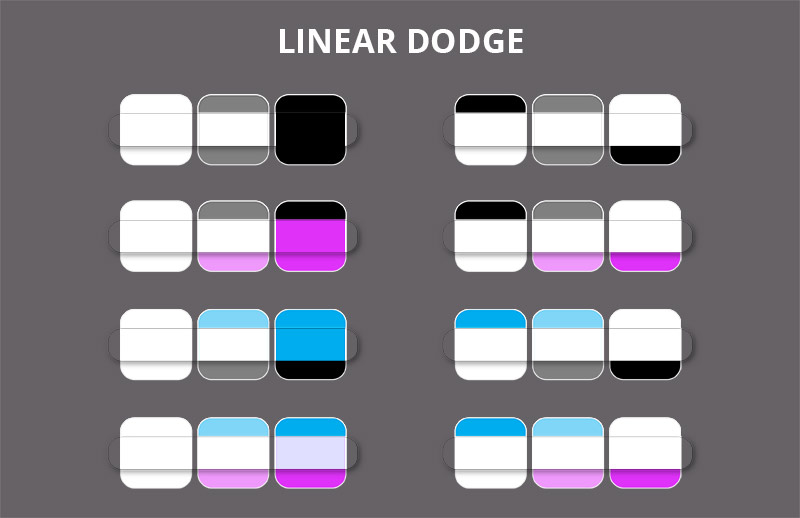
Because of the strong brightening power and coloring abilities of this mode, it’s perfect for very quick rim light and magical effects.
Contrasting Modes
Each contrasting mode is a combination of a darkening mode and its opposite brightening mode. So if you want to darken some parts, and brighten others using the same layer, use one of these!
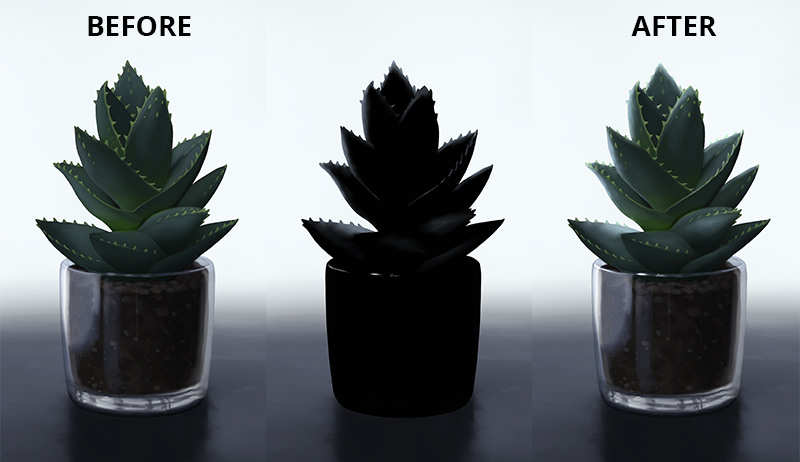
Overlay
The Overlay mode is a mix of the Multiply Mode and the Screen mode. Bright color in an Overlay layer will brighten the bright areas, dark color will darken the dark areas. Because of this combination, you can both brighten and darken colors predictably, while keeping a nice contrast.
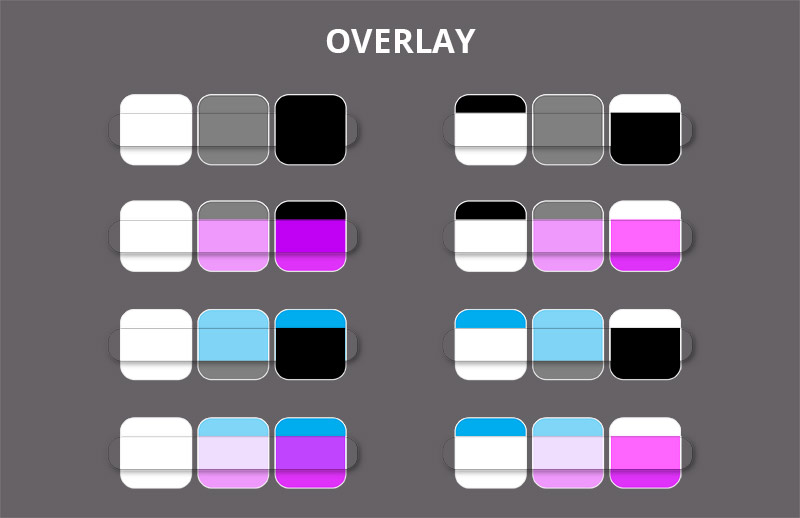
The Overlay mode (as well as the other contrasting modes) will be good for adding the subsurface scattering effect—it allows you to make the shadows properly warmer, more saturated, without brightening them too much. You can also use it to increase the overall contrast in the artwork.
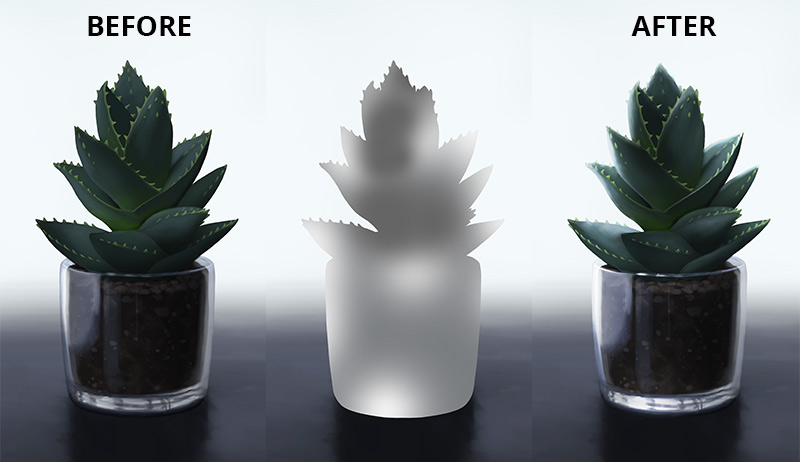
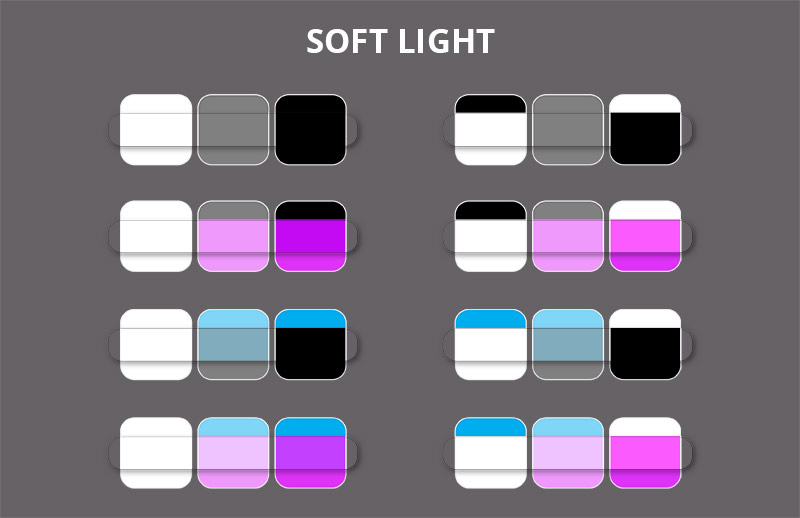
Soft Light
The Soft Light mode is a mix of the Darken mode and the Lighten mode, and it works like a more subdued version of the Overlay mode. Both darkening and brightening are less dramatic and easier to control. Because of this, the Soft Light mode can be a better fit for adding a color filter.
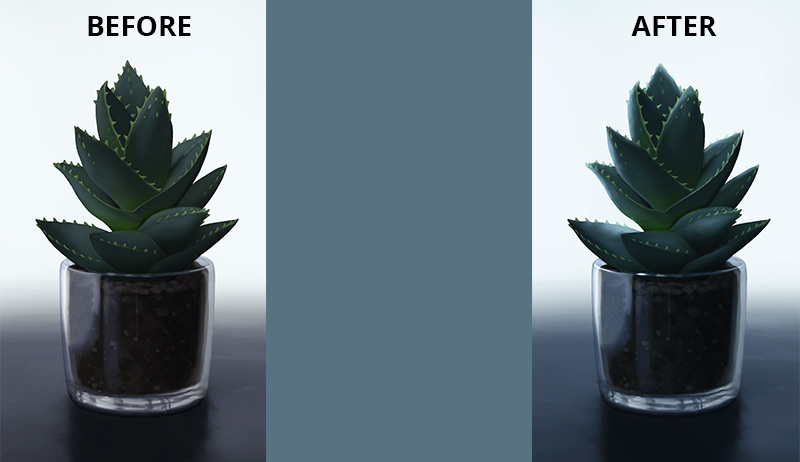
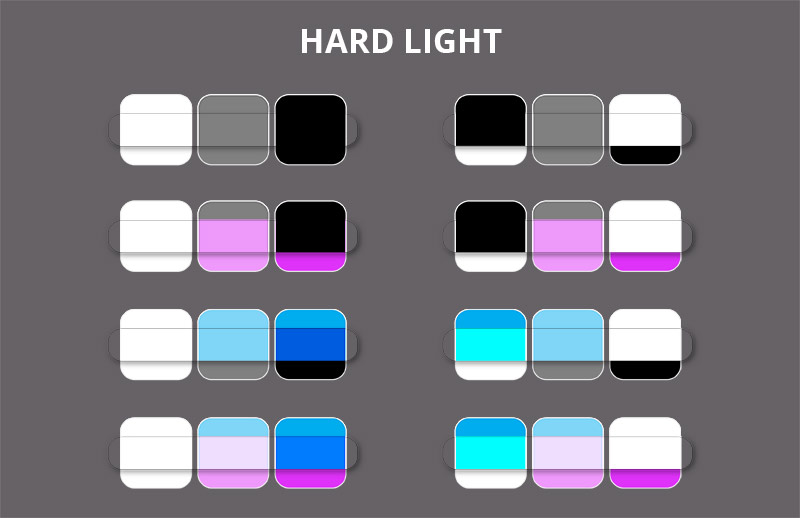
Hard Light
The Hard Light mode is a mix of the Multiply Mode and the Screen mode, just like Overlay, except here the darkening and brightening is uniform, at the cost of the contrast. This mode is useful for introducing reflected light into dark shadows, too dark to be accessible for the Overlay mode.
Coloring Modes
Finally, let’s talk about typical “color filter” modes. In my opinion, these are the easiest to understand, although they may be confusing if you only read the names.
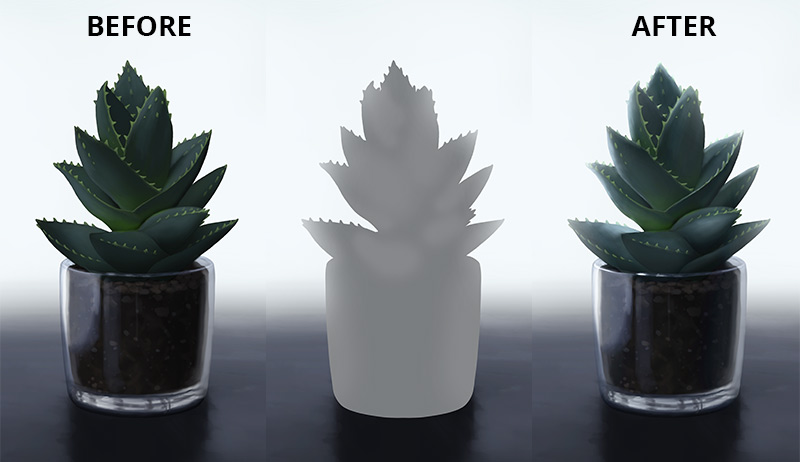
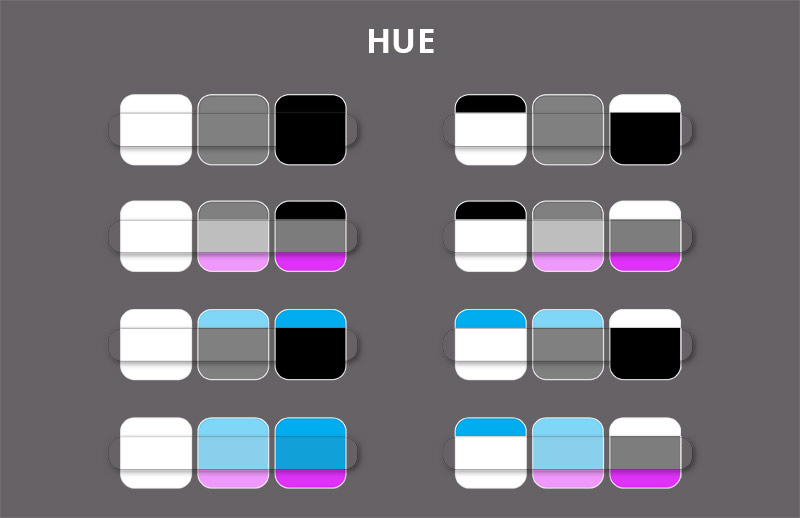
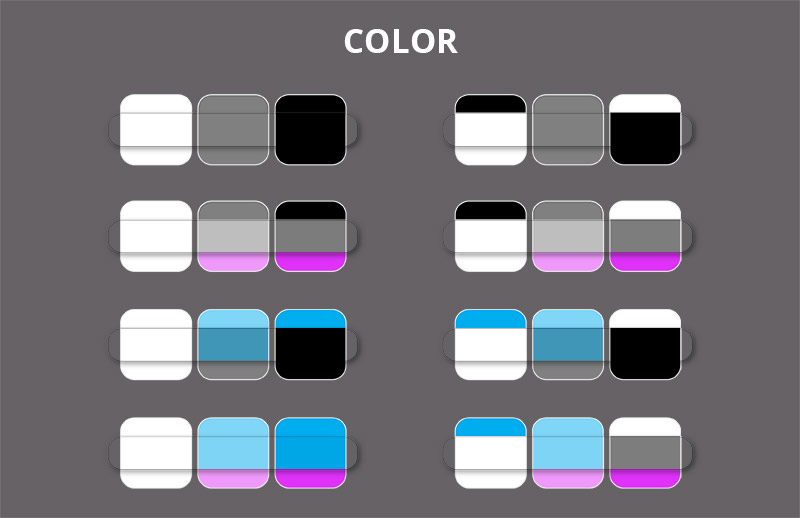
Hue
The Hue mode replaces the hue of the colors below with the hue of its content. The Value isn’t affected by this, so a low saturated red will turn into a low saturated green—no matter how much saturation you add to the Hue layer. This mode is useful for changing the hue of one part of the image, without affecting the contrast of the whole piece.
Saturation
The Saturation mode allows you to modify the saturation of the colors below. It doesn’t matter what Hue you paint with—it will be ignored. However, the higher the Saturation of this layer, the more saturated the colors below will look—and vice versa!

This mode will have a variety of uses—from warming the shadows for subsurface scattering, to adjusting the saturation of parts of the image, to removing the saturation completely using black.
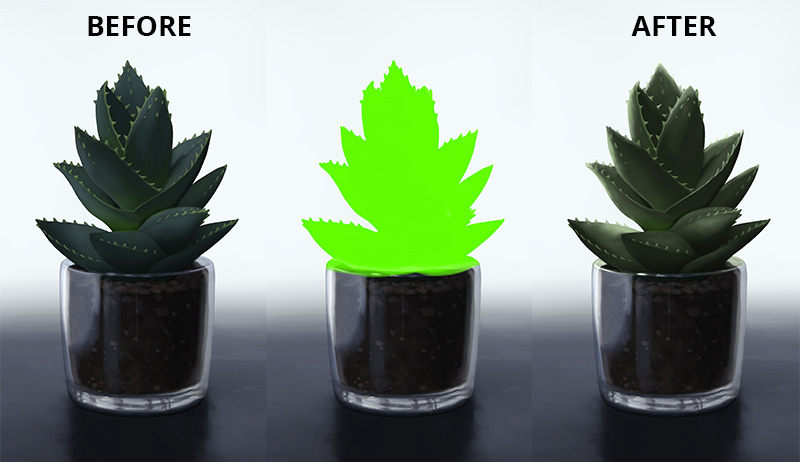
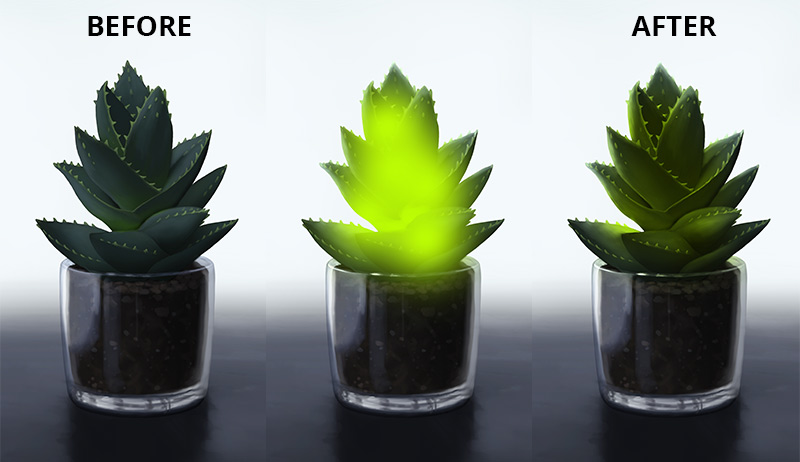
Color
The Color mode works just like the Hue mode, except it adds Saturation to the mix. This may affect the contrast of the picture, so be careful with it—changing the color of one part if the picture may make the whole thing look wrong. However, this mode will also work great as a coloring filter, especially when combined with lower Opacity.
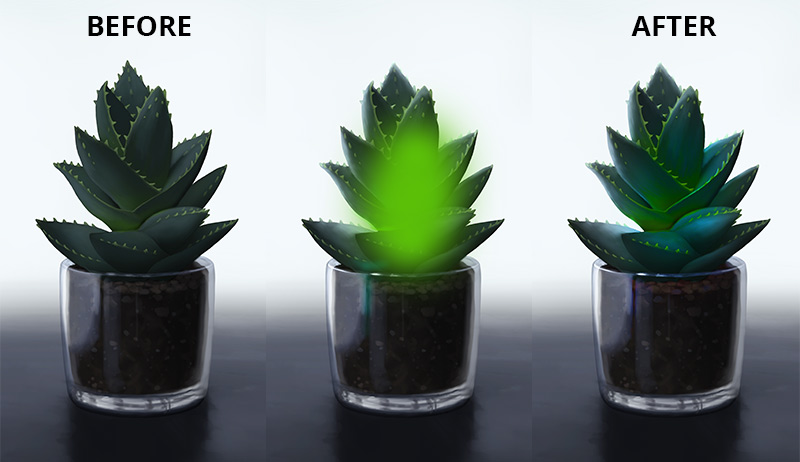
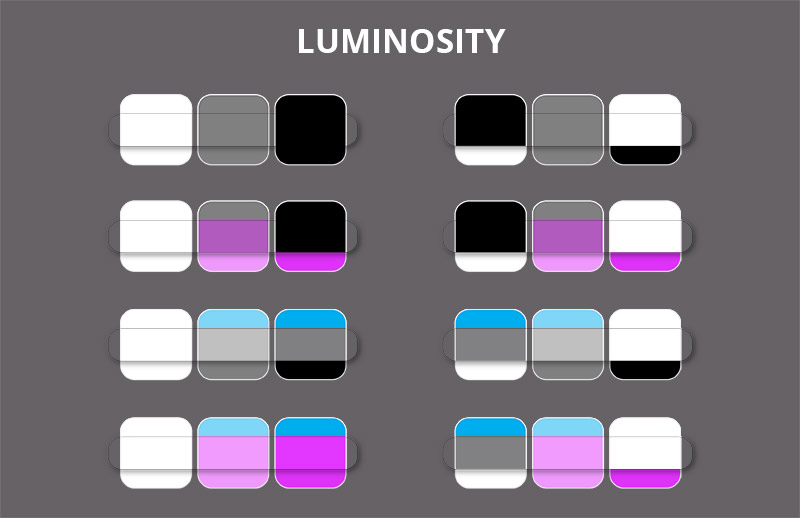
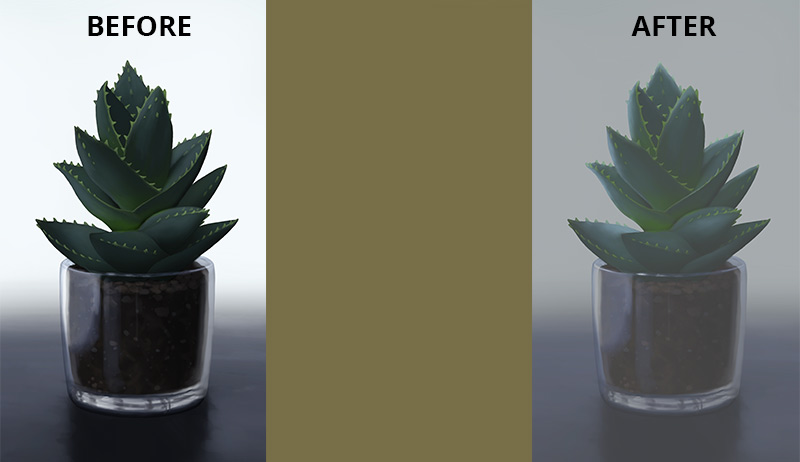
Luminosity
The Luminosity mode replaces the Value of the colors below with its own Value. The Hue and Saturation of this layer are ignored. At 100% Opacity it’s pretty useless, because all it does is decreasing the contrast, but at a low Opacity it can be used to create an effect of fog or smoke
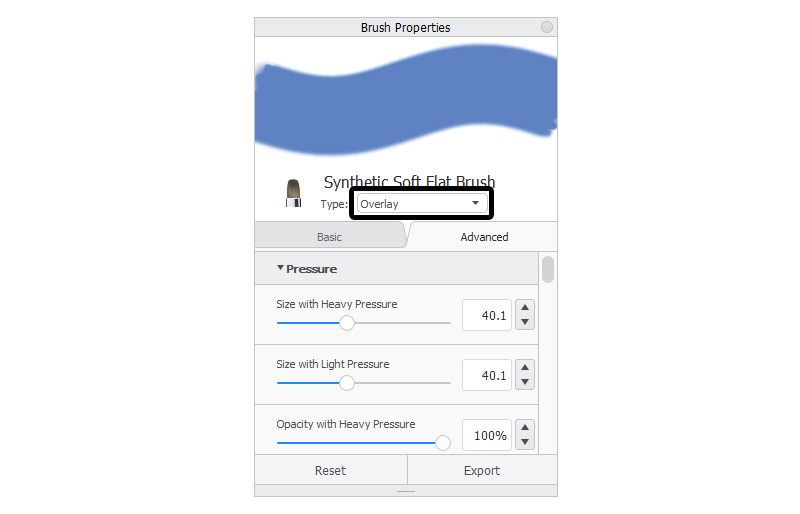
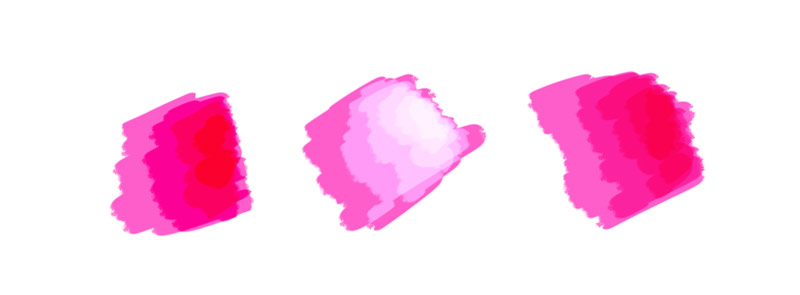
Blend Modes in Brushes
So far we’ve been talking about the layers only, but Blend Modes can be applied to brushes as well. Then each stroke is treated as a new layer, and just like in traditional art, these layers merge by default.
Using a Blend Mode on the Brush instead of on the layer allows you to control the intensity of the effect by simply drawing more strokes in one area. This also makes it feel more like traditional painting, because you don’t have to plan everything ahead— you can keep the layer in Normal mode and change the mode of the brush on the fly, creating various effects on the same layer.
Conclusion
Blend Modes are incredibly useful, and you shouldn’t be afraid to apply them in your art. However, you shouldn’t overstate their power either—they may work like magic sometimes, but it doesn’t mean that they will make your artwork pretty for you. As everything in digital art, they’re just a tool, and they will give you great results only if you control them. But knowing how they work is already the first step towards gaining that control!
Even after all this explanation this topic may still be confusing to you, but now at least you know the general concept and what to expect when experimenting with the Blend Mode list. Also, you don’t have to learn it all by heart—this article will be here whenever you need it!
If you want to see Blend Modes in practice, here are a couple of tutorials where I used this technique:


3 Comments