2. The Sides
What Are They?
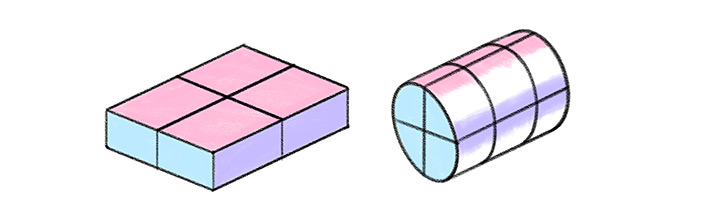
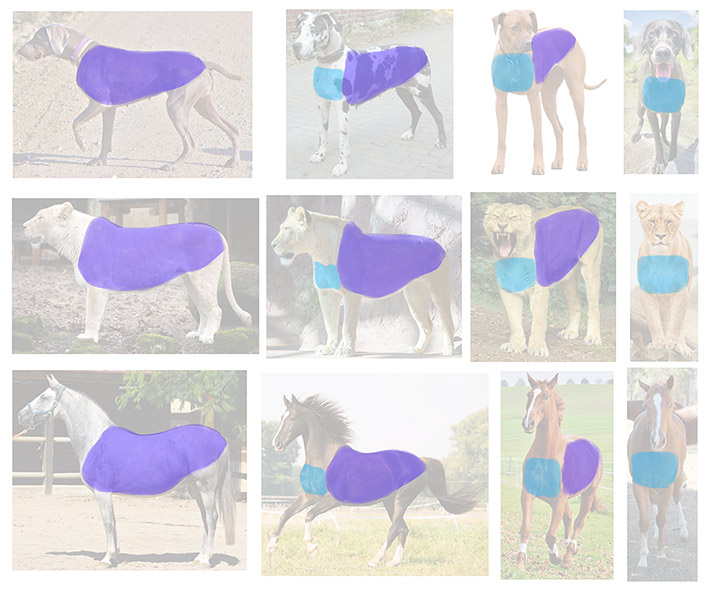
3D objects have three pairs of sides: top/bottom, front/back, and left side/right side. An object looks 3D if you can see one side from each pair.
Why Are They Important?
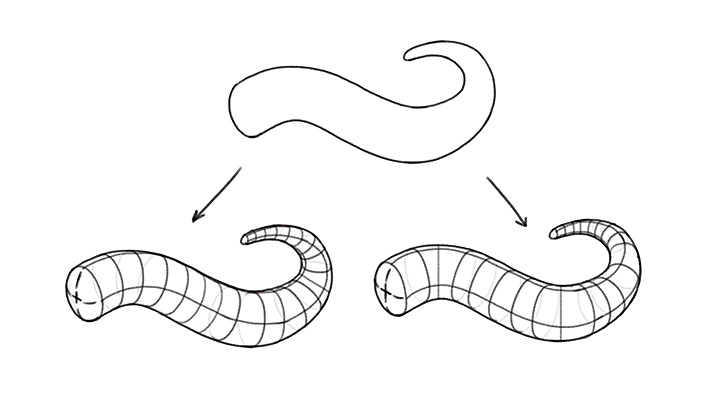
Objects outlined by an identical outline may have completely different orientation in space. The sides will visually communicate this difference to you the way the outline alone can’t.
How Big Should You Make Them?
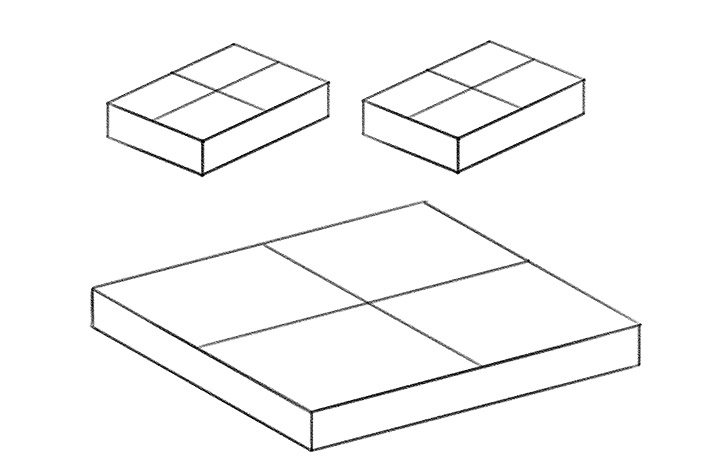
There are two types of size: objective and subjective. Objective size is the actual size of the object–the one you can measure and touch. You know, objectively, that the front of car is shorter than its side, or that your arm is longer than your hand.
However, because of the way our eyes work, we can only see this objective size when we look at one side of the object–just one.
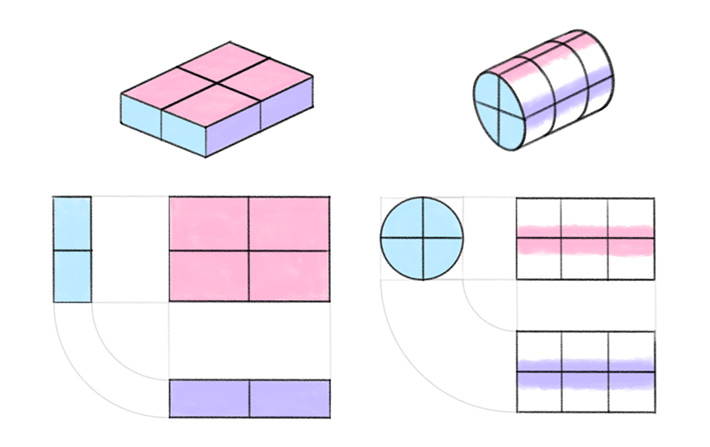
Once another side comes into view, the objective size turns into subjective size–the size you see. The rule is very simple: if you want to see more of one side, you need to show less of another side.
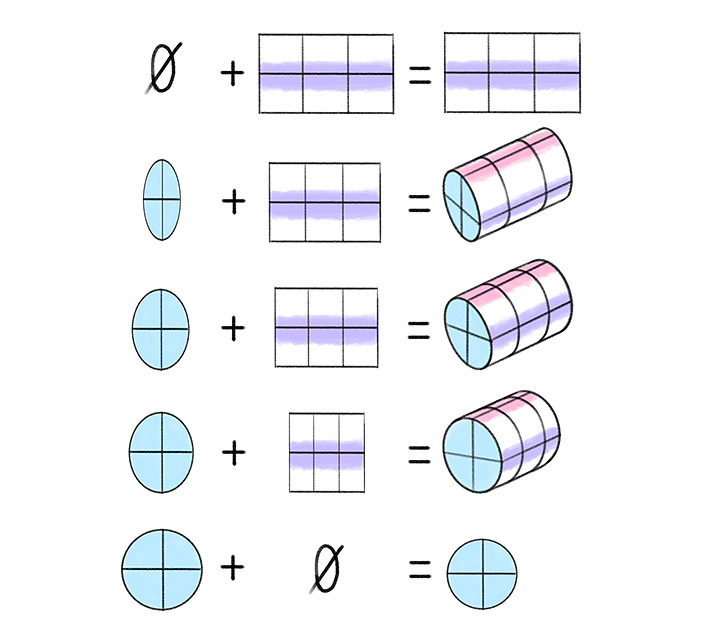
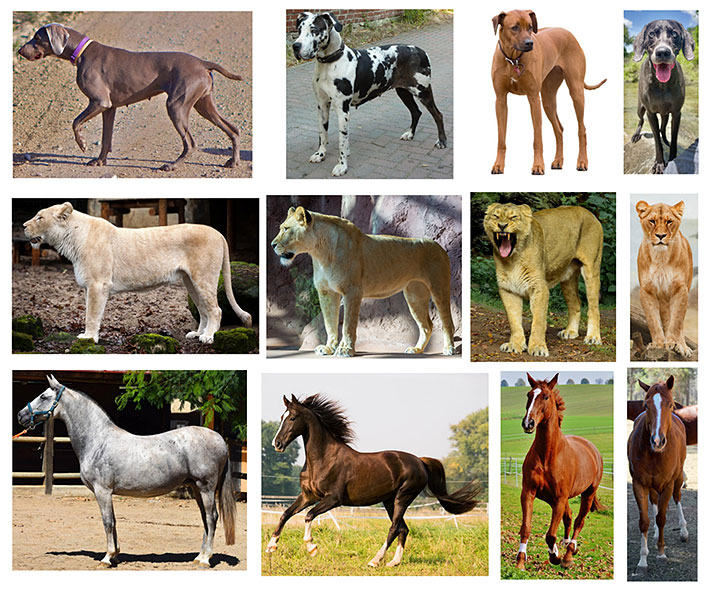
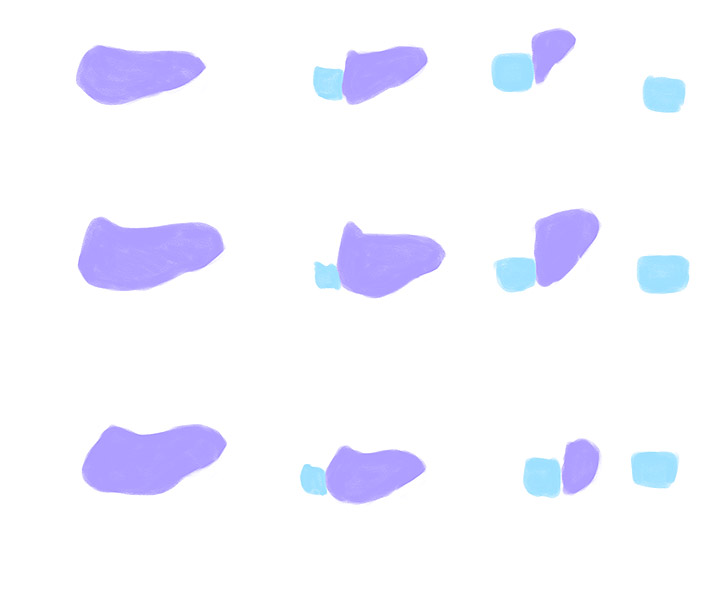
So if you want to check if you got the sides right, just compare their sizes:
- If you can see the whole front, you shouldn’t be able to see anything else.
- If you can see a bit of the front, you should be able to see a lot of the left/right side.
- If you can see a lot of the front, you should be able see a bit of the left/right side, etc.
Where Should You Draw Them?
Define the Volume
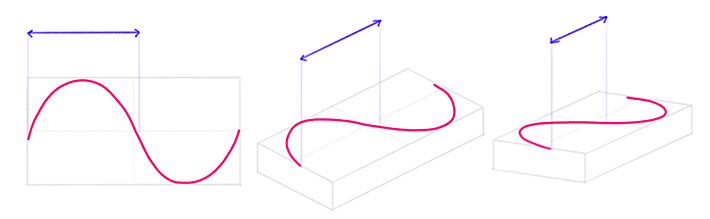
Imagining and drawing the sides of a plane is pretty straightforward, so you should use this for your benefit–even if your object is supposed to be floating in space, always start your drawing with a plane (even imaginary one). The position of the plane should be adjusted to whatever position you want to see your object in.
Sketch the volume of your object using the long axis of the plane for its direction. Remember about the size adjustments–you need to shorten the object to make space for the front.
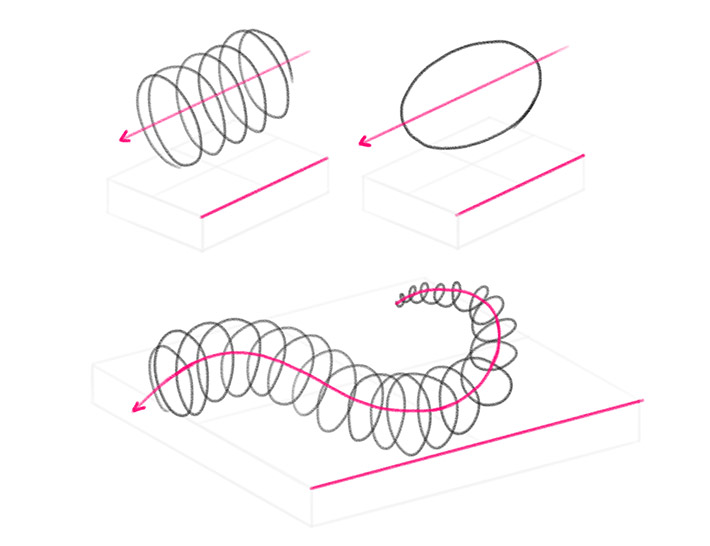
Now, define the size of the front by drawing an ellipse. The bigger the front (and the shorter the object), the wider the ellipse. The ellipse should be rotated in such a way to share one axis with the long axis of the object.
Draw this ellipse wherever it’s most convenient, depending on the shape of the object:
- If it’s a cylinder–on the front
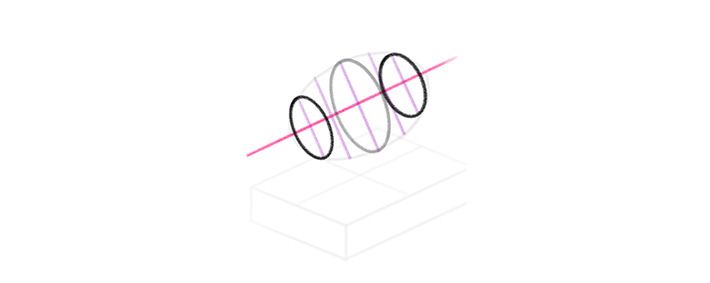
- If it’s an ellipsoid–in the middle
- If it’s a curved tube–in the area parallel to the long axis of the plane
A small disclaimer here: it’s an ellipse only if your object has a circular cross-section. It can be any other shape, but it’s good to start with an ellipse for simplicity’s sake, and adjust the shape at the end.
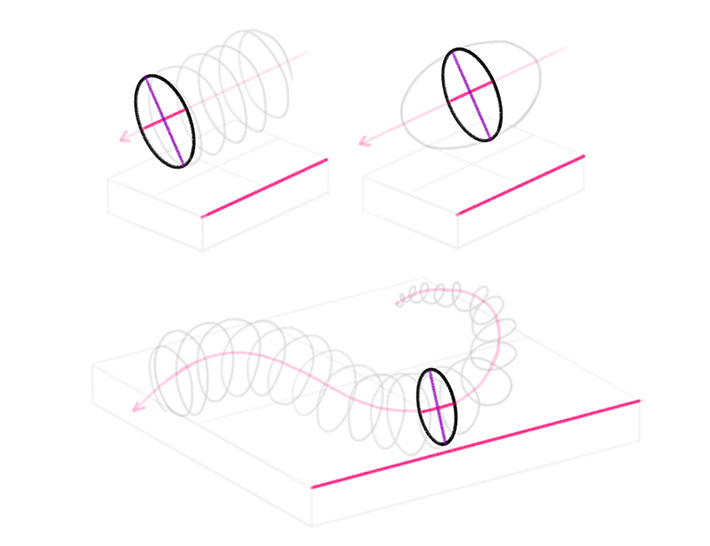
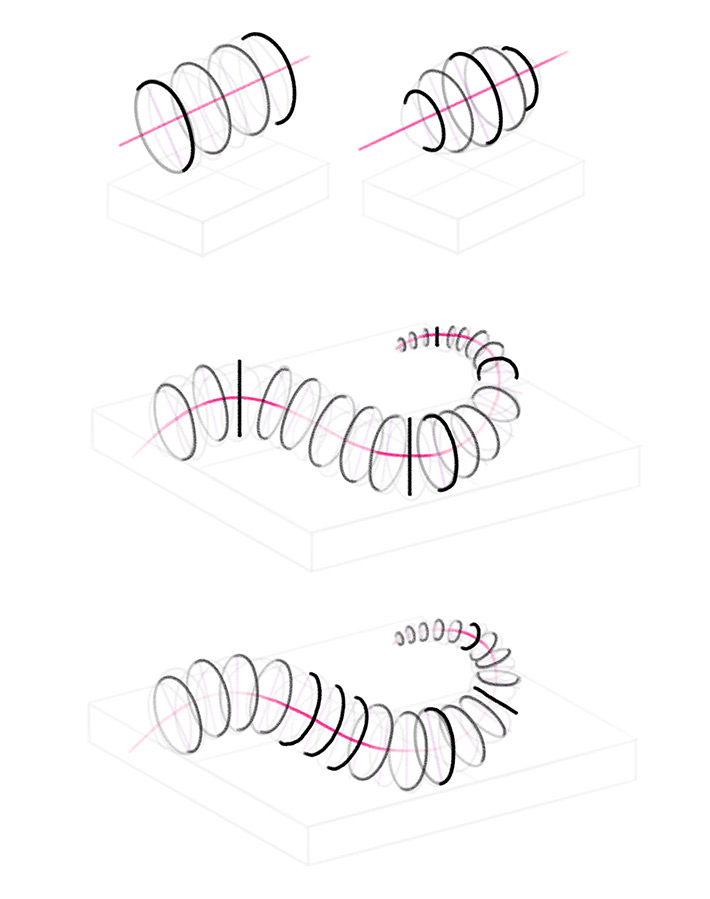
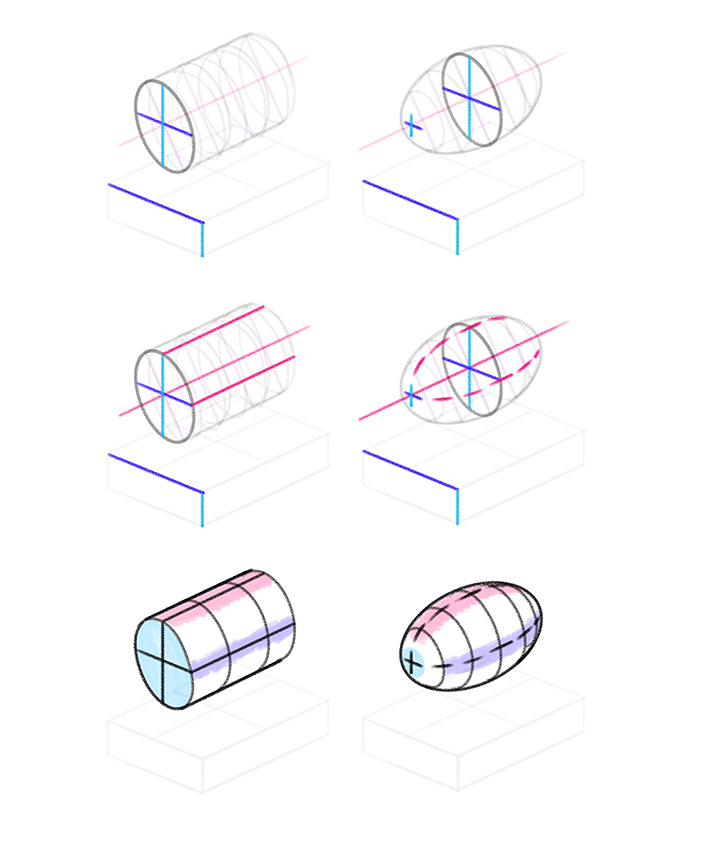
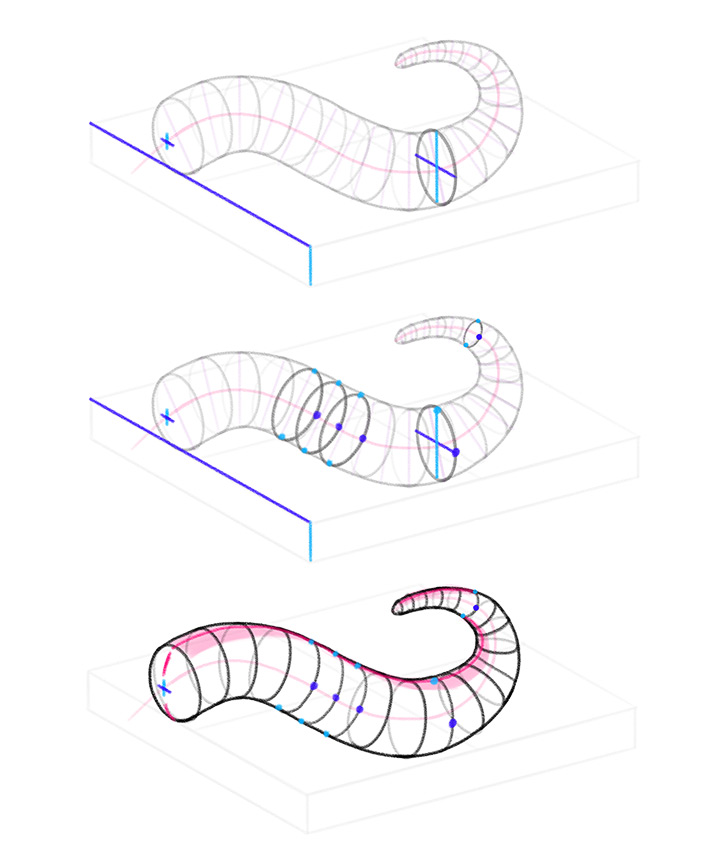
If you draw similar ellipses all over the object, it will immediately look 3D. However, their position and width can’t be random. First, because the short axis of each ellipse is known, you can create the second axis just by crossing the first one at the 90° angle.
Second, you need to define the width of each ellipse. Start by finding the transition points–the will be different depending on the shape the object:
If it’s a cylinder–draw an ellipse on the back. It should be slightly wider than the front (and, if you’re going for the 2-point perspective–also smaller).

If it’s an ellipsoid–draw two transition points:
- one close to the front–smaller and slightly narrower than the middle one.
- one close to the back–smaller and slightly wider than the middle one.
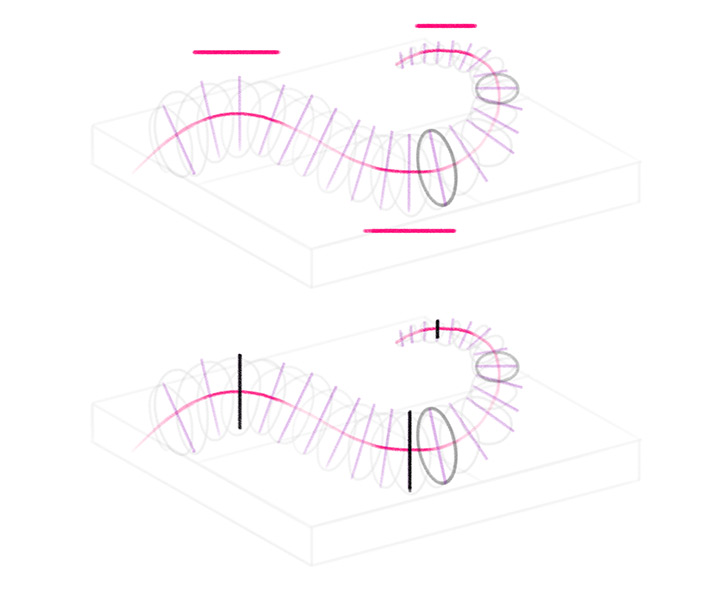
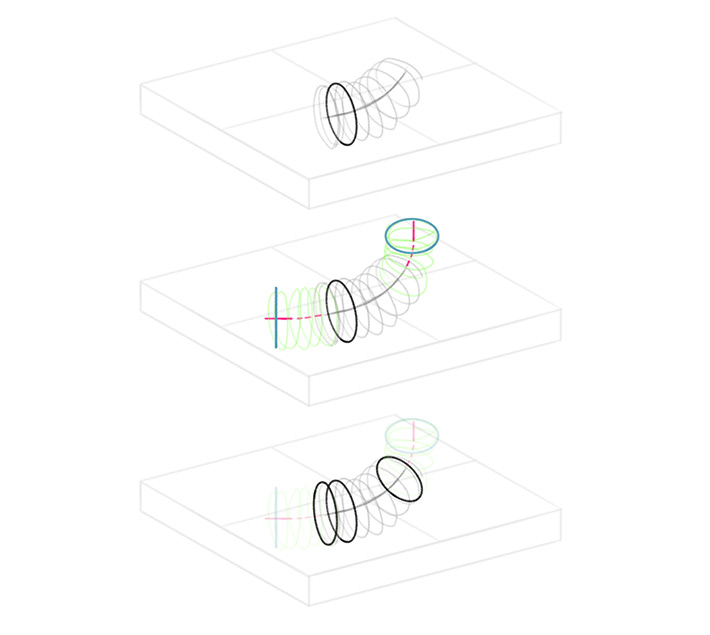
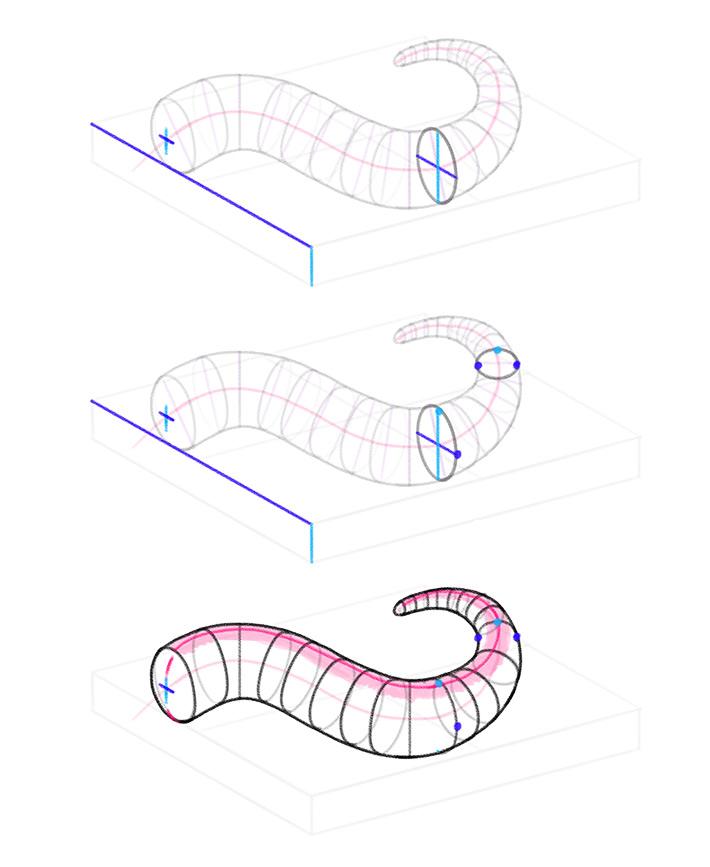
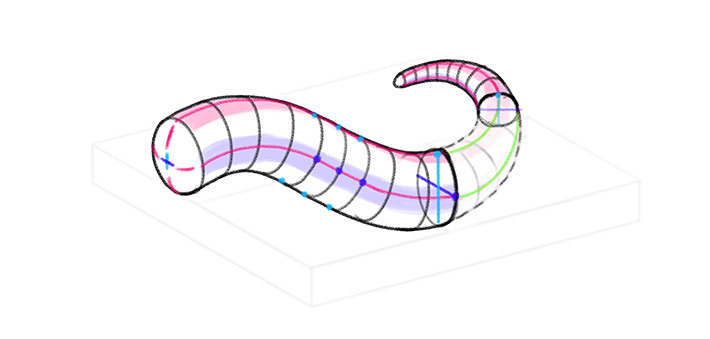
If it’s a tube curving left/right–draw two types of transition points:
- a round one in the area where the curve is vertical–it should be slightly wider than the first ellipse.

- a flat one in the area where the curve is horizontal–it should be simply a vertical line.
If it’s a tube curving up/down–draw two types of transition points:
- a round one in the area where the curve is parallel to the shorter axis of the plane–it should be slightly wider than the first ellipse.
- a flat one in the area where the long axis of the ellipse is parallel to the shorter axis of the plane–it should be simply a line.
Sometimes it may be bard to find such areas in your curve. If this is the case, try to imagine the rest of the curve–conveniently curving in the right direction. You can also use a general rule: if an ellipse looks a certain way in the transition point, the ellipse in an area similar to the transition point will be similar to it.
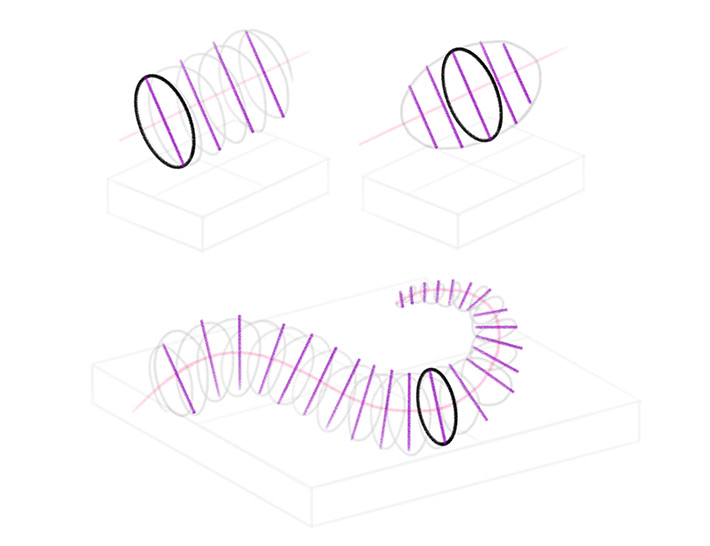
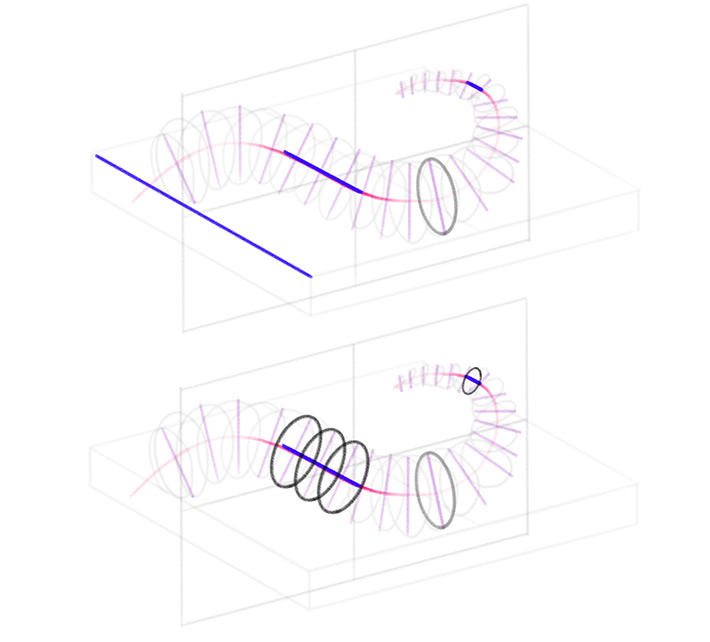
Now all you need to do is to draw a transition between these ellipses/lines. Don’t draw the whole ellipses, just a half of each. These curves should curve away from the front, and change direction every time they meet a flat line.
Once you’re done with the ellipses, it should be easy to outline the whole object:
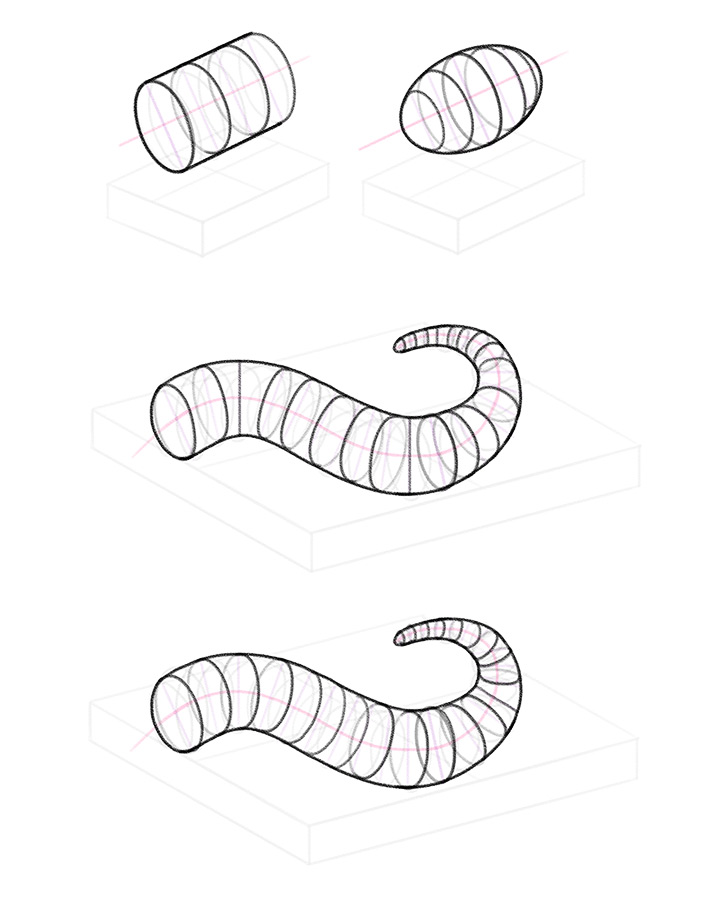
Add The Sides
If the object is a tube/ellipsoid, you can easily add the sides by copying the axes of the plane. You just need to attach lines to their tips, parallel to the long axis of the object:
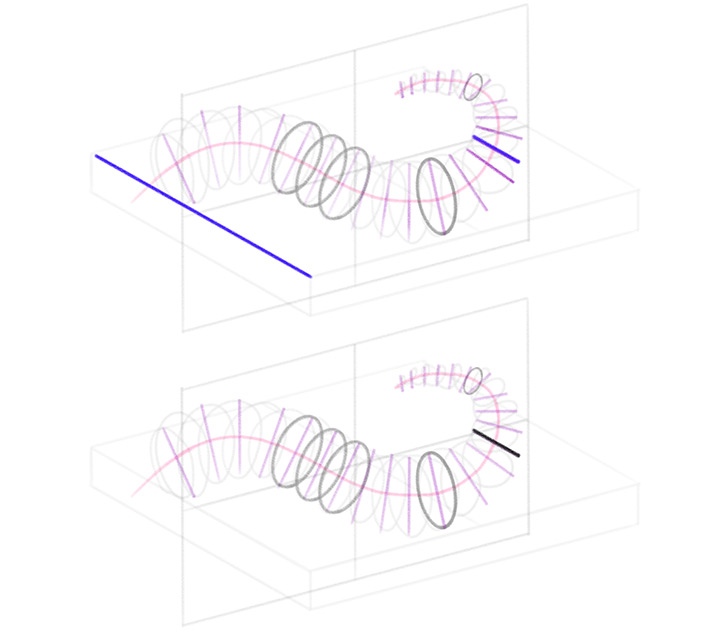
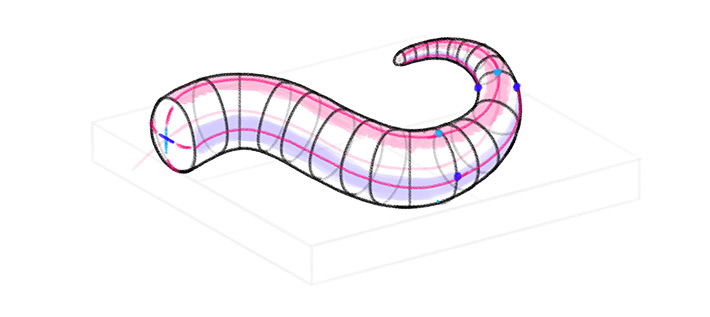
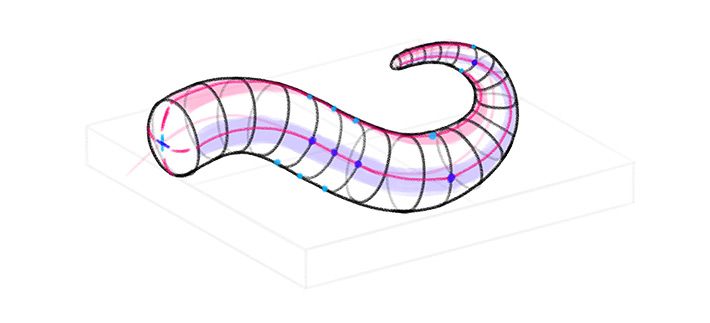
If the object is curved, you can add these axes to the first ellipse, and then draw the top line from them, across the top of the round transition points.
The last side can be added by following the same rule. Personally, I just draw this line by trying to keep the equal distance from the top–if the top goes lower, the side goes lower; the top goes higher, the side goes higher, etc. The distance between the top and the side can never be smaller than the half of the object’s width.
What If the Curve Changes Orientation?
Sometimes the same object curves up/down in one area, and left/right in another. If this is the case, locate the transition area between these two parts, and manage them separately. Then just connect the parts by drawing a transition.
0 Comments