3. Multiple Objects in One Scene
Drawing a single object floating in space is one thing–making multiple objects look like a part of the same scene is another. However, now that you know how the axes work, you’ll see it’s just a matter of paying attention to them!
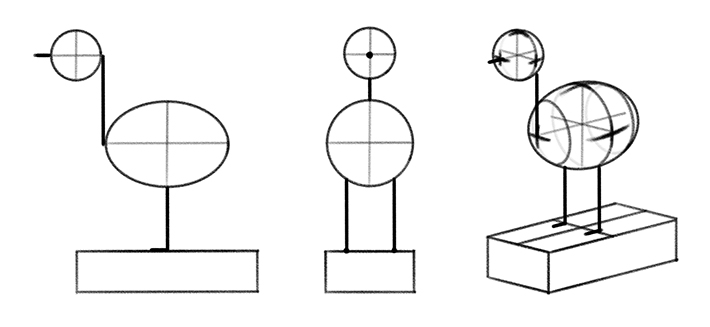
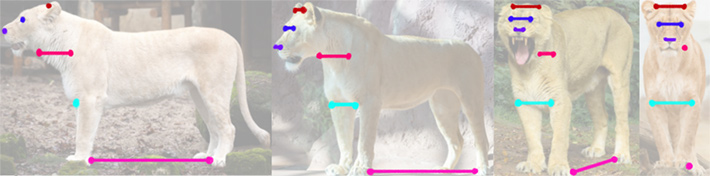
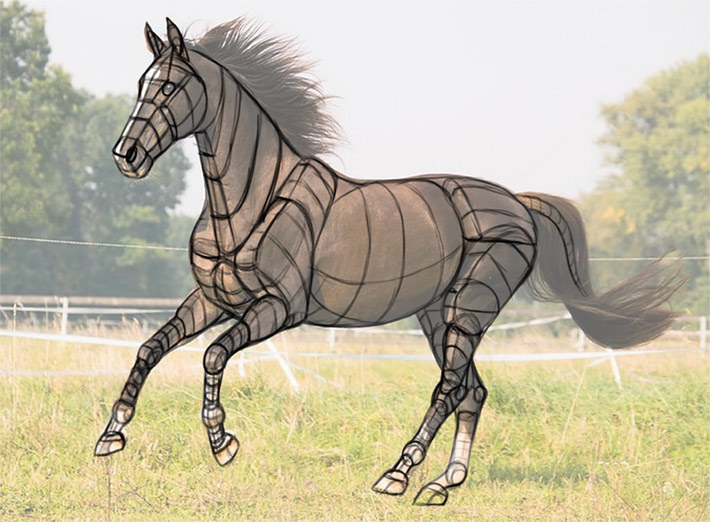
Let’s take a look at this complex object. It’s made of multiple parts: the torso, head, legs, neck, and beak. There’s also a ground plane underneath.
Keep Axes Parallel
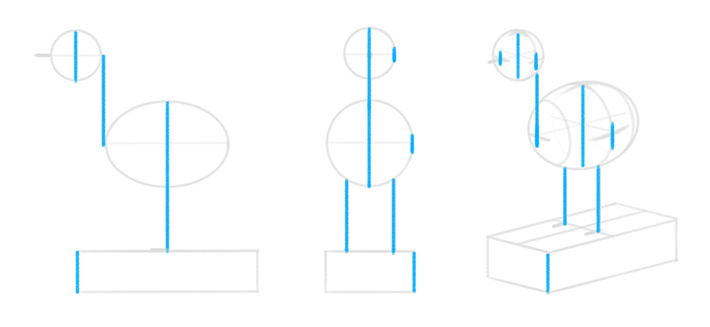
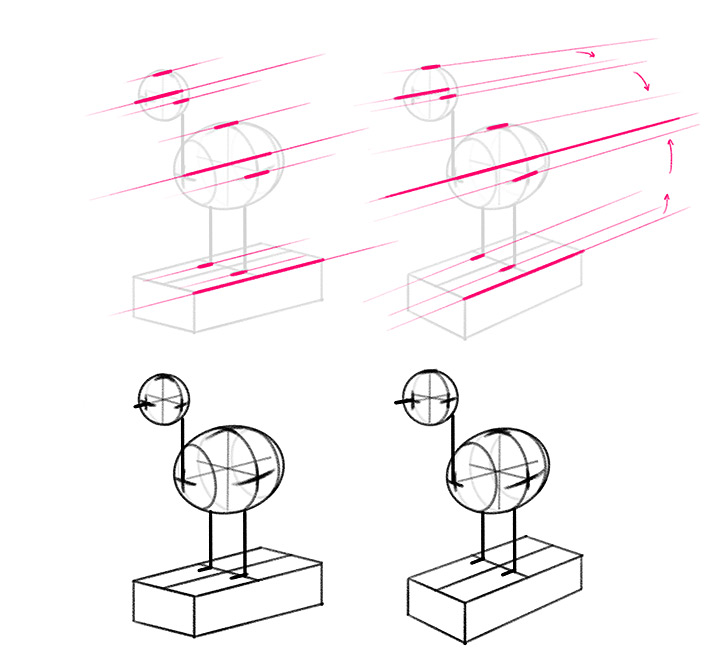
The first rule you need to remember is that if something is parallel in on view, it must be parallel in every other view as well. Here, for example, the legs and neck are parallel in the side view, so they’re also parallel in the front view, and the 3D view.
It works the same for all the other axes:
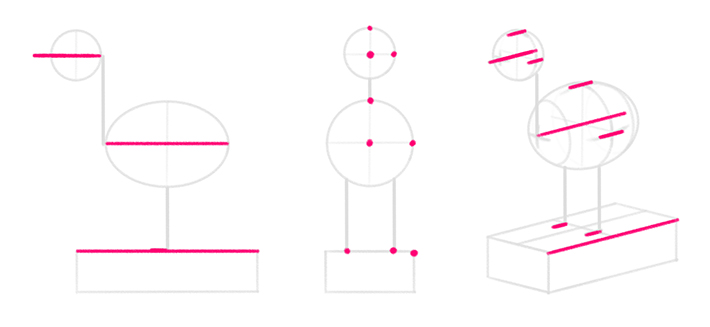
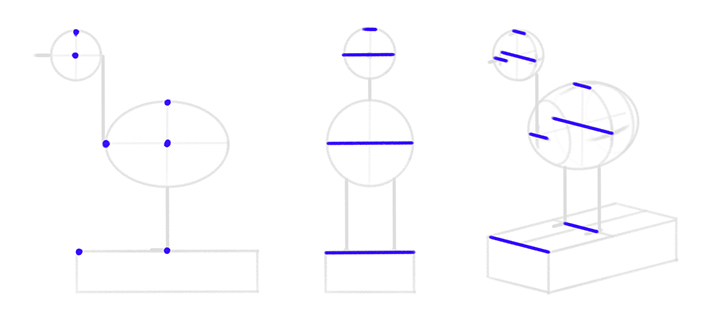
Here’s a practical example:
Keep in mind that when I say “parallel”, I mean objectively parallel. If you want to use the 2-point perspective, you need to tilt these parallel lines, just as you would if you were drawing a plane. Treat the whole scene as one big object when doing this–pick just one axis that all the others will tilt towards.
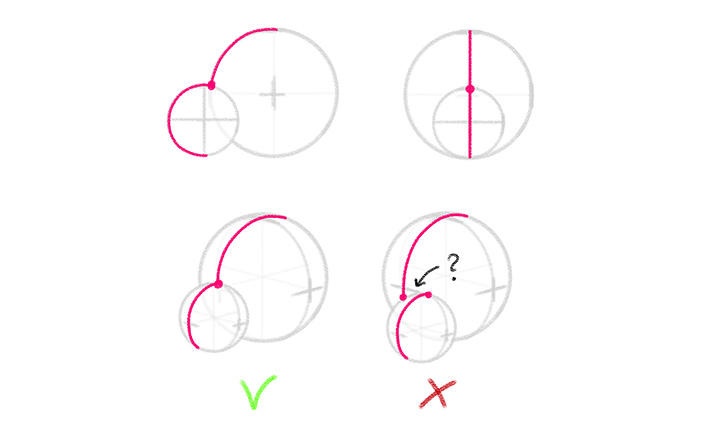
Adjust All distances–Not Just Lengths!
Second, do you remember that rule about shortening one side to make space for the other? It applies to all the distances visible in the view. So, if there’s a certain distance visible between the legs in the front view, this distance must be shortened along with the whole front.

Here’s a practical example:
The same happens to curved shapes, except they get squeezed rather than shortened:
Keep Things Symmetrical
Third, be careful about symmetry. If two objects share the same axis of symmetry in the front view, they must share it in any other view, too–their halves should be in line with each other.
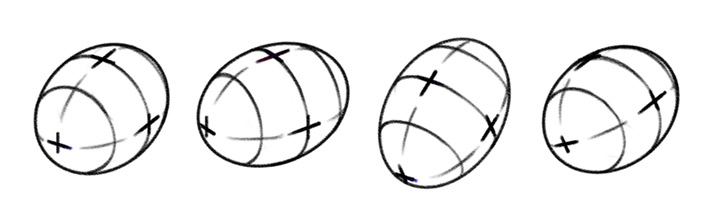
Rotate Objects Around One Axis
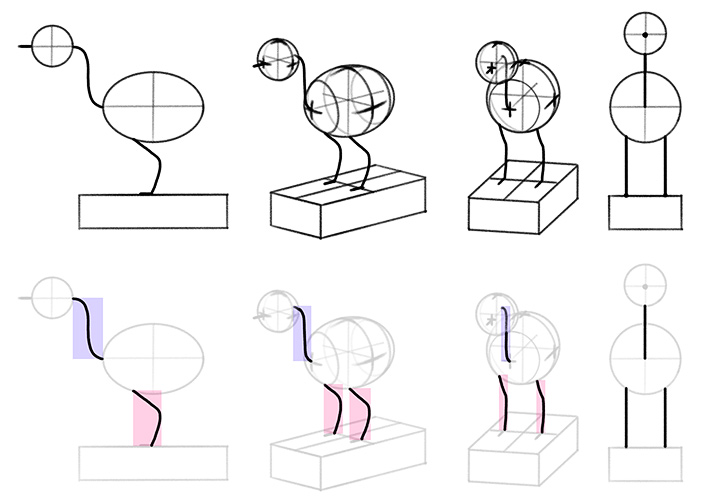
Fourth and last thing: drawing all parts of the object parallel to each other makes it look static and boring. To make your scenes look interesting, you will probably want to rotate the parts in relation to each other, without losing the proportions and correct perspective.
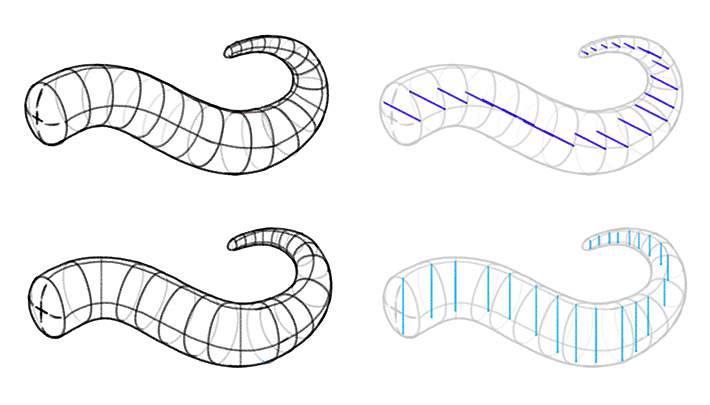
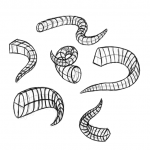
And this is actually pretty simple: you just need to pick one axis–the axis of rotation–and keep it unchanged.
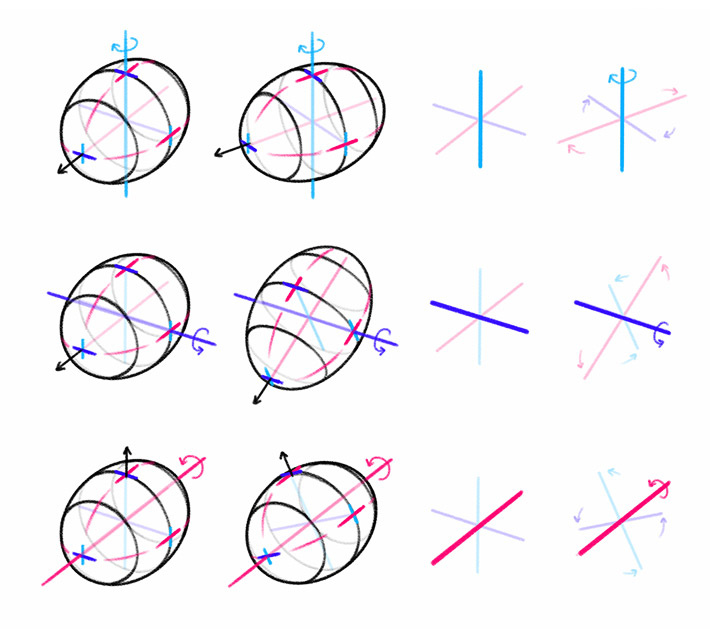
It’s exactly what we did before with the curved tubes! In fact, that’s the difference between the left/right and up/down direction–it’s the axis that stays unchanged along the whole shape.
Conclusion
This is the clearest way I could find to explain all this stuff. If you’re still confused, don’t worry–you’re not really supposed to understand it all consciously, it must become a part of your intuition. And to train your intuition, you have to do something more that reading a tutorial.
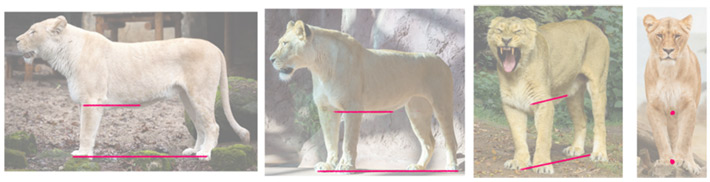
Practice all of this by studying photos, preferably of the objects/animals you’d like to be able to draw from imagination. Print these photos and sketch curves and sides over them. Then use those to sketch the same pose. It’s best to start with simpler animals first (fish, salamanders, dolphins), and then move to the ones with more complex features.
Training your intuition will take some time, but I really believe that the knowledge you’ve acquired today will make the whole process smoother and more satisfying!
If you want to dive deeper into the subject of perspective, you may like these tutorials as well:

Before You Leave
Keeping a tutorial on this topic short and to the point was a real challenge. In fact, I’ve prepared three drafts of this tutorial, with detailed illustrations and all, and scrapped them–because they kept getting needlessly complicated. Figuring out the way to explain it all, and writing the actual tutorial, took weeks out of my personal free time.
If you appreciate my work, please consider sending me a small donation–it will motivate me to keep writing!

0 Comments