They say that practice makes perfect, but how to practice drawing? In most cases it’s not that simple, but there is one kind of exercise that you can do almost without thinking. It’s easy, it’s quick, and it’s perfect if you want to practice drawing everyday, but have little time to do so. I’m talking about sketching poses.
When you sketch a pose, you skip most of the details—you just try to capture the very basic proportions and a general curve of the body parts. This means it doesn’t take a lot of time or mental energy to finish such a sketch. And yet, because the pose is such an important part of the whole drawing, learning how to draw them quickly and efficiently will greatly improve your drawings skills overall.
The general premise of the exercise is very simple: you just draw a lot of different poses. The problem is, what do you use as a reference? Finding good photos, ideally ranging from simple to more complex poses, takes time and effort—which makes the exercise not as quick and simple as it seems.
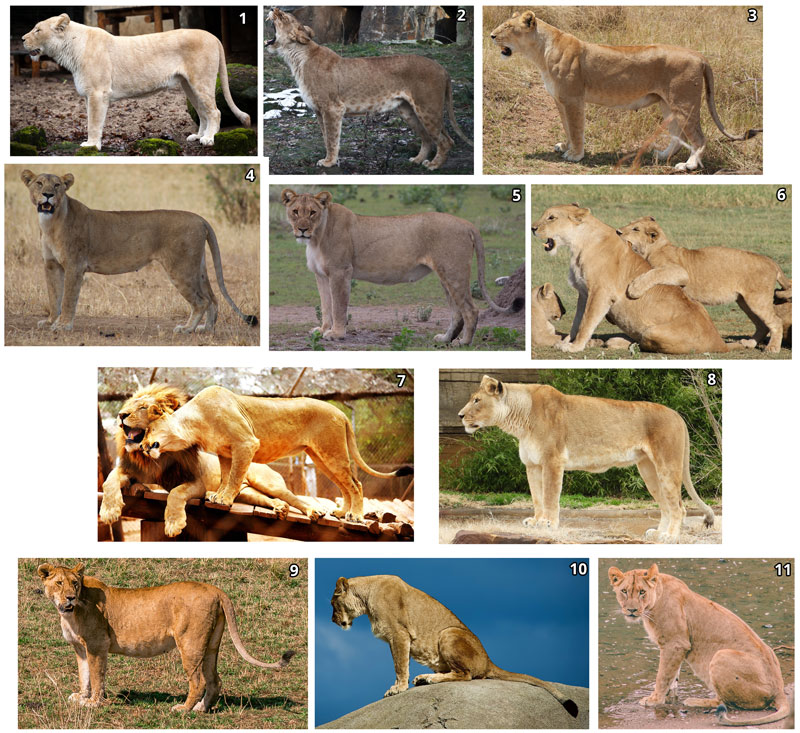
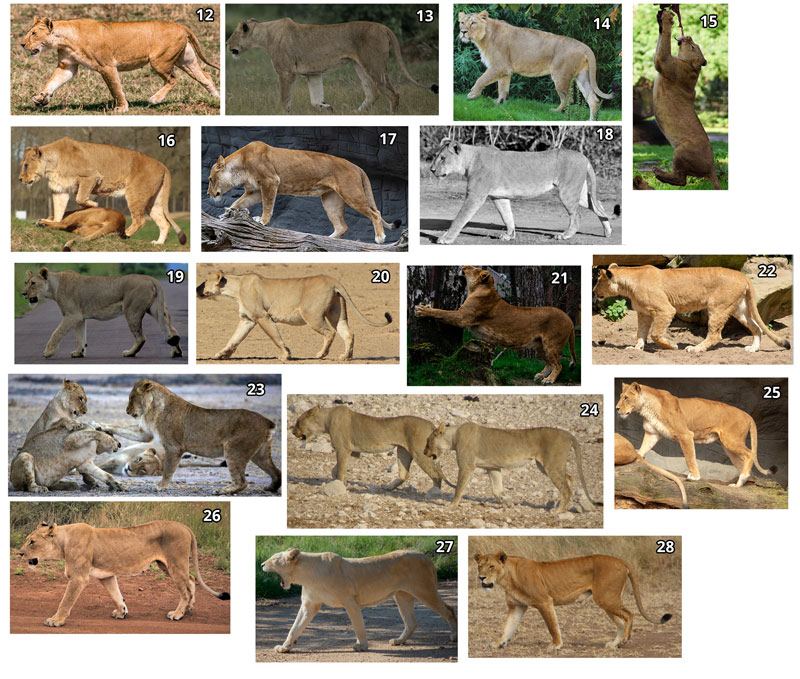
So let me help you! I’ve prepared a collection of 100 photos, separated into 5 groups of increasing difficulty. They come from free stock photos like Pixabay, Unsplash, and Pexels, so you’re free to use them however you want—even if you decide to create a finished drawing out of them. For now, this is a collection of lionesses only, but it will be useful for every animal artist.
100 Photo References
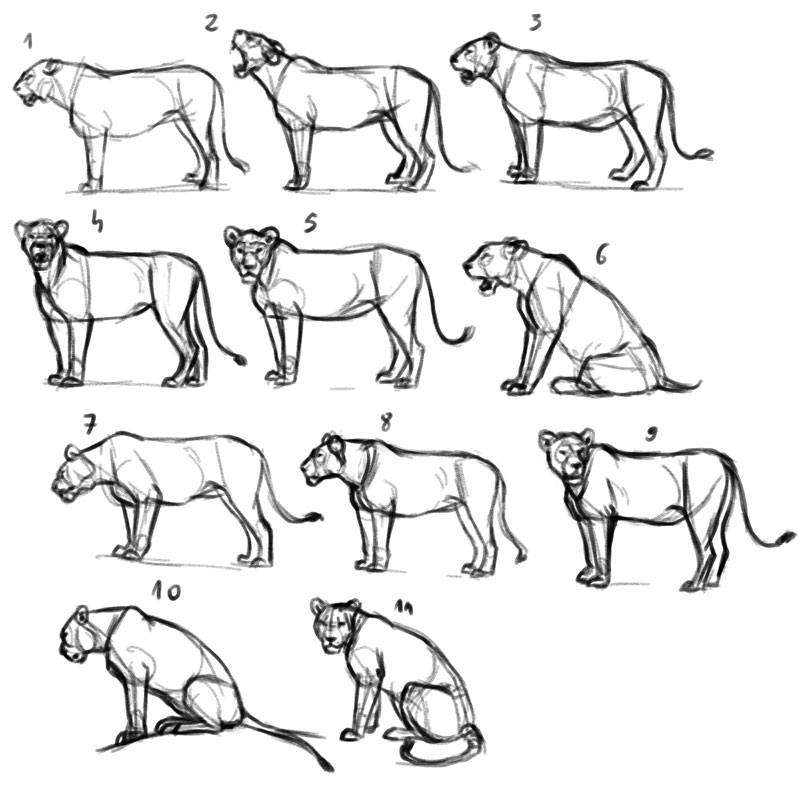
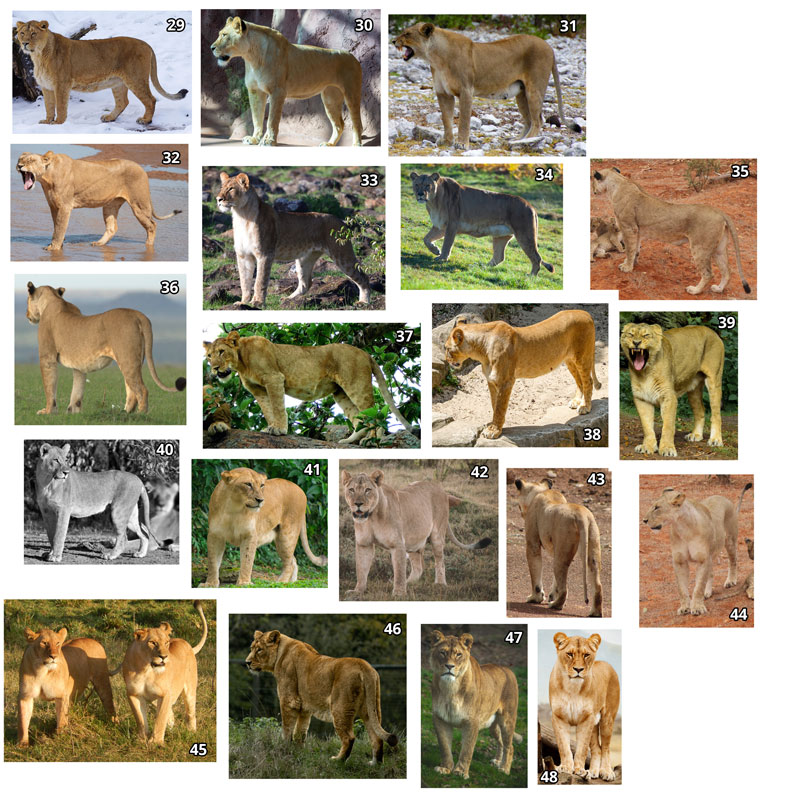
1: Static 2D Poses (11)
At the beginning it’s best to familiarize yourself with the basic proportions first, before they get obscured by complex views and poses. A simple 2D view is the best for it, preferably with little to no motion.
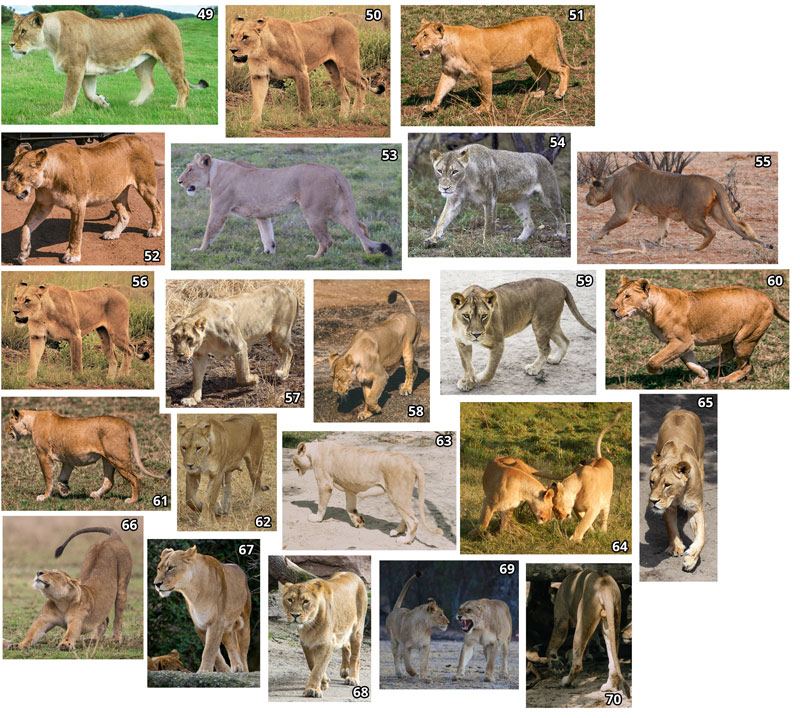
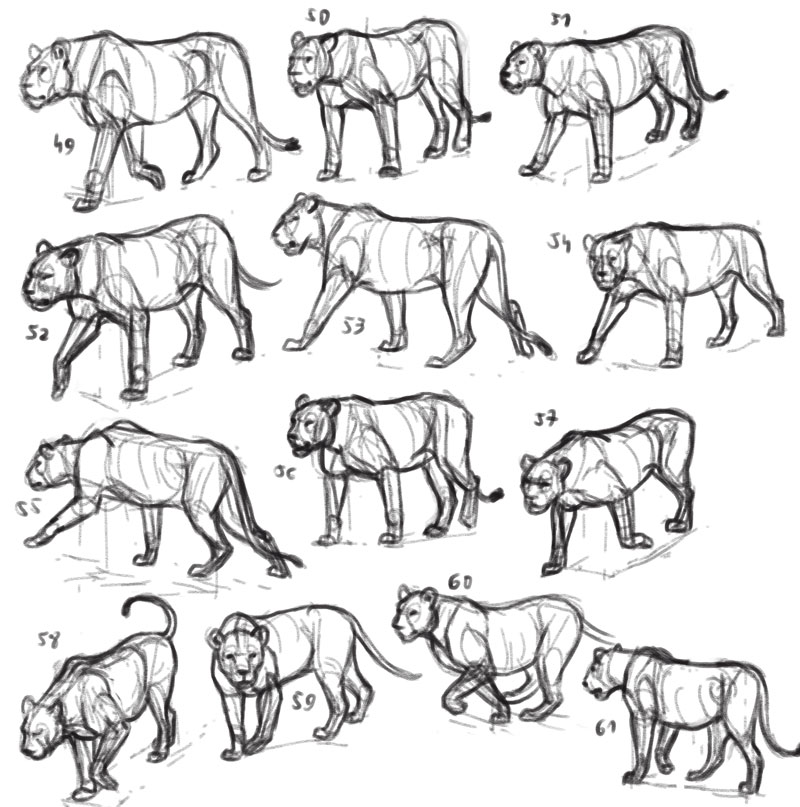
2: Dynamic 2D Poses (17)
Can you draw the basic proportions? Great! Now you can look into how the body parts change their shape when the animal moves. Sticking to the 2D view will be very helpful here.
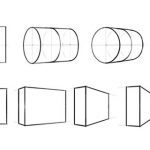
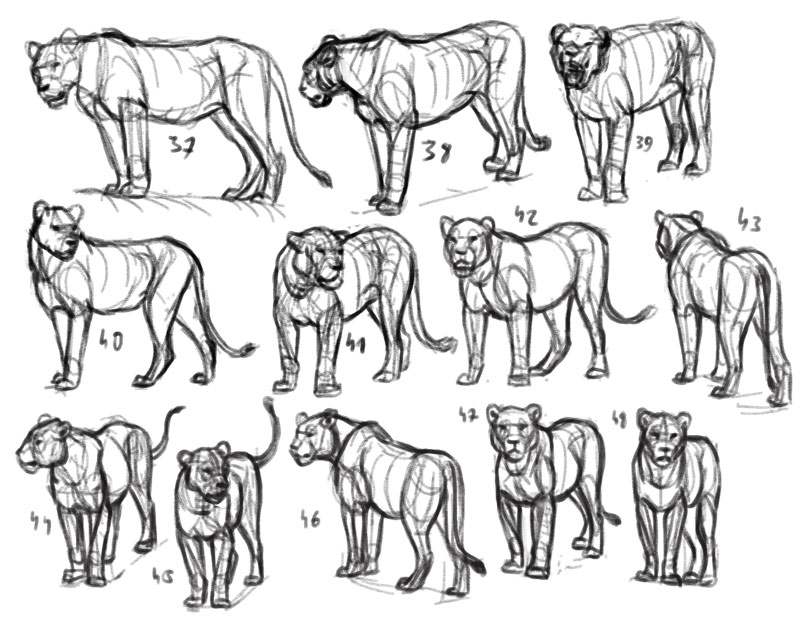
3: Static 3D Poses (20)
Time to give some depth to the poses! It’s no easy feat, so stick to the static poses at first. If you find it too difficult, you may need some 3D drawing practice first:
4: Dynamic 3D Poses (22)
Now add some motion to these poses. This is where the real fun begins!
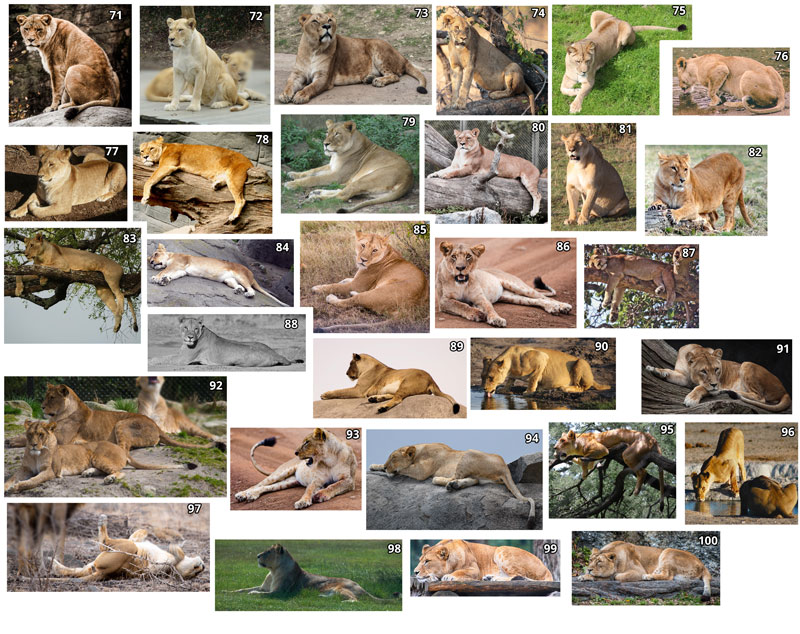
5: Other Poses (30)
Standing and walking poses are one thing, but the same body parts can be placed in many other positions. Challenge everything you’ve learned by practicing these poses!
How to Practice Drawing Poses
You can do this exercise however you want, but here are some tips if you want more guidance:
First of all, remember that the purpose of this exercise is to make you better at drawing poses. This means that after you’re done, you should see a difference between the first and last sketches. It’s obvious, right? So when you start drawing those first sketches, and they turn out bad or even horrible, this is means you’re doing it right! You’re supposed to start in your lowest point, whatever it is. Don’t spend an hour trying to polish a sketch—you’re supposed to practice sketching, not polishing something until it looks better!
However, you shouldn’t also feel that it’s forbidden to sketch one pose more than once. Repeating the same pose, trying to avoid the previous mistakes, can be very educational. It can be especially useful in the first stage of the exercise, when you’re still trying to figure out the proportions—or right at the beginning of each session, when your hand is still warming up.
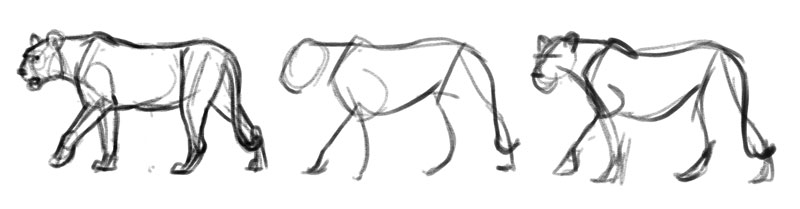
You can draw these sketches in many ways. Ideally, you should try to use the same method you use when starting a drawing from scratch. You can focus on the “skeleton”, forms, or the negative space—or a combination of all. You can use my article about staring a drawing to learn more about drawing gestures.
In the past I often used a timer for this type of exercise, but now I don’t really recommend it. Forcing yourself you draw fast gives you less time to think about what you’re doing—to notice the mistakes right after you’ve made them. And the stress doesn’t help either! So today I recommend a mixed technique: try to capture the first impression of the pose in a few quick, simple strokes, and then spend as much time as you need to make them more accurate.
In terms of the tools, I believe ink liners (also called pigment liners or fineliners) are the best choice if you want to make your lines cleaner and more elegant. If it’s too hard (and it will be extremely hard at the beginning!), you can use a ball-point pen instead. A pencil makes it easy to draw lines without any consequence, so you don’t feel that much pressure to draw them deliberately. That’s why I recommend darker tools for exercises like this. If you draw digitally, you can also set your brush to be mostly opaque and dark, regardless of the pressure. It doesn’t mean you can’t use a pencil, though! All I’m saying is that this is what I found the most effective in my own studies.

The same references can also be used to study any other aspect of the lion body—the 3D forms, the anatomy, or even the details. You can even use them to practice shading and coloring! Just stick to one thing at a time—this will give you a faster progress.
This is a perfect warm-up exercise, so you can simply sketch a few of the poses before starting your proper drawing. Or you can just treat it as a challenge, and create a few sketches every day until you finish all hundred of them. You can use the #100poseschallenge hashtag when sharing these sketches online—it’s not my hashtag, but many people seem to use it for their pose practice.
And please don’t think that you have to draw these sketches the same way I did in my examples. I was practicing both gesture and form here, studying the heads as well. If this is your first study like this, I would recommend making your sketches much simpler—even using a placeholder for the head.
1 Comment