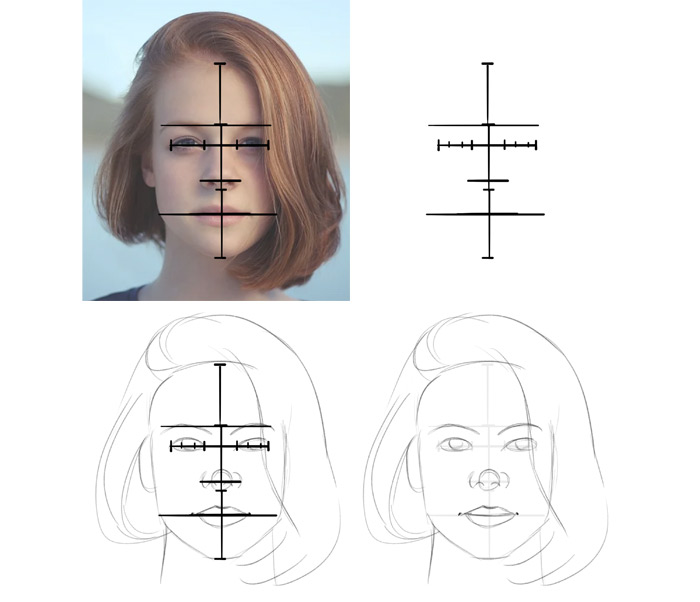
There are plenty of beginner tutorials for people who want to learn how to draw. But it’s like there’s no order to them—one’s teaching you perspective, other’s about color theory, then there’s one about anatomy, and another one about physics of light. And the worst thing is that each of them seems to require knowledge from the other ones! So where do you start?
To solve this problem, we can take a look at the definition of drawing first. Different dictionaries define it differently, but for our purposes let’s use this one:
Drawing—representing the visual side of reality with lines.
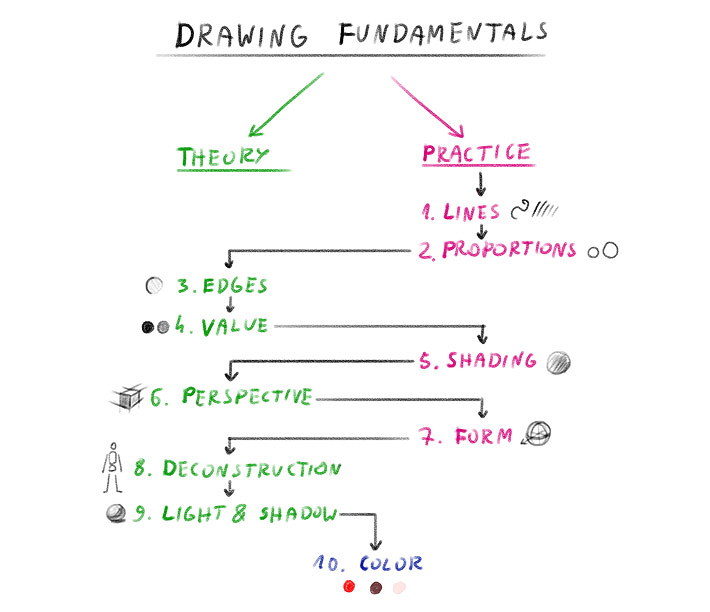
So there are two parts of this definition: the visual side of reality, and creating lines. The former is about understanding, and the latter—about doing, so we’re going to call them theory and practice. These two parts can be divided into smaller parts as well.
These smaller parts are easier to learn that the drawing skill as a whole. So in this article I’ll show you these parts—these will be the fundamentals that everyone talks about. I’ll also show you a proposed order of learning them—however, as you’ll soon notice, some of them can be skipped depending on your needs.
Keep in mind that this tutorial isn’t supposed to teach you all these fundamentals—my goal is only to show you the direction, the names for the things you need to research to learn how to draw. However, I’ll do my best to explain the basics of the theoretical concepts, and recommend some tutorials or exercises for the practical part.
Fundamental Drawing Skills
Lines [Practice]
I lied to you a little when giving you the definition on drawing. The truth is, you can draw lines that don’t represent anything at all—and this is a skill on its own. Before you learn how to represent the visual side of reality, it’s best to familiarize yourself with the line in a pure geometrical meaning.
This is one of the very few things in drawing that you can “just practice”. You don’t need tutorials for it, you can just draw what you feel. And as long as you avoid trying to represent something real, it’s impossible to fail at these exercises.
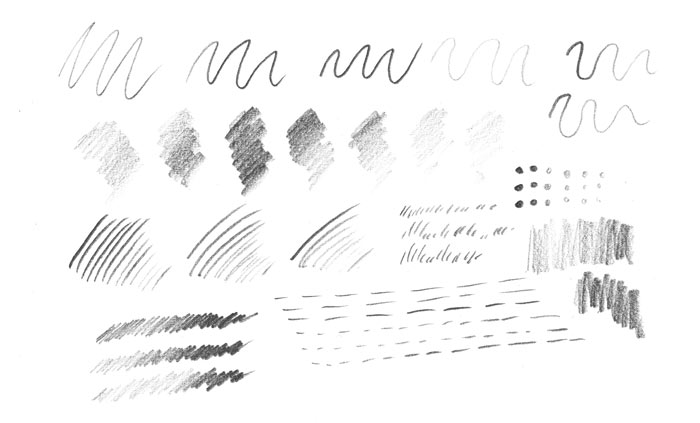
So your only task here is to draw something that doesn’t mean anything. Experiment with your tool, see what it can do, what types of lines, how big, how dark. Learn how to hold it comfortably, how to create tapered or dashed lines, or lines of variable brightness. Basically, do anything you can think of to learn everything about using this tool.
But if you don’t feel particularly creative about inventing exercises for yourself, you can try my propositions:
Proportions [Practice]
Let’s stay in this abstract, geometrical space for a while. Lines have certain properties—they have length and angle. You can draw both randomly, without thinking, but you can also draw them intentionally. And the drawing skill is all about intentionality.
To draw lengths and angles intentionally, first you need to understand that they’re relative—they’re seen by comparison. Even if you only draw one line, your brain will compare its length and angle to the edges of the paper. For example, a line equal to a small fraction of the width of the sheet will be seen as short, and a line parallel to one of the edges will be seen as straight.
The same relation will appear when you add another line. We call this relation proportion. To copy something you need to copy its proportions. So this skill consists of two sub skills: recognizing the proportion and drawing it.
You can practice this skill without any tutorials as well. Just draw something meaningless, and then try to recognize the proportions and recreate them. Here’s a hint: we’re good at recognizing fractions like 1/2 and 1/3, so you can use them for your advantage. You can also check out the tricks explained in my tutorials:

Edges [Theory]
Edges are created by contrast: when a light area meets a dark area, a line seems to appear between them. Our brain uses such lines to recognize objects quickly—a combination of lines, an outline, can be saved as “a tree” or “a lion”.

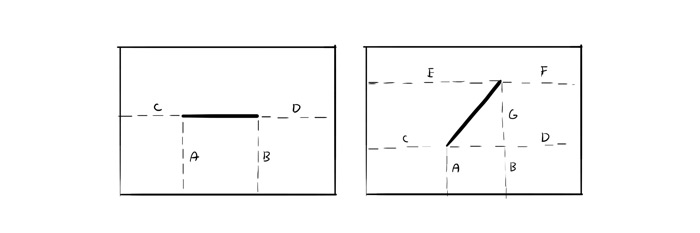
To be able to draw, first and foremost you need to learn to see the visual edge. A common problem for beginners is that they draw what they know, instead of what they see. So let’s say you’re drawing this box. If you know that in reality the AB segment is longer than BC, you’re likely to draw a long line representing AB, and a shorter line representing BC. But if you forget about what you know, just for a minute, and only look at the contrast, you’ll see the visual edge—the line that you’re actually supposed to draw.
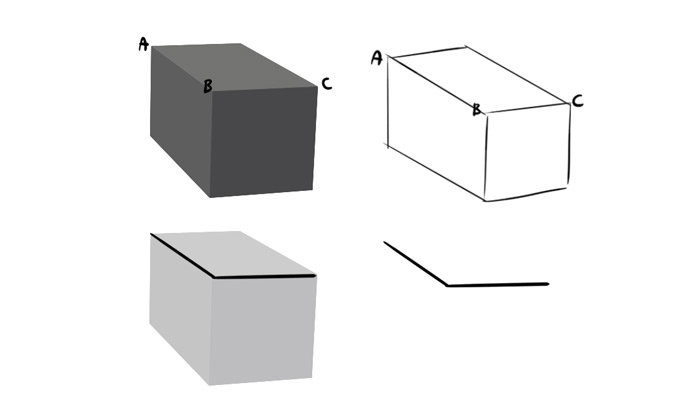
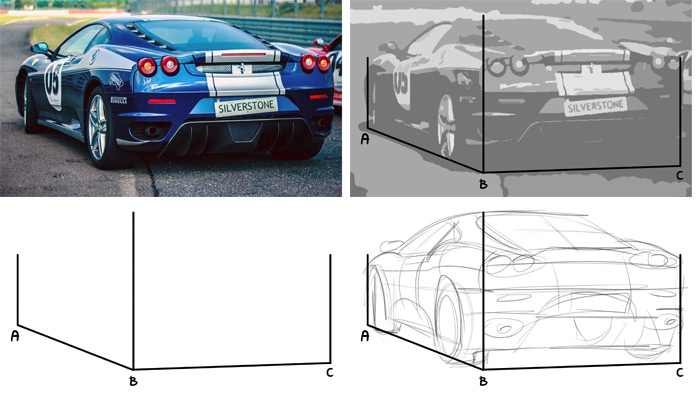
A common trick to learn this is to put your reference photo upside down—it forces you to think of what you see, rather than take a shortcut and use what you remember about the object. You should also start small, with a single object and no background—a more complex scene introduces perspective, which will force you to learn two things at once, and will make it harder to see the progress. Also, remember that the edges will change when you move!
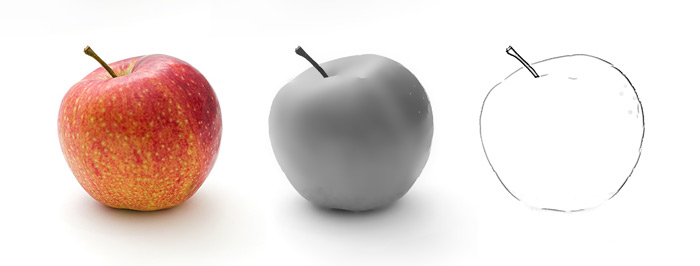
Value [Theory]
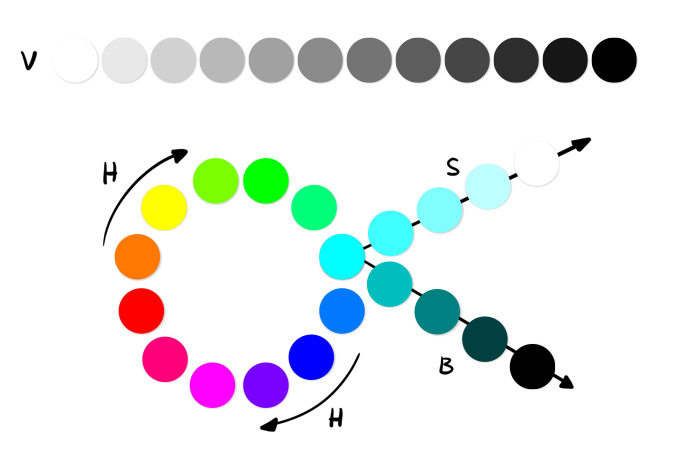
You can draw anything using lines only, but your drawings will be more convincing and impressive if you include the actual source of the lines—the value. Contrast, which produces lines, comes from the difference in brightness of various objects. This relative brightness is called value.
To see value you need to learn to separate it from the hue first. All these circles differ in hue, but the second pair differs in value as well. You can notice it by paying attention to the contrast between them (it’s especially visible one you squint your eyes).
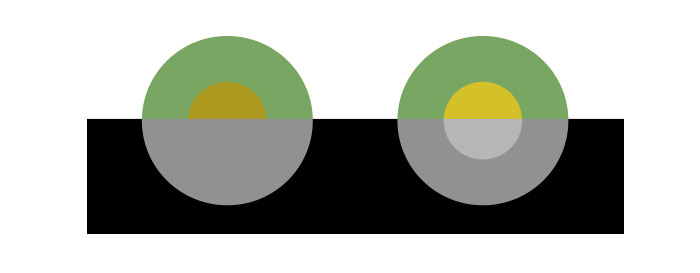
Seeing value is a skill on its own. In your imagination, you need to turn green into dark grey, and yellow into light grey. Once again, you need to separate what you see from what you know, and draw a white object darkened by the shadow as brighter than a blue object in the same shadow. Seeing value also allows you to see a different type of edge: a soft edge, created by a gradient between contrasting values.


Knowing about the existence and effects of value is already a half of the job. But to really understand it you need to practice it with your tool, which brings us to…
Shading [Practice]
Every drawing tool is capable of covering large surfaces. You can tilt your pencil to draw with its side, or draw a lot of thin lines closely to each other, or simply use a thick tool, like a charcoal stick. No matter what you use, you need to learn how to achieve different shades of grey.
Many tutorials conflate shading and the issue of light and shadow, but if you want to learn in a more orderly way, focus on creating areas of various shades, rather then their origin. You don’t even need to search for specific tutorials—just watch videos of artists drawing their works using the tool you’re interested in, and observe the motion of their hands.
This skill can be divided into more specific ones:
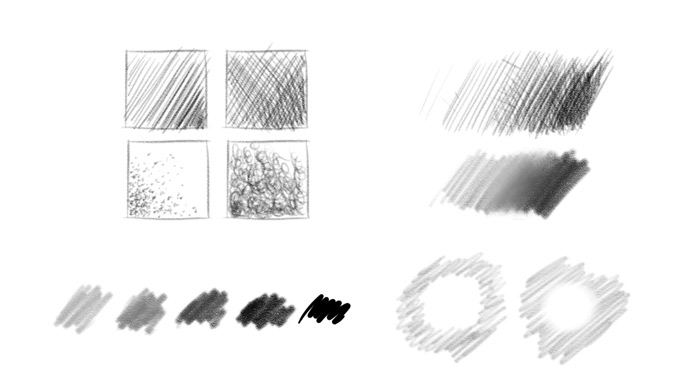
- Covering large surfaces with hatching/cross-hatching/stippling/circling/contouring, etc (google “pencil shading techniques” to find them all
- Blending (achieving soft edges with either one of the shading techniques, or with a blending tool)
- Achieving different levels of darkness with different tools (pencils of different hardness, ink liners/brushes)
- Adding bright areas (either by using an eraser, white ink, or by going around the area when shading)


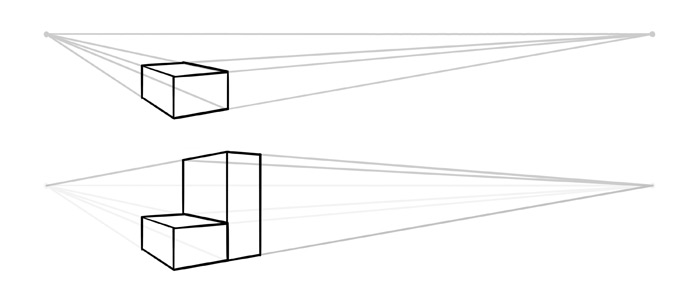
Perspective [Theory]
Perspective in drawing usually refers to a very specific type of proportion characteristic for man-made objects. Humans like to create things with right angles, and place them in line or parallel to each other. A specific property of human vision makes these parallel lines look as if they were all meeting at one point. So if you draw one of these parallel lines, you can draw the rest of them without measuring proportions one by one.
Perspective in more general sense refers to the set of rules that make the 2D drawing look 3D. So you can learn about aerial perspective (which makes the farther objects look more similar to the sky), or the depth of field (which softens the edges of the values in the background), or how object seem to change size depending on their distance from the viewer.
If you want to draw portraits or animals, you may think that you don’t really need to know all this stuff. But perspective is everywhere, and knowing how it works make it easier to understand the form—which is the basis for drawing realistic humans, animals, and cartoons. Also, you only need to learn it once, so bite the bullet and get it over with.


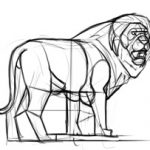
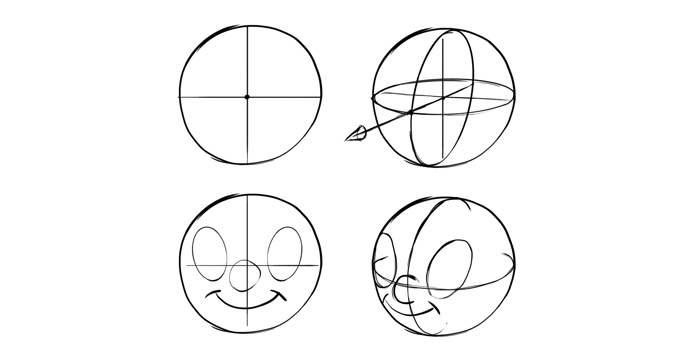
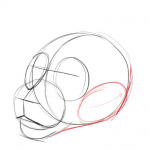
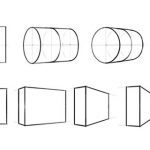
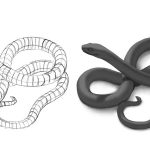
Form [Practice]
Form is related to perspective, but it usually refers to a more freehand type of drawing. This is the skill that allows you to draw spheres instead of circles, and boxes instead of rectangles. It allows you to visually rotate a object, showing it in different views. Most importantly, it allows you to create something, rather than copy it.
All the previous skills were based on seeing the values in reality or photos, and copying them or the lines between them. To draw form, however, means to simulate reality in your imagination and to draw the lines separate from any values you see. It sounds hard, and it is hard—and yet this is one of the first things people try to do when they want to learn how to draw.
You can learn special rules of drawing form from tutorials, but this skill is mainly based on intuition. You can’t build this 3D rendering machine in your brain—it will build itself from the information you feed it. So learn from the tutorials, or simply draw the same object from many different views, and one day you’ll discover that you can do it—without knowing when you learned it.
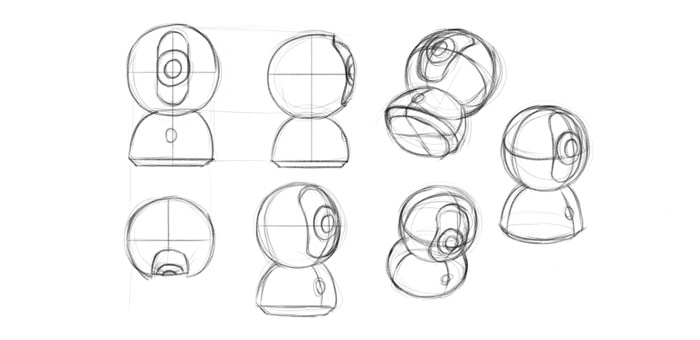
But to make it simpler, focus on basic forms first—spheres, ellipsoids, boxes. Build scenes out of them, first simple, then more complex. Everything can be built out of these simple blocks, so once you grasp the concept, you’ll have a solid foundation to draw anything you want.
Deconstruction [Theory]
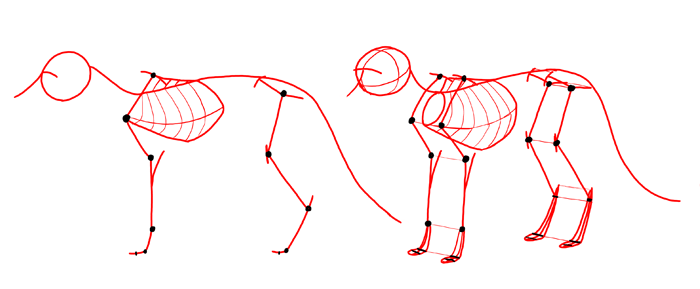
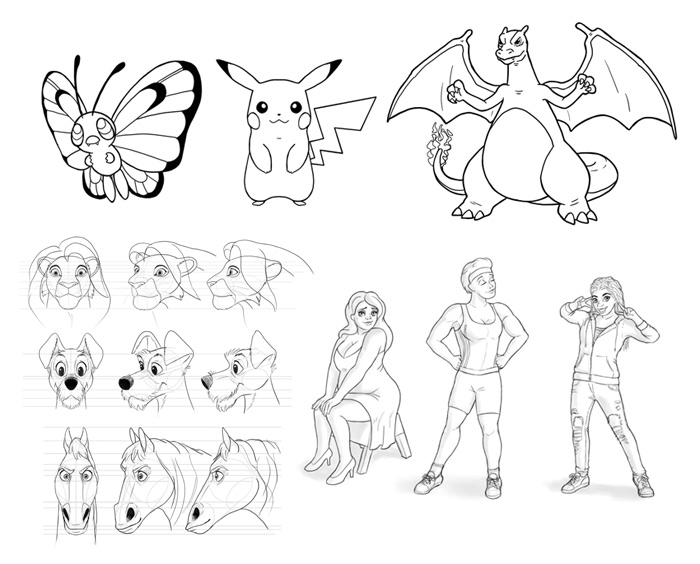
The lists of fundamentals often include “anatomy”, which is discriminatory against people who have no interest in drawing living creatures. To make it more universal, I converted it to something more general: the deconstruction.
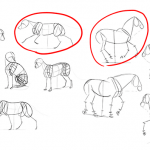
To draw something from imagination you need to know what it’s built of and in what proportions. You may think you know it, but the truth is you only know how to recognize it, not how to recreate it from scratch. So to learn it, you need to deconstruct the subject you’re interested in—turn it into smaller blocks and analyze the relations between them.
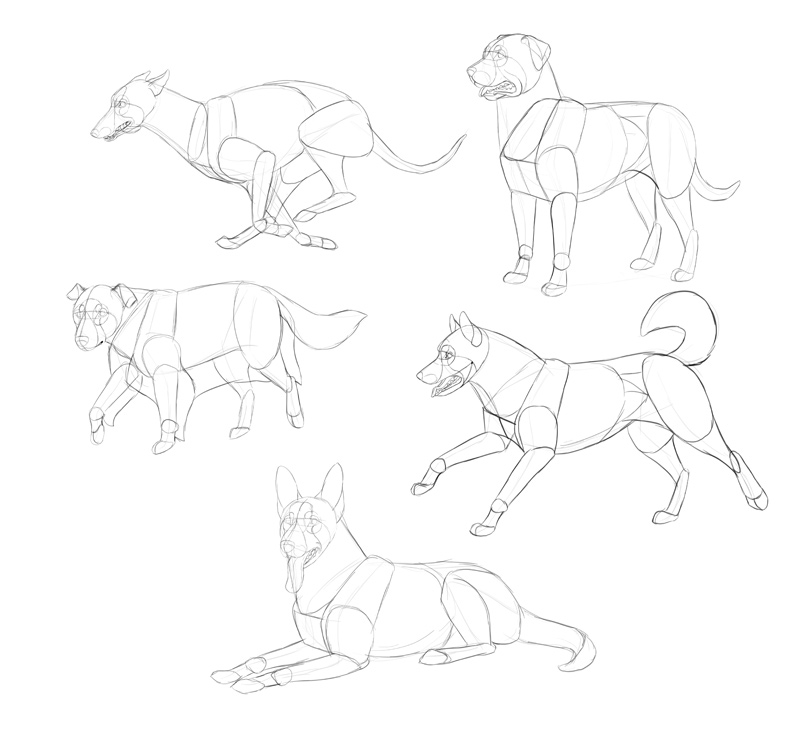
If you want to draw realistic human characters, this deconstruction will include learning the anatomy and simplifying it to shapes that are easier to remember. If you want to draw cartoons or manga, you should deconstruct the drawings of your idols. If you want to draw architecture, you should learn about various buildings and the history of architectural styles. You get the idea!
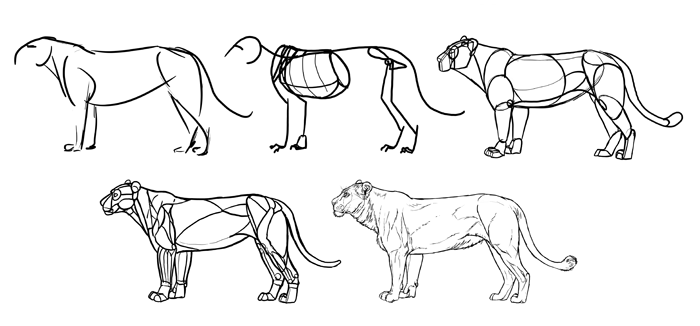
Deconstruction can also be separated into smaller topics, each requiring a separate study. However, they’re so interlinked that it’s the most effective to learn them a little one by one, and then apply that knowledge to learn them all better in the next series:
- Gesture: the first thing we see; a “rhythm” of the object. It’s a suggestion of the shape and form, something that can be sketched with a couple of lines.
- Structure: the basic set of proportions of the object (in case of animals, it can be learned from the skeleton).
- Form: what the object looks like when stripped of all details (imagine the object as a wooden toy with movable parts).
- Anatomy: the origin of the form; it should be learned as a set of more detailed forms (in case of animals, this will be about learning the actual muscles, but it also applies to the parts of a car, a flower, or an armor).
- Details: a closer look into specific parts (like paws or head). Some details may require to go back through all the previous stages separately.
Through deconstruction you’re building a database for your 3D rendering machine, a visual library to use as a reference available to you at any time. However, keep in mind that it’s all saved in a form of a memory—which means it’s prone to fading away with time. No matter how extensive your study, if you don’t use this knowledge regularly afterwards, you’ll simply unlearn most of it.


Light and Shadow [Theory]
Shading something from the photo and from imagination are two completely different things. This is another feature you need to add to the 3D rendering machine in your brain. How does light affects objects? What is a light source, reflected light, terminator, highlight, what is the difference between a cast shadow and a core shadow?
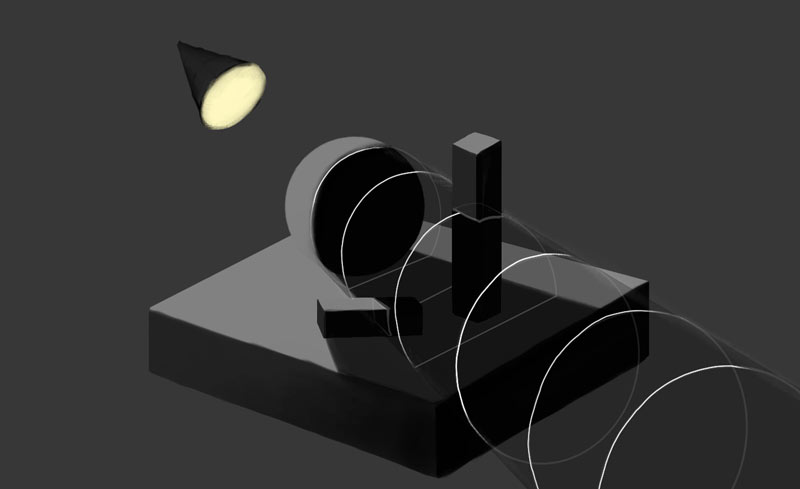
There’s a lot of theory you need to familiarize yourself with before you’ll be able to add virtual light sources to your drawings. To keep it simple, focus on the effects of the light and shadow on the value, ignoring the issue of color. This is also a good time to learn about materials and texture.

Color [Theory & Practice]
So far we’ve been learning how to represent the reality in grayscale. But reality is full of colors, and you can use certain drawing tools to capture them. However, this will be a little tricky for a couple of reasons:
First, when blending pencil strokes, you always end up with the same hue (or lack thereof) you started with. When blending colored pencil/marker strokes the colors mix, giving you a result you may have not expected. So before you learn more about color, take your color tools and come back to the first step—learn how these tools work.
Second, switching between colors takes time, so it may be tempting to draw grass with one shade of green, and the sky with one shade of blue. However, this will make your drawing look amateurish. You can draw fast and in grayscale/monochrome, or slow and in color—pick one.

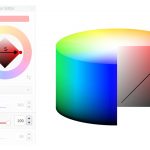
Third, creating an appealing composition of various values is easier in grayscale. You only need to take care of the contrast between high value and low value. When drawing in color, however, you need to think about hue, saturation, and brightness—and value will depend on the combination of the three.
While all values look good together, some colors will clash if you put them in the same scene. To avoid this, don’t use more than one bright, highly saturated color, and if you have to use more, analogous hues will look better together than the complementary ones. Google “color theory” if you don’t know these terms.
Other than that, you should also observe reality to see how color is affected by light and shadow, depending on the material of the surface. Drawing from real life is a great exercise for your brain—it forces you to pay attention to what you see rather than what you know. Do you think that tree trunks are brown? Well, prepare for a surprise!

What About Non-Fundamental Skills?
Now you know what the fundamental skills are, but it’s also important to know what skills are not fundamental and should not be learned at first. Here’s what I didn’t mention and why:
- Speed—good artists are quick, but it doesn’t mean that you need to be quick to be a good artist. Speed comes with experience and trying to force it will only slow down your progress. Draw slowly, give yourself time to think. Don’t try to rely on your intuition before you train it, otherwise it will be sheer guesswork.
- Your personal style—you can probably recognize the drawings of your favorite artists even if they’re not signed. That’s because they have their personal style of simplifying reality. And you will have it too—but you shouldn’t strive to get it here and now. For me, style is like your personal handwriting. First you learn how to write by copying the letters from the textbook, but with time you create your own shortcuts to write faster, and thus your style is created.
- Composition—many tutorials list it as one of the fundamentals, but for me, this was one of these things that came with time. Besides, you can be a great artist and only draw single cars or animals in the center of the sheet of paper, and nobody will say you lack something fundamental.
Do I Have to Learn All of It?
Now, here’s an interesting point—should you learn all of these, regardless of your interests? The answer is no. Of course, some artists will say you can’t draw unless you obtain all these skills, but that’s just their opinion. The truth is, if you can draw what you want, you can draw—and you shouldn’t keep learning popular, but useless things just to prove something to others.
There are many types of drawings and I’m not able to list them all, but maybe this will give you an idea about what to focus on:
Drawing Objects with Outlines Only
- From a reference:
- Lines
- Proportions
- Edges
- From imagination (add):
- Perspective
- Form
- Deconstruction
Drawing Objects with Grayscale Shading
- From a reference:
- Lines
- Proportions
- Edges
- Value
- Shading
- From imagination (add):
- Perspective
- Form
- Deconstruction
- Light and shadow
Drawing Objects with Color Shading
- From a reference:
- Lines
- Proportions
- Edges
- Value
- Shading
- Color
- From imagination (add):
- Perspective
- Form
- Deconstruction
- Light and shadow
- Color

Conclusion
So that would be it—my own personal list of drawing fundamentals. I hope you found it helpful, and that I made the path before you seem clearer and brighter. Not everyone will agree with my order of learning, but after years of writing tutorials for beginners I think I learned how these skills are linked together, and how they could be potentially separated without losing crucial information. So this order should work—at least in theory!
Speaking of theory, I divided these topics into theory and practice. But it doesn’t mean that when studying the theoretical topics you should only read or watch, and not draw anything. Drawing the things you read about will help you understand the subject better, and memorize it as well. I called it theory because these topics must be learned through understanding, while the practice topics are designed mostly for training your intuition.
You may wonder how much time you should spend at each topic. And the answer is… how much you want. I don’t believe it’s possible to learn something perfectly, no matter how long you try—knowledge is fractal, so the more you learn, the more things you discover that need to be learned. So keep reading, researching, and studying, until you’re bored. And then move to the next subject. You’ll learn more by moving forward, than by forcing yourself to learn something you’re no longer interested in. You can always come back to it later!
There’s a lot of work before you, but remember: every failure teaches you what you shouldn’t do, which makes you closer to learning what you should do. So prepare for a lot of failures, give yourself the time you need, and stay excited!
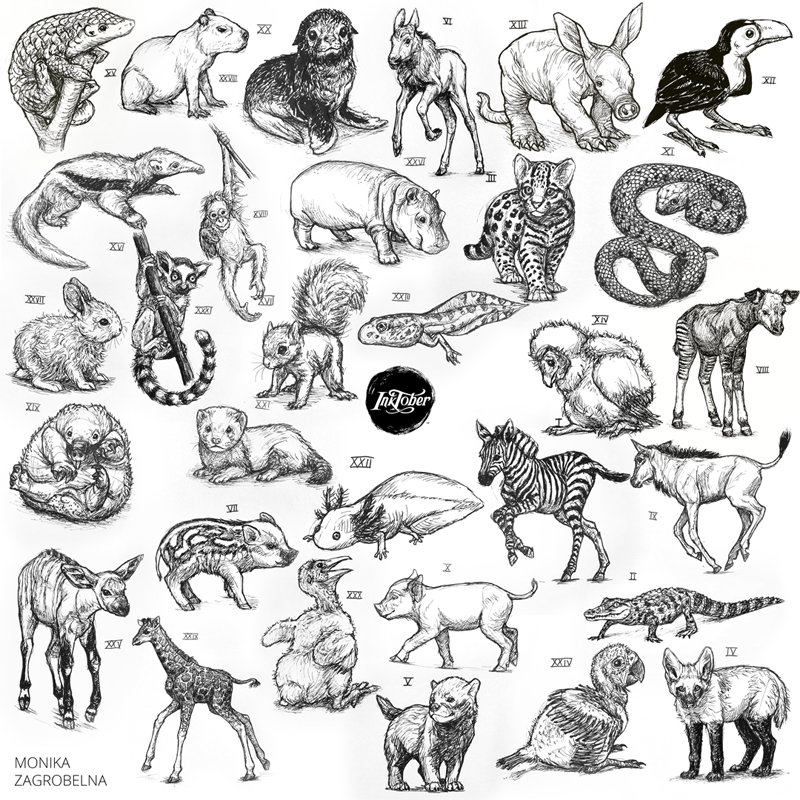
Want to Go Deeper?
If you’re interested in animal drawing/creature design, consider joining my Patreon! It’s been going for years, and over that time I’ve produced hundreds of useful diagrams, of both detailed and simplified anatomy. Or you can just join for a month or two to show me some support—that’s appreciated, too!

7 Comments